Magnification of your Diamond Setting Tools.
This essay has an overall “Difficulty Level Scale” 7 out of 10.
(I posted on Ganoksin a short time ago about ‘close-up’ setting photographs. This technical essay bears repeating, agree?)
With my Macro-lens attached to my iPhone & my 220x power-digital microscope, I’m now using these ‘photographic tools’ to my ongoing essays.
Every few weeks I will have prepared another collection of setting tools ready to be photographed. I need to know & be more fully acquainted with their actions & uses. This is so paramount in our jewellery profession. Literally every two weeks I will go to my tool supplier & see what new tools are now available.
" New & improved setting tools " are like food for the setter, without learning about any advances of modern technology, a setter will fall by the wayside.
I met a setter he said to me “I do only Claw-Setting…no Pave…no Fancy-cut stones, no Princess-Settings and no Bezel Setting either! ”(and he then called himself a setter?)
While we are setting stones, we sometimes come across some ‘interesting mini-tools’. Just how “mini” can they get? I decided to photograph some of them for you, the range of magnification is from 50 => 125 power just enough to lose sight of their original design. " There is a new world out there and it’s right at your bench-peg! "
You can see that you’ve entered visually a very different world of setting stones. The tools are only a random selection, I could have shown more, but I’ll do that in the next few essays.
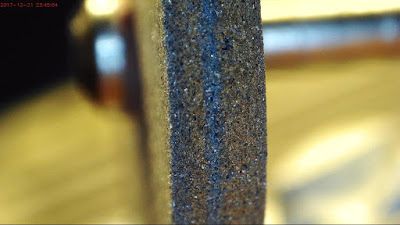
I’m now showing some very basic setting tools, such as a #180 grit
Pumice wheel with a Flat-face at 40x power then an up-close, 125x power magnification.
This photograph is of the same pumice wheel (listed above)but now being shown at only 95x power.
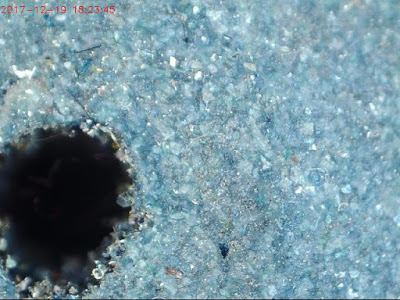
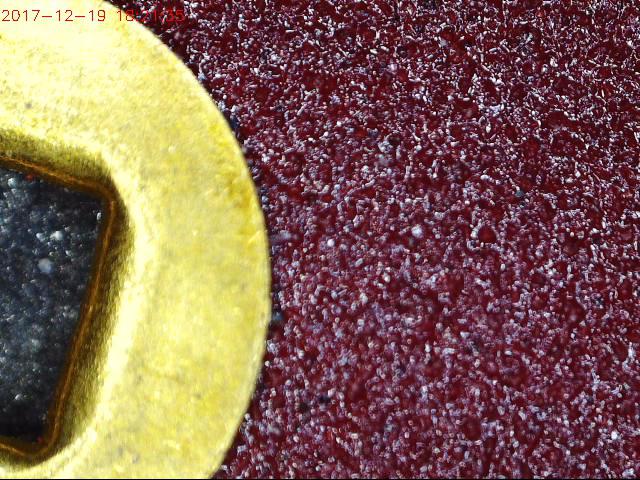
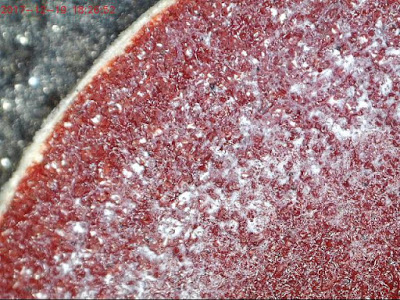
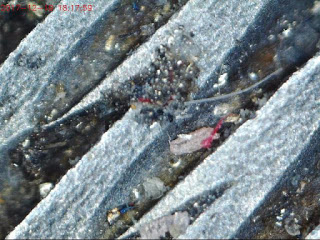
Shown above are a “Snap-On” Emery disk with a “Medium” grit with a 75x power magnification. I’ve followed that with a photograph of a #1,000 grit Pink Pumice wheel, with this you can see the many “contact spots” from the previous setting jobs. The next photo is so very interesting and that is a “17 jeweled” watch movement.


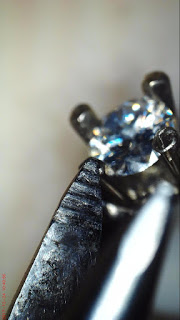
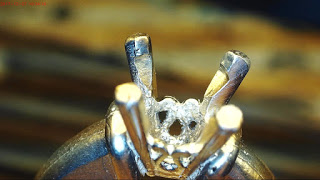
During the course of setting an Engagement ring, you might find that the claw tips are not ‘joined & secured’ to the center-stone. Just how can the setter securely align the tips of the claws so they are fully contacting the “Crown Facets”? My answer is so very simple & it’s just so easy to correct.
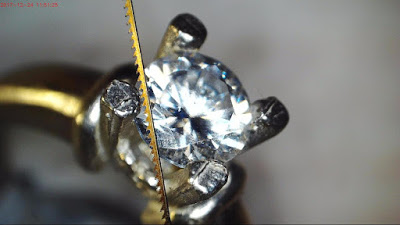
I suggest in using a saw blade of #4/0 width & cut with three draws down the stone from the “Table-facet” down and cutting beyond the “Girdle of the stone”. You are now literally filing the inside of the claw as it now makes a better contact with the Diamond or Gemstone facets!
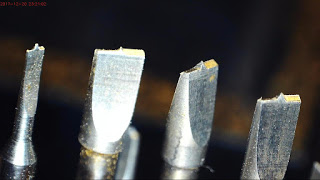
All of my 12 pairs pair of pliers have been ‘modified’ as to just never again to allow the plier-tips not slip-off during the gentle claw moving. How is this possible? Again, this is so easy to explain, I’d use my 7/8" inch "Separating Disk” and make little cuts into the very tip of the jaws of the pliers. This ‘rippled configuration’ inside of the plier jaws totally prevents any slipping-off & ruining your highly polished claws. The pliers will now grab, but not digging into the metal. If there are any residual claw marks from this process, these marks can be easily removed with your #180 Grit, Pumice wheel. No more pushing over each claw with your serrated-edge of your claw pusher (seen below)!
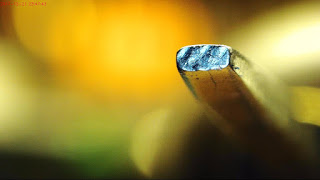
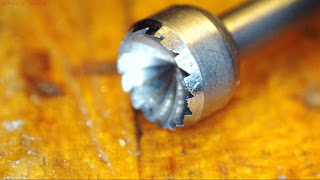
How do you drill a ‘seat’ for a ½ round pearl? In this essay on ‘magnified tools’, I think it would be a fantastic idea to show how these can be drilled prior to actual pearl setting. (BTW, the yellow tint on the burs is just light reflecting off the above lighting). The little mini-post in the center of the drill/bur holds the bur steady & in place while the bur is rotating (always held in an upright position). It’s actually drilling a hole if not, the bur would be sliding & running amok and ruining your creation for Pearl Setting.
To re-sharpen the worn-down Pearl-bur teeth, is can be an easy task, just use your Emery wheel (“Medium” grit) and recut @ 45 degrees on that worn & no longer sharp teeth. Do not use a bench-grinder for this application!!
If you are filing waxes while preparing for casting, your 'rotary, wax- bur file’ looks like something out a sci-fi movie. Don’t worry, I’ve just magnified these two burs just for this essay, at 95x power!

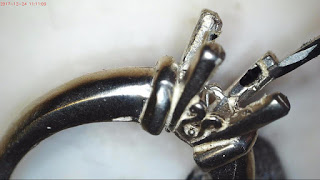
In this photograph you can see just how two bearing cuts look, the claw on the right is nicely carved . The ‘bearing-cut’ on the left, has some features of not being ready to accept the Diamond. I always keep my 10x power loupe within finger reach…(BTW, I always keep 4 loupes near my bench!) These magnification ranges from a 10 power and up to 15x power and each loupe has different lens opening!
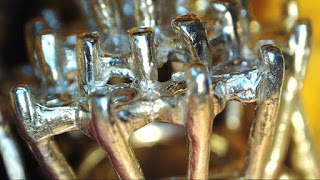

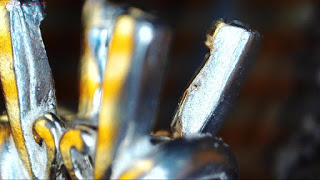
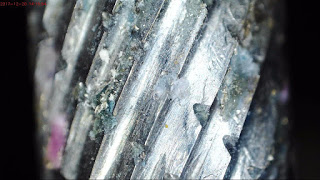
Has anyone actually seen just how the rotating 156C (Carbide) undercutting bur as it makes contact? I’ve prepared some photos on just how the bur-cutting looks like as it’s starting to cut into the metal of the claw. Remembering, that my rings have not been cleaned of any casting marks, these too are interesting to look at. I usually leave this prior to the setting or even post setting, both #180 & #1,000 grit pumice wheels will clean my ring. If the ring warrants further cleaning prior to the Pumice Wheels, I would use my “Mini-Magnetic Tumbler”. The “Magnetic-Tumbling” is safe with my Swarovski stones.
For the final cleaning of a claw-tip just to make it round, I’d be using a modified Cup-Bur a.k.a. “77B” . Just shaving off the top, outside-lip edge of the bur on an oil-stone you won’t be worrying if you might ‘graze or damage’ some facets on the stone.
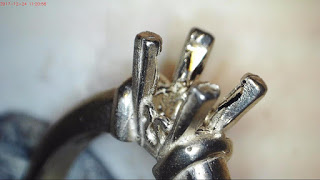
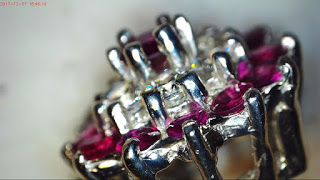
For the initial preparation of bearing cuts in a 4-Claw Engagement ring. You can see how some bearings are not created equally. At the magnification of only 40x power you can easily see the errors, you should re-carve a newer bearing-cut to match the facet angle of the stone.
Once the bearings are nicely carved an additional little problem arises, what is that? On every engagement ring, a definite little sliver of metal will be formed. This is due to the rotation of the High Speed Steel bur extruding a very noticeable slice of sliver that appears on only one side of the claw!!!
Don’t ignore it, the customer might just see it under the diamond; not very nice!
Don’t even think of trimming this sliver of metal with a file. You’ll have a serrated edge afterwards. I suggest using a Flat Graver with a width of #40 (1.30mm) and then you should cut down along the one side of the claw to from the top of the bearing-cut to just everywhere your HSS bur touched the claw . Basically, you are now removing this ‘extra metal’ and polishing the side of the claw at the same time and really how easy was this?