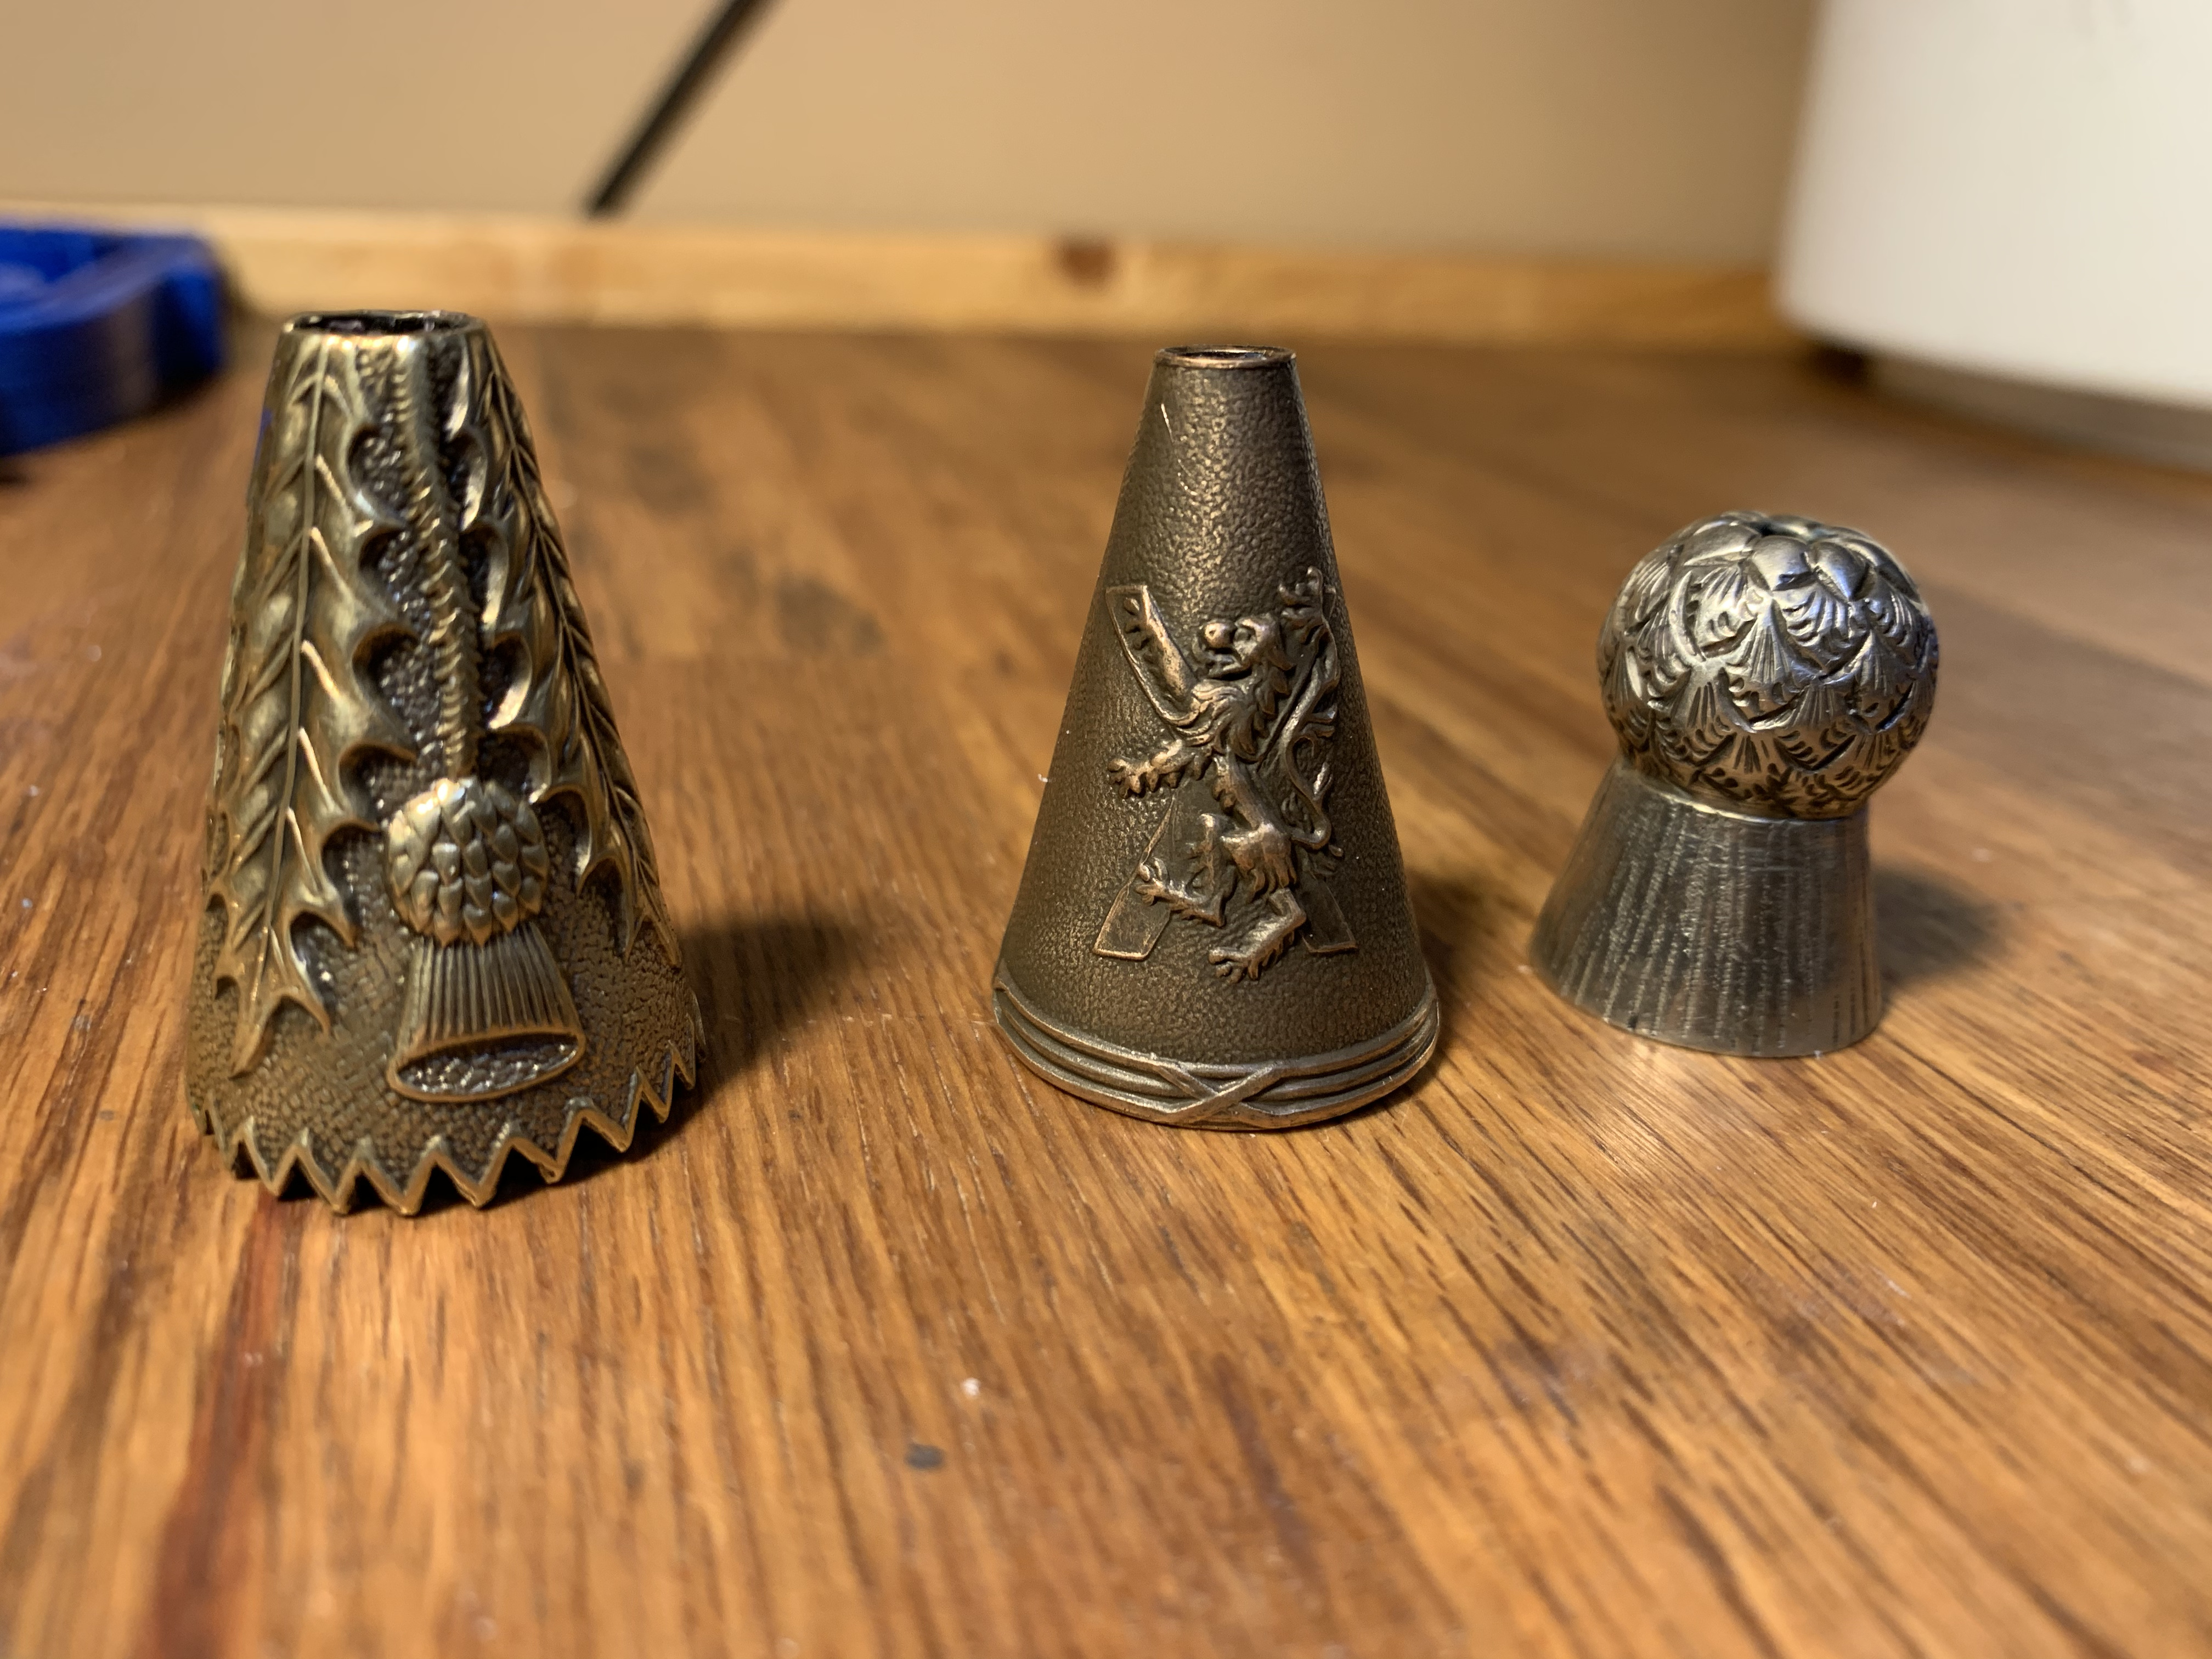
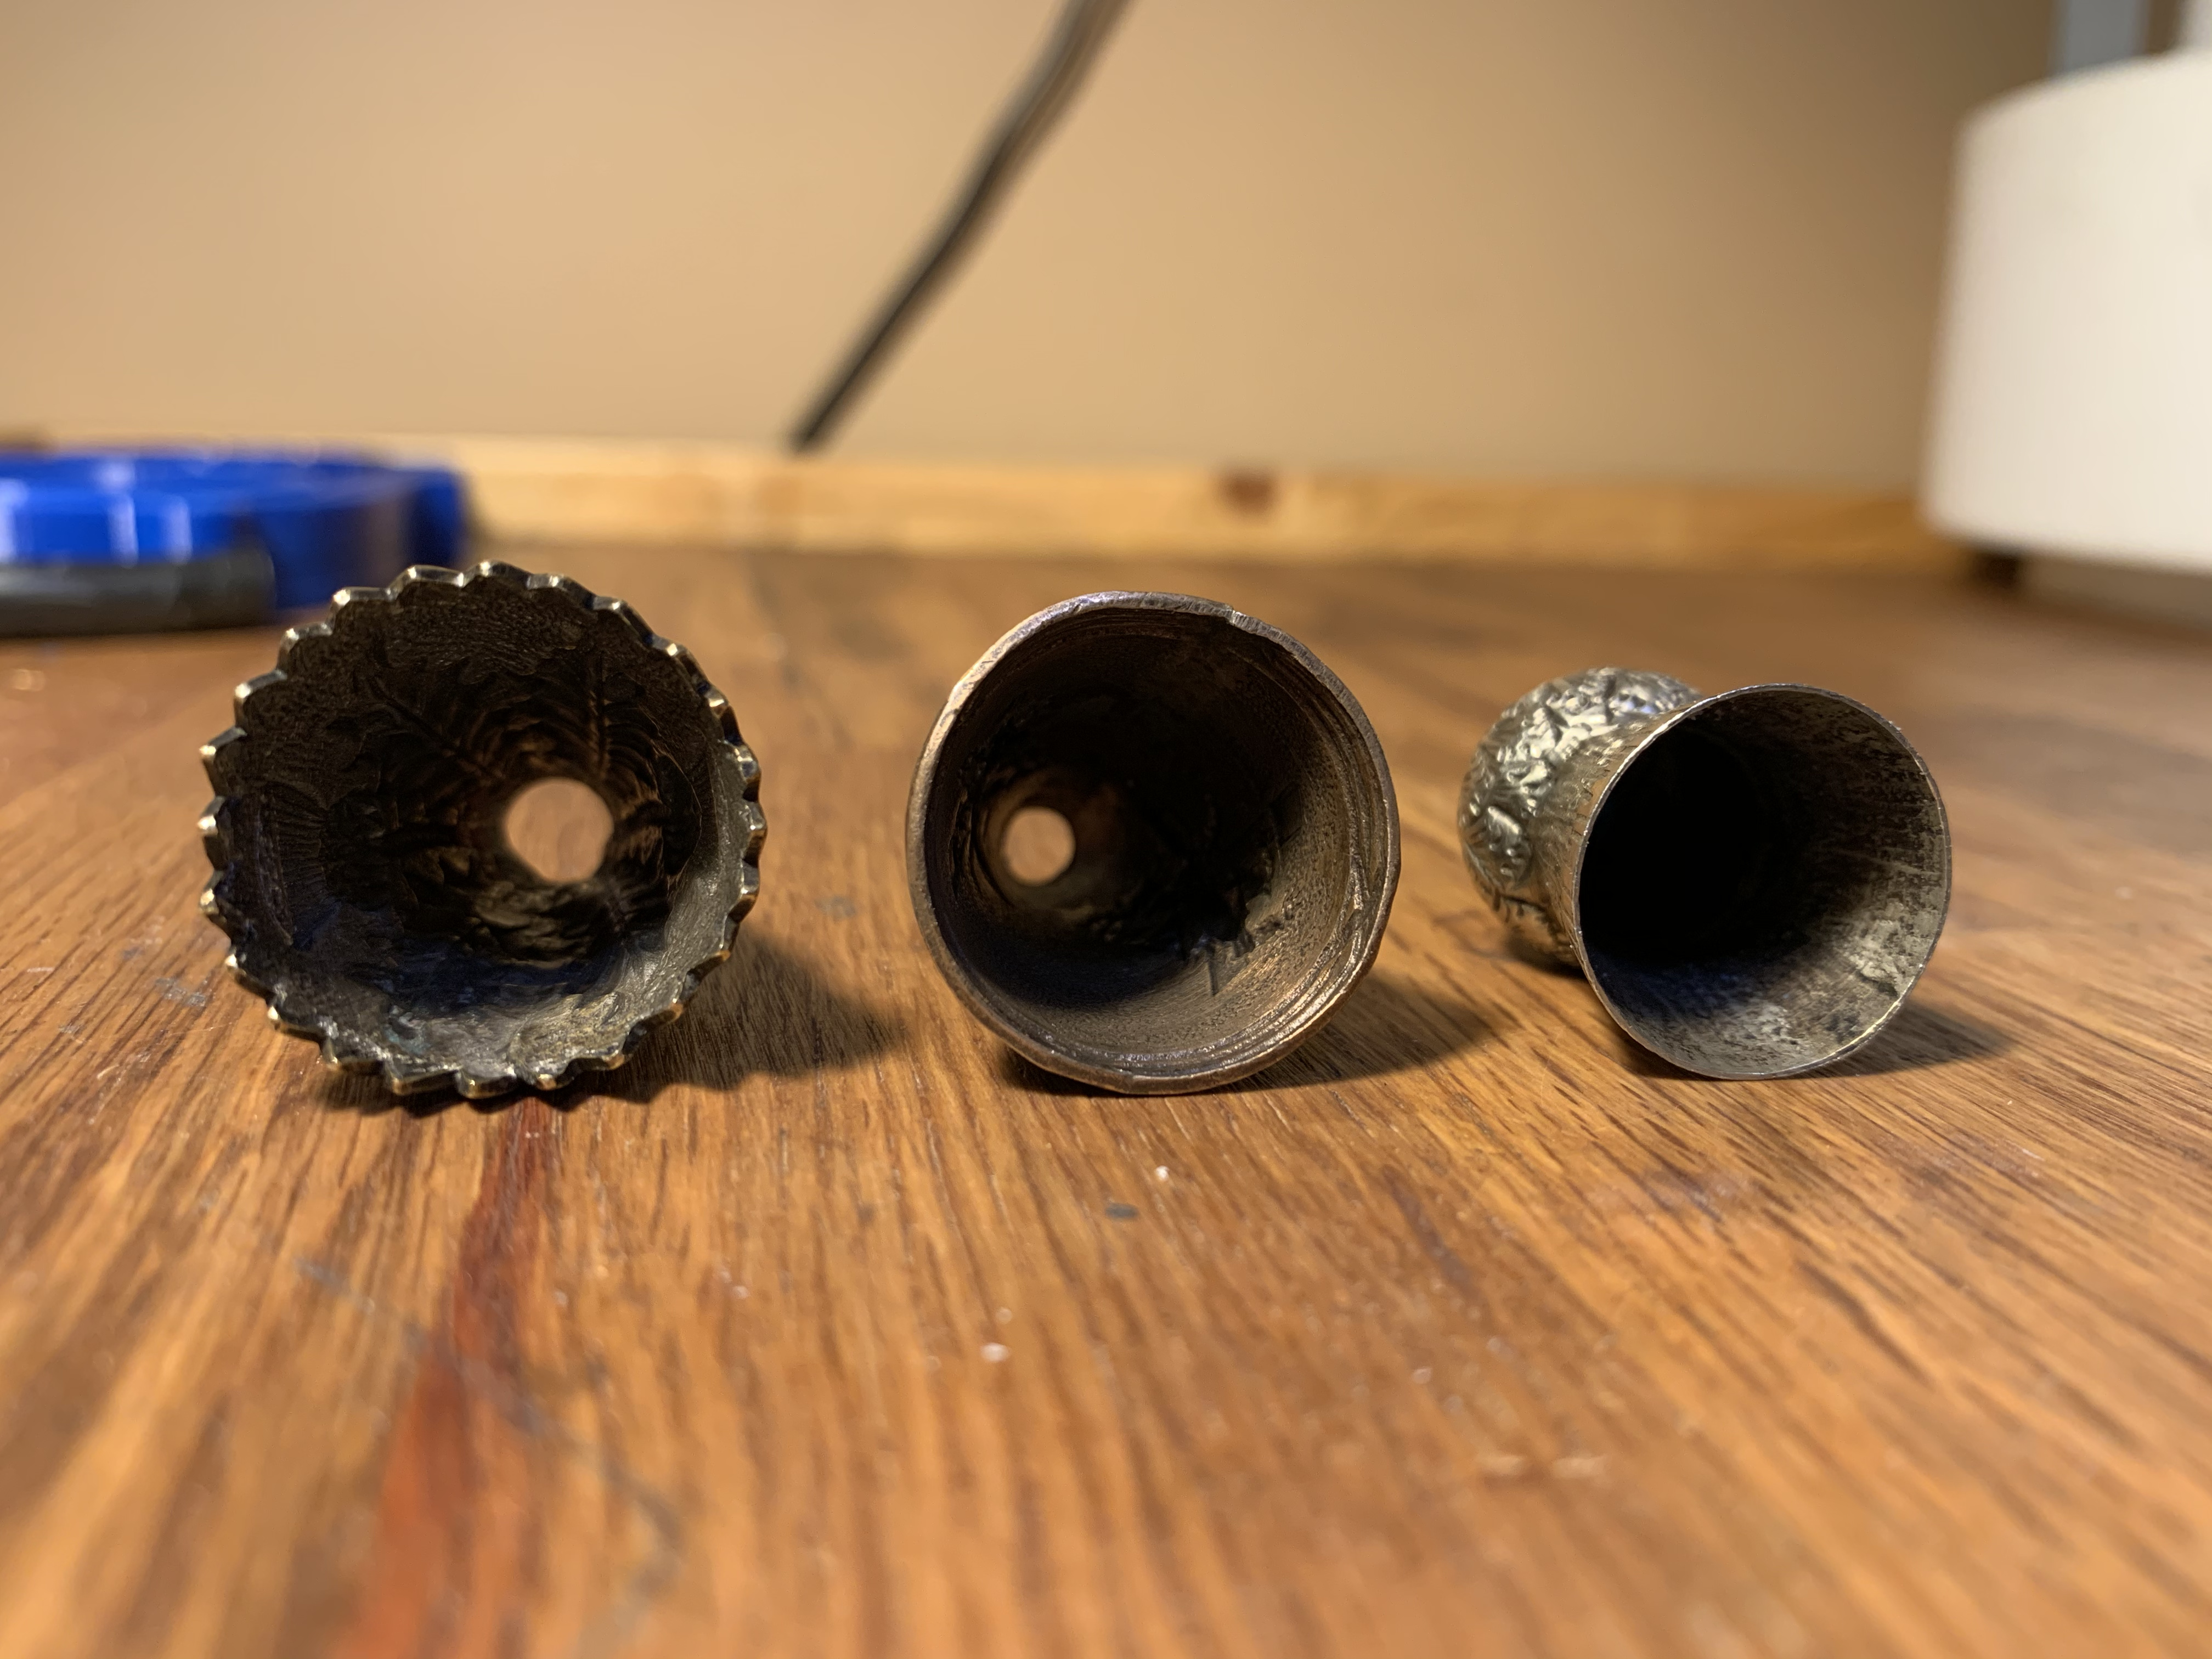
I have these cones that I need to cast in brass and am having issues with getting a solid wax model from the silicone molds that I made. The walls are very thin on the cones and wondering if anyone has any suggestions?
I need to redo the silicone molds, so basically starting from scratch again.
Also I have never cast in bass before… Any helpful tips on this too?
Any time you try to make a mold from thin sheet you will have to beef up the thickness of the material so that the shot wax, and eventually the cast metal, will fill well. The flair of the thistle looks especially thin.
Since you are making cold setting silicone molds you have easy options. I suggest filling the originals with melted wax and then drilling/filing the interior to a thickness that will cast well. Since you’re working in brass the cost of a slightly thicker piece is negligible, so I’d making the thickness at least 0.75mm throughout.
You can beef up the thicknesses your models by coating the interiors with melted wax and remolding them with RTV mold material like Silastic J or some other minimally shrinking RTV material. Room temperature vulcanizing materials won’t affect your wax so you won’t have to remake your models.
You can also try placing a piece of card stock with a cutout larger than the outline of your model cavity between your mold and the mold plate. This gives a little space for mold expansion when you inject your wax. This might be enough to get a fill. You can try card stock (or pieces of index card or manila folder) on both the top and bottom and you can experiment with slightly thicker, thinner or multiple pieces of card stock. You can also experiment with the shape and size of your cutouts - how much margin around the model cavity will increase or decrease expansion accordingly. If only part doesn’t fill, you can decrease or remove your cutout in the good area and have open margins only where you need them. You can even try stacking staggered size cutouts. Hope this helps.
I have used 5 minute epoxy to beef up thickness on thin models. In this case perhaps you could put a thin coat of epoxy on the inside of the models, and when set, reinsert the model into the mold and re-pour just the bottom half. You would need mold release for the silicone on silicone, or, let it bond and re-cut the mold. In certain models, similar to this, I have simply abandoned the inside half of the mould and painted or poured wax into it and then poured it out after it forms a skin on the surface. Often many tries to get the thickness and temperature just right. Too hot and you might get uneven thickness on high and low sections of the relief detail of the design, and too cool and you risk bubbles. To solve this problem I have poured a hot layer for insuring a complete coverage, and then a second cooler coat to insure proper thickness. I have also used a paintbrush to apply the wax, which pushes out air bubbles. I use foundry blend wax for this which is a happy medium between the softer “victory brown” sculpting wax and injection wax. However, I think in this case, using the 5 minute epoxy would be the best bet. It self smoothes on the surface. It looks like you would only need to apply it on the parts that are thin.
Is your mould vented? Air needs to be displaced before the wax can fill.
This next part is a bit fiddley. You’ll have to experiment and adjust both pressure of clamping and injection pressure. It’s a bit of a dance. Inexpensive ratcheting clamps are found in all the big hardware stores. The advantage is that unlike spring clamps, you can adjust the pressure of the hold. Silicone moulds tend to be a bit flexible and softer than vulcanized ones. Thin areas can be squished when held too tightly. Even a small holdinging pressure adjustment can often do the trick.
Increasing fill pressure is also a balance between filling and flashing at the mould seams. Finally, wax temp can be adjusted also for a more liquid flow.
Jeff Deegan