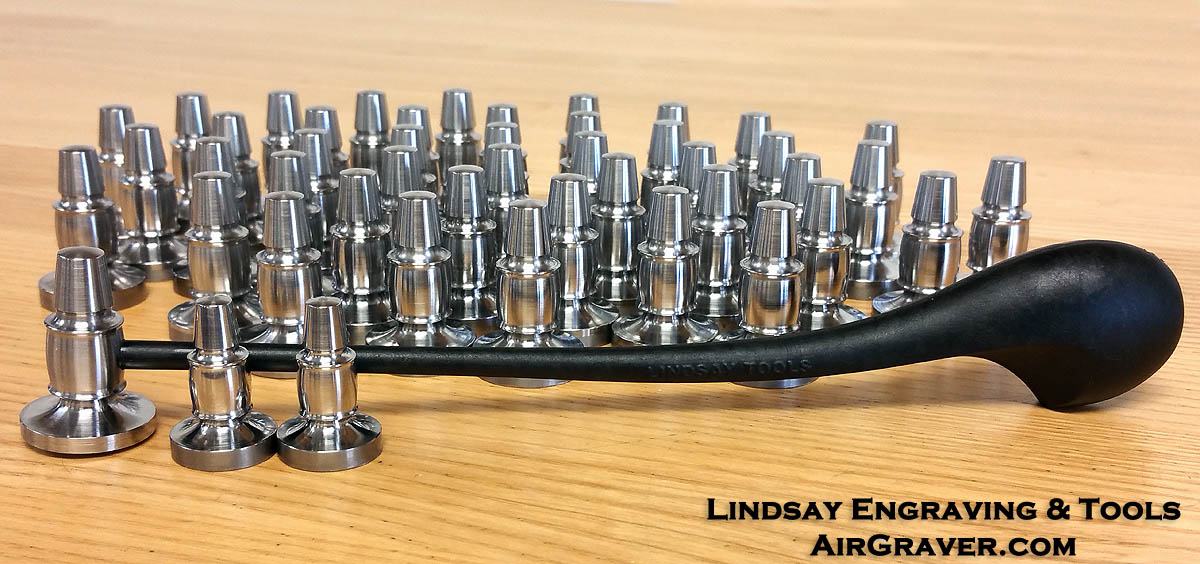
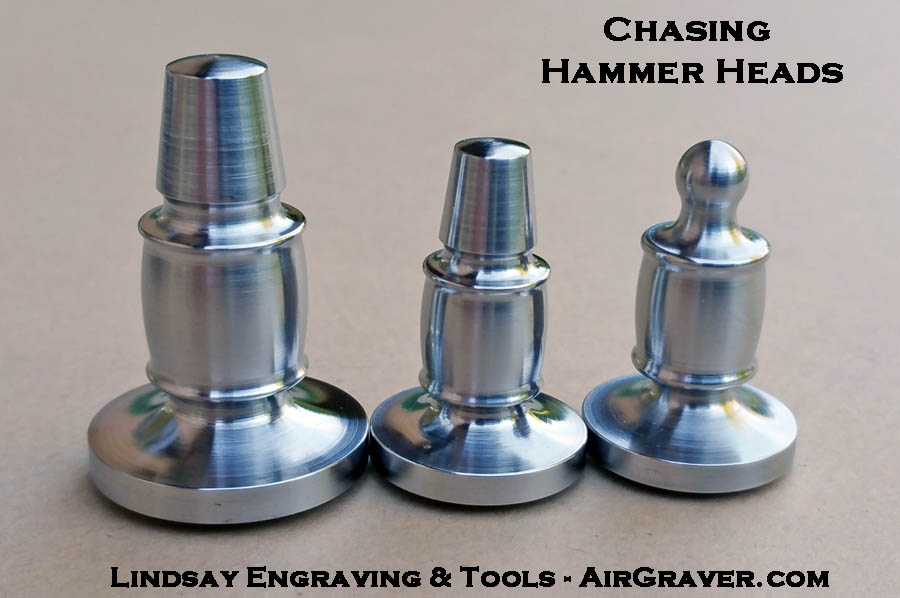
Turning more chasing hammer heads this weekend and trying a smaller one also. I only turned two of the small version though as I just wanted to try out a smaller size. They are in the foreground. I still need to turn faces and drill for handles. This batch is from S7 tool steel. Attached are three photos of them.
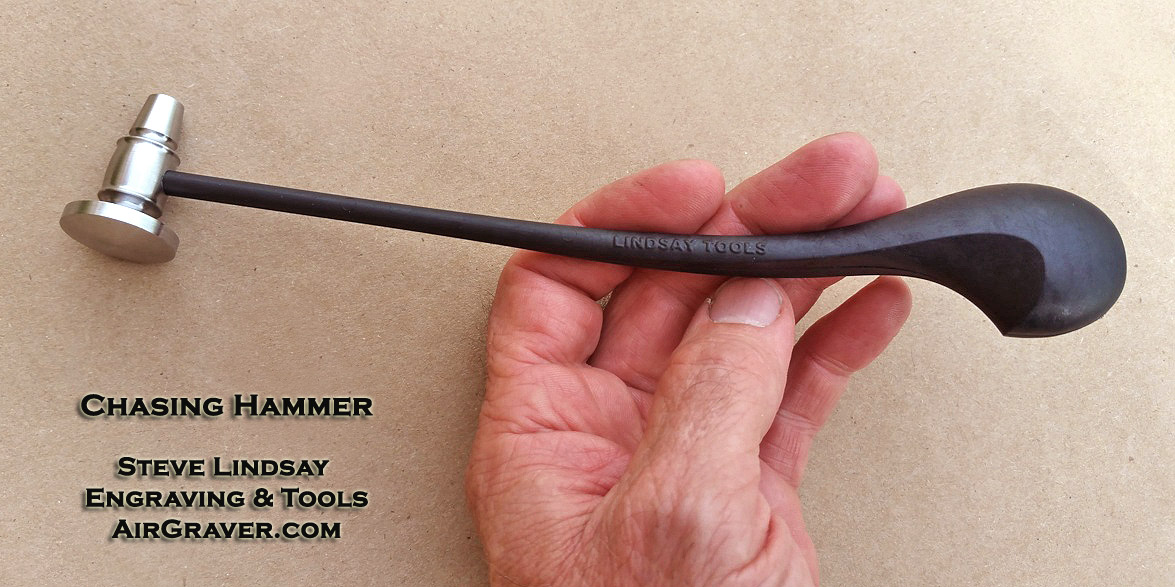
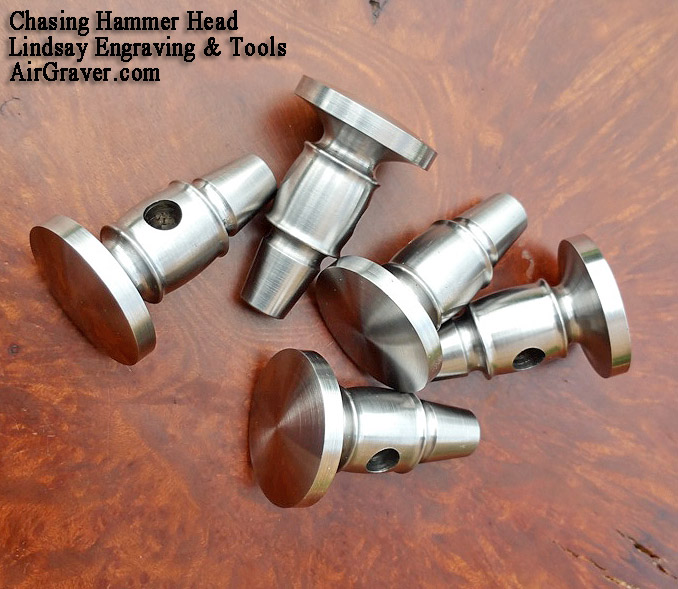
Thanks Mark and Julie. The hammer faces get turned to a slight dome in a second operation. I have attached another photo that may help show that. Concerning weight: After facing and drilling for the handle the head is 38 grams (1.4oz). That smaller version after facing and drilling is around 19 to 20 grams (0.7oz). The last batch was from 4140 chrome-molly, but I decided to use S7 tool steel for this batch. They will be hardened. I plan to run more of the small version while the lathe is still setup for them.
The handle is for chasing work and is designed to flex slightly during use for solid/no vibration impact taps. When the handles were made from wood this thin, the amount of flex was unpredictable from one to another. There was also the risk of breakage this thin from wood. These handles made from composite provide a cross between predicable minimal flex as well as strength.
Lovely work, Steve,
Will you caseharden these or actually temper the whole thing with a torch or in a furnace? I just got a small lathe and might like to turn one of these for myself.
royjohn
Thank you Roy,
The heads are hardened clear through in a furnace. Great on making one for a project. The handles and heads are available separately on the site, so you can pick up a handle for your own hammer head. Scroll down to the bottom of this page to find them: Manual operated engraving tools
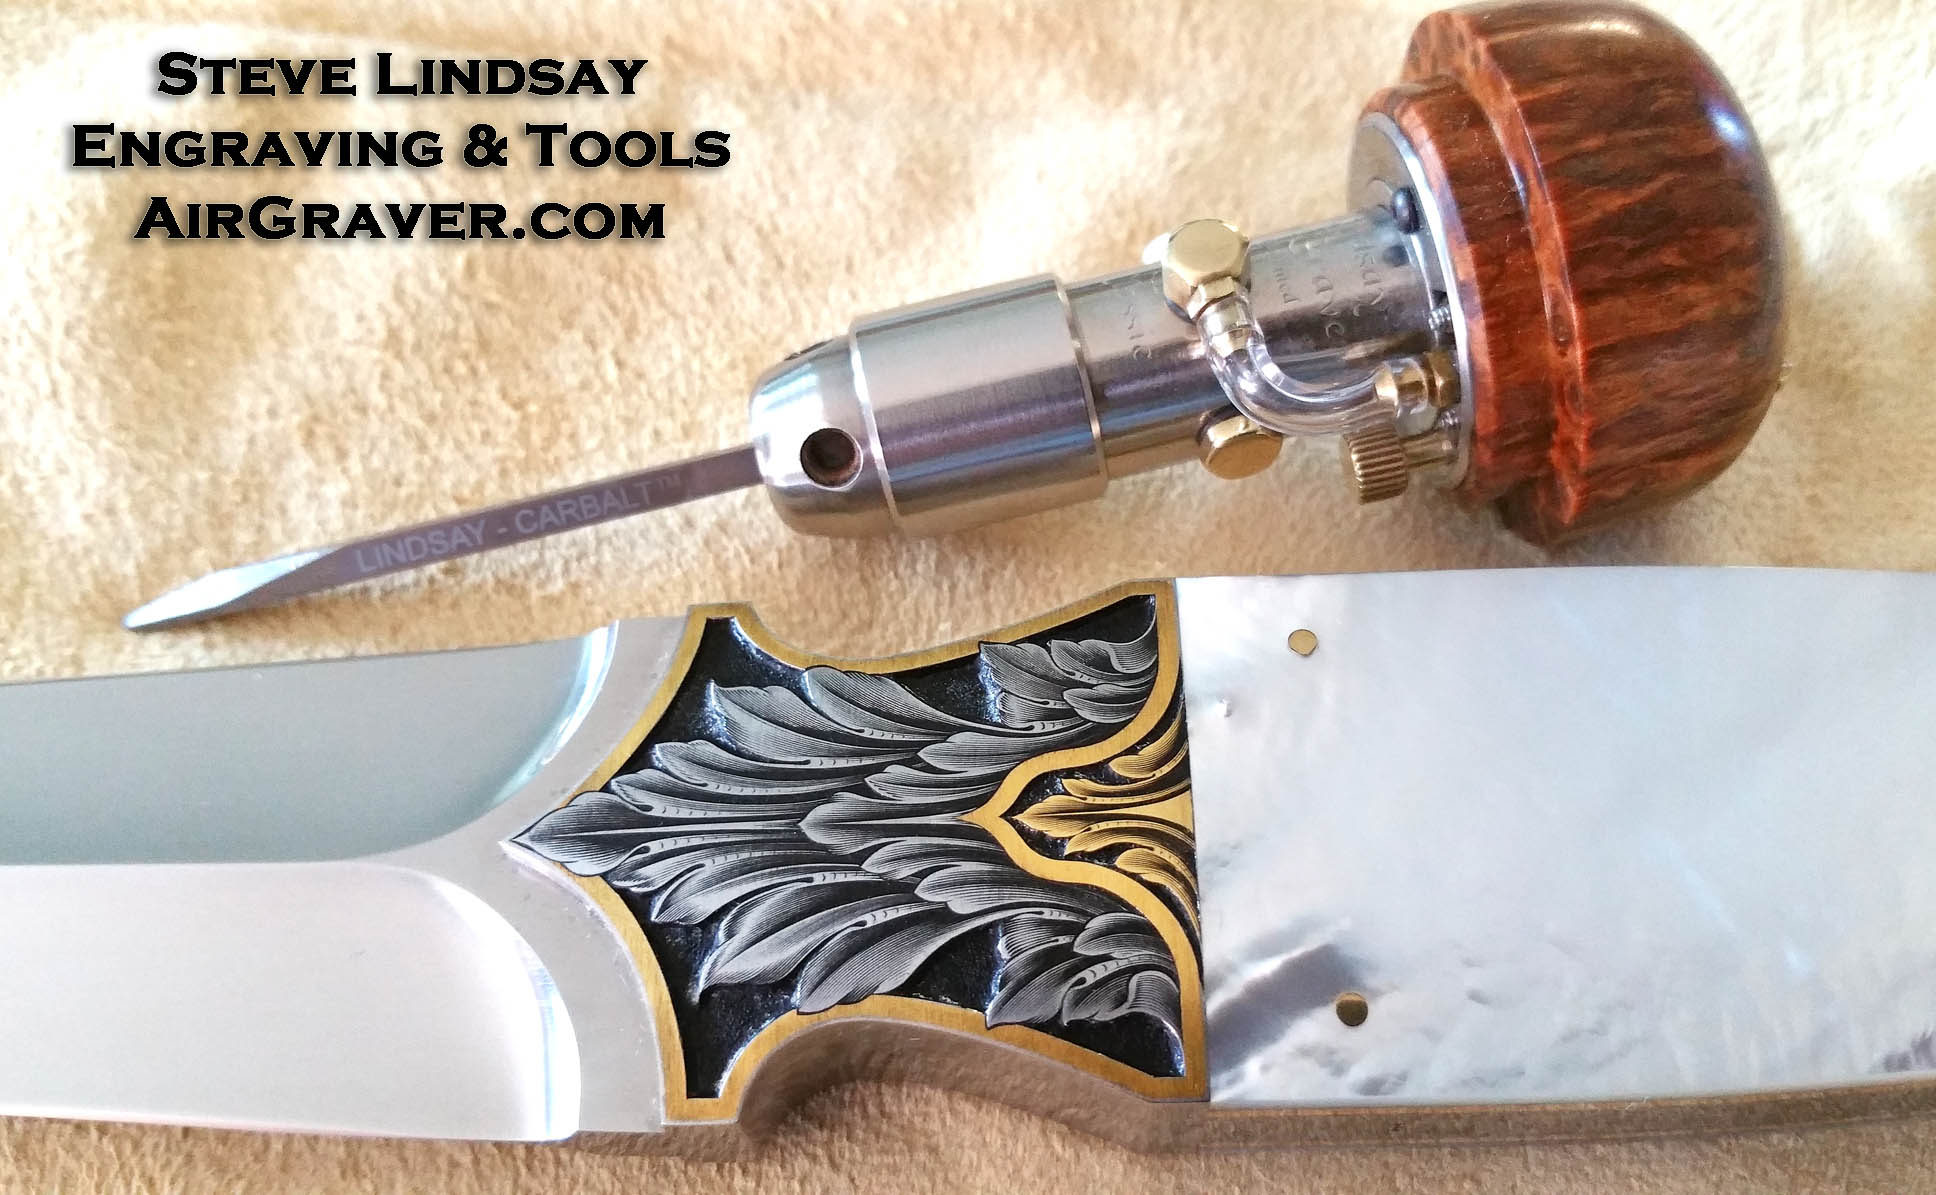
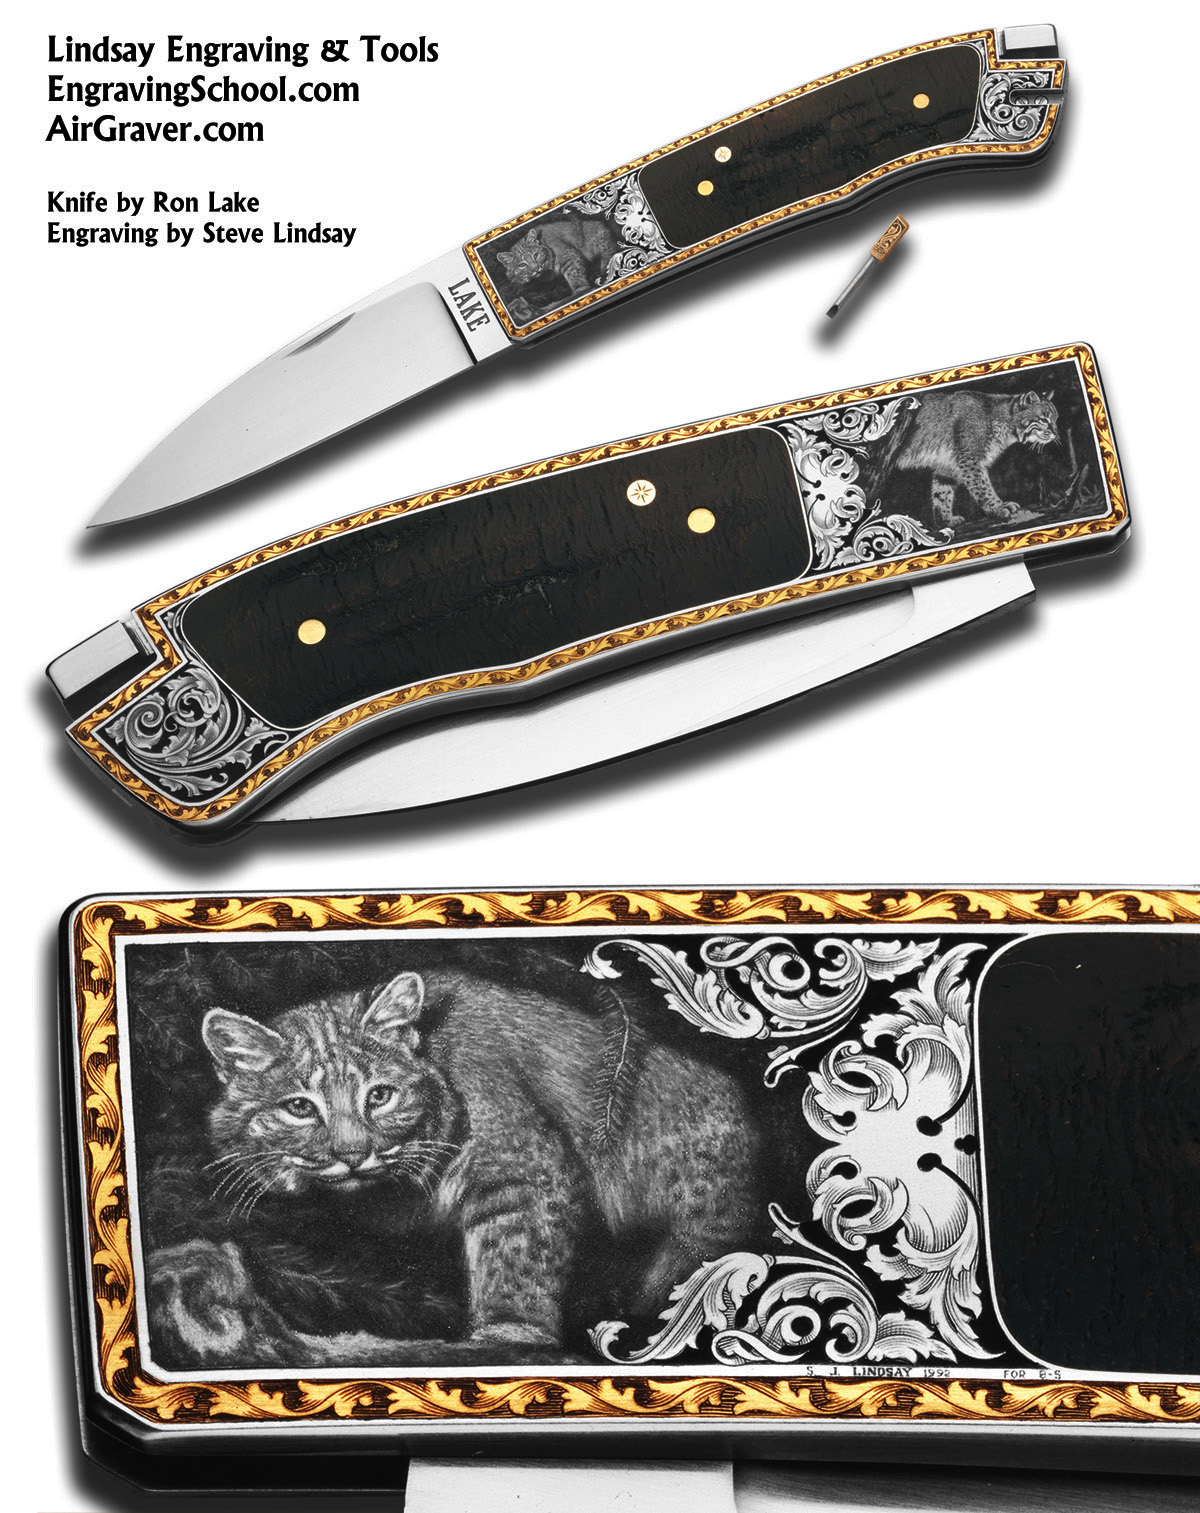
Attached is an Acanthus leaves engraving. The gold border is 24k wire that was rolled out slightly making it wider to begin with, annealed, and inlaid. Hammering in wire that does not fit the inlay well will work harden before it gets set in the undercut, and makes it harder to get it to set. The inlaid leaves in the center were sawn from gold sheet. The prepared pockets were undercut… but up against the edge and the pearl is risky. To try to leave some material next to those edges, I angled the cut more and undercut at the bottom of the pocket so it leaves material at the top edge. A right angle inlay pocket next to these edges wouldn’t have worked.
Old 1886 book designing resource; For learning to draw and design with Acanthus leaves there is a wonderful book from 1886 that google-books scanned. Information about it was posted in 2007 on the engraving forum. The book is called “Guide For Drawing the Acanthus”. The drawing tutorials teach how to draw some of the most beautiful Acanthus leaves. I noticed a section toward the end titled Arabesque. It is interesting to read through that.
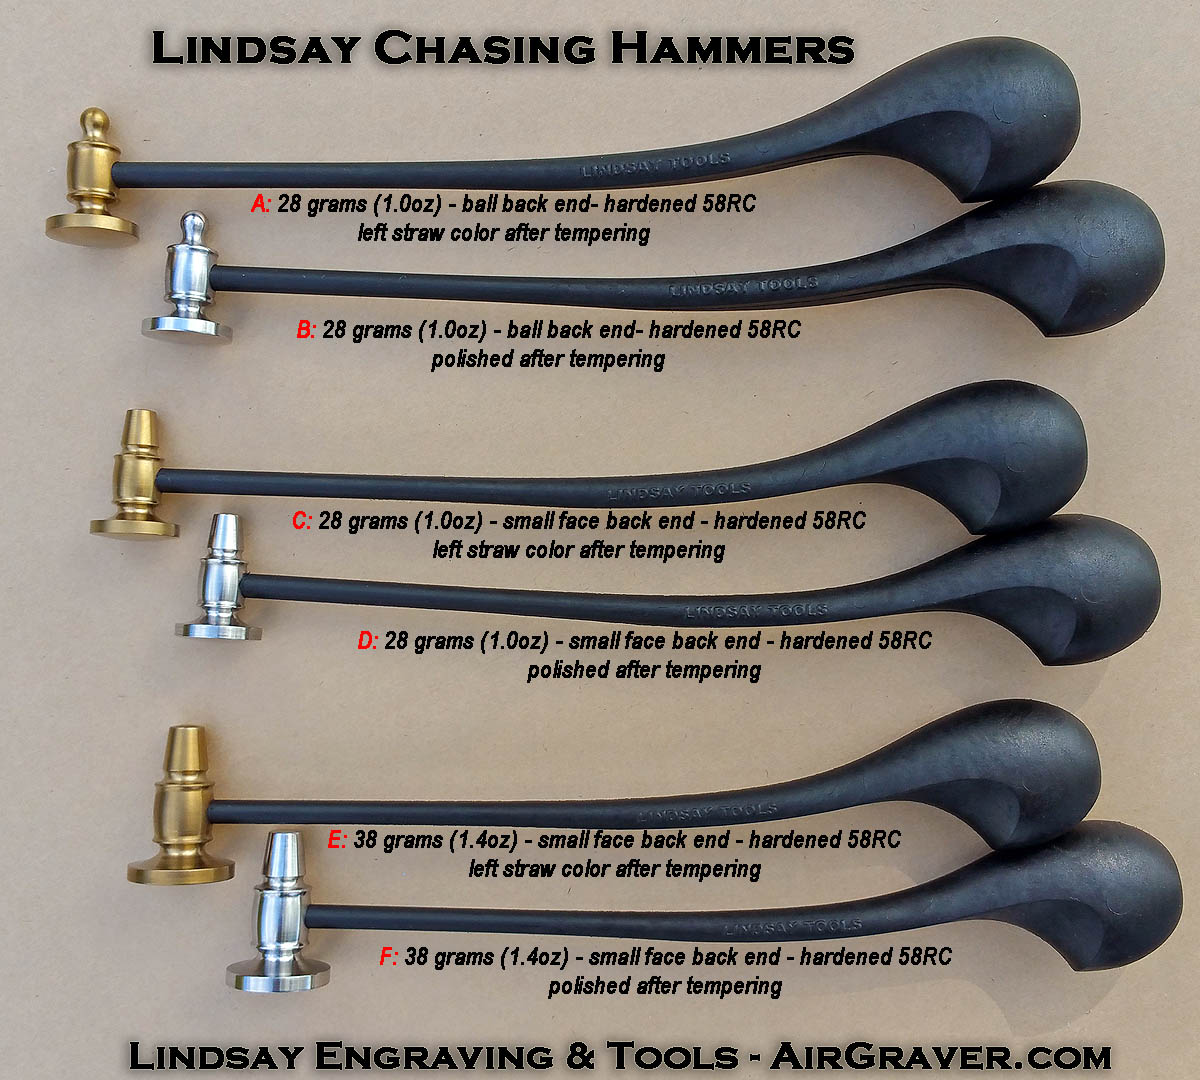
That latest batch of chasing hammers are finished and hardened. They are from S7 tool steel and I took them to 58RC. Ended up with several (six) options for them. Attached is a photo.
Bobcat engraving – Where the gold borders are, the metal was first removed and undercut. 24k gold wire was then inlaid with a brass punch in the AirGraver – then stoned flush and blocked polished to 2000 grit paper coated with rouge. The repeating leaves were then engraved in the gold. The engraving in the scene is made with short dashes and dots. The scroll work is line banknote style engraved. Notice the small gold screw driver. It fits in the butt.
Absolutely, utterly, amazing work. Of all the skills I most envy in the jewelry world, this is it. . .hands-down! Not just the inlay and the rich scrollwork, but the stunning bulino-style engraving. Man, what I’d give to be able to have the time to learn that to this level!
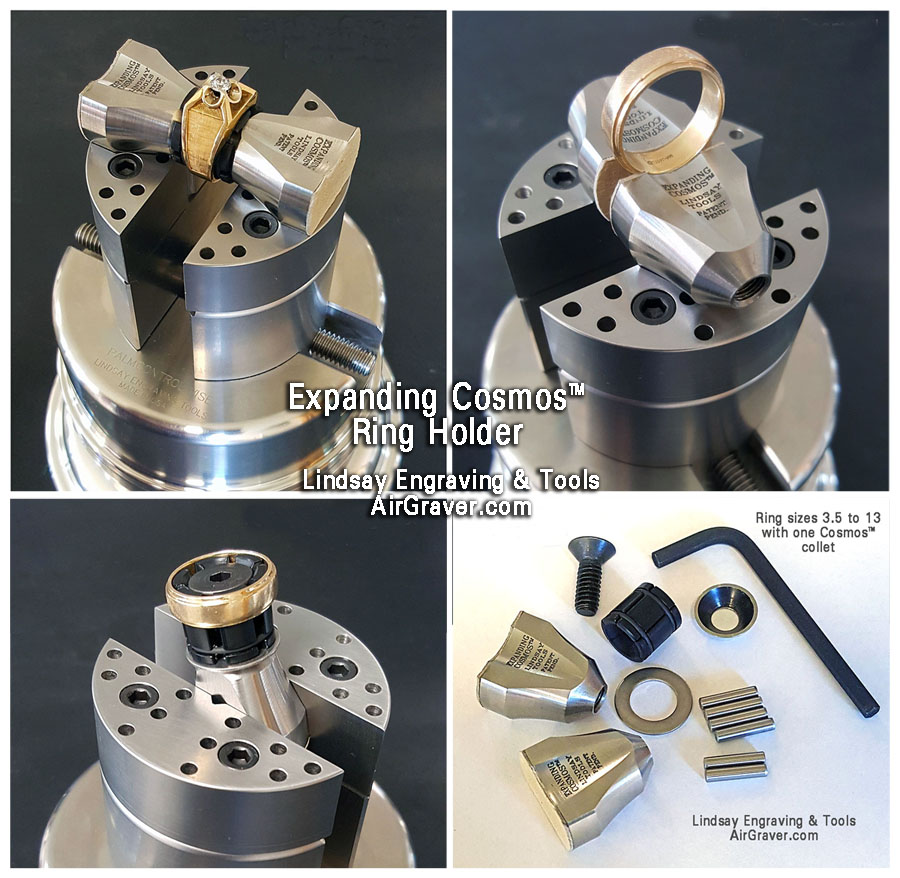
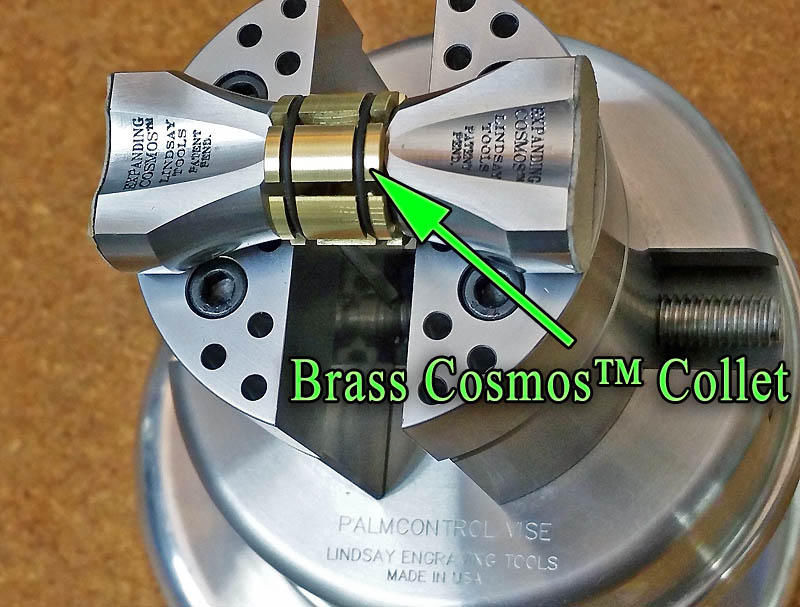
One Cosmos collet will hold ring sizes from 3.5 to 13. In other words, many different sized collets are not needed with it. I’ve been making the collets from both plastic and brass. I like the brass ones better. They are the same price or both for $25 additional.
There is also a simple add-on spin option for the Cosmos™ ring holder. The add-on is $33.50
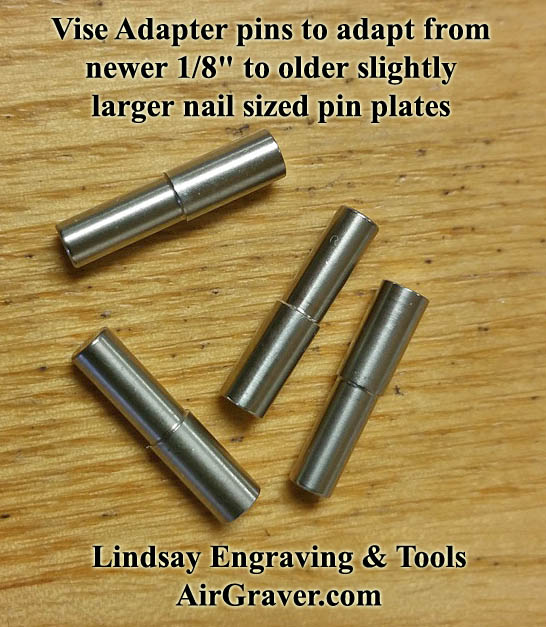
The video and photos are of the holder in the 12lb PalmControl Vise. PalmControl Engraving Vise The Cosmos holder comes with pins to fit my vises (EngravingVises.com), however I’ve made adapter pins so it can be used in other vises as well. The adapter pin are about mid way down on the vise accessories page: Vise Holding Accessory kit
Steve … I want to order one, but have an old Victor vise with 1/4" pins … sent you email from your website but all that appeared to be in the body of the email was an IP address … mine I guess. Can you supply adapter pins for the Victor 1/4" pin holes?
Brent
Hi Brent, I see a couple emails that are blank. They must be you. That is weird. Yes, I’d be happy to make some custom adapter pins for your Victor. Have you miked the pins? Are they on the button .250"? You can email me direct… to: Steve@LindsayEngraving.com
Thanks Gerry!
The collets I’ve been making are for the Cosmos have 6 fingers. For fun I’ve made some with 12 fingers. This video is one with 12. At special request I can make them this way with 12. I’ve made a few for people, but my concern is if you take it apart it will be a puzzle to get back together. lol.