I have never used nor seen a graver, but know that I need to learn
how to properly use them. Are there specific ones that I should
start with and how do I learn how to use them properly?
Ginger Smietana
I have never used nor seen a graver, but know that I need to learn
how to properly use them. Are there specific ones that I should start
with and how do I learn how to use them properly?
Ginger Smietana
Do a search for Sam Alfonso and just watch everything on his site.
If you like what you see get some gravers and put some money into
some sharpening equipment. Or takes practice and you may suck for a
while but keep at it.
His name is Sam Alfano
I have never used nor seen a graver, but know that I need to learn how to properly use them. Are there specific ones that I should start with and how do I learn how to use them properly?
Ginger, a graver has to fit your hand. I am sure there are tutorials
in the lovely Orchid Archives, you’ll need access to a grinder (with
safety goggles) but the procedure is quite easy - a little scary the
first time.
Best advice, go for a really thin one first time. I had a 4mm thick
round graver and couldn’t understand why i kept skidding, until
someone handed me a 0.4mm round graver and it was much much easier!
For lettering you need a square graver and you cut with the sharp
point. Most engravers put a heel (look it up). For texture there are
many shapes, I use 0.4, to 1.0mm round, same for flat gravers. If at
all possible go for a few lessons with someone who knows, as
engraving is complicated to start with.
Good luck
Tamizan
Ginger- To save yourself some frustration be sure to learn to
properly prepare your gravers. It’s all about the prep. Fitting them
to your hand, mounting the handles, sharpening, tempering, and most
importantly polishing. Plan on taking at least one or two full days
just doing the prep. Really.
Which gravers you start with depends on what you want to do with
them.
For lettering and decorative stuff you’ll need one kind. For stone
setting another. There are plenty of resources and videos online. For
the best results if you live near someone who is a master engraver or
stone setter, in person instruction can be so much easier and faster
to learn.
Regardless of where you want to go in the jewelry world I think that
having mastered the graver is so very important.
Have fun and make lots of jewelry.
Jo Haemer
timothywgreen.com
Learning to use gravers for jewelry construction and setting is much
easier than learning engraving.
That said, unless you learn to shape and sharpen them correctly
you’ll have difficulty even in their simplest use.
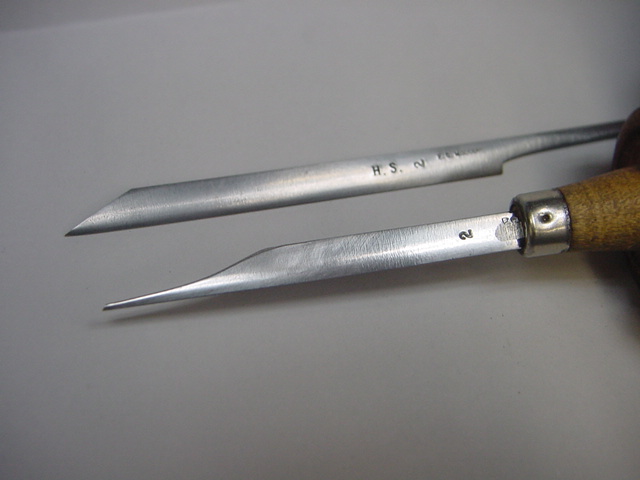
As to which shapes, pick up a knife edge, a 1mm flat, and a couple
of small onglettes, one to be sharpened left the other right. These
will cover the vast majority of uses you’ll have as a jeweler. Gerry
Lewy can speak to what’s needed for setting.
For shaping you’ll need a bench grinder, for sharpening a white hard
arkansas stone or similar and for polishing (for bright cutting)
either a ruby stone or a black surgical arkansas. Myself, I don’t
like papers for sharpening or polishing blades of any sort.
Elliot Nesterman
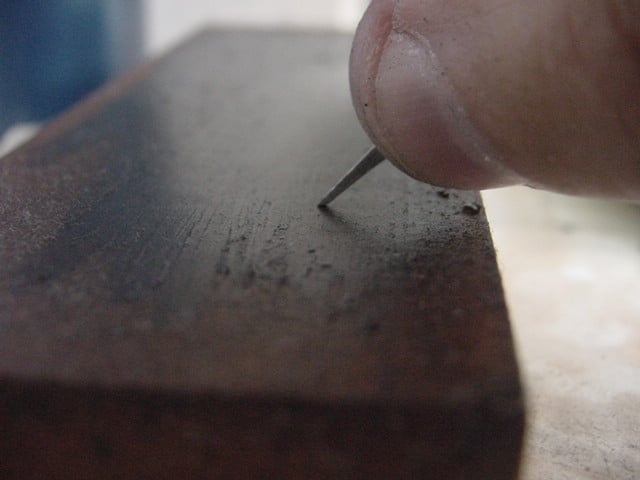
Do a search of the internet and find a description of the various
kinds of gravers as well as a diagram giving the names of the parts
of the gravers. I believe there is an excellent one on the Ganoksin
site. If I recall correctly it was called " engraving tools
andpreparation. " When I started using gravers for bright cutting
and also cutting seats for stones, I was really puzzled when told to
be sure to sharpen the belly of the graver. I did not have a clue as
to which part was the belly, or which sides should be up or down
when using them.
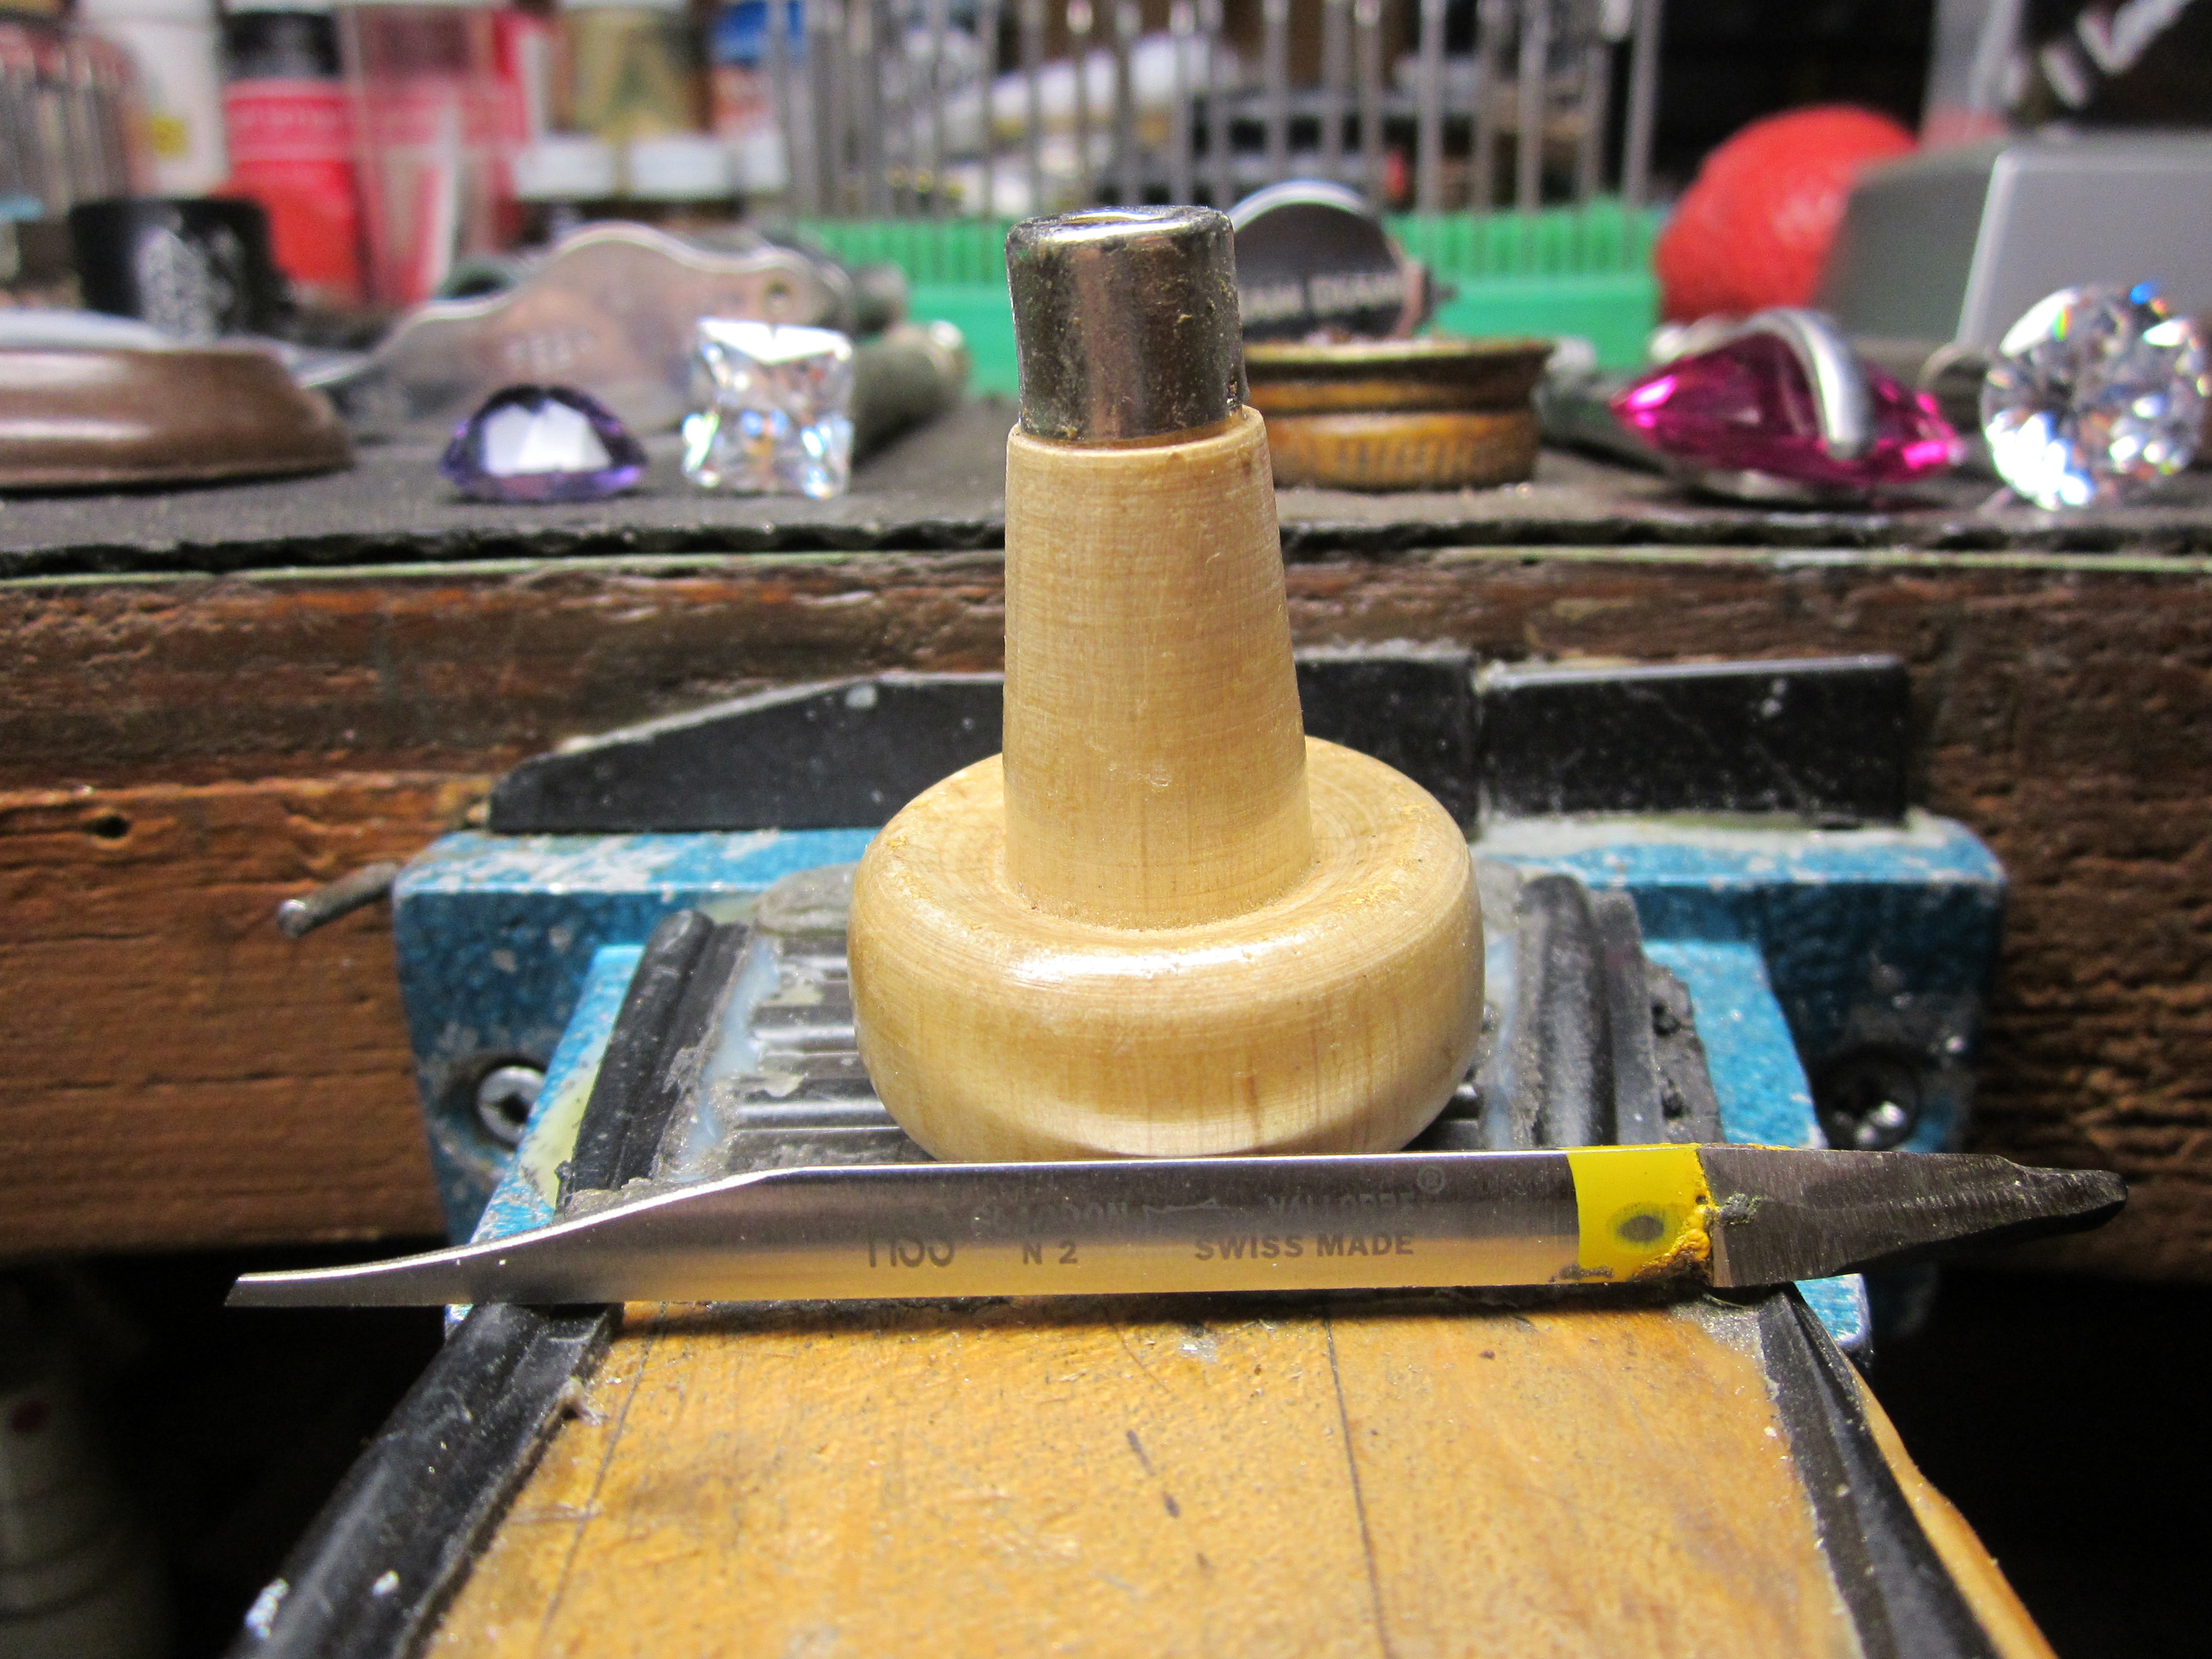
Also, it is important that the graver fit your hand comfortably.
They come rather long and have to be cut down to size.
All of this sounds complicated, but once you start working with them
it will all become easier.
Alma
Alma & Robert
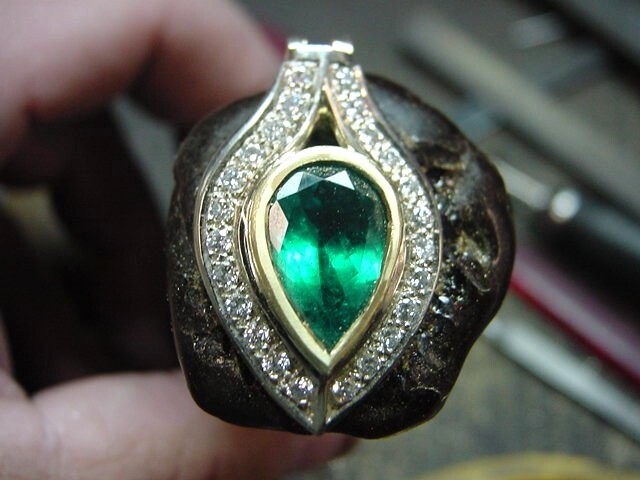
All I use extensively are three simple gravers in all of my
Bright-Cutting projects. The widths of graver is noted by the
classification or number Onglette #1 is the thinnest I’d use. I use
this just for the preliminary line-cutting. Followed by an Onglette
#2, I will use this for all of my Bright-Cutting. Many times I’d use
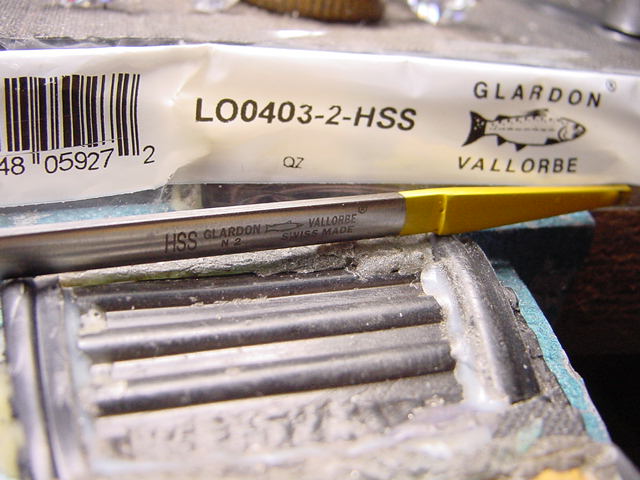
a Flat “E. C.Muller” #40 or a “Glardon #12”. Basically, I use only
three of them in all of my demonstrations on Orchid, “BenchTube”. But
I make darn sure they are all shaped to a ‘fine’ point on a simple
bench-grinder.
This process does take much time & great skill. Once these are
shaped, I finely polish each of them to suite the setting I’m then
working on. That Emerald shown was totally Bezel-Set @ $12,000 for
the stone…& Bright-Cut on the inside wall. no easy feat!

[Edit]
Sharing files and pictures with Orchid is easy - Simply attach them
to your Orchid post.
[/Edit]
Gerry, thank you very much for steering us to your wonderful videos.
I learned a lot just watching you sharpen your graver. Alma
Thank you all so much. Now I have to find someone near me to spend copious time.
Ginger
Please write back to me if you need ‘that’ kind of graver-assistance! I sent this letter initially as an open letter in error & also by mistake. (gerrylewy18@gmail.com)
Gerry Lewy!