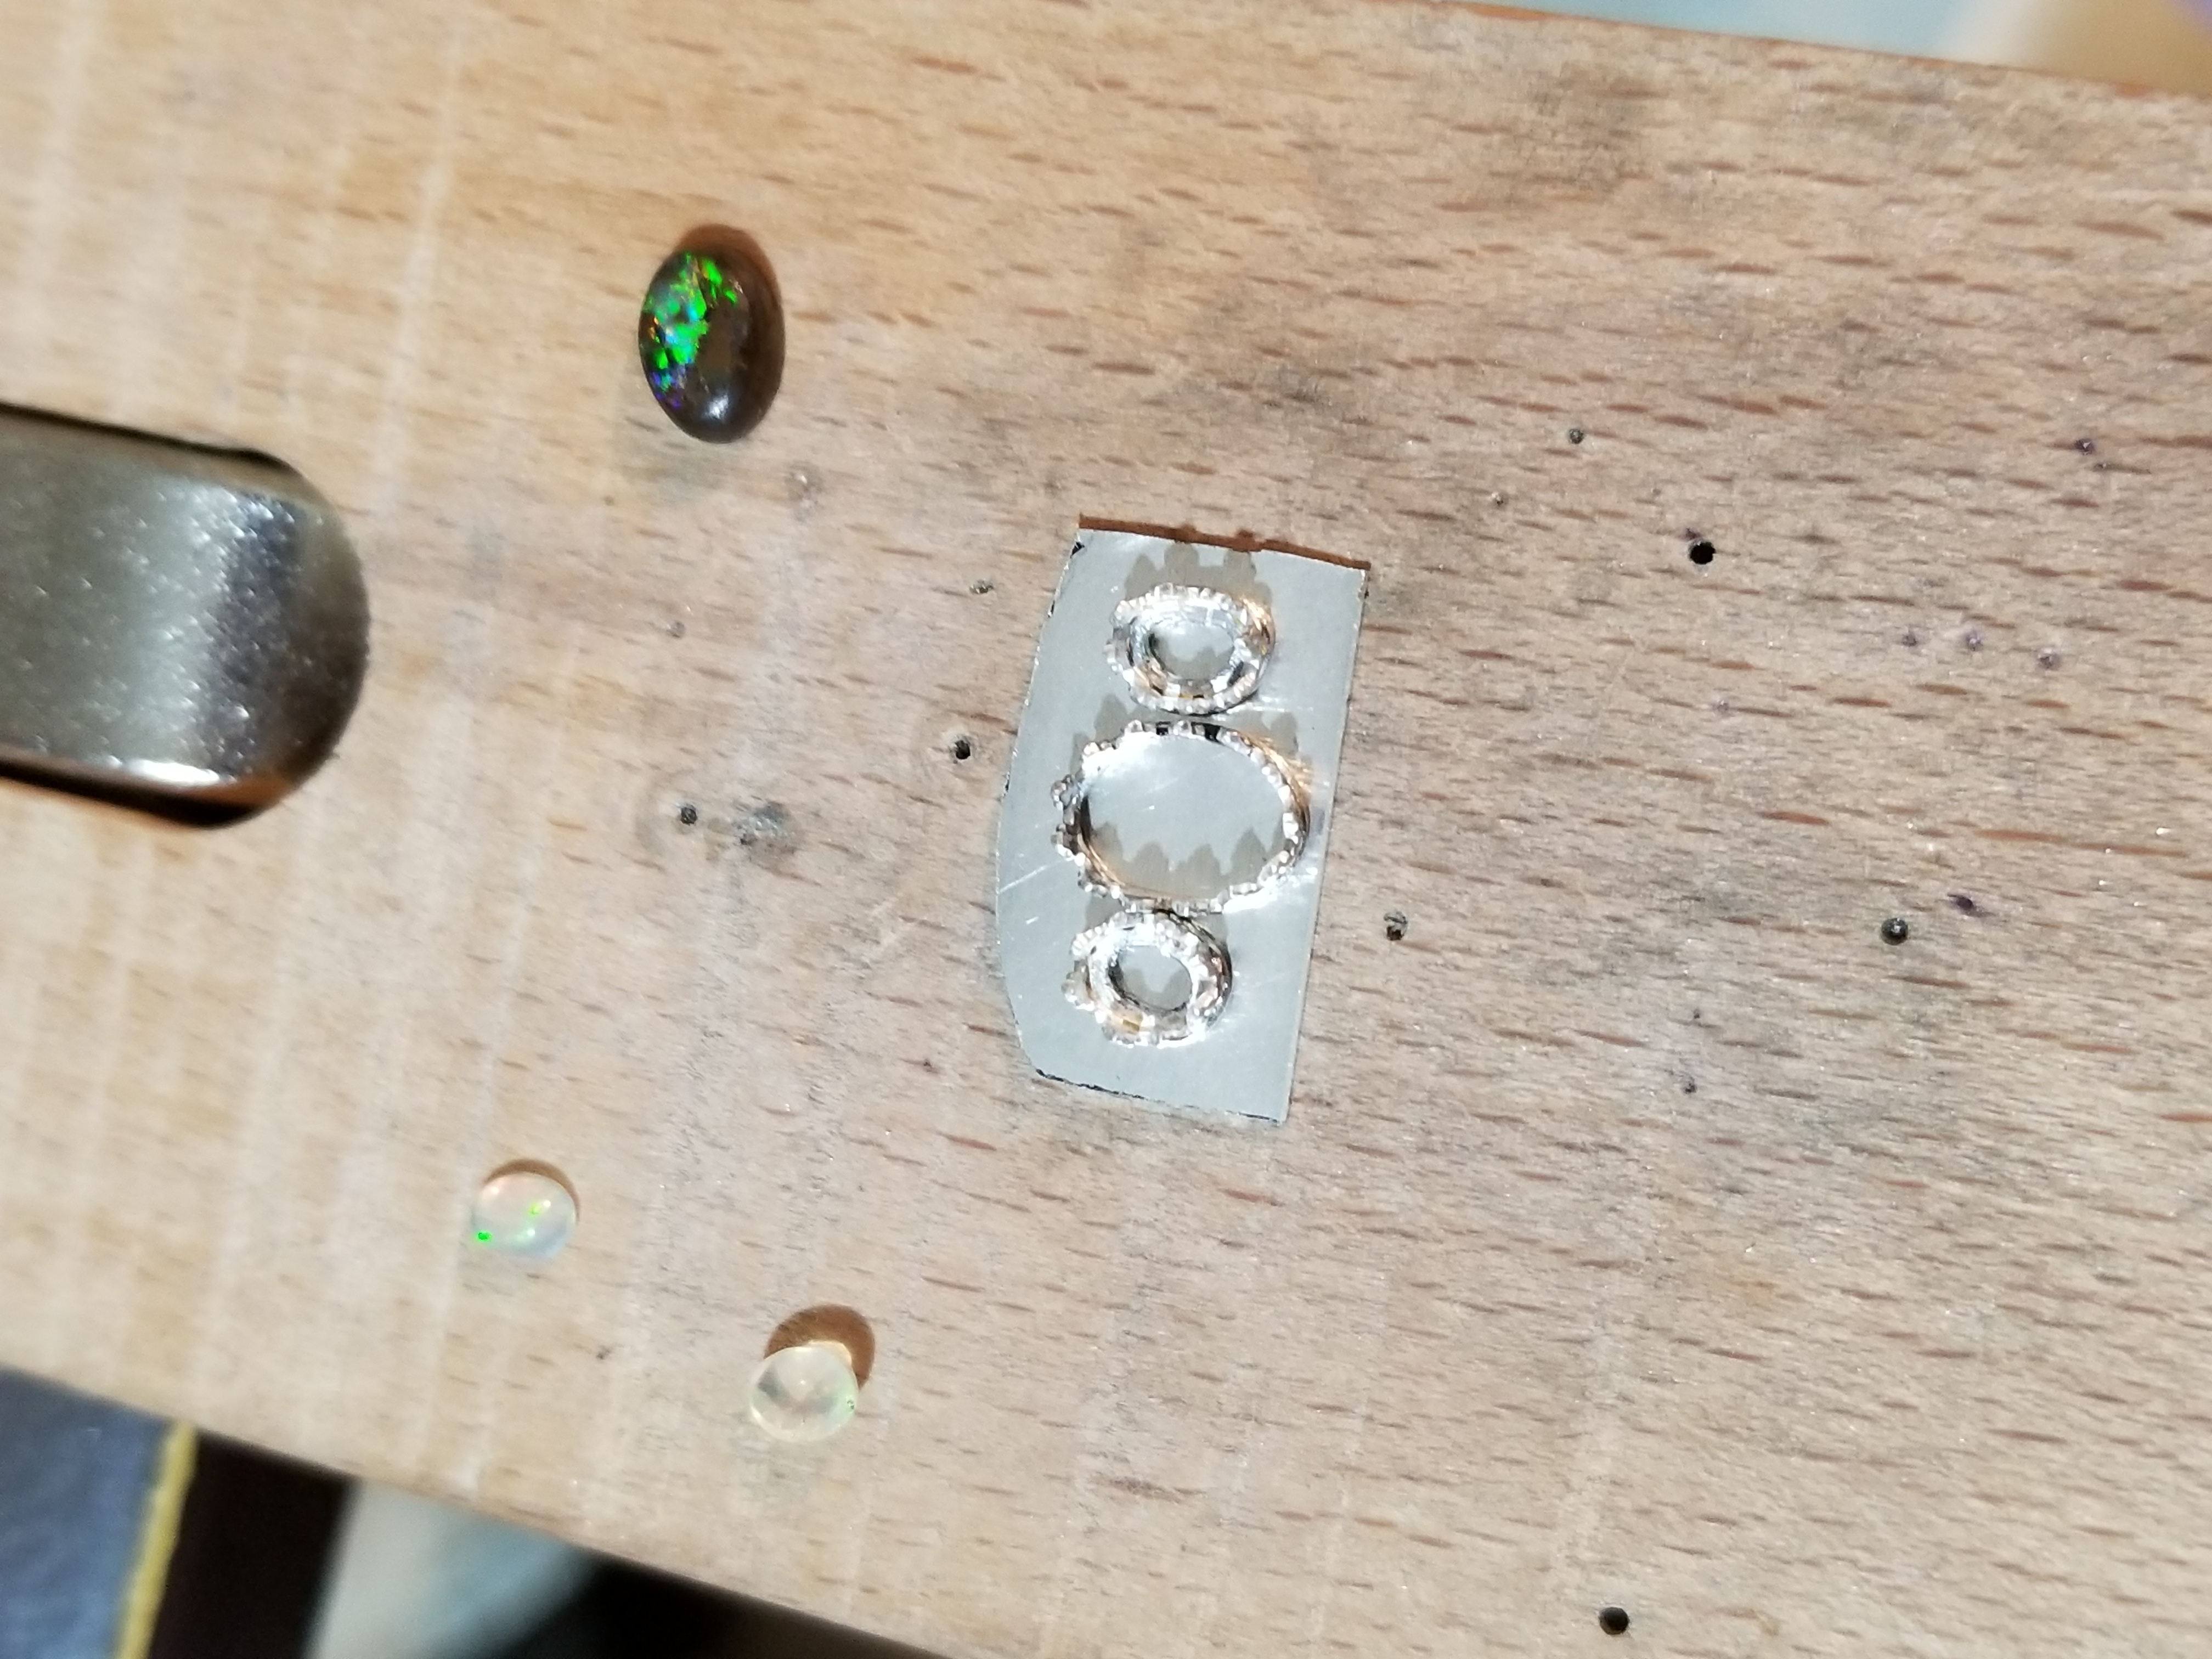
Hi all! I’m new to the community and to silversmithing. I’ve made a few pieces so far. I’m currently working on my first 3 stone opal ring. I’m using gallery wire and a backplate. I’m not sure how to proceed. I’ve hard soldered the 3 bezels into 3 separate settings. I’ve been running into the problem of my joins melting when I reach this point of joining to the backplate. I had to make my own “stepped” ring inside the accent bezels because the stones were too short for my wire and I didn’t want to file away any of the detail of my wire. But now I’m not sure how to shape and curve the backplate and still keep the bezels from sliding off since they’re not joined to each other. If I joined them when the sheet is flat, wouldn’t I risk cracking my joints? I don’t have wax to hold the bezels on my mandrel in order to join prior to soldering to the backplate. So what should I do?
Usually the bezels and back plates are both curved to fit the profile of the finger before they are soldered. How big are your stones?
Jo
If you curve the bezels after shaping to fit the stones and soldering them, they will distort and no longer fit the stones.
-Jo
Maybe you intend to make a ring with a flat backplate soldered to a shank, Southwest Indian style?
Okay, so it looks like you intend to solder the settings to a curved surface. I don’t think you
can do that because you will have to shape the bottoms of the bezels to the curve. If you just bend the bezels the stones won’t fit. You would have to cut the curve into the bottom of the settings , which would mean you would probably cut past the solid part of the bezels and they would fall apart. Even if you succeeded it would not look good at all.
Jerry in Kodiak
Hmm. So I was correct in my thinking. Darn. Maybe I could do as jholtak suggested and make it flat? Or file diagonally on the bottom of each bezel So they curve and just cut a well in my shank? The only one that needs to be supported on the bottom is the middle opal since the 2 accent ones are already freestanding settings. I do have a small section of space on the bottom that I could file a curve. I’m sure it sounds amateur, since I am lol, but i basically made a jumpring and soldered it about 0.3mm above the base of the bezel on the inside. So the 2 rings (jumpring and bezel) don’t sit flush against the backplate. I hope that makes sense.
I’m sorry, just proofreading. I meant to say “file the base of the bezels where they join”
So for future knowledge, where did I make my mistake in creating this bezel?
I do not see a mistake in creating the bezels, but possibly a lack of plan for the final assembly as a ring.
You are not going to “bend” your bezel to fit the finger, as noted above, or they will not hold the stone. Since you mention that your stones ride high on the inner support you created, you could file away the bottom of each to follow the curve of the finger, but that may remove detail you wish to keep.
You could creat a silver ring and the solder each bezel onto this in a step pattern. You could add some gallery wire, or sheet to support, and clean up these steps.
I am on my phone, so a very simple finger sketch is all that I can quickly add.
Thank you for that  yeah, I try to think out what I’m going to do, but then, I get to that point and it’s a bit different than I expected. I might measure out a cut out spot on the top of the shank to see if it might fit without looking sloppy.
I have a favorite trick to shaping a bezel bottom to fit a curved surface.
First I use a #2 cut half round file to rough the curve out. Then to make
it fit the curve of the ring shank perfectly I do the following…
I find a wooden dowel or a dapping punch that matches the size and curve of
the ring. Then I take some emery and curl it around the dowel or the shaft
of the punch and hold it in place as I rub the bottom of the bezel on the
curved emery paper.
-Jo
Oh, that’s a good idea I haven’t added dapping tools to my arsenal yet  I’ll have to remember that trick though.
“I have a favorite trick to shaping a bezel bottom to fit a curved surface.
First I use a #2 cut half round file to rough the curve out. Then to make
it fit the curve of the ring shank perfectly I do the following…”
I use a heatless mizzy wheel to start the curve on front and back of the underside of a bezel where it would go across the finger matching the curve of the ring size on a ring mandrel, then I use sandpaper wrapped around a ring mandrel at the ring size needed to clean up and make it match and sand the length of the mandrel at the ring size required not going larger than the finger size.
I curve a piece of sheet to match the curve I have sanded into the bottom of the bezel and solder bezel to back plate.You asked where you made your mistake ? Well, you didn’t make a mistake. The problem is not the bezel but the design. It is not complete. I happens that just three weeks ago I made a ring using what appears to be the same gallery wire you did. I made it to fit the stone just as you did. I then soldered it to a backplate and trimmed it to conform to the bottom of the bezel. This I soldered on to the ring shank, then formed another piece of pattern wire narrower than the shank to fit over the shank and curve up 'til it joined the edge of the bezel, and soldered it. I filled the space between the edge of the pattern wire and the edges of the shank with circlets of bead wire. You could do something similar and assuming the side stones are small enough you could solder their bezels, including fitted backplates, directly to the shank on either side of the center stone.
I wish I knew how to to add a picture of the ring I described above to the email, but I don’t. Maybe that would be a good project for me this afternoon, eh?
Jerry in Kodiak
I was actually thinking of doing something like that to sort of “hide” the flat bottom of the 3 stones. I just usually run into problems when trying to solder multiple items onto 1 piece if i dont do them at the same time. I have a pair of head and shank tweezers that I can use for the main stone.
I’m also at the point where I’d like a closed backplate for the main stone, but the bottom of the side stones are open in the bottom. The center stone is opaque (Australian boulder opal), so I really wouldn’t need it open, but I don’t want it to look sloppy
Unsure what size your stones are. But have you thought about making a square ring which may accommodate the stones easily?
I find a wooden dowel or a dapping punch that matches the size and curve of
the ring.
In a pinch, you can even use a ring sizing mandrel. Just requires a little more control. ![]()