Dear all
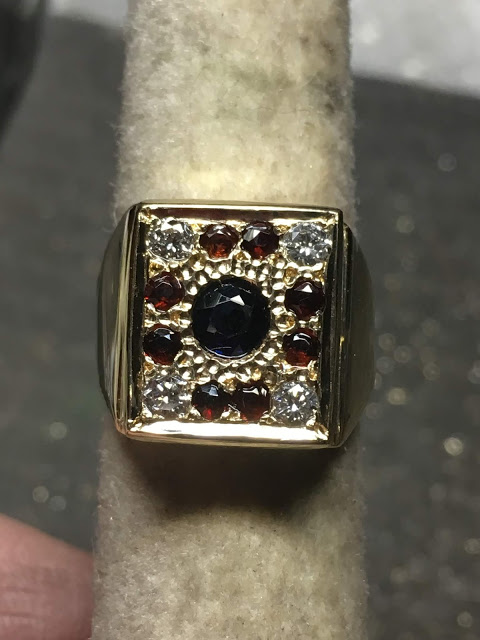
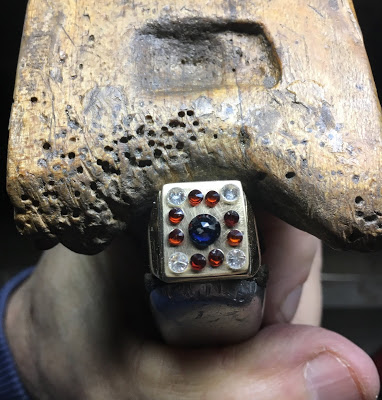
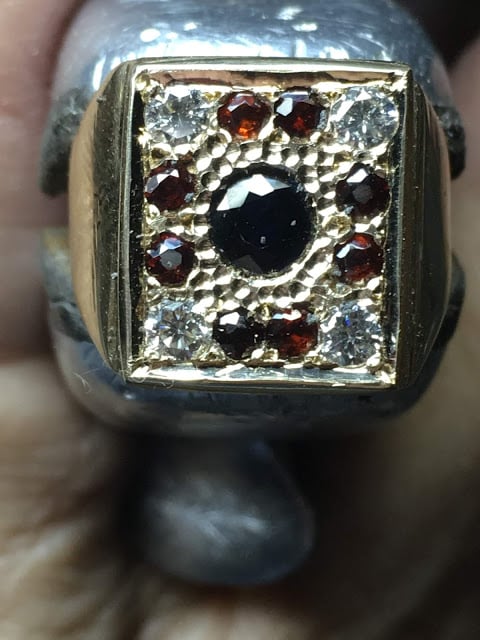
I had my client give me an old pendant and use these stones into a large Gent’s ring. My newest essay on my blog discusses this process in great detail. Here are the before and after photos, enjoy the reading and the close-up views. Listed below is my blog address, the whole essay is now ready for the reading & your learning. This essay shows how to manage the many little setting problems as you encounter them…enjoy!..enjoy!
Regards.
When I learned how to free-form via Bright-Cutting in 1970 B.C. (Before Cad) My knowledge of any cutting ideas was very limited. But by the mid-by 1980s, it increased 100 fold as I then saw just how important “engraving with setting” can be. These are symbiotic relationships with each setting process and are so very important.
These many techniques give you the best chance of developing added ideas. These make your ‘cutting and engraving’ the best opportunity and then give you a better chance to make your stones shine!
For this case as in point and a good example, my client gave me some old Garnets, Blue Sapphire and Diamonds to reset. I then applied these instances of Bright-Cutting and designing into a new ring for him to now wear.
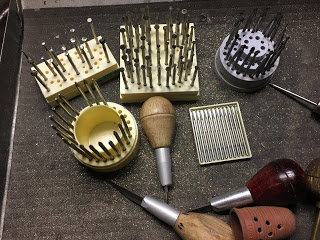
What setting tools did I use, and why! (There are simply no ‘short-cuts’ in using these many setting tools.)
Bead-Burnishers: I used many sizes that were available to me. This is because some of the ‘beads’ were again of a variety of sizes.
Large round burs: As I had a wide selection (in my bur-tool inventory) of these large sizes, I found that most all of them were used just to set the large Blue-Sapphire.
Bead-Raiser: This well-used Beading tool is my own design. I shaped it directly from an Onglette, #2 graver. There are many in tool shops, as “Half-Round”.
But with my graver point, I find I can modify it directly to the Bead when needed. The Garnets and Diamonds were all of different shapes and sizes. Hence, different widths of Graver points.
Rough-Cutting Onglette #1: This graver does only one thing, it cuts an outline prior to the Right-Sided graver#2 cutting process.
Bright-Cutting graver, Onglette #2: These are modified directly from the beginning from the bench-grinding process. This blade is fashioned to cut ONLY on the Right-Side. Why this right side? Obviously, I’m right-handed!!!
Bead-Burnisher: These tools are to be used just to ‘round’ off the “bead-point”. It actually presses down on the bead, as to strengthen & hold the diamond in place.
Thumb-guards: If you don’t use any of them then…" Don’t come crying to me that your fingers are being cut from holding the bottom of the graver-edge". I use them constantly and this avoids any cut to my ‘finger-pads’ during the setting process.
Flat-Graver: I use only ONE width and that is with the Flat graver #40 or a Glardon #12
Dividers: I used this tool extensively during the ‘layout of the stones’ being shown.
10power loupe: Basically I use it just to examine where the beads are being formed. I never rely upon my Opti-Visor with a #5 lens. I just gotta make darned sure each bead is formed in the correct spot.
In this photograph, I’m starting to separate the large and small sizes of the Garnets. I had to plan every step in this layout. Already you can see the smallest stones just where the dividers are touching!
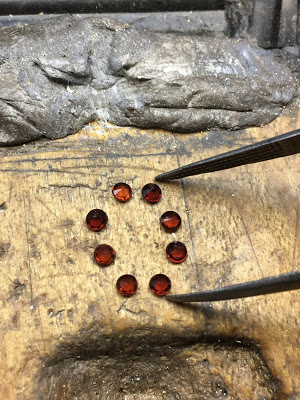
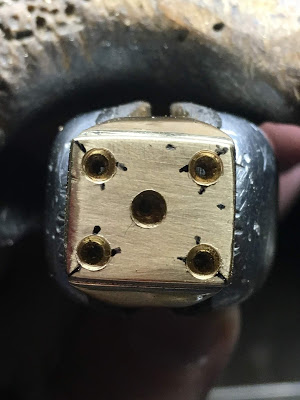
I placed (carefully) just where the stones will be ready for drilling with my ‘twist drill’
For an overall view, I looked at the final placement prior to any sort of drilling! Already you can see just how close the stones are to each other…OUCH!
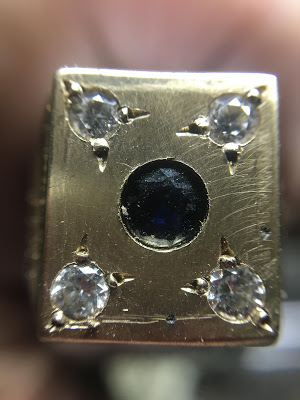
Once I drilled the four Diamond holes at 90% of the diameter of each stone I did something very interesting. I marked with my pen where the beads “might” be placed.
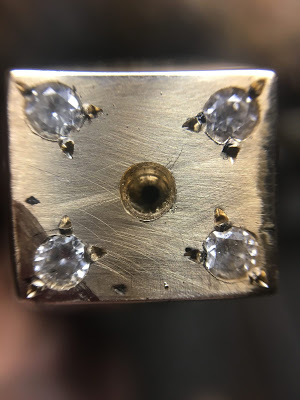
I drilled and finally set the four stones and used my Bead-Raiser to start the next step in this creation. I noticed one bead was slightly out of place, (this is on the left stone in this picture). Can you see which one it is? But this won’t be a major problem for me, as we will see further on how I blended all of the beads into a nice pattern.
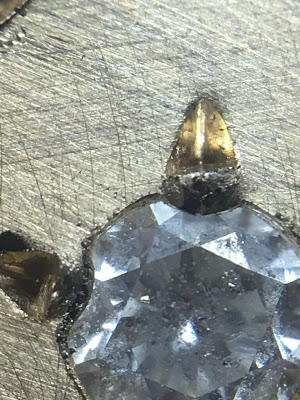
With my Onglette graver of #2 width, you can now see just how deep into the metal I created the bead. Also, how much of the metal is being formed OVER the diamond. The bead MUST be 1/2 over the Girdle/Edge of the stone, this is 100% important!
After quite some time in drilling and using many of my large Round burs, I finally placed the stone into the metal…whew!
My method of securing the stone was a decision I made that I wanted all of the stone to be shown. this was the initial request of my client, not me!
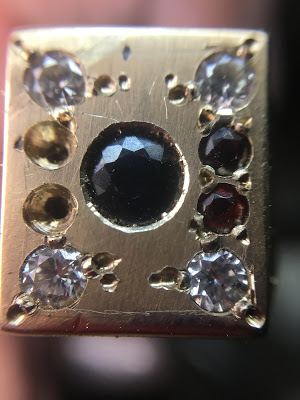
With my Onglette #1 graver, I then carefully created many ‘mini-beads’ just inside the hole and against the metal. These “wire-tips” now fully secure the stone!
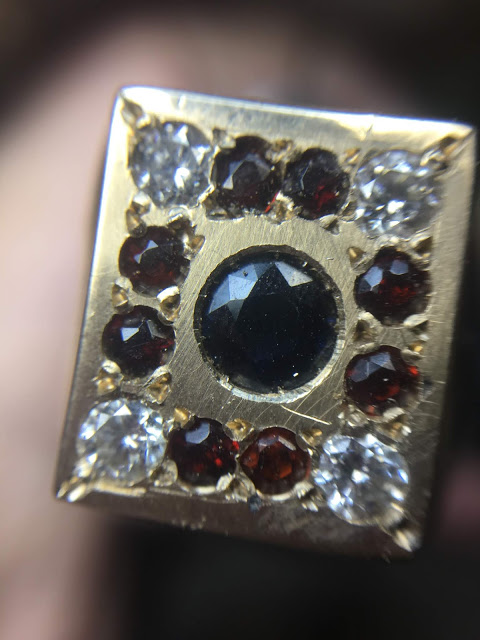
If you notice, I used my Flat graver and cut a circle in the metal around the upper edge of the Blue Sapphire. With this cutting process now the stone looks larger!..:>)
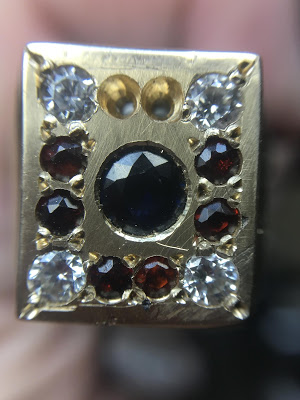
You can see that two of the Garnets are now fully secured with four Beads each!
As I was dealing with multiple sizes of the Garnets, I had to consider where each stone would be set. Already you can see some problems starting with the remaining two stones.
I avoided to Burnish any of the Beads on the Garnets, lest some of them could get ruined! All of these stones were from a pendant from 40 years ago. The bad word “Breakage” was not in my vocabulary…:>(
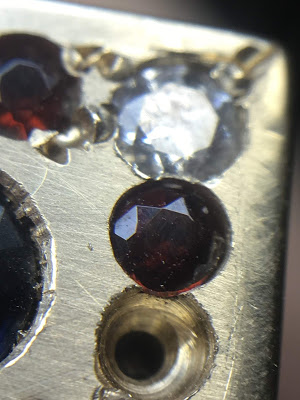
I decided from my few years of experience, that I should place these two Garnet stone literally ’under the Girdle’ of the Diamond. This was a challenge, as some of the burs were grinding against the Diamond and many times these burs same got ruined.

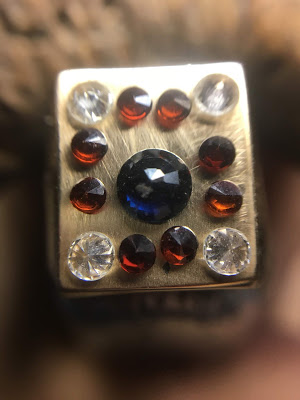
Here is a great close-up photo opportunity is showing how the stone is now resting. On the left you can see the many mini-beads I was raising for the Blue Sapphire. Can you also notice that one Diamond Bead was not aligned properly, this is and still not a problem? As I had other ‘other methods’ to cover this up…:>)
Finally, all of the stones are now ‘safely’ in the metal. Now comes the next step of ’Rough & Bright-Cutting’ the metal. Above all, I wanted the stones to be secure in the metal, nothing else right now!
From the corner Bead on the Diamond, I used this to be the Corner bead and for the cutting to take place. I wanted a “Picture frame” pattern.

Any remaining metal from my cutting should be eliminated! This the metal being shown at the bottom where the Garnet beads are.

I decided at the last moment to avoid any touching of the metal near the stones. I had no ’extra’ Garnets to work with in case my graver touched and chipped any soft (Garnet) stone. "Better safe than sorry", agree? I just left alone any further ‘touching’!..:>(
As I was dealing with many places that had no oportunity to cut any pattern in Bright-Cutting. I used a method that one of my past clients told me about, just "Get rid of all of the flat spots", so I did!
I used small round burs of #007 & #008 and just a little touching of the surface. This now gives the impression of more stones, and still giving more reflective light to the wearer.*
The whole surface now appears to be a mass of stones all nicely set and easy to polish. I prefer a “Rouge” compound, “Tripoly” compound smooths the cutting patterns and wears away any Beads.