Ingot molds and the little torch

So far I used a charcoal block, carved in different ways, to pour the molten metal from the scorifier. I am considering acquiring an ingot mold and I have a few questions here:

  1. For multiple options, I think a combination ingot mold might be the best option long term (for both wire and sheet). Why would one buy an open ingot mold instead?
  2. I have a little torch, without the rose bud since I am using a disposable cylinder with a Smith regulator. Is the largest tip enough to heat up the ingot mold enough?
2 Likes

I did the same thing with the charcoal when first starting. I still mostly use my Little Torch and melt up to 3oz. with the number 7 tip. (It’s either 5 or 7. It’s the biggest one before the rosebud tip.) If I’m going to do a big melt, I go to my big torch.
I’ve always used the cast iron ingot mold with the 4 round wire ports on the top and you can re-configure to make flat sheet. I have been using mine for at least 20 years.
I’m not sure your fuel will do a melt. Do you have oxygen and fuel? If you have only fuel, I don’t know. In all cases, have fun!

3 Likes

Thanks for the answer.

I do use oxy propane for the little torch. So a number 7 tip should be enough for heating up the ingot mold?

As for the metal, it worked every time for what I do. Not even a single piece remained unmolten :blush:

2 Likes

I have a Durston open ingot mold, ancient two piece closed sheet ingot mold and a typical four wire reversible sheet ingot mold. I have used them all and they have their pluses and minuses. I also build odd shaped molds on the top of my anvil using various sized 1/4" square tool steel rods that I hold in place with small magnets. This lets me make an odd shape and get closer to the desired final shape. You should carbon coat the surface of each mold before you pour and pre-heat them. I have also wiped a thin coat of 3 in 1 oil on the surface of my open molds. When I pour into my wire molds and fill up above the button top, as the ingot cools it will develop a crack just below the button. I don’t know if this is just my molds or typical of all of them. While you can vary the width of the sheet molds, you can’t vary the depth. I get my best ingots by using a piece of paint stir stick as the model and make a mold in delft clay or petrobond. My ingots always come out nicely done and rarely do they develop any cracks. I do first sand and then peen all the surfaces hammering in the same direction and then anneal before I do any rolling or drawing. I use a meco torch and it works very well. I am not sure about the Little Torch. If it will do melt that you can cast on charcoal, it will do it using an ingot mold. Good luck…Rob

1 Like

Oh yes! It will melt! Make sure your flame is nice and big. Bring your flame up slow to a loud hissing. if it dosen’t start melting in the first 30 seconds, your flame is not hot enough. experiment first to get where your flame should be. Ask more if you need!

2 Likes

I just use motor oil for my ingots with very nice turn out. And now I gotta try ingots on my anvil!

1 Like

I am not concerned about melting, it worked fine for me so far, I am more concerned if the flame is large enough to be able to preheat the ingot mold enough without a rose bud.

1 Like

I have used all the options mentioned so far to create ingots with the exception of charcoal. And all of them work reasonable well for me. I think Rob and I have the same combination ingot mold and as often as not my my round castings will crack at the top at the mold.

For a mold release I have used mainly Vaseline but I have also used carbon, smoked from candles, and none at all.

I have never weighed how much a pour of silver would be but I do weight piece once it is trimmed of flash and sprues. If I am casting a model I use a small jar of water, mark the height of the water with sharpie on the side of the jar and I mark it again with the model submerged. Then I pull the model out. I start putting scrap and new material into the jar and when the water is displaced as much as the model I add a reasonable amount more for sprues and spillage and that is my melt. I have been able to adequately melt enough metal with the #7 torch from Smith on my Little Torch to handle all of my needs so far.

Tilt the mold, heat the mold, melt the metal, a dash of boric acid, stir with a carbon rod, heat the mold again, melt the metal, more heat on the mold, heat the metal as I pour, get a cup of coffee while the whole thing cools. This is my process and it works for me.

I think the importance of pouring into a warm mold can’t be understated. Things that cool to quickly will crack.( I think that is why the tops crack off on the wire ingots) I heat up my molds with the #7 tip. I don’t know how much I heat them but I heat them enough. That’s an experience will tell you kind of thing.

Don Meixner

3 Likes

As the water tops the displacement line do you shout “Eureka!?”

hello,

re: seasoning a new ingot mold

remember to “season” a new ingot mold.
i seasoned mine in the oven, at 500 farenheit

i first coated with cooking oil, and then put it in the oven, and waited until the oil started to “smoke”

you can search “smoke point” of cooking oils to see what temp each oil smokes at.

i have both a closed combination rod and sheet mold, and an open ingot mold from durston

i use the smith rosebud tip

re: closed combination mold
ability to do both wider sheet and round rod ingots
ingots come out evenly formed all around
mold is small, has small footprint, preheat faster
(slightly bigger than a pack of cards)
the top openings are kinda small, so takes deliberation to pour into small holes/slits

re:open mold
ability to do various bar ingots, not as wide as sheet ingot
ingots come out rounded on top
(like loaf of bread)
mold is very long, has bigger footprint
(something to consider when using in a 3 sided heating “cave” to retain heat, slow down cooling)
the top openings are bigger/ longer/ open, so a bit easier to pour

i saw someone use a wad of wet tissue to make a “stop” in the open ingot mold. to control the bar length…havent tried it yet myself…

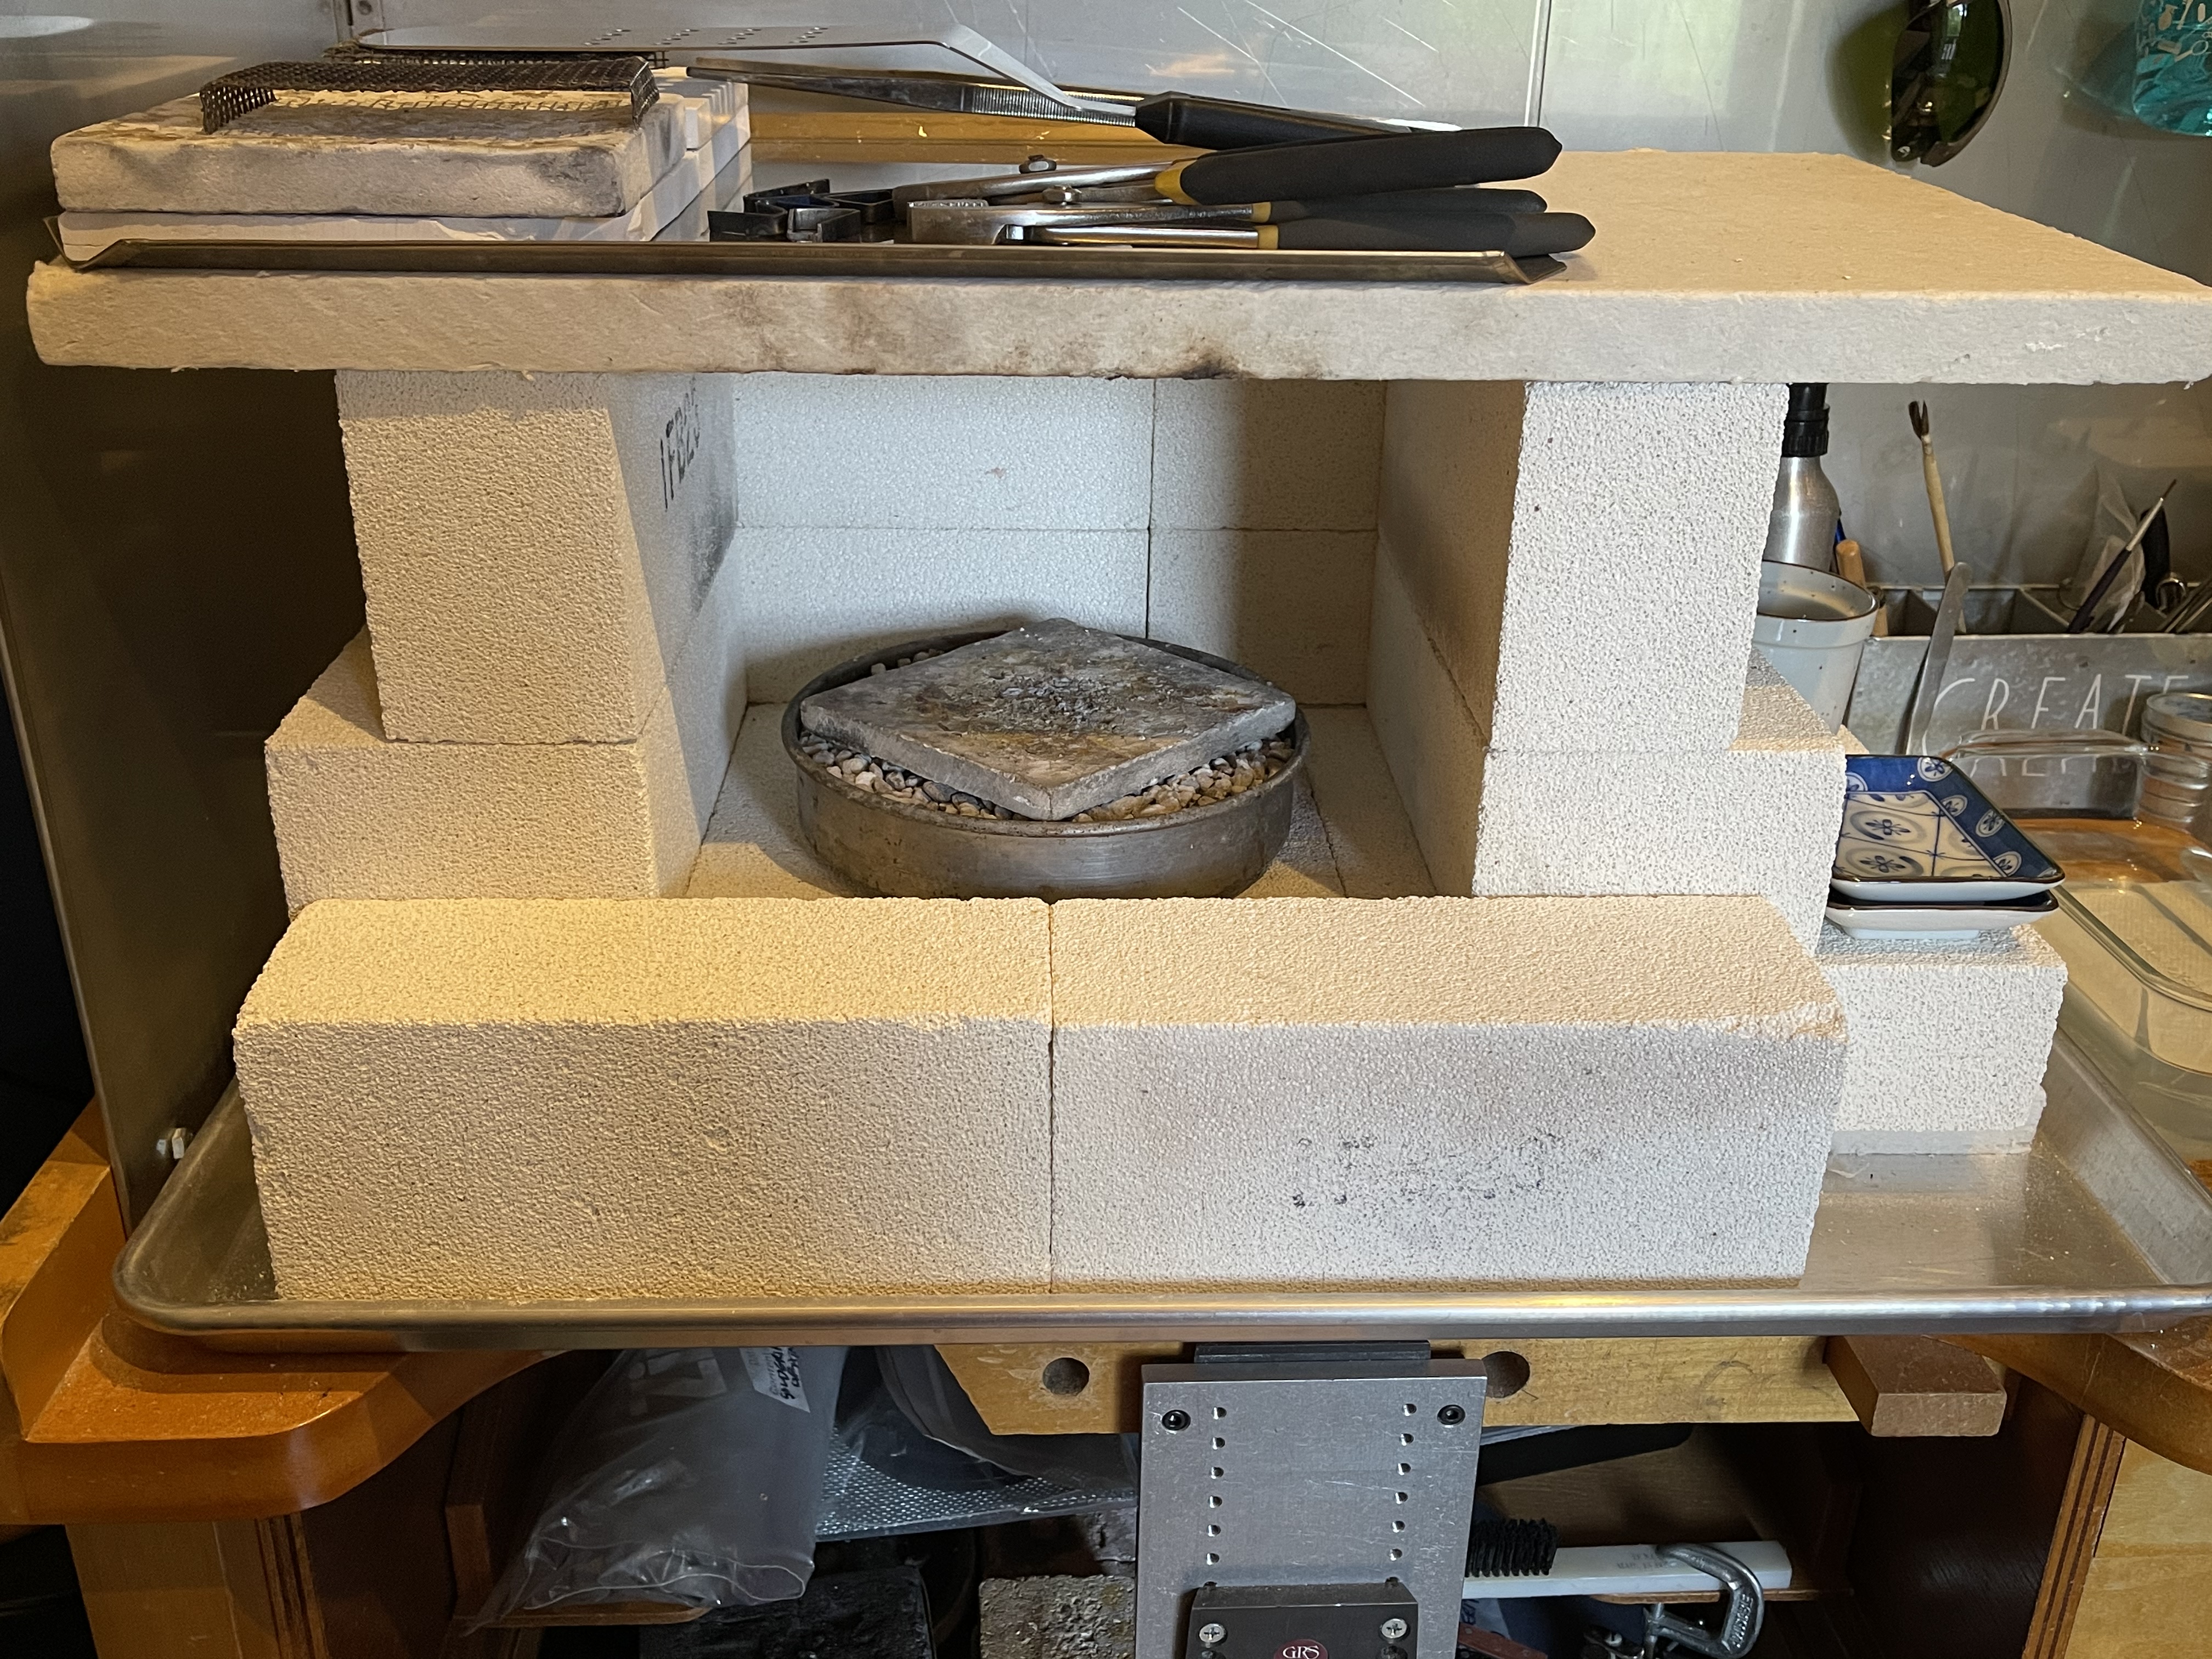
when i think of pouring ingots, what has helped me most is creating an advantageous set up (which is also my soldering setup).

my setup is on top of a 39” jewelers bench (i am only 5’ tall…)

first, i put down a half sheet bakers baking sheet (has a rim to stop metal from rolling off)

then i ordered stuff from www.clayking.com
to build my heat cave

2 large flat fiber boards (for subfloor and roof of heating “cave”)(i can remove top for better soldering viewing)

fire bricks (for floor and stacking to create sides of heating cave)(i can adjust height of walls by adding/ removing fire bricks)

5 bricks across floor, 2 across back floor- 7 total
8 bricks stacked for 3 side walls (2 bricks high)
2 bricks across front sideways
17 bricks total used

side wall height can be adjusted by stacking bricks flat or on sides.

size/ volume of heat cave can be adjusted by moving side walls in or out

i have a row of bricks across the front, sideways, to rest my wrists on, while heating and pouring, and even soldering…i find this stability is key to confidence building…this has weirdly “grounded” me…

i find that the height of my station being perfect for me. makes it comfortable to “see” whats going on , without bending over too much, while allowing me to get close in…if that makes sense…

because the heat is retained in the cave , i got some comfortable, flexible leather gloves at a welding supply place to keep my hands cozy

i also had a metal fabricator make me a 3 sides metal hinged thing made to bolt around bench…

your mileage may vary
this is just my setup

julie

3 Likes

Elliot, it disturbs me much every time a find a sense of humor as bent as mine. :slight_smile:

D

I believe the reason they say a Smith Rosebud should not be used with disposable cylinders is that there is a danger of the flame traveling back into the cylinder when the volume of propane is low (you are near the end of the gas) and the pressure is high. Switching to a #7 tip would not obviate the problem. Instead, a safety measure would be to make sure you are never melting when the cylinder is low…something you can’t really determine because there is no regulator to tell you how much gas is left. Instead you can weigh a new cylinder, mark the weight on the cylinder, and use only that one to melt. Weigh it before each use and you will be able to see when it is halfway. Then switch to a new cylinder (weighed and marked) and use the previous one for regular soldering. Hope this makes sense.

6 Likes

Thank you for the answer. I think what you just said is correct. Additionally, worth mentioning is that not only a low fuel level could cause a flashback, the pressure with this disposable cylinder regulator is not high enough to “push” the flame out of the tip and will cause a backfire (the flame burns partially inside the tip), which when sustained could also cause a flashback or even melt the tip.

2 Likes

Paigetools.com makes a special tip for melting with the Little Torch. Call them before ordering to be sure you get the right one and tell them you are using the disposable. And consider their other torch tips. I cannot recommend them enough. They changed the whole soldering experience for me.

4 Likes

I echo the recommendation of the Paige tips. I found the flame easier to ignite and the flame more consistent and controllable.

When I got my tips years ago now, they commented that using the largest (bud?) tip with small hardware store tanks was tricky because the high flow rate cooled the tank alot, affecting consistent flow.

3 Likes

Hi DE and Vera,

thank you all for your comments re disposable propane tank and smith rose bud tip! I forgot about that…

I have Paige tips as well.

i need to re-visit both!

Julie

1 Like