Repairing your “High Speed Steel” bur!
As the price of Diamond Setting tools are always increasing, I have found a method to cut some of the costs of these “HSS burs”.
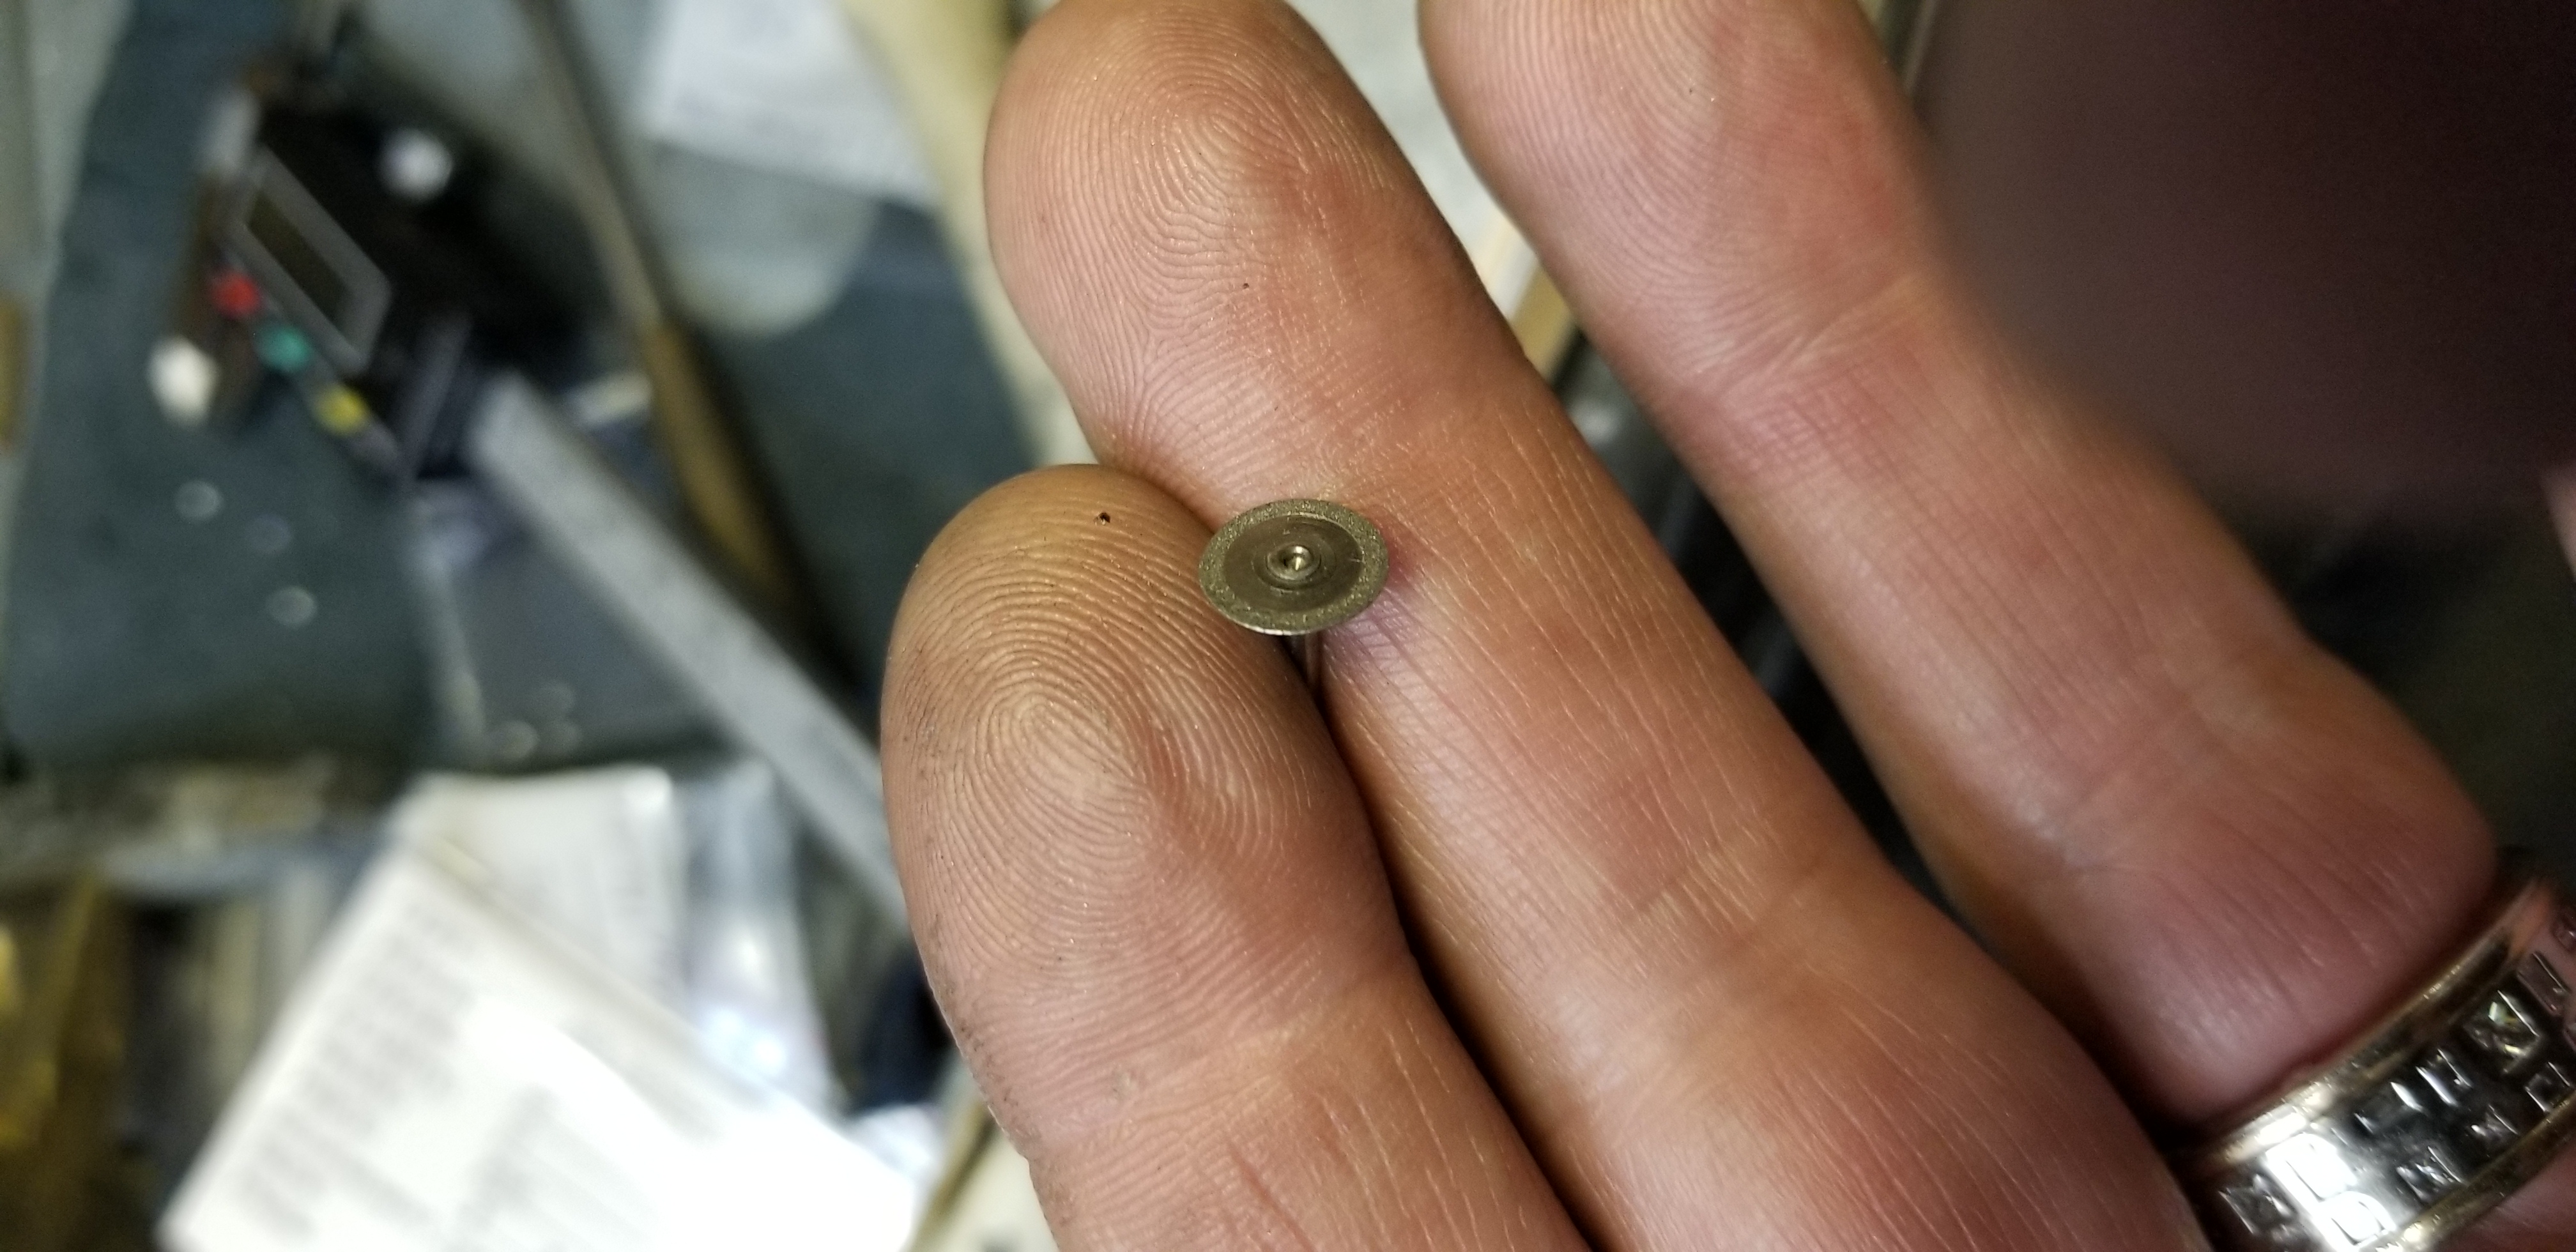
The only tools you need to do this repair, is a Corundum (separating) disk. This rather unique method will continue to save you many dollars in the future.
BTW, the down-side to this process, is that every time you repair that bur, you are slowly reducing that size of the bur by almost 1/10th of mm. That is just why I usually have many burs in my collection. So if one bur is slightly made smaller over a period of time, I have another bur at the “original size!”
“On the Difficulty Scale, this procedure is a 3 out of 10!”
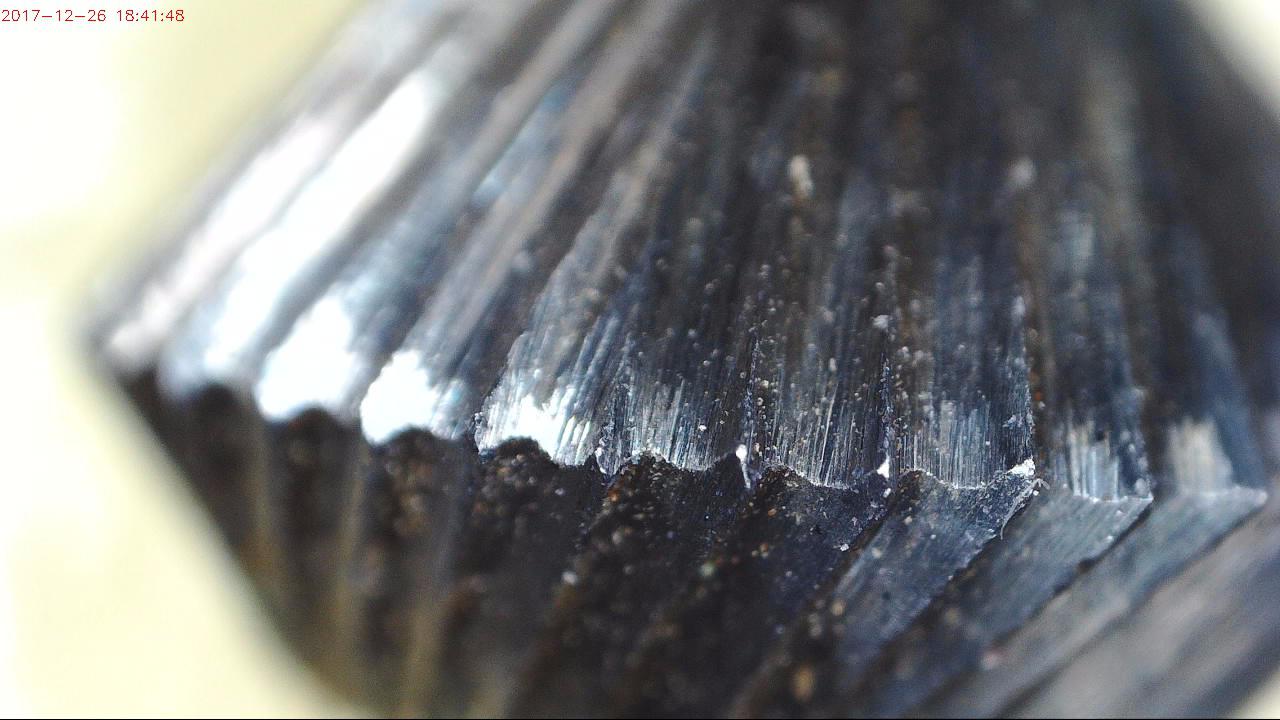
The first indication that the ‘teeth are not cutting’ is you will see a little bright & shiny surfaces on the edge of the teeth. These teeth will be noticeable on the widest cutting section, this is where the ‘bearings for the girdle’ are being created. Basically, “no sharp teeth…no metal cutting!”

When I have a bur selected, I will ‘paint the teeth’ with a black marking pen. Why so? This will make the “untouched teeth” distinguishable to the ‘repaired teeth’, simple as that!
Once the teeth are totally blackened on the top and the bottom of the bearing-cut sections, you may now proceed!
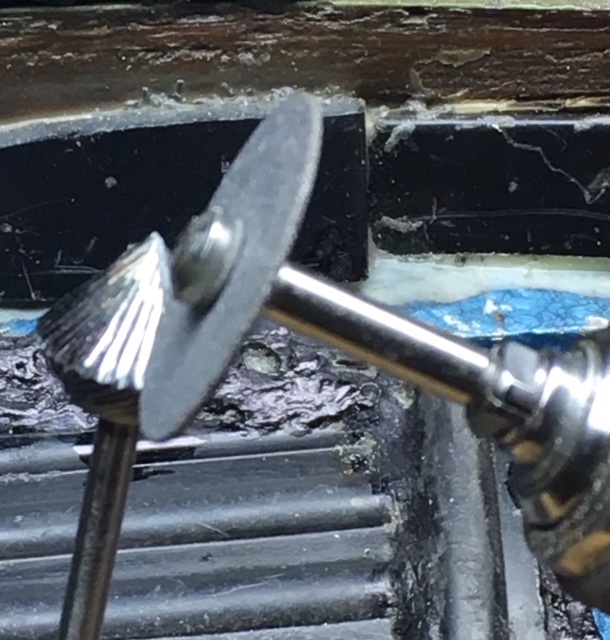
I will hold the bur steady in one hand & use your stronger 5x, or 7x power lens on your Opti-Visor then you can see exactly where you are cutting. The ‘separating disk/wheel’ must cut just one tooth at a time, but you must follow the same angle as on the bur.
The size of the cutting wheel is 7/8” inch and have the width of .035mm’s the disk must now rotate at a relatively slow speed.
This process is very delicate with little or no mistakes are allowed, why so? You are dealing with a new and repaired bur!! If some of the teeth are missed or ruined, therefore the numerous cutting teeth will not cut as you expected! Please watch every tooth that you are now delicately ‘repairing’!

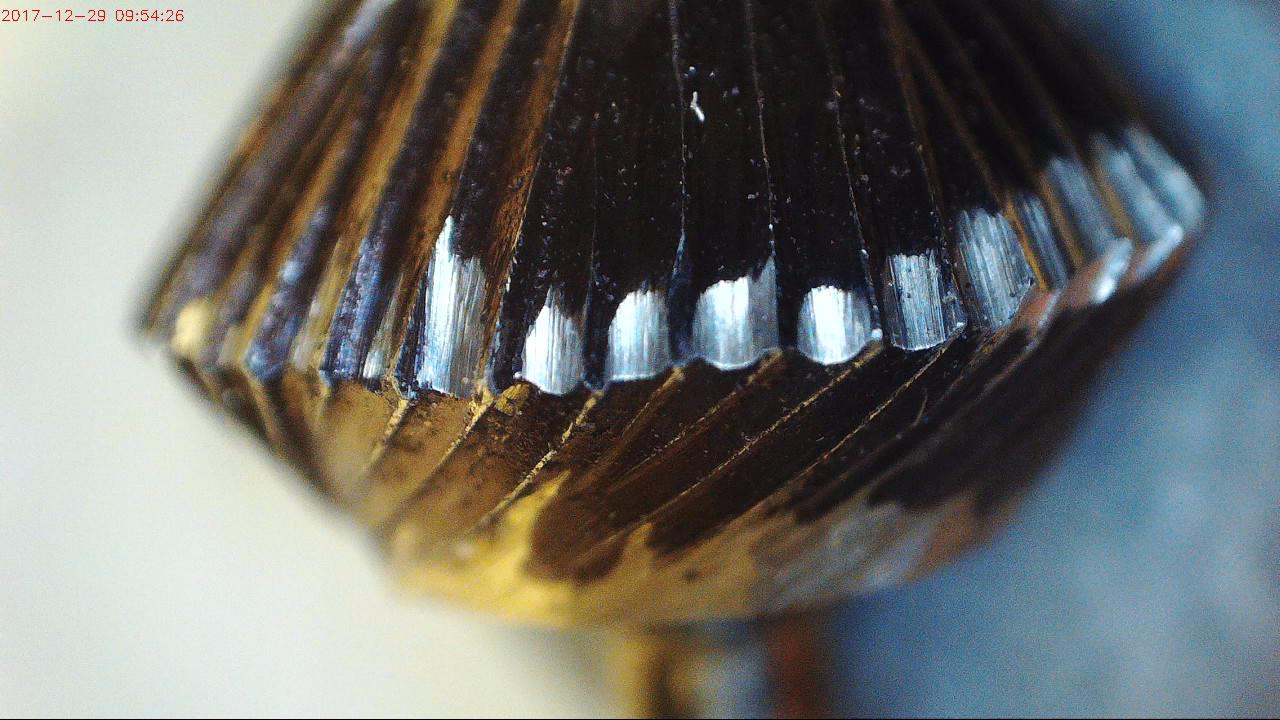
This complete process should take no longer than 5 minutes. My saying is “Out of this negative, you now have a new cutting bur!”
This delicate action will not be useful for the 156C (Carbide, Under-Cutting) burs, as the teeth are too close together & not made aggressive in cutting a bearing.
When you start, align up the separating disk with the first tooth. Start the rotating disk and observe if you are actually repairing one tooth and not two at a time. Start half-way (Pavilion) down the HSS bur and finish at the widest section (bearing-cut section).
Invert your bur and start at the section halfway from the bur shaft! From that point…finish at the ‘bearing-cutting teeth!’
Please view the many photographs showing this delicate procedure. If you read this and find this process too convoluted. Remember, it’s still a rather easy method and saving you money at the end of the day.
Remember if you ‘cut two teeth at a time’, it isn’t going work!!
Here is a cardinal rule “cut one tooth, inspect for accuracy, cut another tooth, inspect => ad infinitum!” I would suggest “to align the separating-disk to the bur-cutting angles first” but not to start your bench-motor. Even I do this myself.
.
Once you feel comfortable with the preparation, you are on your way to successfully learning a new ‘bur repairing processes”.
Over the period of one year, can imagine the dollars being saved in not needing to buy newer burs?..now back to setting!