There are many times a wax injection might break just after the wax is ‘gently’ being removed from your rubber mold.
The Scale of Difficulty is rated at about 4, (or a 5) out of 10!
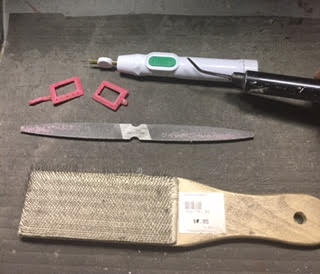
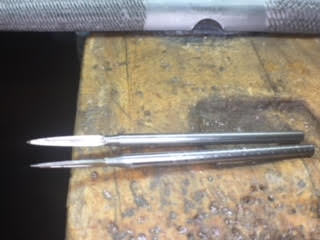
What tools are needed? Here is my tool collection that serves me just fine!
On the top of this display, you will notice a ’ hand-held’ wax-pen, it has just two temperature ratings…" On , or Off ". These have ‘pre-selected’ temperatures at some unknown number.
Many times I need a very hot or even a lower temperature , this gadget offers me little opportunity in varying my temperature selections… ;>(
I am displaying a 'wax-file’ and it’s accompanying ‘wire-brush’ that removes any wax build-up.
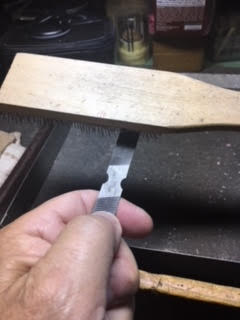
Here are two photo’s showing how the wire-brush cleans the file.
Here is a close-up of the wires cleaning the file, interesting?
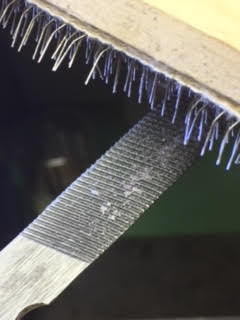
In this photograph, I’m showing just how coarse the teeth must be! These teeth get clogged-up in only a few filing strokes. But we’re not dealing with wax-filing in this essay. It was given to you as a little added piece of information. All of this helpful information all at…‘No charge’!

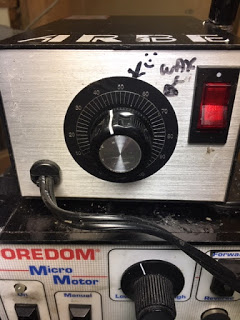
This is my ‘best, wax melting tool’. On the front panel, you can see temperatures that I wrote on the Rheostat dial. I don’t have to experiment with the heat setting all the time. I just look at the ’ :>) & smiley ’ and the other is with the maximum ’ wax ’ heating requirements. I like the #45 (on the dial) for the ‘wax-repairing temperatures’ just for these delicate waxes that we’re now working on.
These little ‘wax-carving’ burs have only 3 teeth! You will see these ‘little burs’ being used in later photographs. These are very sharp, please be careful.OUCH!
This was not a ‘planned’ exercise , I hasten to add that my metal-caster told me of a “little crack in the wax”. I thought, " Nice, what a great idea to let you see how this can be fixed and still be used afterwards ".
I looked further into these waxes, I saw some rather interesting defects! Many of them will be dealt with, in this essay.
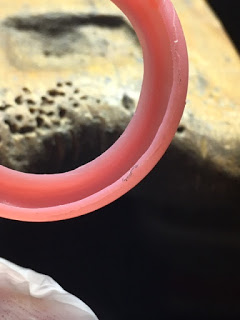
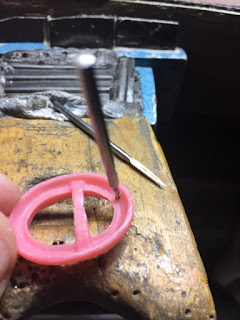
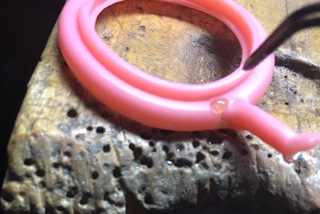
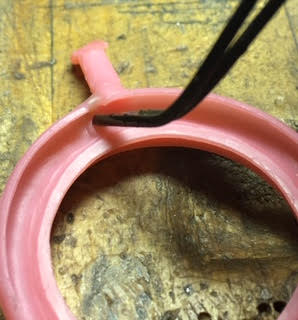
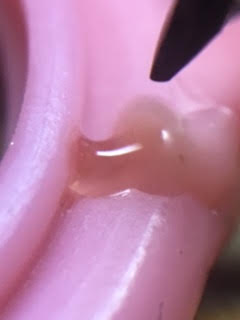
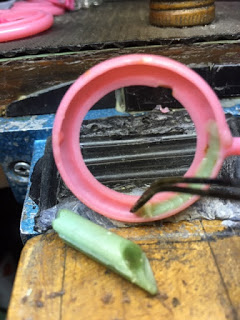
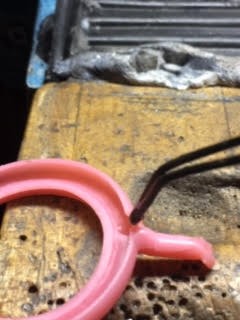
Sometimes a quick glance at a wax might show something worth looking further! I saw that the wax-injection was quickly removed from the mold, instead of carefully extracting it. Hence the crack just where the sprue is located!
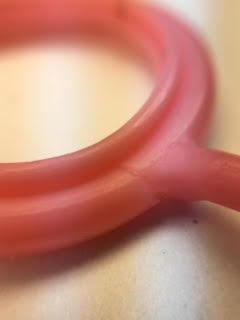
Under a 10x power inspection shows more of this serious problem. This wax form is easy to fix & is completely repairable and not to be thrown away.
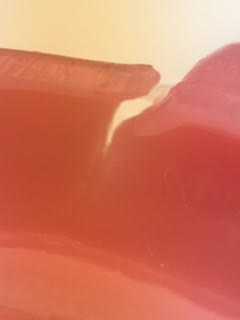
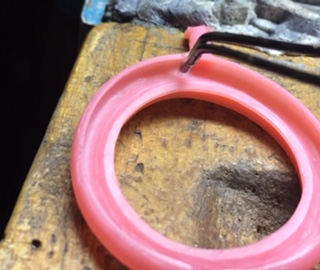
This ‘break’ is shown again but at a different angle . But wait, there are more ‘errors’ to be shown.
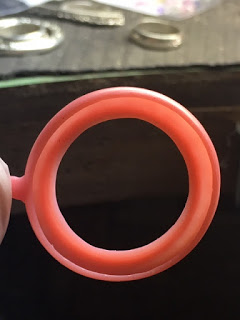
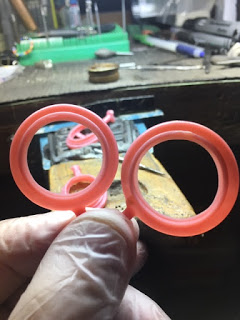
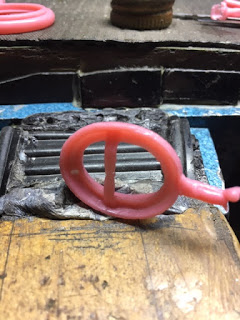
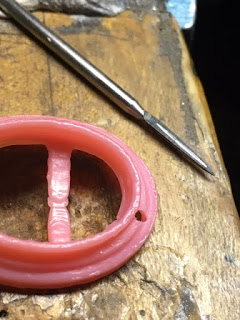
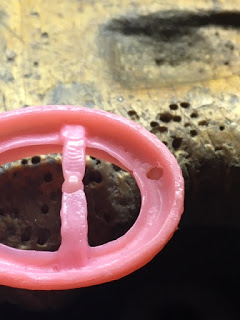
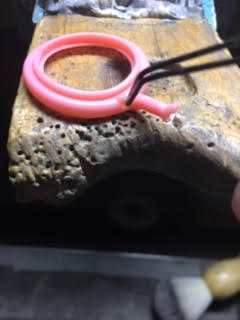
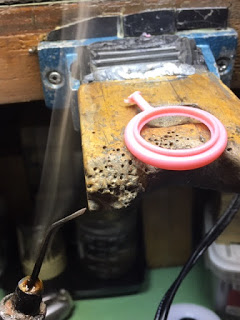
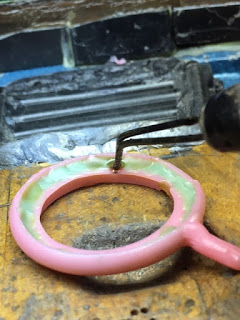
You can see a problem that will definitely cause some problems in the casting. This ‘feeder’ bridge for metal to go from one side of the oval-frame to the next is something to be concerned about. When the molten metal is being poured, there would be no ‘bridge’ for the metal to join to the other side. It would just literally stop! I measured the separation it was a mere 0.5mm’s. It’s just barely visible!
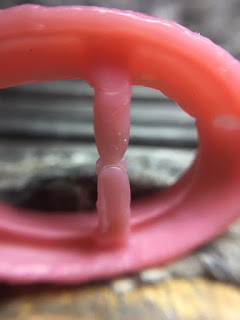
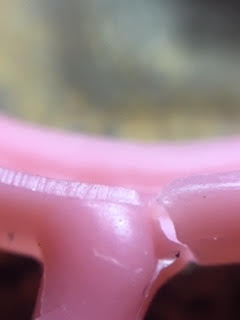
In this photograph, you can see the minute 'break’ and this MUST be repaired NOW!!
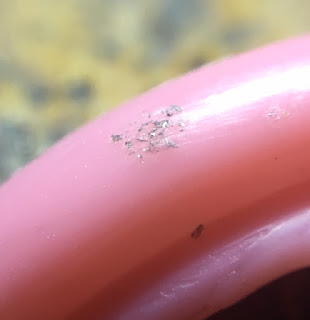
This is a pile of ‘dirt’ that must never be overlooked. What happens is that when the wax is burned-out in the oven, this dirt will remain and leave you with a hole in the new metal from the casting process. GET RID OF THIS NOW! "Dirt is your ever constant enemy" . How can this be avoided?
Just try to keep your bench CLEAN . I know of some jewellers who have two benches, one for metal with the other just for their wax cleaning & preparations!
For some of my delicate cleaning, I use rubber gloves as you will see them in a few of my photographs!
What is this? Let me explain what you are looking at is a ‘bubble of wax that has been covered over’ when the injection of wax was being forced under air pressure into the mold. There was an ‘air pocket’ laying in the rubber mold and that ‘air-pocket’ got caught and stayed in the wax.
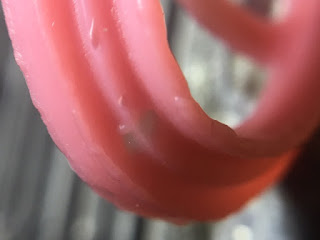
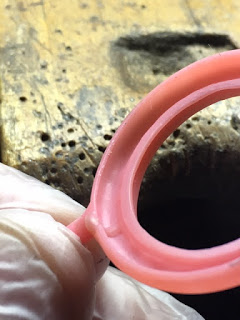
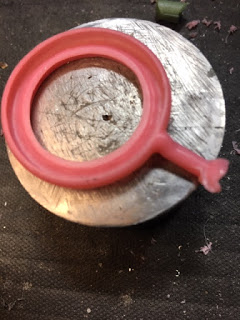
This is a very nice wax-injection, here is where the next problem lays. The wax is too thin for my present needs, I can almost see right through the wax.
More ‘dirt’! Get rid of all those little pieces of metal shavings, or just some (?) bench-dirt! Under closer examination, you might just ‘find’ more pieces of ugly metal particles sticking to your new wax… get rid of this collection of dirt NOW!
As you can see I AM wearing the rubber gloves, I try and avoid any form of dirt as the repercussions will be time wasting in the cleaning & extra re-casting fees.
Here is the much-needed repairing of the wax-problems that I just showed you.
I attempted to “burst the bubble” from the inside of the wax , please avoid ruining the wax shape ’ from the top’ . I always work from the ’ inside, up & out '. I like to keep the overall shape in these delicate areas. (Sorry for the repetition!)
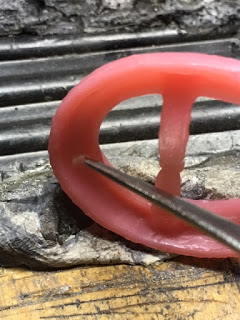
Remember these two little friends of mine? Here is what I’m now doing. I need to scrape away every little excess of wax that is not wanted! If needed, I’ll even cut further into the wax, why so? I need to get rid of any ‘unseen’ bubble that is nearby.
Here is the final result in that ‘extra’ clean-up near the new hole. Remember this isn’t metal, you can work in removing extra wax if you wish. Do not be worried, just be slow & above all…be very careful!
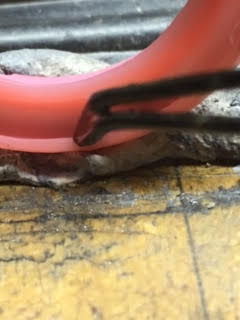
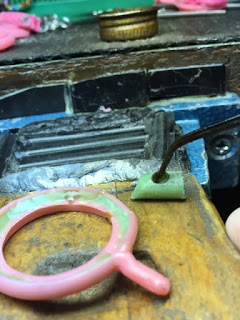
In this picture, you can see for the first time “how & where” the heating pen ‘tip’ is touching. I did say touching , don’t let the hot wax-pen destroy anything else that is needed!
Keep your hot pen at a lower temperature…please? Even angle your tip away from getting near the wax form, as even the tip might touch something you need…a.k.a. ‘WOOPS & OUCH’!
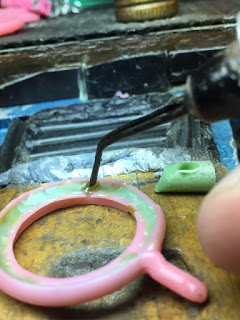
You can now see the 'new spot of wax’ as I just caught the action with my camera. This ‘cooling to room temperature’ lasts for only a few ‘seconds’. It might look like water at first, but as it ‘cools’ it changes colour to the surrounding wax form.
Just watch where your pen is after you let go of the wax. Sometimes your pen might just touch another part of the wax, this sometimes happens!
Angle your pen away from other important sections, of the repaired form.
Will this new ‘bridge’ be thick enough for any metal flow? As you can see this ‘cross-over’ is lacking sufficient chance for the casting process!
Just keep your pen at an angle as to prevent ANY touching. I use my loupe to verify my hand won’t let the pen hit anything else. This calls for a steady hand!
Try also to avoid any long-term hand-holding of your wax, why is this? Even the temperature of your fingers might slowly destroy the shape. I’m now placing the wax on my ‘bench-peg’ or on a ‘steel block’ as this will be acting as a deterrent just for this sole reason.
What I do is to get a little amount of wax unto the warm pen and then get to the area that is needed. Everything looks like water but this is only hot wax giving an optical illusion.

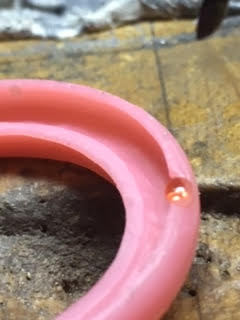
Here is the final result of the repaired surface break! I can file off the unwanted wax with my wax-file shown in my ‘tools’ photo.
Just how do you ‘clean’ your wax-pen? This is an easy answer! Just turn on your Rheostat to the highest temperature and you can see all of the globules of collected wax literally burn away…cough…cough! Don’t dare to inhale the fumes.
I do this heat-cleaning regularly as I need to have a clean tip at all times.
Why is the tender wax-form sitting on a steel block, easy answer! The steel is constantly ‘cool to the touch’. If I was holding the wax all the time, it might get distorted or just go out of alignment, not a nice thing to continually happen.
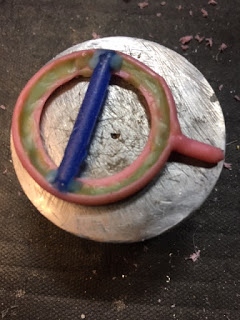
Here is my ‘new’ bridge. I selected a thicker piece of ‘connecting wax’ to fix the thin piece being previously shown.
For Pave Setting, I must have the inside of the wax made thicker , I am starting this process now.
Even that there is a defect seen here , this is of no importance to me right now. The melting of new wax will fill in the missing sections. Multi-tasking & multi-wax casting!
You can now see just how important it is by not having my fingers touch the wax. Distortion of the wax is not warranted and the hot pen is truly very HOT!
Why am I using a different coloured fill-in wax? This way I can see easily where the ‘newer’ wax is going.
If you must hold the wax-shape do so by holding the sprue stem!
Nice to get and maintain a clean wax , so very important! Use your gloves if it’s warranted.
The chances of touching another spot like this being shown are very good. Then just turn your wax around and get to the same spot but at a different position.
On another wax form , I am showing how the sprue needed to be made much thicker. I prefer to have more ‘wax-to-metal’ than to be told: “OMG, the casting didn’t work”…OUCH (again!).

I hope that you all have a better understanding of the continuing ’ how, where & when '.