A few days ago (October 14th) I posted or published an interesting technical essay of “graver modification”.
This process bears repeating, as it is one of the most commonly used activities at your setting bench. The scenario is that you have a graver that is too wide and the subsequent cuts you need to make are almost less than 1/3 of the width of your Onglette #2 graver. Don’t just throw it away or put in your little box of unused tools.
After reading my essay, you will see just how easy it is to ‘reshape’ these graver great blades for yourselves. I’ve been doing this ‘graver changing’
for literally decades, now it’s your turn to learn this ‘easy to do task’.ENJOY!
"Modifying your new Gravers! "
In this ongoing series of "Gravers" , I should mention that this (modification) process can be very active during some of my intricate Diamond Settings.
I continually think of this phrase… "this graver needs to be modified further!"
BTW, this essay is all about reshaping or changing the original construction of the graver blade . The process of Bright-Cutting, or Pave setting will be greatly discussed in a future essay(s).
Just what does “modify this graver” mean? It is basically ‘re-sculpturing’ the section of your graver that is making contact with the metal!
Just as important as Bright-Cutting , is the method & reasons to alter the angles and shapes that were made for the graver that you just bought.
Let’s now start with this technical essay, as we have ‘lots & lots’ to discuss!
You are now looking at a very well-used graver as I changed the need of it for another setting use…a " Bead-Raiser !" This blade will now be used to ’ push over’ any prepared beads! These will be seen shortly!
Although this graver is many years old, I’m not finished with it just yet, as I have another use for it.
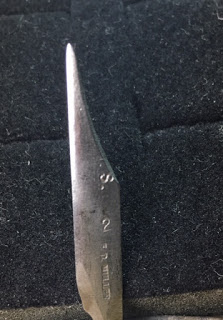
Here is a great view of my 'Bead-Raiser’ as I use it even today! I am able to use an Onglette #1, #2 or even a #3 (widest useable width) as many times the size of beads literally depends upon the size & width of the graver that is to do the bead-moving!
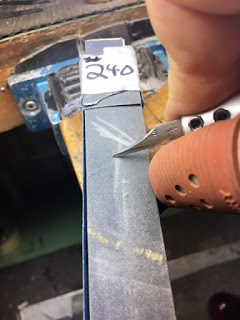
Remember, DON’T USE ANY POLISHING PAPER, I prefer to use an Emery-Paper #240 grit . This ‘light shaping or scoring’ of the steel will prevent any slipping of the steel blade around the bead you are using with the soft papers.
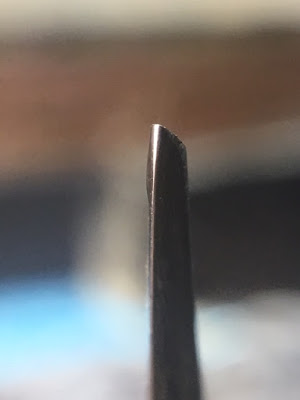
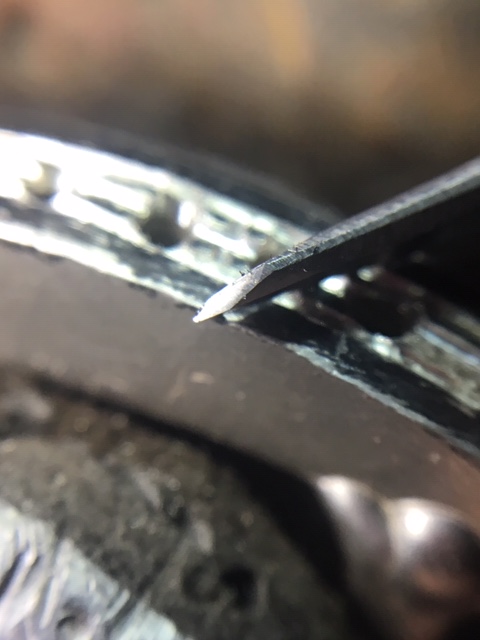
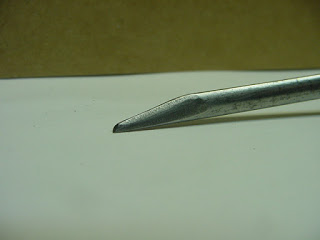
Here in this photograph, you can see just how the steel point has been ‘slightly’ changed , just enough to suit the purpose.
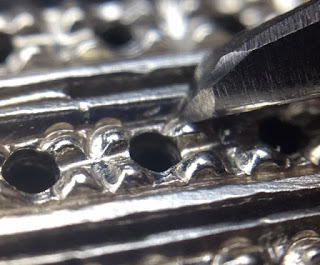
In this photograph you can see the bead-pusher ‘gently’ moving the prepared bead ‘over’ the girdle of the stone. It actually digs into the metal and with a pivoting motion (side to side and then forward) to move the metal…(but no more cutting!)
This is more greatly modified Onglette #0 & I could still use an Onglette #1. It was positioned to lay flat on the oilstone and repeatedly inspected and I kept removing the ‘barrel-shaped’ section of the graver.
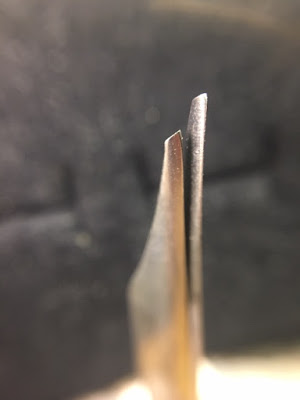
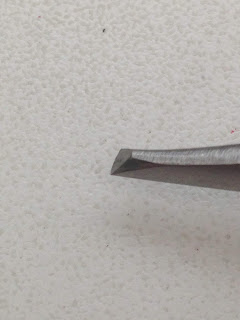
Here is a Flat graver that has been re-shaped as to permit me to cut into very small crevices of the metal. The measurement of the face is only 0.40mm’s. I want to ‘Bright-Cut’, but not to remove any other important metal, such as beads!

This is a great photo as it now shows as you can see how the cutting area has not been touched on the graver but only the “Right Side”.
I’ve removed much of the graver-metal on the left side on this blade . I don’t want ANY metal on the left side to be ‘touched’ at all. It has just one purpose & that is to ‘cut’, but not damage or ruin any precious ‘beads’.
This simple process lasting only a few moments will literally transform a useable cutting blade into this newer tool…" Modification processes at work! ".
How is can this blade be changed? I’m easily removing the sharp & pointed section underneath. Continue on with the removal of that point & rotating on your #240 emery paper. Repeating again! You are doing one thing and that is to ‘remove the point’, nothing else!
Modify the point of the graver into a little-rounded surface. Your needs are many and not every Half-Round #50, #51 or a #53 tool supplied gravers can even accommodate your individual setting needs. JUST MAKE YOUR OWN TOOL!
Here is a Flat Graver doing what is expected of it , and that is to “Bright-Cut” a flat surface but NEVER damaging the 'beads on the left side.
I’ve darkened the gravers just to show you the front face, why? The graver is white, the metal is white and under great magnification, it is too darned difficult to distinguish the two metals together.
Tell me how can anyone justify a thick-faced graver? You just can’t do this intricate setting & cutting with poorly made tools.

In this photograph, you can see how this graver can only now reach into very narrow areas to cut. The thickness of this ‘rough-cut’ is a mere 0. 55 mm’s , while the greatly modified graver is measured at 0.44mm’s. The width of a regular size and new (thick) graver is 1.35mm.
Can you now see why I’m so-o anxious to make many of my gravers thin? The reasons are now easily shown!
In using a Modified, Onglette graver #1 , I am showing you just how the very narrow #1 Onglette blade can cut these little lines in the gold.
When I visited a jewellery factory in another country , their staff were in total awe & amazement that this kind of cutting is still being done. Here it is for yourselves, again, I NEVER use Cad to guide my cuts . Once you get much practice, you too can cut and achieve great 'cutting!
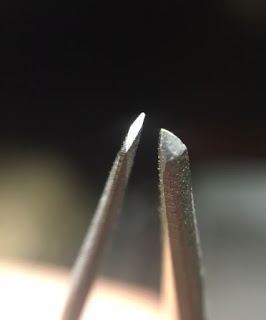
In this photo, you are viewing Onglette #1 and a #2 blade , quite a big difference isn’t there? The difference is the amount of modification that has just taken place. This careful process can take as much as 15 minutes.
Bearing in mind that there are many times you MUST use your 10x power loupe. This is just to examine your little ‘subtle’ changes and slight modifications that are now slowly taking place.
It’s just no way could I Bright-Cut with a graver of 1.35 mm’s if the cutting area is only 1/3 of that width. I can easily cut with a #1 ‘rough-cutting’ blade.
The name ’rough-cutting’ is a blade that ONLY cuts as a guide for the next step, the much wider Onglette#2. The groove in the metal is measured at 0.43mm’s Just not possible, and here is the proof!!!

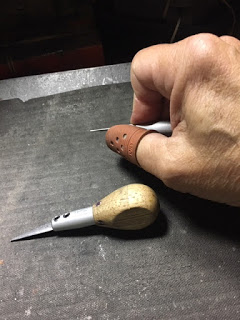
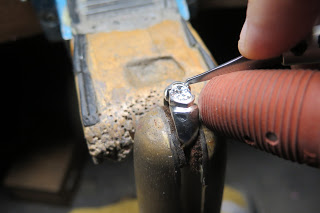
Here is the ‘correct’ position to hold a graver in its handle. I always use a ‘rubber, finger guard’ of size #14, as I don’t want any cuts going into my finger-pad. Here is a good reason!
Let’s suppose you are getting little cuts by putting your finger-pad underneath the graver blade and now this sharp blade cuts the skin.
You do your cloth wheel polishing and the compounds get into the finger cuts. Can you say " Severe, Infection of the Thumb " has just resulted? You have only 10 fingers and please don’t reduce the numbers! (I can say this with personal experience but with a saw-blade)
My teacher & Mentor gave me his very own ‘graver’ to keep & you are now looking at this " Bull-Stick ". Don’ ask me where this name came from, but this tool gave me ideas. You can see just how “Stanley Levine, R.I.P.” used this tool, why not I make this? "Right-Sided, Onglette #2 Bright-Cutting Tool" ?
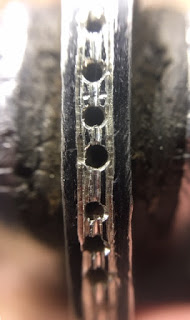
BTW, in London, England during the 1940’s he used to cut open each hole by his graver, as steel burs were not easily available during WW2.
Each hole had to be sculptured to fit each " Mein-Cut ", or " Rose-Cut " stones (irregular & flat bottomed) diamond. BTW, the way that the beads were formed and pushed over, I can easily tell you that this Diamond Setter was ‘Left-Handed’.
In the earlier days, the setter had to manufacture the steel blade , soften it to start the grinding process. Then once this was done, he had to re-harden the steel & after everything he had to polish the steel using other implements made available. For sure this was a very difficult process!
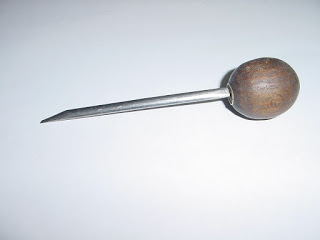
You can observe that the shape of the graver fits its original purpose, as cutting in the metal. If the setter was ‘left-handed’, so he had to reconfigure the blade for a ‘left-handed’ setter.
From Stan’s graver tip , I transformed my very own selection of gravers similar to his blade. Now it’s your turn to learn how to modify your own tools!
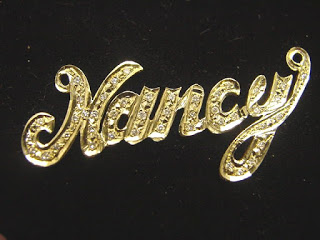
Here is a sample of what some of your new gravers can produce, given time in your own practicing!
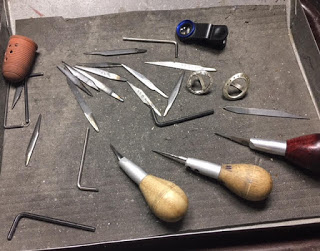
I know this collection of gravers & tools inside my bench looks like a mess , but I call this ’ controlled chaos '. You will notice two colours of handles, the Wine-coloured handle will ONLY hold a Flat graver .
This is using my ‘peripheral recognition’ while I’m concentrating and looking at my setting item. I can still see that coloured handle in the corner of my eyes as it’s sitting in my bench-pan tray, good idea?
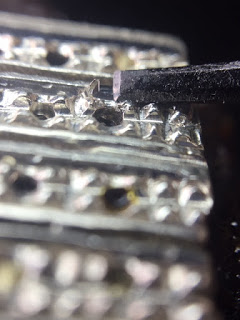
All of this Bright-cutting was done with only three gravers , there was no need for Cad designing. All of this cutting was done without any measuring in mm’s.
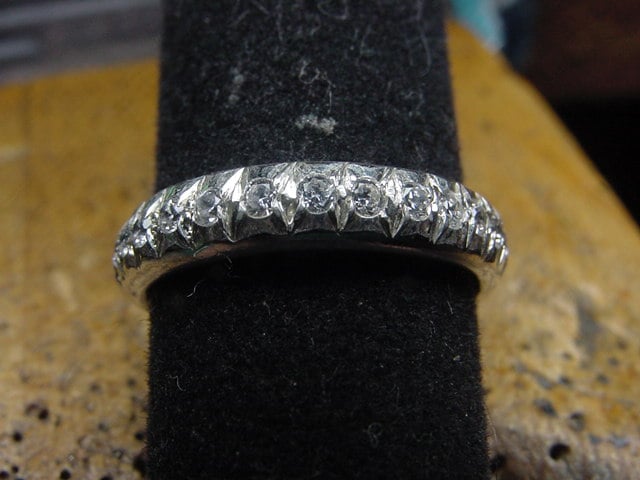
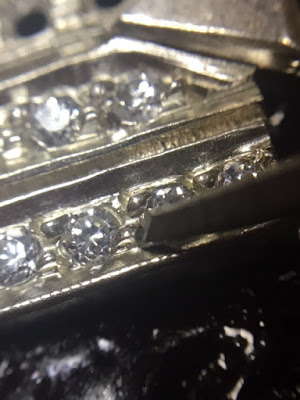
The Bright-Cutting is so 'bright and shiny’ you can see the reflection of the beads along the cutting line.
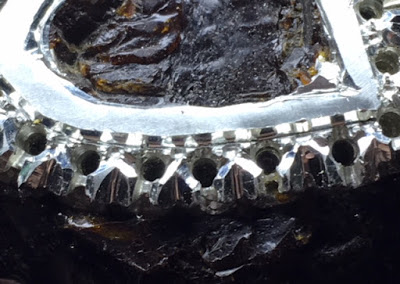
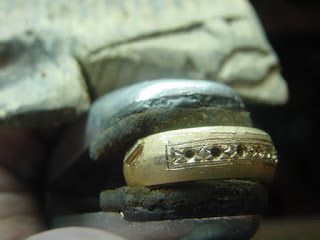
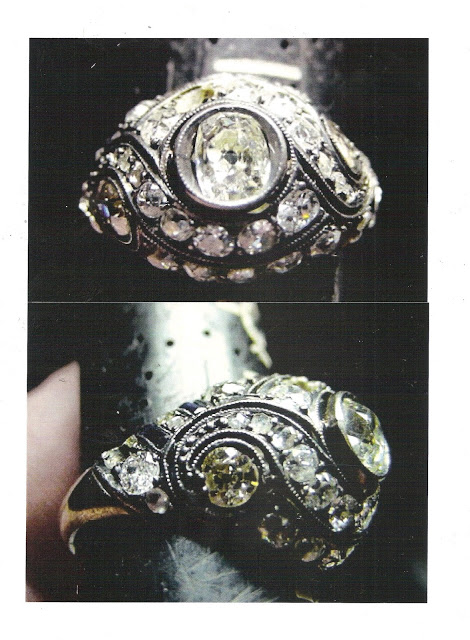
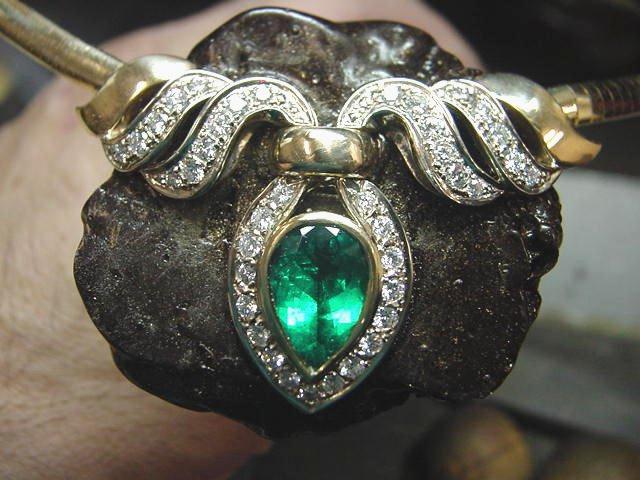
In this interesting photograph, I set all of the Diamonds and even hammered the Emerald Bezel. Although in today’s market, this little 5.25 carat Emerald stone is now worth at least $12,500.00.
YES, I did Bright-Cut inside of the bezel wall. I used a greatly modified Onglette #2 graver just so I won’t touch the many soft Facet edges on this expensive Emerald.
The very thought of using a Flat graver never entered my mind , as I needed to have a smooth inside cut in the metal.
A Flat #40 graver will leave ‘faceting’ in the metal as its being rotated and cut on an ‘inside’ curve. The metal of that graver will ‘ride’ over the facets of the stone and have them being transferred into the bezel metal.
On this left side of this Flat graver is another (difficult to see) little ‘facet’ cut along the left side of the graver edge. This will allow me to easily Bright-cut without any danger of cutting off any beads.
This is a printout of a page I used on this topic just last year, it bears repeating!

This cutting is the ‘ultimate’ in frustration & stress. If any errors or mistake occurr, nothing can be done to fix them in the ongoing task of cutting!

Just how can ‘we’ now even think of not using a graver while doing your gem-
stone setting? The answer is almost impossible, now do you agree?
In this Bezel cutting project, I Used an Oglette #2 adn again modified to cut on my right side. This photograph appeared in the MJSA magazine.
I really hope that this technical essay opens a new door for you and also everyone. This is the most serious of cutting as it is guides your graver into the next step. That step is the actual Bright-Cutting process.