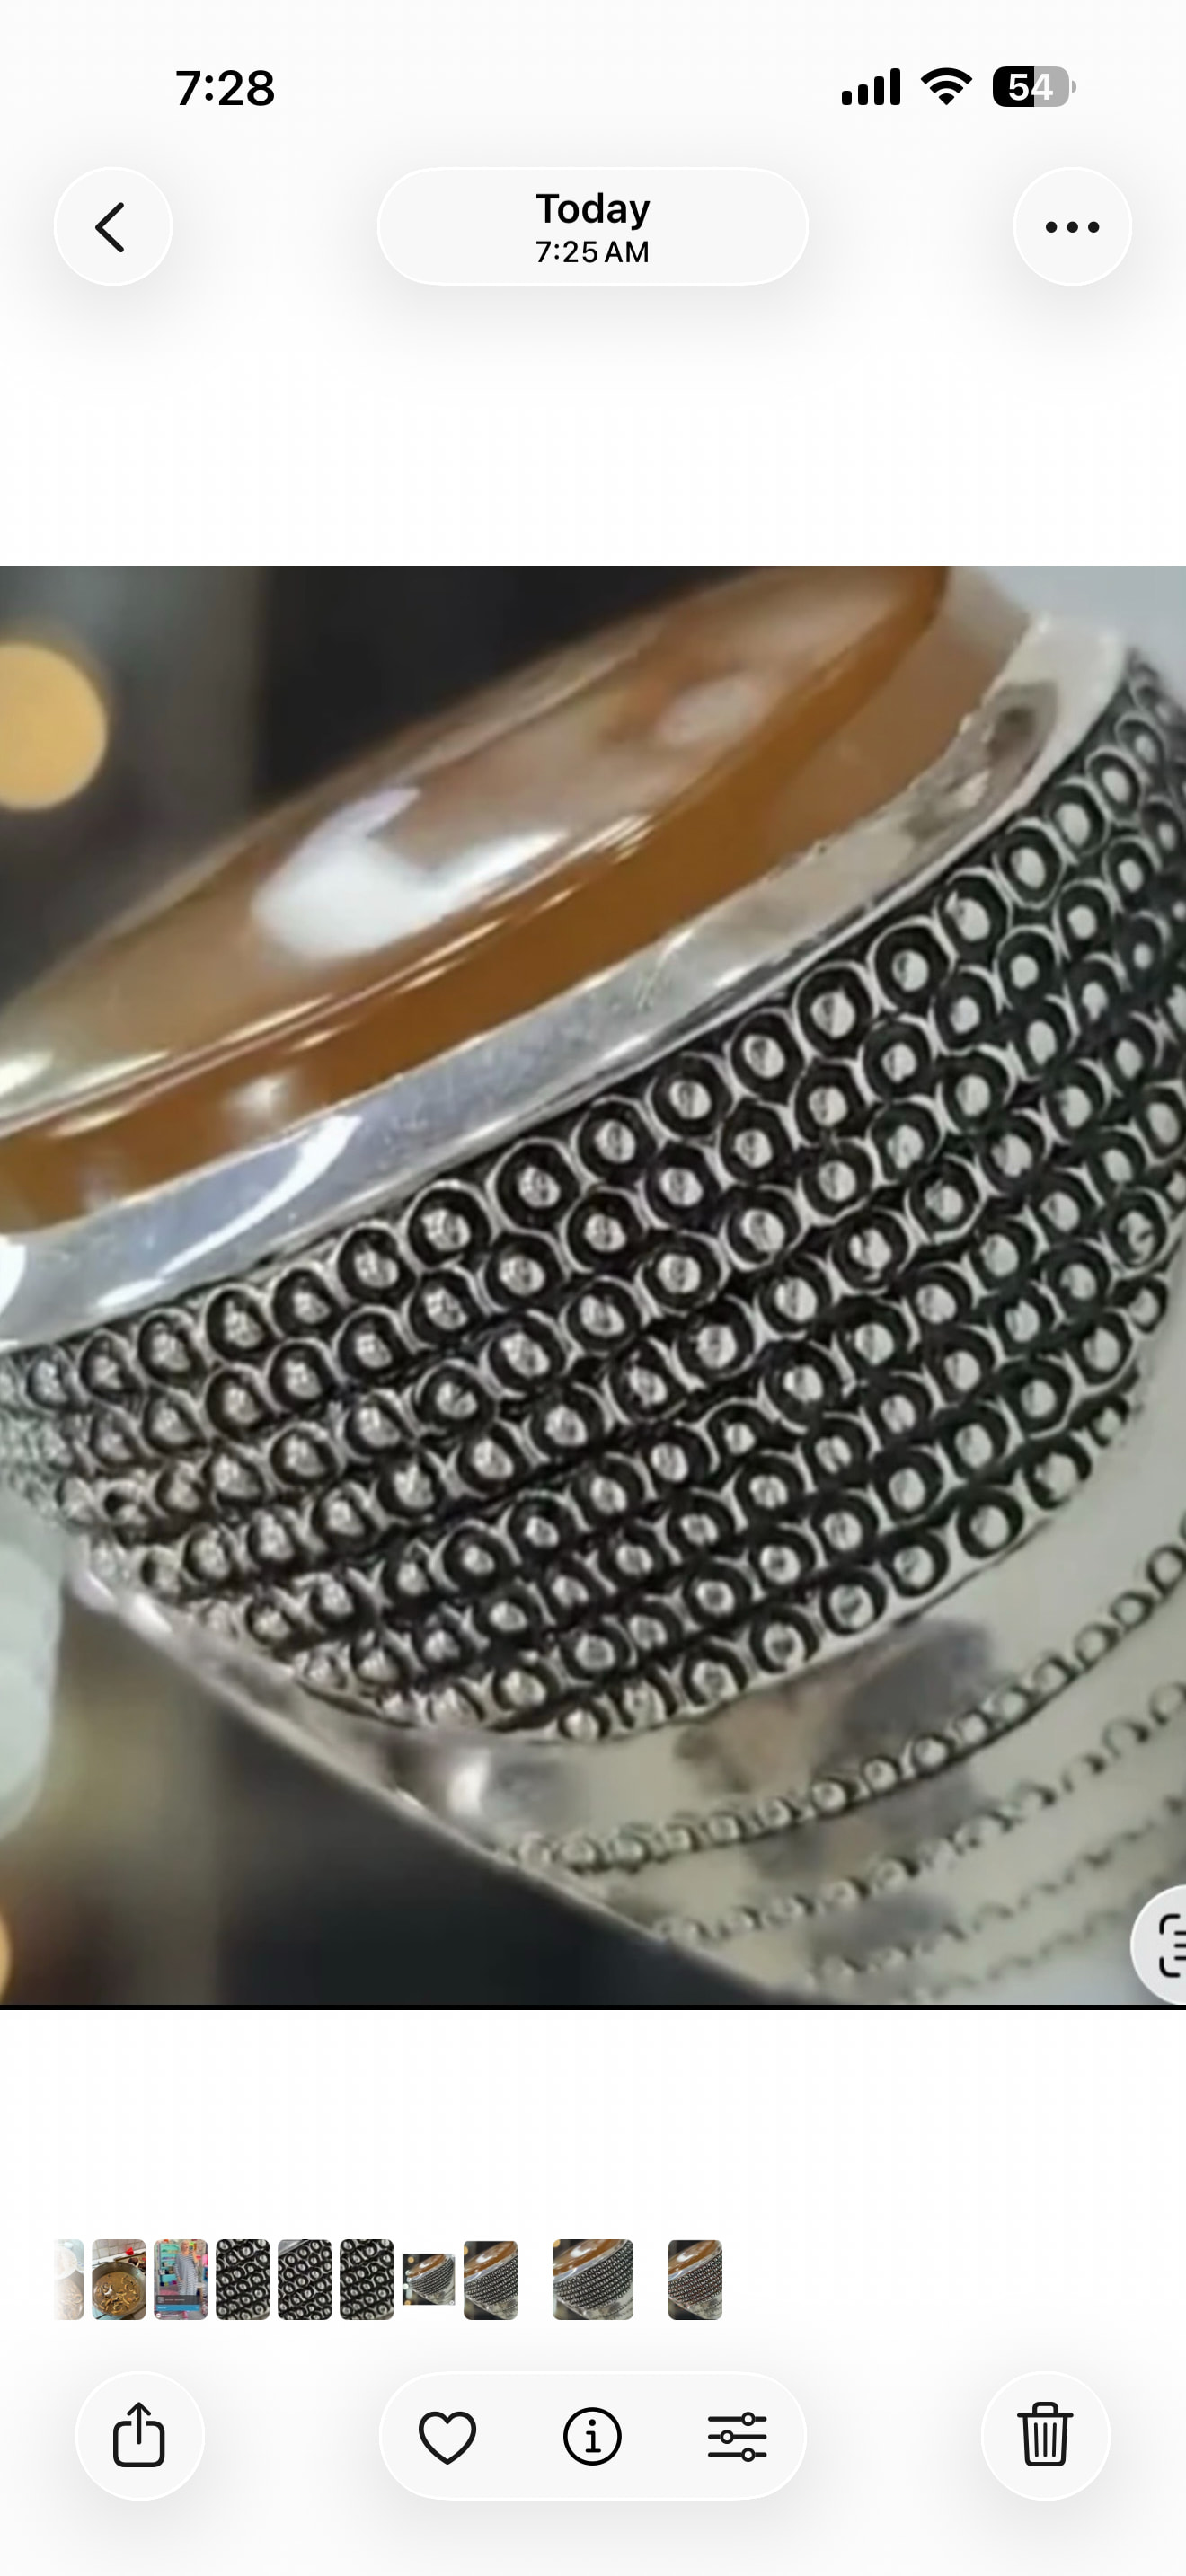
Hello. Does anyone know which rotary burr creates a 2-3 mm beaded pattern on gold and silver jewelry, similar to the attached image? Prong rounding burs and bowl shaped diamond burrs are not effective, and millgrain is not working either.
Thank you.
Hello. Does anyone know which rotary burr creates a 2-3 mm beaded pattern on gold and silver jewelry, similar to the attached image? Prong rounding burs and bowl shaped diamond burrs are not effective, and millgrain is not working either.
Thank you.
Just a guess, but I’ll bet those are stamped with a concave metal stamp (maybe even using a beading tool as a stamp). Let’s see what others suggest.
Jeff
I have tried using a metal stamp, but it only leaves a circular shaped impression. It needs to carve deeper to create a dome shape, which is what a prong rounding burr does. I believe the edge should have saw-like teeth.
Hi,
perhaps the ring was carved in wax…
i see this as a non-uniform repetitive-type of pattern…
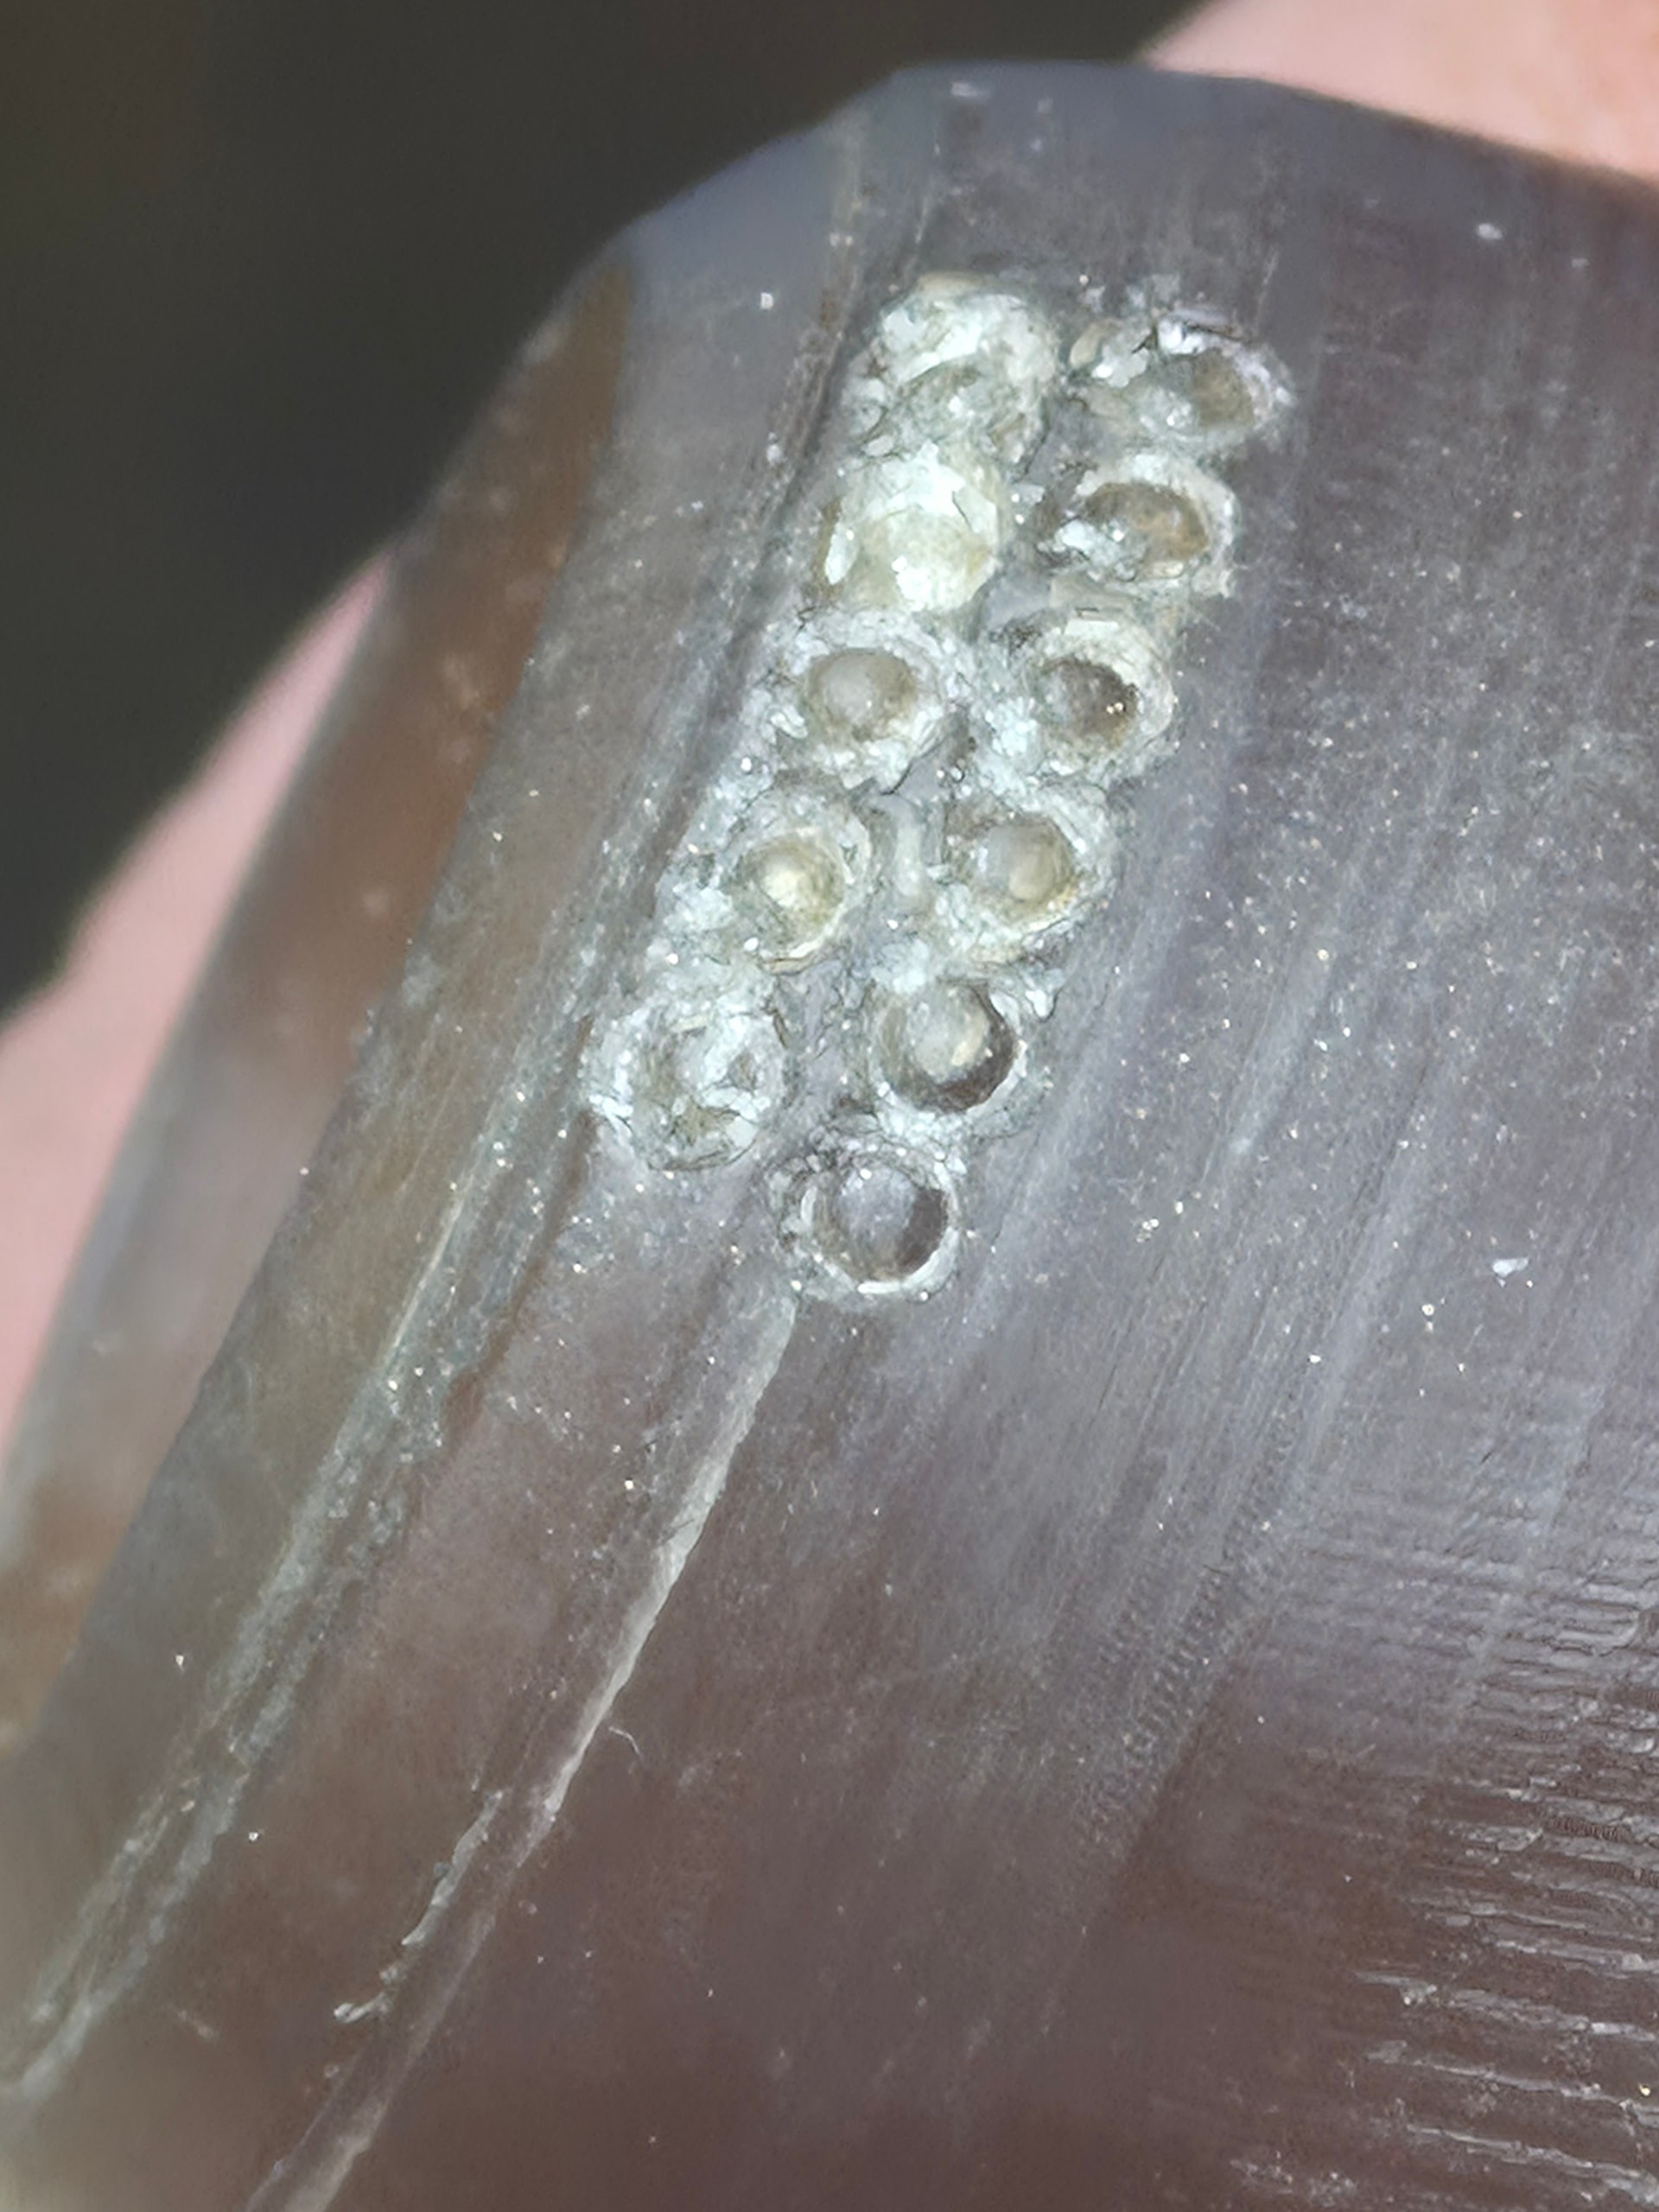
if i break it down and look at one complete “element”, i see a “lip”, a hexagonal depression, and an irregular ball in the center of the depression…
each element appears to be non-uniform and additive onto the wax shank…i say additive in that each element appears as separate…with spaces in between yet sometimes touching…this makes me think that each element started as a semi-spherical blob of wax…then a heated beading tool might have been pushed down into the blob…thus creating the lip, the depression, and the center ball…
but!… inner depression/ lip appears hexagonal…curious…so that kind of rules out a ball but or beading tool…
the outer edges of the blobs are also kind of hexagonal but that might be explained by the wax blobs touching at tangent points…
the inner beads are very imperfect, so perhaps the were added ad tiny wax beads using a heateddental pick type tool
the blobs may have been lightly filed down to level them off a bit before using the heated beading tool…
that could explain what i am seeing…
maybe…
julie
julie
My first thought is also that it may be stamped. Have you ever seen the work of Matthieu Cheminee? If not, check out his website, his work is beautiful and the depth he achieves using multiple handmade stamps is impressive. He’s also written a book on the subject.
Pam
Hi Julie I just want to compliment you on your always analytical and erudite suggestions for solving our problems! You are very generous and helpful and it is much appreciated. Thank you.
Cheers Willie
My vote is for a beading tool, pushed into the wax pattern, and twisted slightly. This could explain the slightly raised lip between the beads.
What I find difficult to explain, if that is the process, is how some of the beads along the edge of the pattern are not quite complete.
hi,
a beading tool would create the inner bead…but! notice the recesses between each element…
if just a beading tool were used, the result would be more like the smaller pattern lower down…where the surface between the elements was solid…no recess…
the lip and recess between each element is the curious part…and the fact that they are not uniform…leads me to think it is additive…
julie
Could the beading have been done on a fairly thick piece of stock on a flat surface and then somehow fabricated with the piece, looks like a ring. If the metal was moved after the ring was made, I worry that it might deform it. The bezel also looks like it might have been made from fairly thick material. I second Matthhieu Cheminee’s book The Art of Stamping. I think that I read in it that it is best to start with fairly thick material in the 18 gauge range or thicker. This will allow the stamp to penetrate into the stock. The contrast in his book between what look like fairly crude handmade stamps and the final product is amazing as are the artists. Don and I have a collection of old stamps made by our father when he was teaching at the Chiloco Indian School and learning to work metal from the native silversmiths that he worked with…Rob
Hi,
only thing is, there is no real east/ west depression between the elements…the “lips” touch…at their ranger point..a stamp would have made a depression around the whole element…needing space between elements…?…like the north/ south depressions between the elements…?
julie
This was just a quick test using a beading tool on scrap casting wax. I made no attempts to refine or experiment.
I still suspect that this could have been the technique employeed, with some practice the effect would be very similar.
Hi!
nice! (but…no “lip”…ie: bezel-like rim…raised above the background…?…)
the center bead sits in a crater…
the crater is surrounded by a bezel-like rim…
the bezel-like rim is raised above the background…
the actual background beyond the rim, is lower…more so north/south, than east/west as the rims touch at east/ west tangent points…?
a stamp incorporating the bead, crater, and rim could be used…but in this case there is no overlap deformation at east/ west…where the rims are practically touching
julie
Could it be that a heated beading tool was used in the wax? That could account for the rim around the bead. Just brainstorming.
~AJ
It seems from the details visible of the edges of the cells that the field is constructed of a series of serpentine wires soldered closely together giving the illusion of rows of circular frames. This would certainly be the quickest method of making the frames.
I think the dots are simply wires with balled ends soldered into drilled holes. This would keep them centered and enable them all to be soldered in at once without falling out.
It’s a fair amount of work, but might be well within the labor outlay for the time and place of manufacture.
Hi,
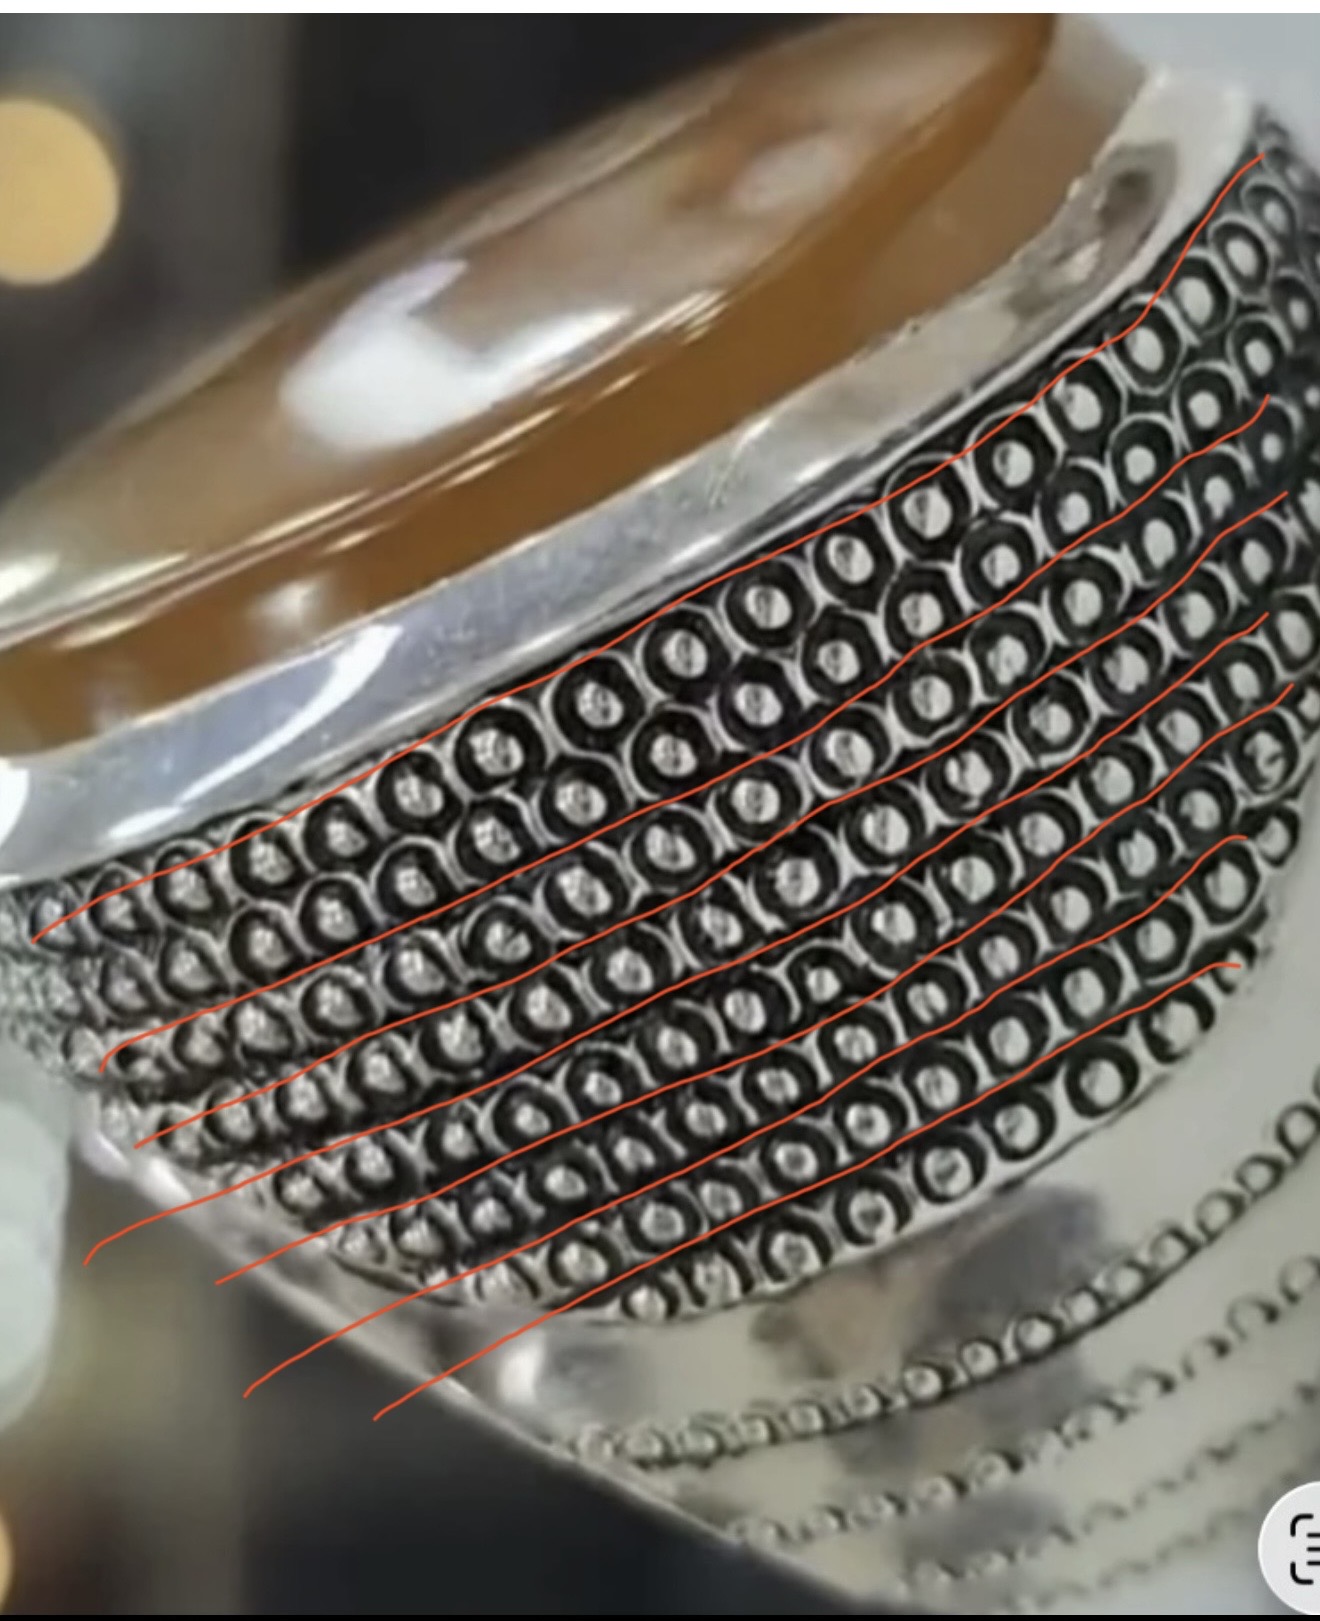
perhaps a graver was used after the beading tool, in the wax, to lower the background between the rows
my brain is kinda seeing “straight lines” there…
Hu,
the bottom row shows what it looks like when there is no rim…no lowered background…outside the lip rim
I agree that it looks stamped. But like everyone so far, something is not right about it. Then I looked at the construction of the piece as a whole. What if it was a flat piece that was stamped, then cut to fit the what I suppose is a ring shank. The bottom row of the multi line area would support more of it being shaped after stamping. Where the other lines seem to have a more stamped patter format to them, that bottom line looks to have been soldered into place. It would also answer why some areas seem more precise and others look to be more distorted. This is just a thought about what I’m seeing.
Hi,
the curious part is the raised outer “rim”…if a stamp was used, the rim would be somewhat consistent…in circling the bead…for each element
(actually, none of the elements are “consistent”…which leads me to consider an additive method of “building up” wax, and a graver to remove wax between elements to “clean up” the pattern)
(it seems to appear stamped, probably due to the inconsistent, “hand wrought” positioning of the elements)
(but the elements themselves lack the consistency of a stamp)
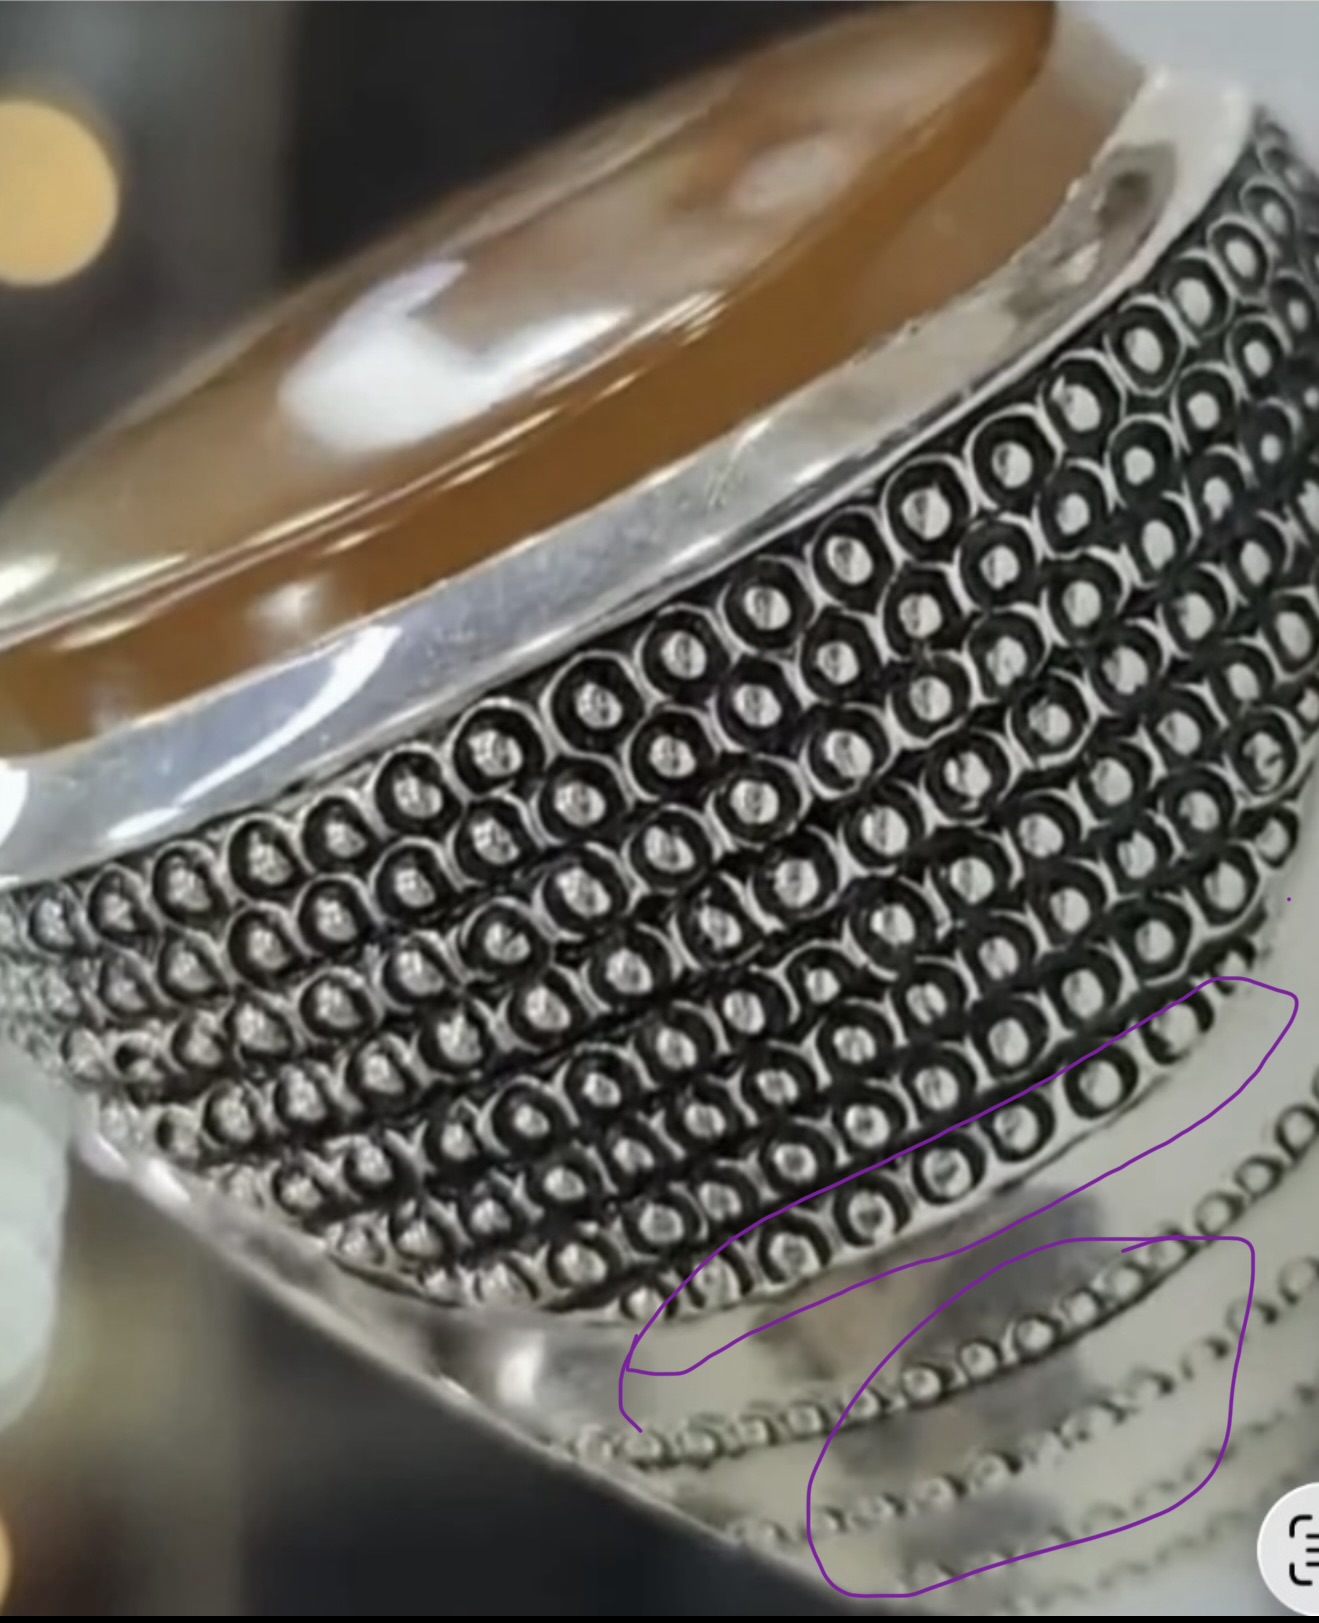
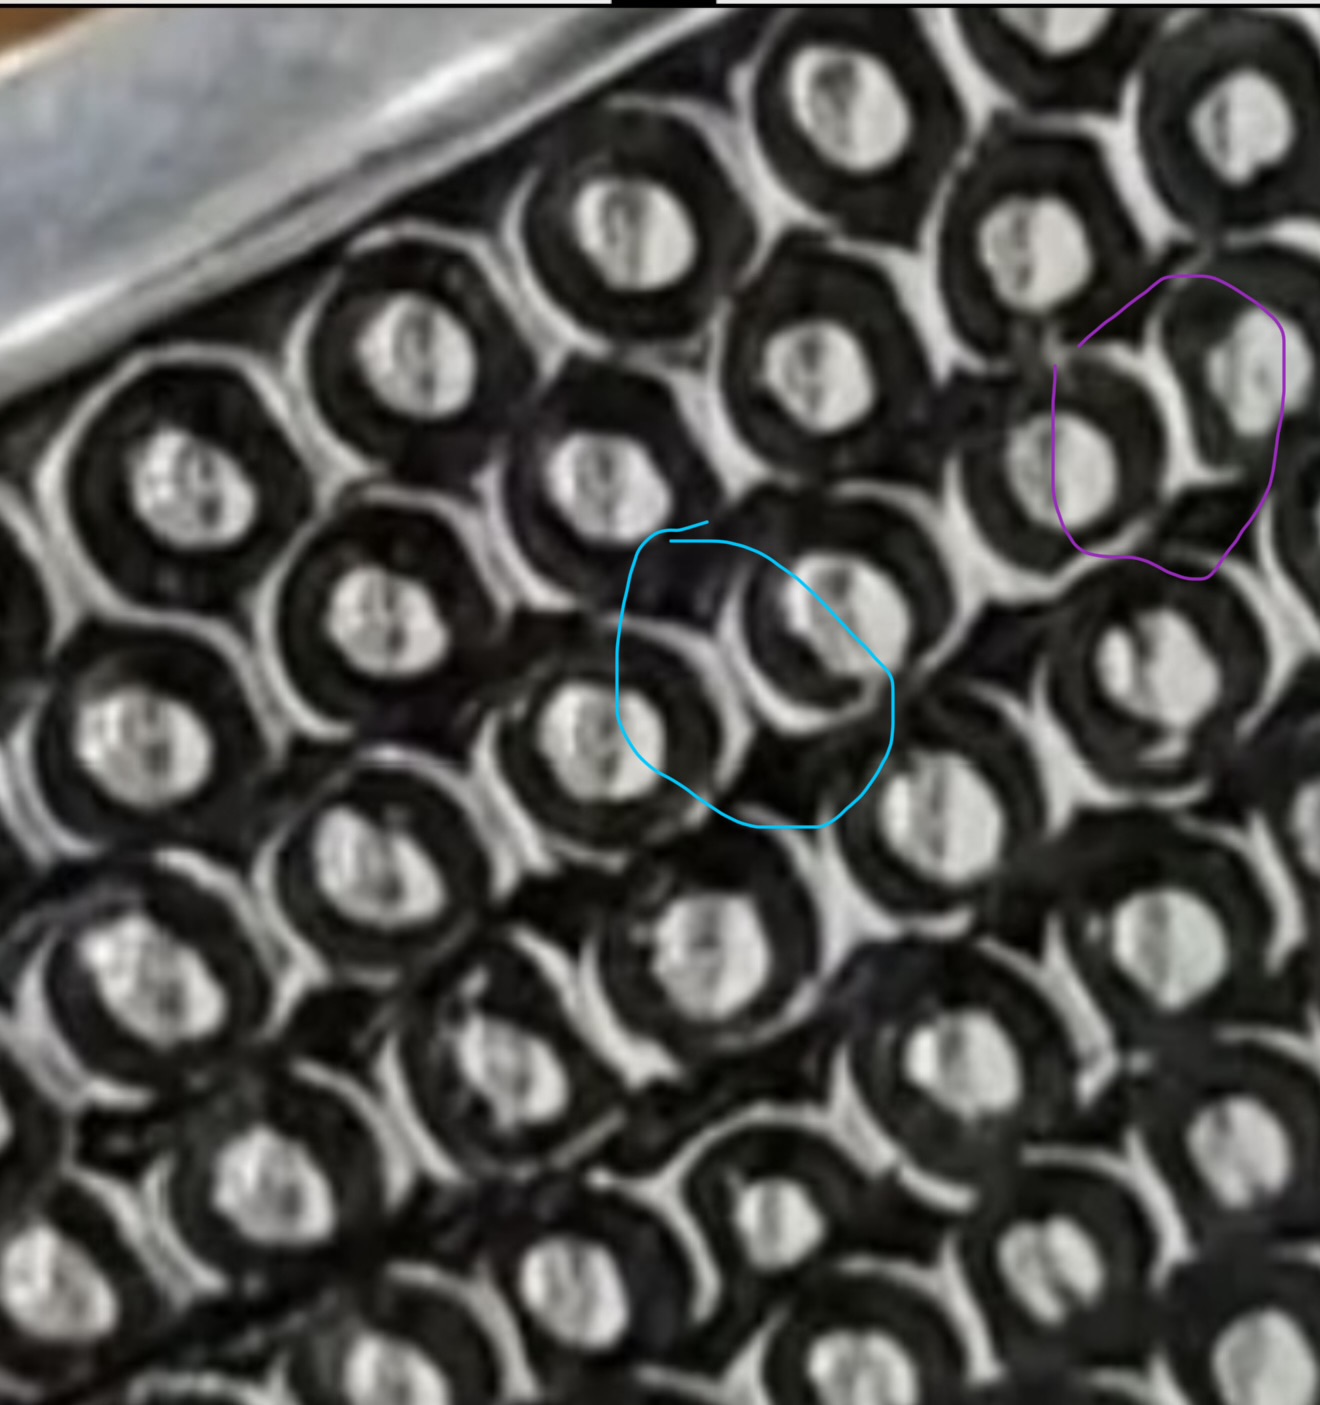
note the example circled in red, where the rim is incomplete and seems to be as elliott suggested, serpantine…moving down to the lower row of offset elements.
note the example circled in green, where rather than two rims side by side, with a space between…the rim is singular at the east/ west tangent points…if a stamp was used, the 2nd stamped element’s rim would cut into the 1st stamped element’s rim…overlapping…rather, it looks like the wax sometimes merged at these points…losing their separation…
also note that many elements have the north/ south parts of their rims removed…which leads me to believe a graver was used in the wax, to further define the “rows”…but inadvertently clipping off the north/ south parts of the rim…
note below elements circled in blue have distinct east/ west rims
whereas the elements circled in purple have merged east/ west rims, with one element “dominant” over the other
what a fun puzzle we have!
julie
If I were to make this pattern, I’d cut a groove in the wax delineating each line, then use a beading tool, maybe warm. I think that would work better that doing the line after cutting beads…
I don’t know how to make this pattern, but I used the image, did a reverse image search, and found this TikTok account who are claiming to be the makers. Perhaps you could ask them how they did it?