Dear everyone on “Orchid/Ganoksin”.
I’m very sure many of you use these fantastic HSS burs. there are basically used for making bearings in “4 & 6-claw” heads for your Engagement rings. But after time, the edges of the teeth seem to wear down, agree? What do you do with them, throw them away, no longer?
With this essay, I’ll show you just how to re-cut them, this method is so easy you’ll be amazed why you never did this before. ** There are no special tools to buy**, not at all!
I learned this method only about 60 years ago and I still use this re-cutting process even today!
This essay has now been posted on my blog
These 'High-Speed Steel" burs are not at all cheap, by any stretch of your imagination.
But many times they will get worn down by the continual use of scraping against other stones and even making contact with metal.
The question is how can you, or any setter maintain the life of these expensive burs?
I found a way to prolong the life of these great cutting burs and it’s so darned simple, but it works!!!
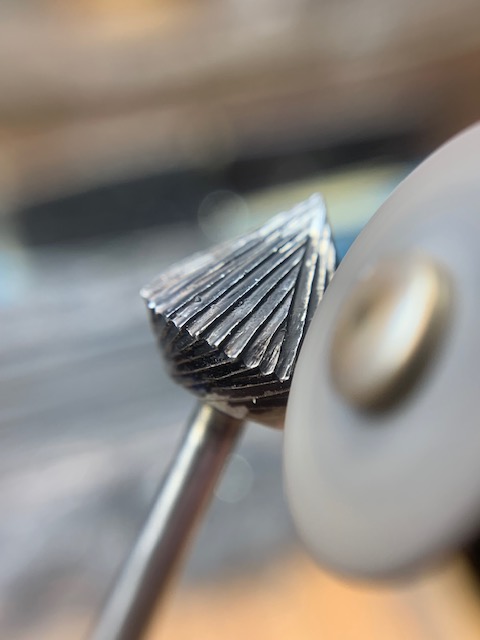
Warning! If you can call it that, it’s almost impossible to re-cut any HSS bur smaller than 3.00 mm’s in size. The reason is that the “Corundum Separating-Disk” is too thick to get in between the teeth on those smaller burs. Each cutting disk is 0.025 mm’s in width, as seen on the photograph being shown lower down.
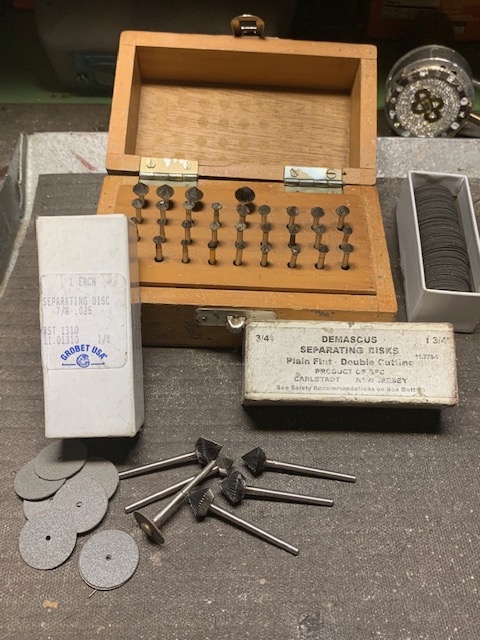
Here is my collection of burs, somethings I might just need one bur out of many, and it’s always good to keep ‘extra’ on hand.
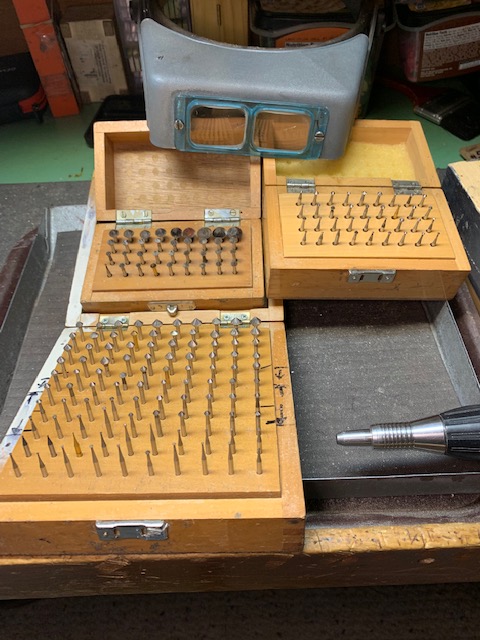
I keep the very large burs in a separate box as I’m always using them on a regular basis.
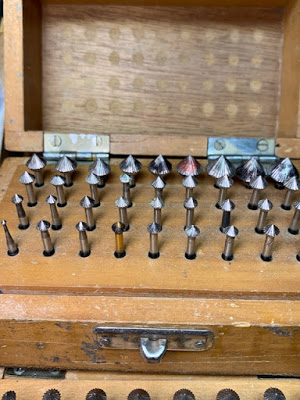
The burs being shown are the ones I will be demonstrating with, why? The teeth are much further apart and much more easy to re-cut.
There is one bur in this box that is 70 degree in thickness, I bought this by accident, for more accurate bearing angles, I buy only a 90degree-bur.

This is my box number 5 in my inventory. these are just too small to waste my time in re-cutting. If one bur gets worn from being used too often => out it goes into the metal recycling bin!
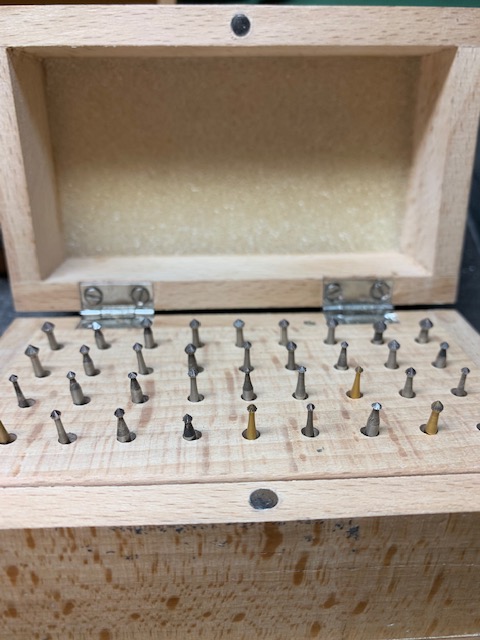
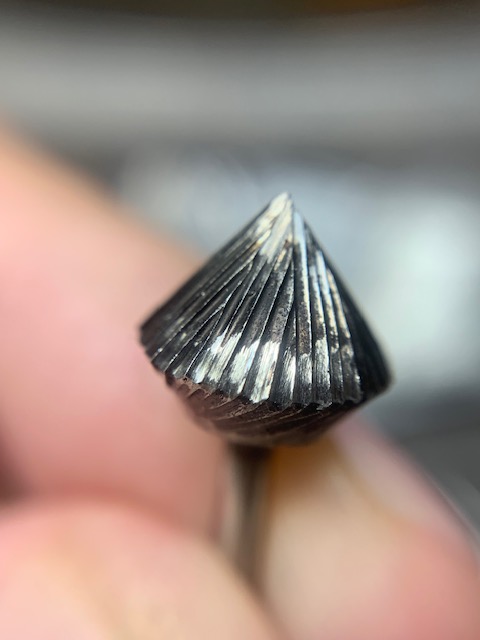
I’ve picked the best of the bur grouping and have ‘darkened’ them for easy access to see if one tooth has been touched or not. Please scroll down to see what I mean.
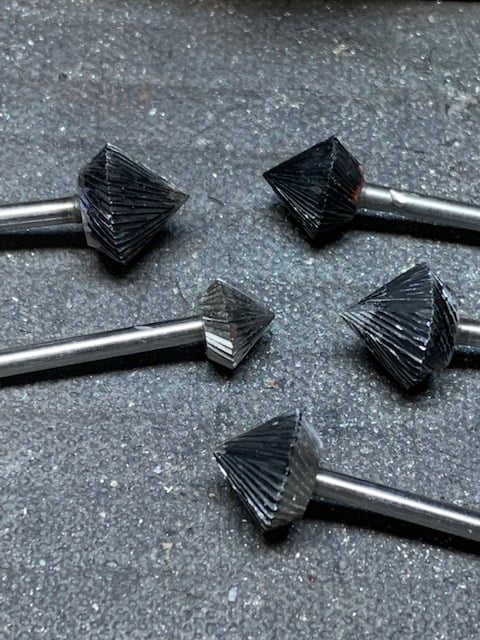
This darkening is not just for this essay, I do this automatically and on a regular basis.

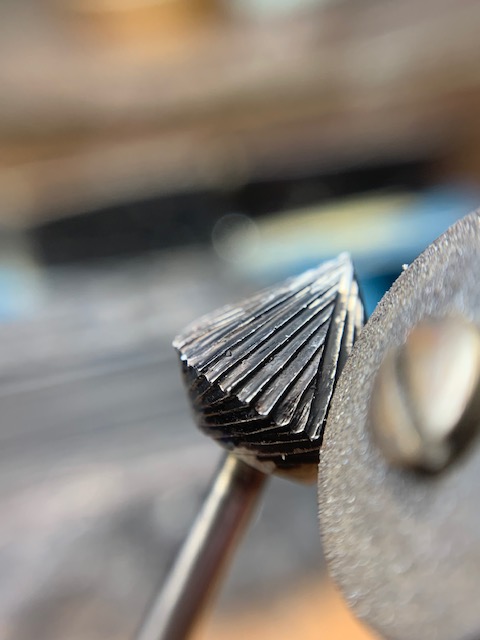
Here is the box of "Separating Disks" I was mentioning to you about. The diameter is 7/8 of an inch and just works best for my fingertips.
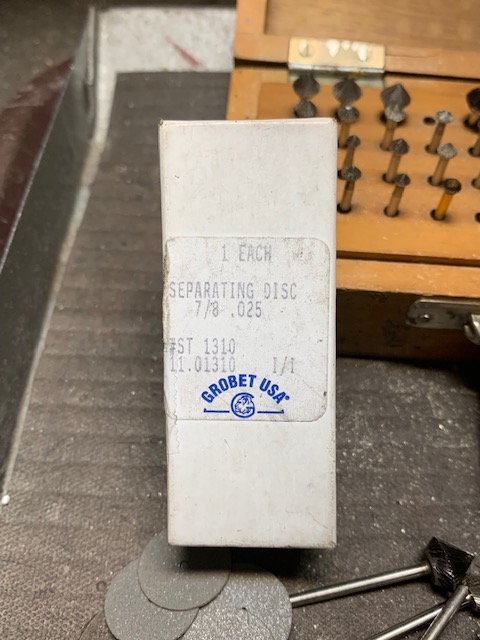
I find that if you use a larger disk, the speed of that disk might overheat and literally break apart! Therefore I prefer, from experience, a smaller rotating disk as in 7/8 in diameter.
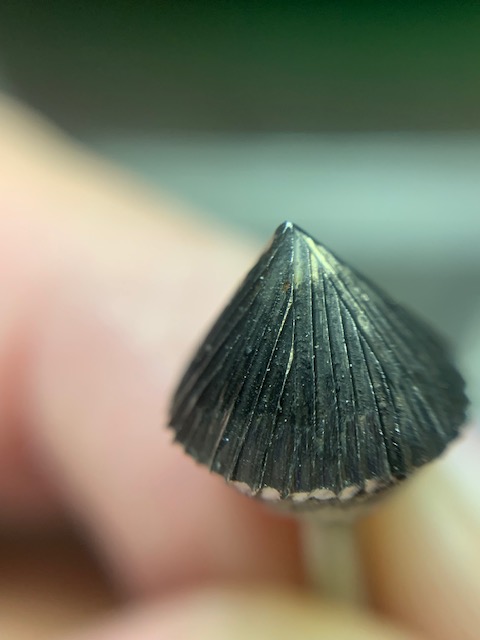
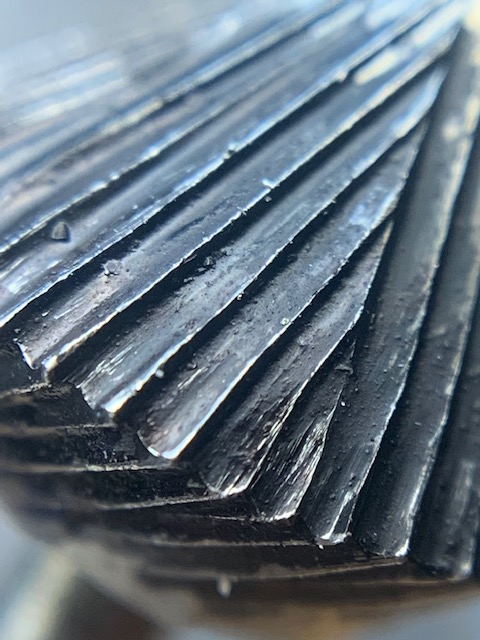
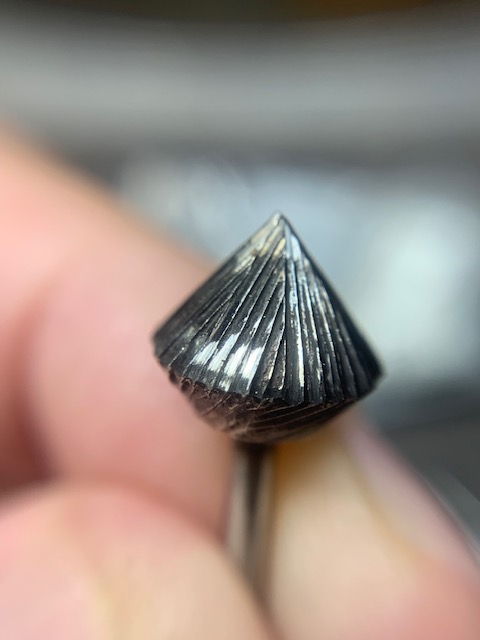
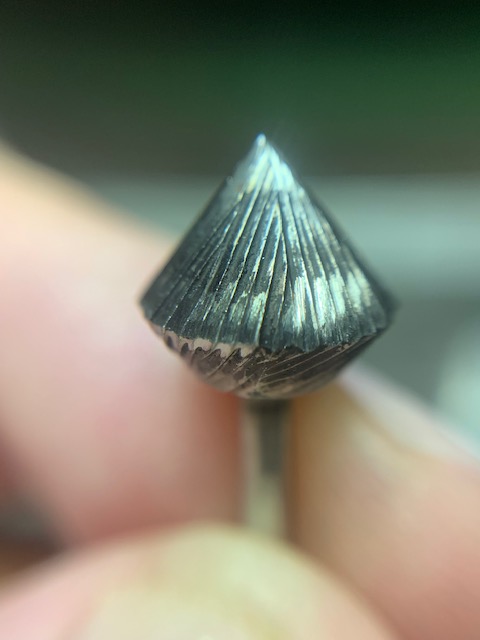
This is the shape of the cutting teeth, these were milled by hand, on a cutting lathe and not every tooth is in pristine condition.
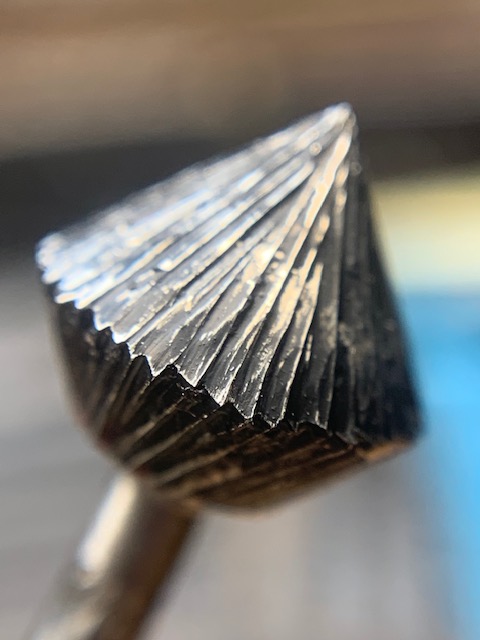
Already you can see that the very edge of each tooth is slightly rounded, THIS IS NOT GOOD!
I’ve blackened the teeth so that each tooth I re-cut, is now a metallic colour! So much easier to distinguish from the others in this fine process.
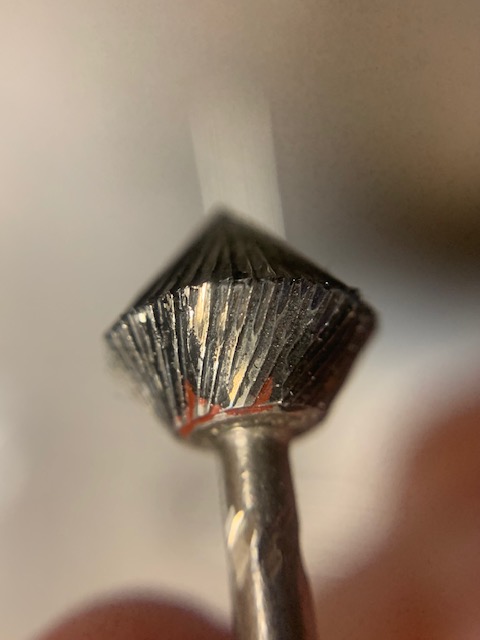
It is not necessary to re-cut all along with each tooth . Please, make contact where the actual cutting into where the “claw bearings” are made. You don’t have to go right to the point of the bur, it’s so unnecessary!
You can see where the cutting took place, it’s not necessary to cut anywhere else!!!
Please be so very careful when you get to the little “1/2 teeth”, so much care is now involved.
You can re-cut underneath if you wish. I just stay with the “upper Faceting teeth” and not the “Pavilion” tooth location.
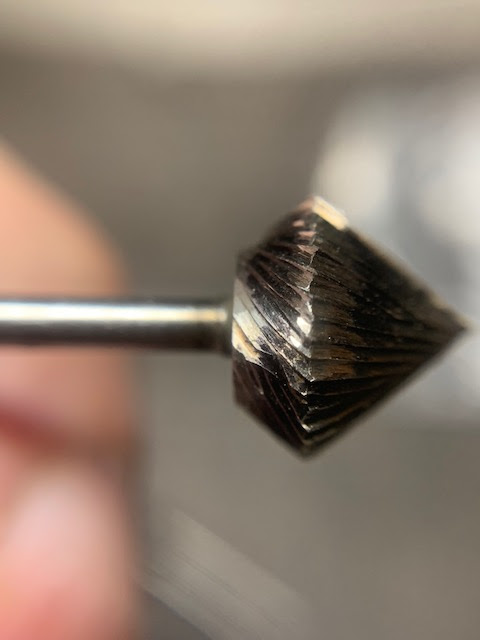
Can you now see the cutting and where the cuts were done, supposing you didn’t darken each tooth, you wouldn’t have any idea where to cut next, great idea? I think so!
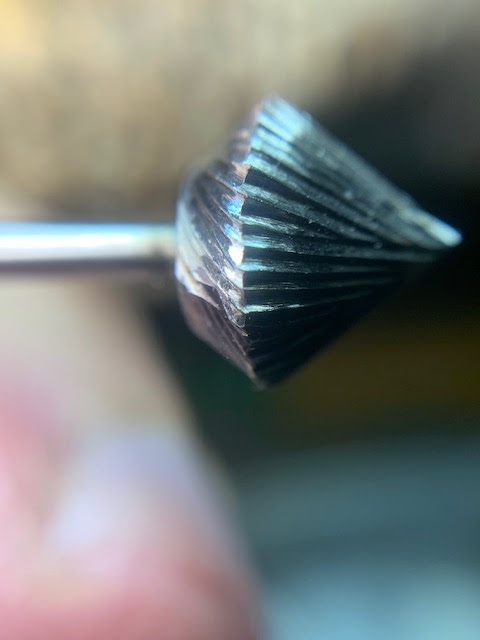
Please be warned, for each subsequent and repeated re-cutting slightly reduces the overall diameter of that bur. Do not be too aggressive in your cutting, as you should only lightly touch the surface
I suggest a few practice cuts on another bur that is worn down. I’d have you use an “Opti-Visor” of a stronger lens to see exactly what you are doing. That is why I have lens number 5 for Diamond Setting and #7 for these bur cuts. I must see exactly what and where I’m doing these money-saving re-cuts.
These bigger burs can cost you upwards of $20.00 EACH! So why throw them away if they are slightly used? Just use my money-saving method and re-cut them all, all the time.