I get less than stellar results sometimes pouring flat ingots that will become sheets. I speculate it’s due to rapid cooling of the silver.
How do you preheat, and how hot do you get your molds?
I get less than stellar results sometimes pouring flat ingots that will become sheets. I speculate it’s due to rapid cooling of the silver.
How do you preheat, and how hot do you get your molds?
This is a loaded question with multiple paths and opinions and lengthy instructions to the same result.
Basically you need to figure out how to preheat your mold to 400ish degrees. The most accurate way is in an oven or a kiln, but you can guesstimate with a torch. Then you need to coat your mold with a release agent of some kind. Some folks prefer a thin coat of oil. Others prefer soot from an acetylene torch. I like the soot method.
Your ingot mold looks totally dry without a coating of any kind. It’s no wonder you’re not getting good results.
There must be zillion YouTube videos on this topic. If not, info is in how to jewelry making books as well.
Cut out any solder seams in the scrap. Run a magnet through the scrap before you put it into the crucible to remove anything magnetic. Coat the mold halves with a little bit of oil. I use 3 in 1. Preheat the halves before you assemble the mold. Keep the mold near the crucible so that it gets heated up while you heat and melt the scrap metal. Go back and forth between the crucible and the mold to make sure that you drive off all the water and get the oil smoking. Pick up the mold and heat it on all sides while still heating the crucible. Add some borax to the melt. I use an old restaurant salt shaker. Run a graphite rod through the mix to make sure that there isn’t any thing that won’t melt in it. Once the melt is glassy and shimmering, give the opening to the mold another direct heat then pour the melt. You might tip the mold a bit to allow the air to leave as you pour the melt. Direct your torch into the ingot to keep O2 out. Remove the ingot when it is solid. Let the ingot cool. Remove any flashing with pliers or a grinding belt. Forge the ingot from one end to the other using a pall peen hammer. Do this on all sides in the same direction. Anneal and start rolling. Anneal often, may be after each MM of reduction. Roll until you get to where you want to go. Good luck…Rob
Thanks, I’ll start with those things.
Here’s a video on the topic by Rio Grande. This video demonstrates the soot method of ingot mold release. Like I said I prefer the soot method, but that’s probably just because that’s how I’ve been doing it forever.

But there is no one answer here. The path that Rob describes for pouring ingots works well.
Rob mentions at least two things that I think are great ideas that I’ve never thought of. When the ingot mold oil is smoking that means that the ingot mold has reached temperature. I usually just guess what I think is 400F. (You don’t want to get the ingot mold too hot or heat the ingot mold for too long though as you’ll burn all of the oil away. I’ve done that before.) Another of Rob’s suggestions is to tip the mold while pouring to help air escaping. I’ve never tried that before.
Ingot mold pouring is complicated because there are a lot of things going on at once and you’ll be wearing dark glasses so it’s hard to see. I’ve found it takes practice to create muscle memory.
You should definitely put your ingot mold in some kind of metal enclosure to catch your molten metal in case of spillage while pouring. You don’t want molten metal dripping to places where you don’t want it to go. Like onto your torch hose, your foot, etc. The enclosure can be as simple as an old cast iron frying pan with a piece of fire brick in the middle that your ingot mold sits on. There are many simple potential solutions for this.
Like I said pouring ingots takes practice. You’ll get it!
Jeff
Hi,
another thing to consider…
when you tilt the crucible, leaning the spout onto the mold, keep the flame on the melt. while you are pouring…
pour in one smooth, quick movement
consider setting up your pouring station to help you…
perhaps put a firebrick next to your mold…rest the crucible on the raised firebrick…with the mold against the firebrick…so that you merely have to lean on it and tilt to pour…when you are ready
you can easily heat the mold as you heat the crucible
consider creating a hive for your melting station with firebricks…side and back walls to contain the heat…
julie
Thank you both!
I have good results pouring round ingots. The flat sheets seem to more challenging. I’ll definitely lubricate the mold and heat it more thoroughly.
I also picked up some square stock at the store to make an adjustable mold for pointing ingots flat. Maybe I can also pour sheet that way as well.
Every step of the way is more learning how to do things!
If your ingot mold is coated with either of a light coating of soot or oil and is at the proper temperature (approx 400F), then your issues with full sheets are probably with the pouring side.
First how are you melting your metal?
I kind of remember that you have an electromelt furnace. If so, that’s the most accurate way to pour an ingot with regulating metal melting temperature. I used to have a great chart by Kerr (a casting supply company) that showed melting, casting and flask temperatures of jewelry metals, but sadly it disappeared when we moved. But I remember that the Kerr chart said that casting temperature is 100F to 150F above melting temperature.
Sterling silver melts at 1640 F, so casting/pouring temp is 1765F or so. With an electro melt furnace you can pretty much guarantee that the metal is at the proper pouring temperature. Another perk is that you don’t have to wear dark glasses, which makes everything in this process much easier!
If you’re melting the metal with a torch, then you have to guesstimate the casting temperature by what Rob says. Look for the metal to swirl on top.
With torch melting and wearing dark welder’s glasses (shade #5 is what I use) I kind of use the torch like a flashlight. I move it all around while I’m melting the metal and keeping the ingot mold hot to help me stay oriented towards where I need to go.
Julie’s suggestion of leaning the crucible lightly on your mold is a good one as it helps to steady things.
When you pour, you need to pour steadily, decisively and without any pausing. If you pause, even slightly, chances are good that you’ll get a parting line.
Rob’s idea of somehow tipping the ingot mold slightly to help release air as the molten metal goes into the mold is something that I’ve never tried, but it makes total sense.
Like I said this process takes practice as you have to do a number of time sensitive things at once and if you’re torch melting and wearing dark glasses, then you’re doing it in the dark.
If things are working with pouring round rod shapes then I’m pretty certain you just need to tweak the process a little bit to make solid sheet ingots.
Have fun!!
Jeff
My MO for pouring ingots.
I generously oil the ingot. I then wedge an old stainless knife under one end of the ingot to tip it toward my pouring hand. I turn on the exhaust fan and start heating the ingot with a large rosebud tip on our casting torch and then start to heat the mold. Very important tip here… It takes longer than you can imagine to heat the mold up. So I ALWAYS pee before I start. I know TMI but it’s important to me.
I think of pre oiling and heating the mold like seasoning a cast iron frying pan. I continuously move the torch on all sides. When I think I’m getting close to to temp I hold my hand a few inches away from the mold to see if it’s putting off enough heat to my satisfaction. It’s kinda like a Grandma cooking instruction. “How hot should the oven be?” “Hot enough”. “How long do I cook it?” “Til it’s done.”
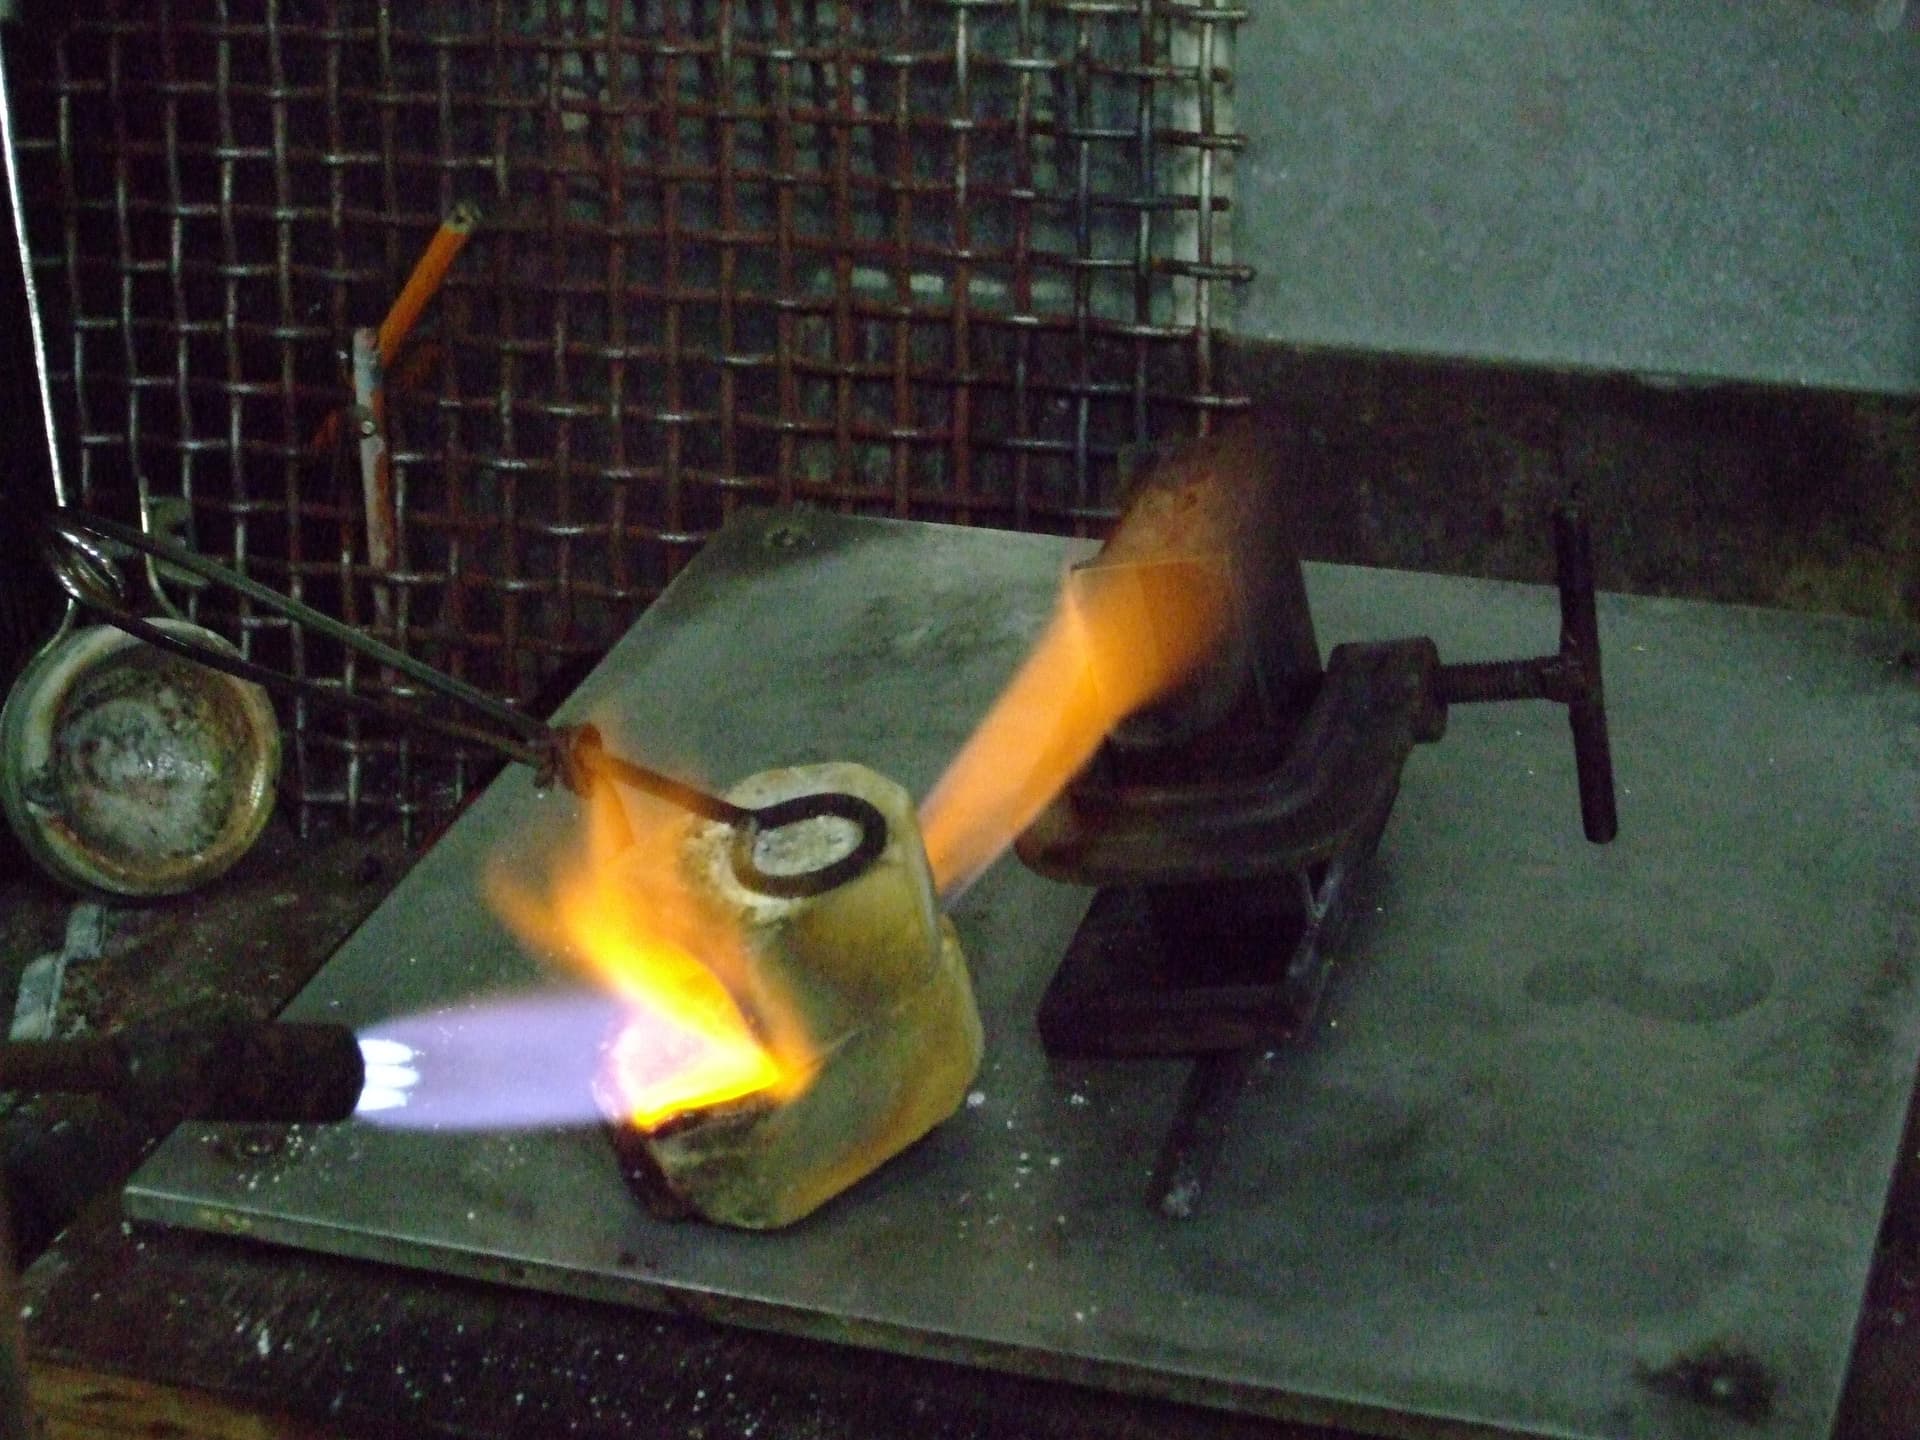
Once I feel it’s up to temp I pick up my crucible and position the crucible and tip it to the point that the flame is hitting both the metal and shooting out of the crucible and heating the mold at the same time. See attached photo. I keep moving the crucible all around the mold to keep it hot. Once the metal is molten I swirl it around in the crucible and keep heating it until the metal goes from being thick like honey to a more watery state. I keep a close eye out for sparks on the metal which means that it’s too hot and the alloys are being burned out of it. When I feel that it’s ready to pour I rest the pouring lip of my crucible on the edge of the ingot mold and then pour in one swift but smooth motion.
I tell my students that it takes several fails at pouring until you get it dialed in. Thank God that we metal smiths have the luxury of remelting our mistakes and doing it again.
Thank you! The details in your descriptions are really helpful.
That is slick Jo! Decades ago in school, we had others to man an extra torch to help keep the ingot mold hot. Since I taught my son how to help me.
BTW the TMI problem, ask your doctor about Gemtessa. Never know will you will learn a new way to solve your problems.
No wonder you have problems casting sheets, only jewellers use this method, and I will comment on my own experience. Electromelts are very affordable, not only are safer but you have control over the temperature, strongly recommended. Mine is from VEVOR and cost me $250 bucks.
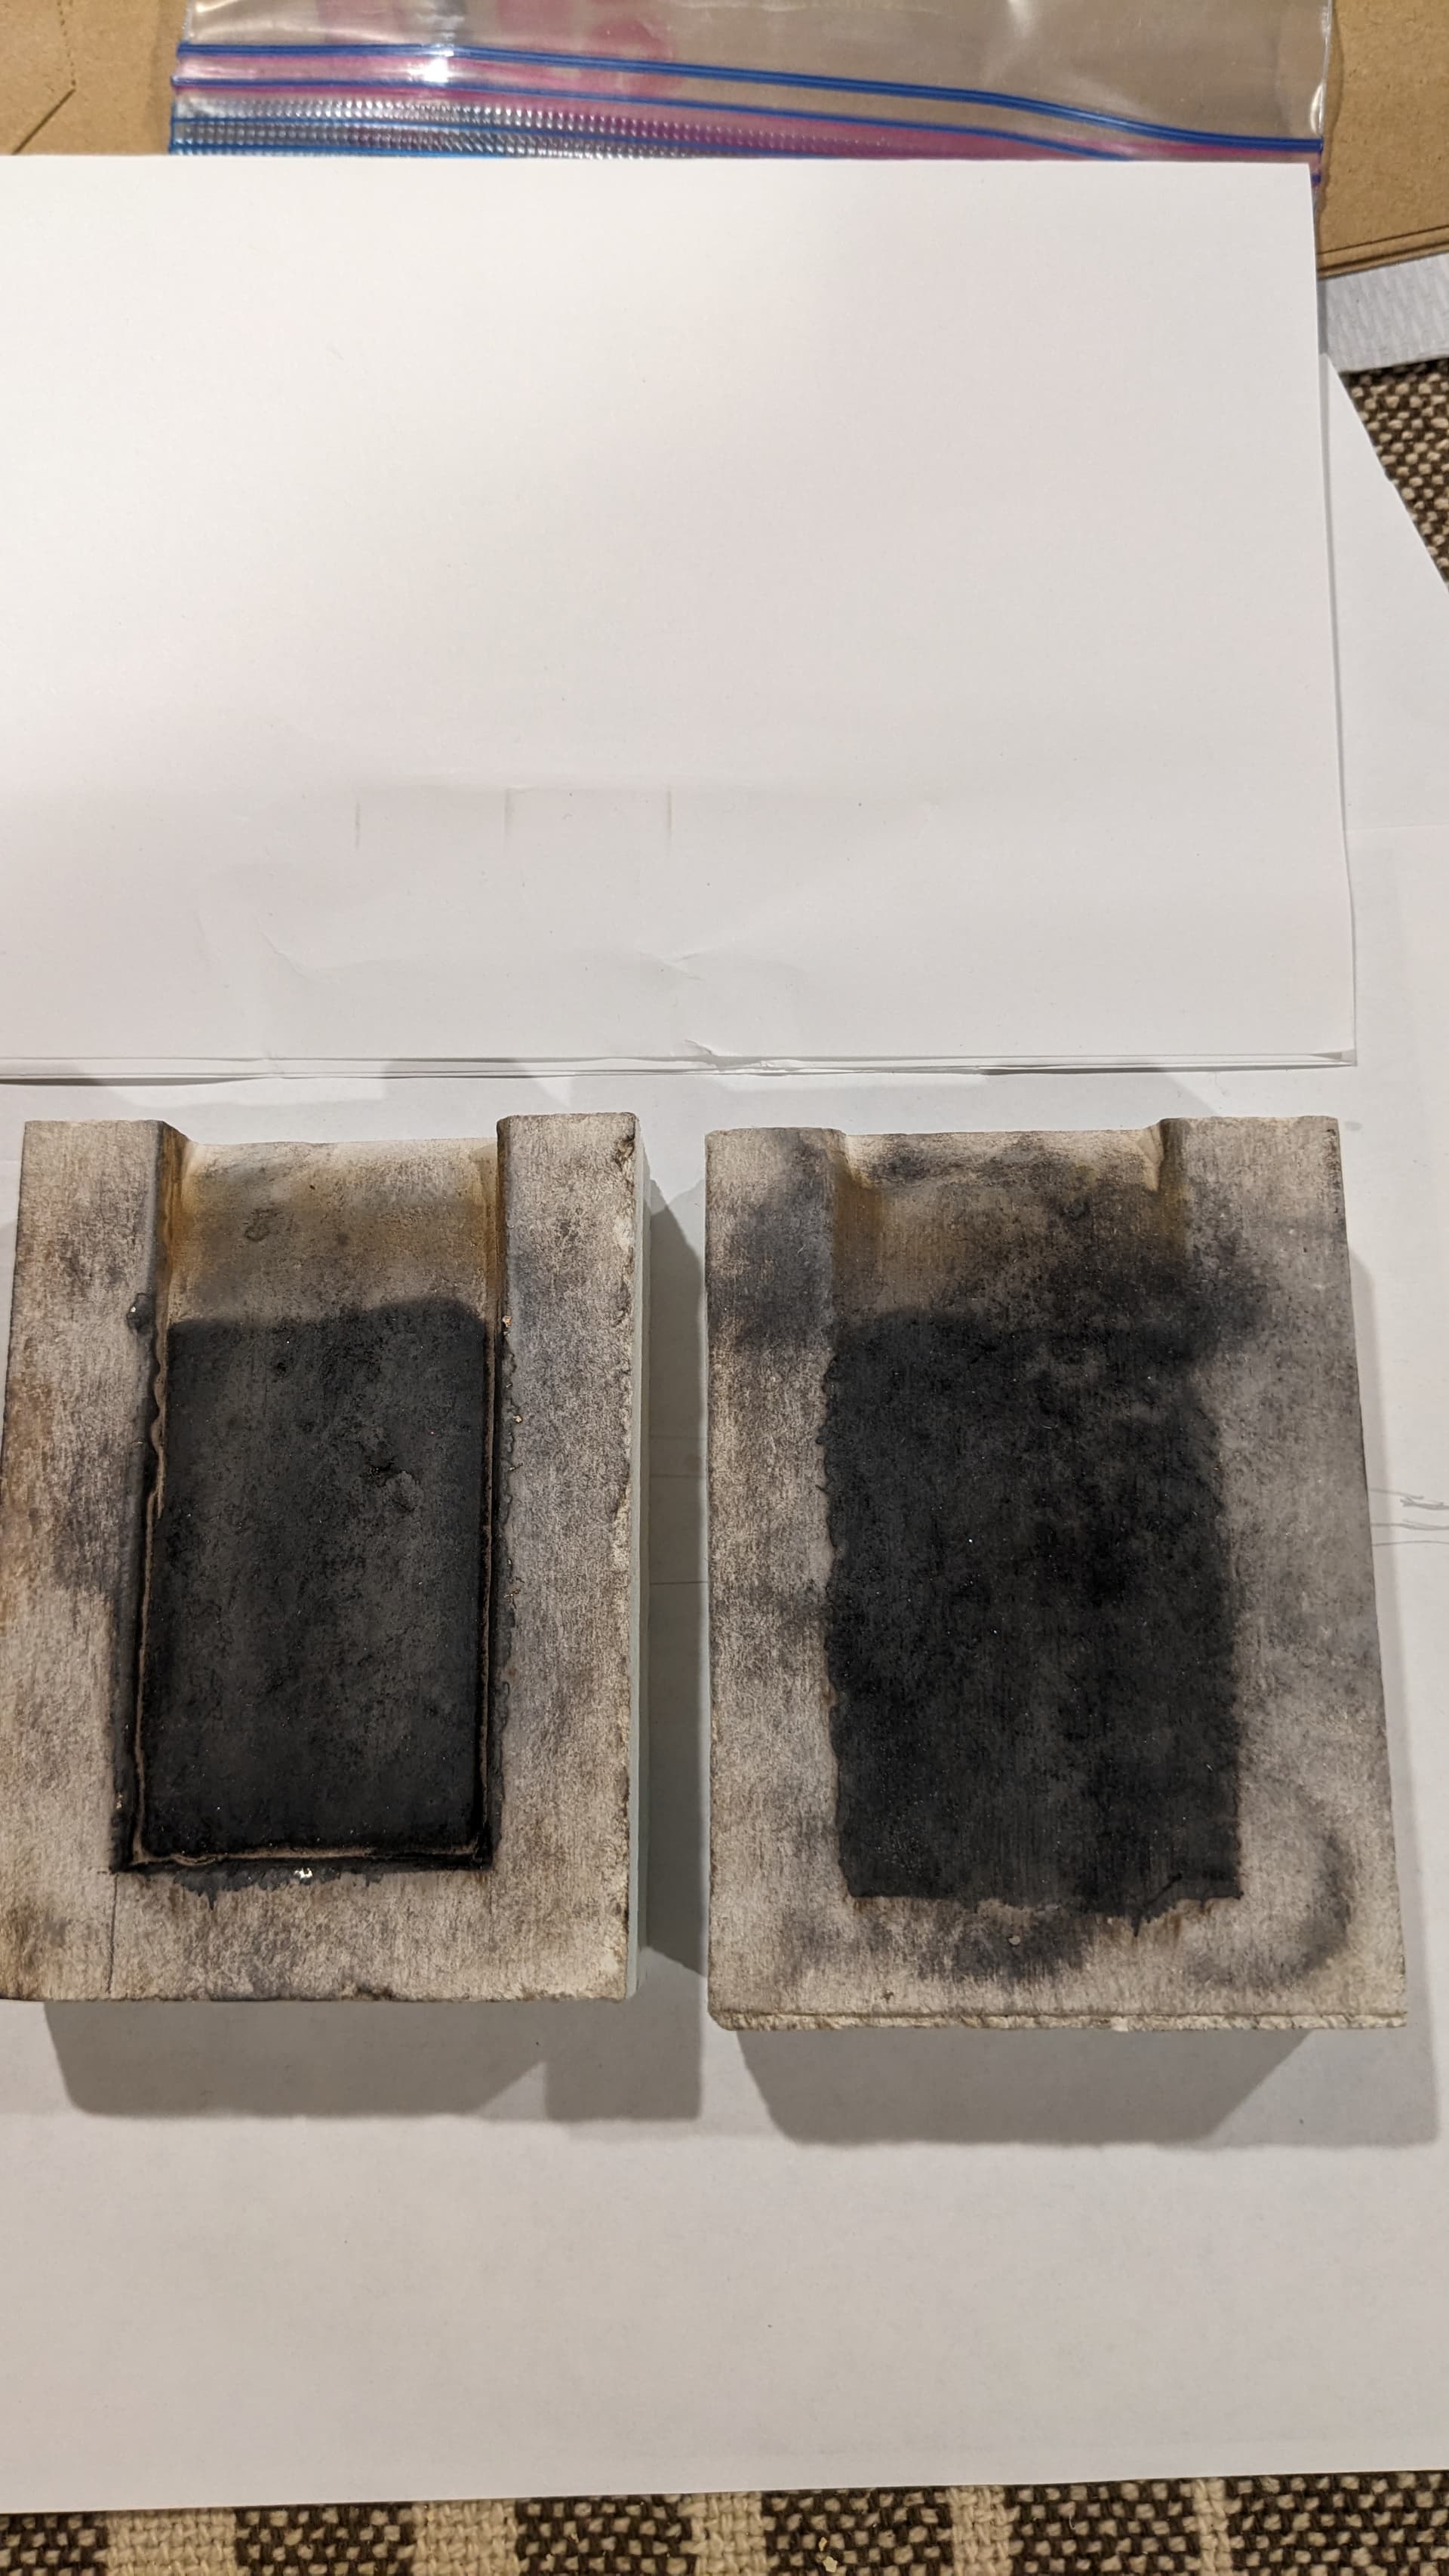
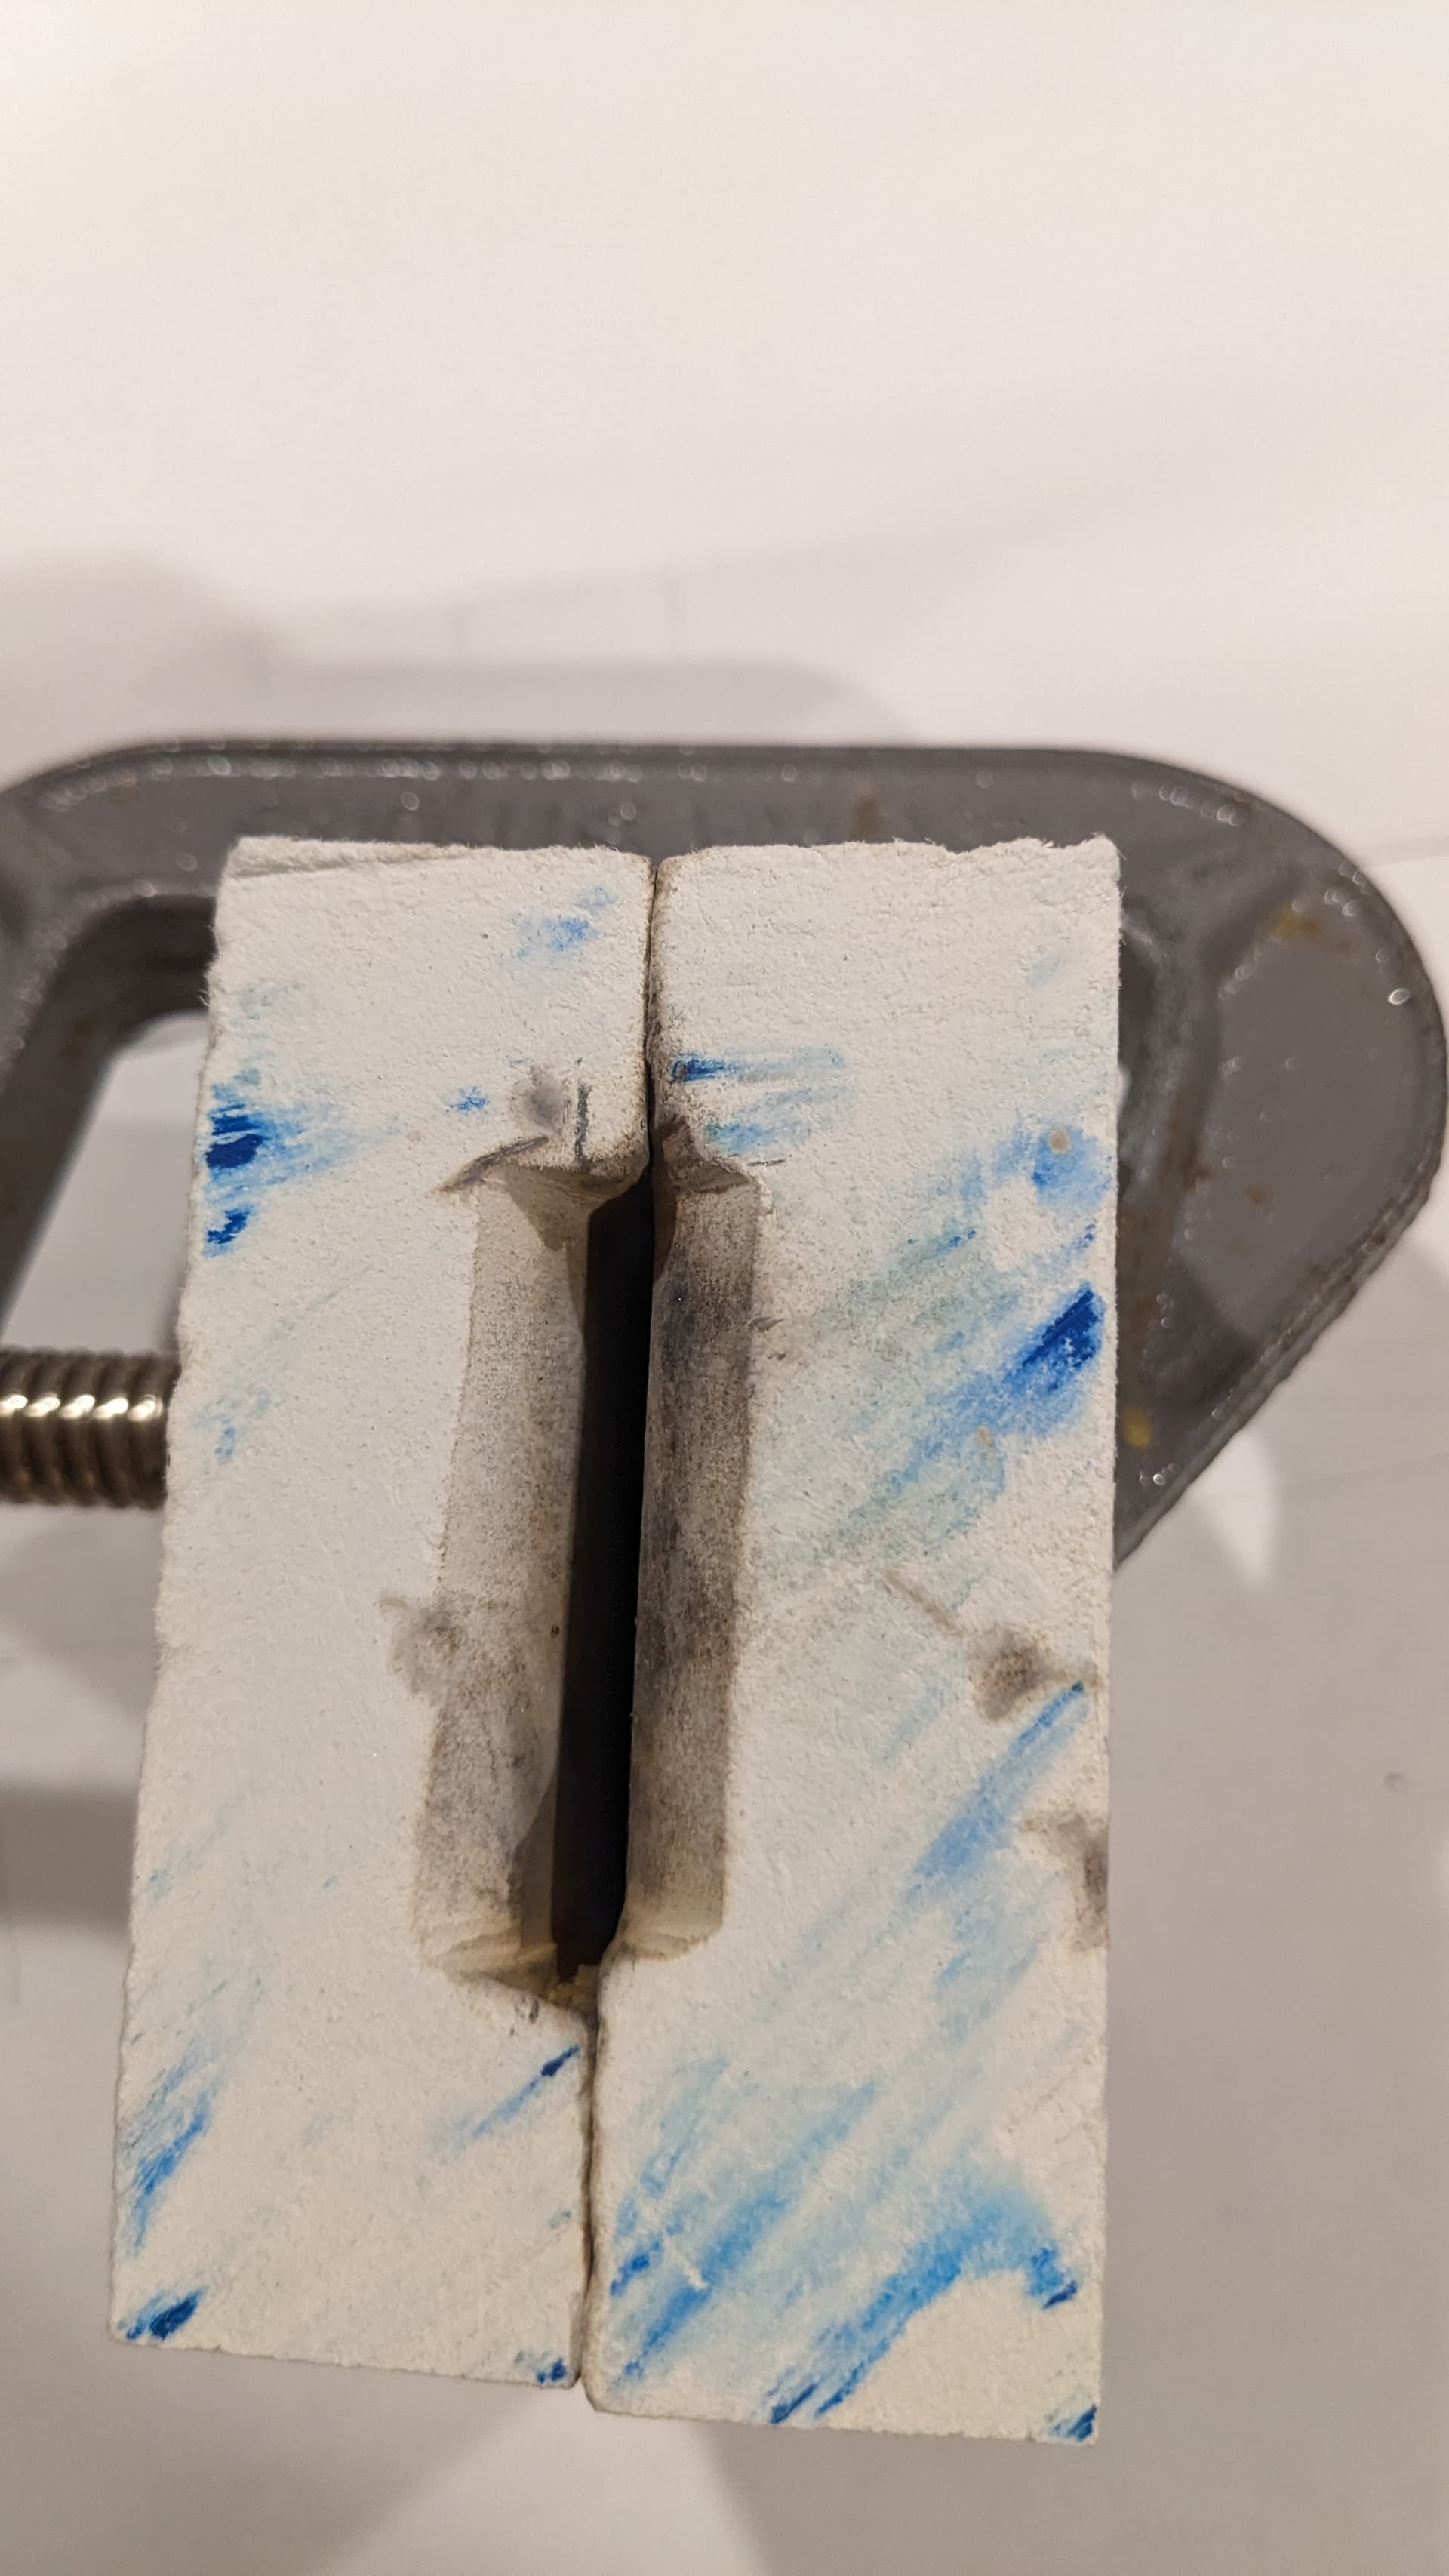
Regarding the mold it stand to reason that metal is about the worst stuff for a mold as it absorbs the heat, and there are many options to replace them. Navajo silversmiths use tufa stone for molds, also Delft clay can be used to make molds. Mine are made using high temperature ceramic insulation (Mc Master Carr). The material is soft enough and asbestos free that can be milled using a drill press and also cut with a knife. Unfortunately I don’t have the grade of this material as I received scrap pieces from an industrial job. I cast 3mm thick sheets good enough for my small mill. Using this process you will not need ANY torch which was my goal
Would you post a pic so i can see more clearly? I like this idea a lot.
There is no preparation or any oil. When the mold is new I cooked in the kitchen oven at 500F for let say an hour to displace any moisture. After the first casting I keep the mold in a ziploc bag to prevent moisture ingress.
I am aware of professor Brepohl comment about the casting grain size by casting in metal or insulation. After casting I do a light forging and annealing before rolling. In my modest experience my sheets and commercial sheets don’t seem to be any different !! As I am not a metallurgist I can comment any further.
Thank you for sharing that. I appreciate it very much. I tried to pour a sheet in the ingot mold and failed again but I know failure is part of the journey. Onward!
Hi,
in addition to closed molds, there are also open molds, that may be easier(?) to pour into…i have seen metal ones, and graphite ones…i have only used the metal type of open mold
julie
Can you be a bit more specific about what McMaster - Carr material you use. I have toyed with making molds myself, but I am looking for a material that has a smooth surface and can also be easily machined. Thanks…Rob
Rob:
The material I use was given to me decades ago and I know the density around 19 to 20 lbs/cu.ft. My best guess is that was called “Extra High Temperature Rigid Insulation” by looking at an old #120 catalog and rated for 2000F.
The material is powdery if you touch it you get a small amount of white powder and also is brittle, there is no organic binder as it doesn’t smoke at all if you heat it with a torch. I use it to make simple molds and brazing fixtures and holders.
There are a multitude of machinable ceramics from many vendors but I never worked with any, Mc Master show some as machinable.
Thanks! The MC website is extensive and a chore to wade through. This probably is because they aren’t focused on the needs of people who do what we do. If I find something, I will share it…Rob