How do you make tiny beads to set small stones in wax?

Hello everyone! I’m brand new to the community and I was hoping to start my journey here by asking a question. I have been making pendants and rings with wax, for lost wax casting. I really want to try casting stones in place, but I cannot figure out how to make beads from the wax. The trouble I keep running into is that I can only seem to produce wax drips that are much too large to be a reasonable bead. In most cases my attempts to make a bead result in completely covering the stone I’m trying to set.

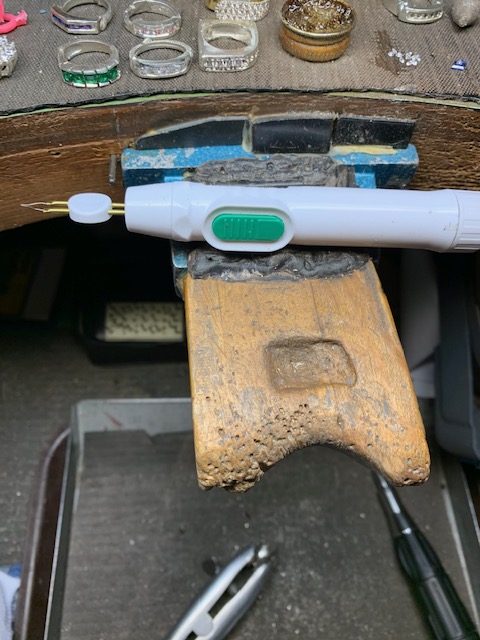
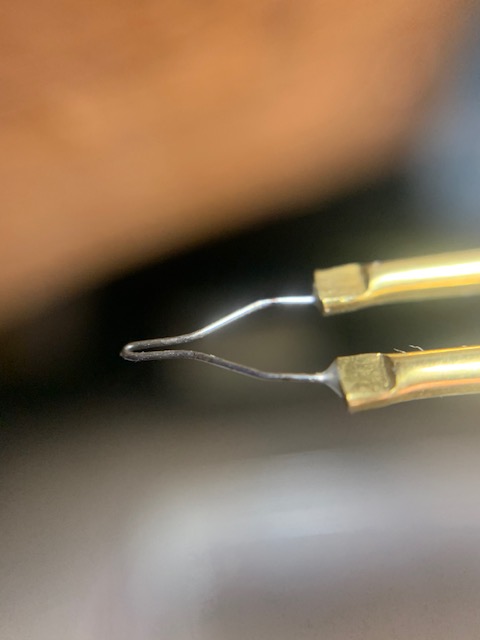
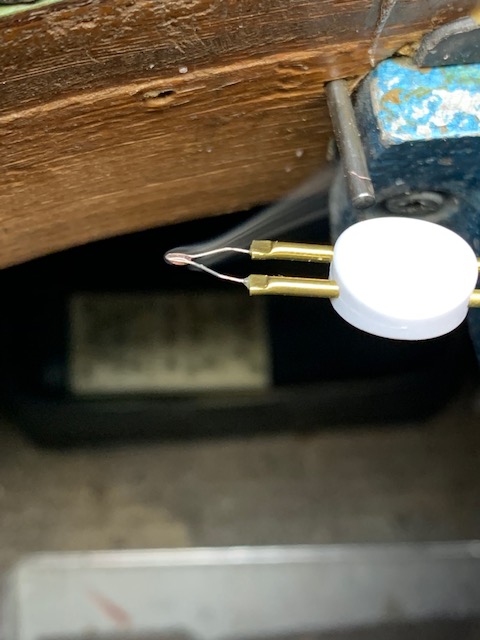
The tools I’ve tried are an array of dental picks, large and small sewing needles embedded in a wooden handle, an adjustable temperature soldering iron, and battery powered max wax pen. The best I’ve been able to accomplish so far has been with the dental tools, heated over an alcohol lamp. I scrape a bit of wax onto the tool, heat it over the lamp until it’s liquid and then hold the tool with the point down until the wax beads up on the tip.

This hasn’t been entirely successful because it takes much too wax for the bead to actually come off of the tool. At the point where gravity takes over, the amount of wax will make a droplet that is several millimeters wide. Without that much, the wax just pools up very near the tip, but never close enough for me to deposit it onto the model.

Does anyone have a method they can describe for me? Do I absolutely need one of those expensive waxing pens? I’m not entirely opposed, especially if it will reliably get the job done. I was just hoping to avoid the cost if I could. Thanks and I look forward to being a part of community moving forward!

1 Like

Henry Williams

To make a setting bead in wax is not possible. All bead setting techniques are done after the stone IS IN THE METAL.

Here is what my portable & inexpensive wax-pen looks like when being used and the point for heating the wax!

***Gerry Lewy ***

"RAPTORS’ CITY…:>)

Hi and thanks! I may have used the wrong word, as I’m very new to this craft. Here is a link to an example of what I’m trying to accomplish.

[VIVIAN’S COCINA on Instagram: "I like how it’s looking so far. What do you think? #viviansaadeprocess151"](Vivian Saade’s Bracelet)

I though those were referred to as beads, but perhaps not. I do have that same wax pen, but I can’t figure out how to use it in a way that produces small drops of wax around a stone.

Hi,

I am not an expert, but I will throw out a few ideas.

I am sure wax pros will have better advice.

I was taught to do those tiny beads, by an amazing teacher, but have never been that good at executing the concept…so I am only able to tell you about what she showed me…

the short story is:
she poked the tip of the hot, wax laden pick into the parent wax, and then the pick pulled out…

…I think there is a sort of zen involved in the timing of everything…the speed at which you move…the rhythm…because you are working with a pick that has been heated, but is cooling…and wax picked up from a block that has been heated, but is cooling…and then parent wax that has been heated from the pick, and had more hot wax introduced, and where the parent and ball wax is cooling, as the cooling pick is removed…see what I mean?

I used to practice, a lot, just making tiny balls on a sheet of wax…I had wax pen tips that I later modified…this is tricky…interesting how capillary action works…watch what the wax does, if you have a single tip, versus a tip with a slit in the center, or a double wire tip…see what different sized tips do…only the very tip end goes into the metal for this process…different tips do different things…see how fast wax cools on a pick, see how much parent wax melts as you put a wax pen in, depending on the set temp…

she used a curved dental pick and an alcohol lamp

she heated up the dental pick in the blue part of the flame, which is hotter than the yellow part of the flame

then, she would poke the pick into a block of wax to pick up a tiny bit of wax

and then she poked the tip of the dental pick, with the still hot tip and hot wax, into the parent wax model

the pick would melt the parent wax around the pick, which would mix with the hot wax coming down off the pick

then she would pull the tip of the pick out of the wax model, pulling up some of the still hot wax, which would then pull off the pick, and stay on the parent wax as a ball.

there is surface tension between the parent wax, and the hot ball of wax, at the tangent point (the area where they meet), and the parent wax and wax ball are cooling, as the pick is pulled up and out and removed. (i hope those are the correct technical words!)

also, notice that in your example link, the tiny beads are purple wax (ie: Matt purple 225d egrees, which melts at a slightly lower temp than green wax (ie: Matt green 230 degrees)

  • i wonder if the lower melt temp of the bead wax helps? or if the purple is just a good working color contrast?

just my thoughts.

good luck

Julie

2 Likes

Julie, thank you SO much for that level of detail. I will practice exactly what you said. I had never considered pushing my tool into the parent wax. I just assumed the melted wax was being gently touched to the surface or dripped onto it. Pushing my needle into the parent would solve my problem of the wax balling up just behind the tip. Since the tip would enter the parent, that ball would reach the surface and the capillary action would pull it off of the tool.

If anyone else has ideas I would love to hear them.

As for the wax, I’m not sure what Vivian is using. I’ve been trying all sorts of waxes to see if any seem to work better than others for each stage of the process. I like to hand carve the Matt’s green, I inject the Freeman’s purple, and I lathe the Wolf Gold. I’ve been trying to make the beads with Wolf Touch-Up wax, but I think it might be too brittle. I’ve also tried the purple injection wax, but it seems to burn up on the tool at a fairly low temperature. Maybe I’ll try using a chunk of my Matt’s green, purple, and blue next and see if those work better.

Hi,
ok, great, practice and experiment and learn lots!

my jewelry teacher used to use this “special” red wax…not sure what it was…he gave me a chunk…i still have it…so I am sure there are special tips and tricks for this procedure…he also had me make a tip where i soldered a broken drill tip onto a modified wax pen tip, as well as using copper wire, twisted onto a modified wax pen tip…

there is some straight forward science behind how the wax climbs up, and runs down the tip…depending on how the tip is configured…and probably the heat temp too(?)…

i think the spiral of the drill tip, and the twisted wire, and the slit or open center of the wax pen tip somehow helps to pull the wax onto the pen tip…my problem when modifying the tips was that the wax would run up, but not down!..and the tips are not inexpensive to experiment with…I never tried to modify the texture of a pick…hmmm…

none of the bought wax tip pens have an open split, like a fountain pen…i wonder if the width of the tip and shape also make a differents…in wax running, holding heat, etc…

maybe we should google "how does a fountain pen tip, quill tip pen work? I bet there are millions of youtube videos to watch…fountain pens have splits and open hole to work the ink too…hmmmm

my wax teacher was also a professional wax carver…she did tiny figurines for companies too…her work was amazing in its detail and precision…her pick work was like a fairy with a magic wand!

Julie

1 Like