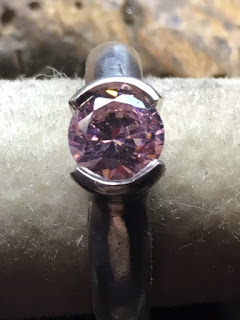
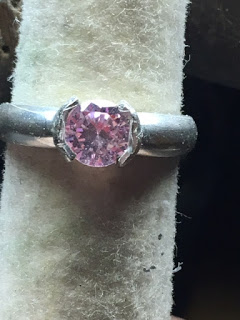
My 75th essay is on Bezel Setting and it’s a quite an easy setting process. Enclosed is my ‘finished’ photograph, I’d put the Difficulty Scale to 6.0 out of 10.
’Written text is good, but photographs ARE BEST".
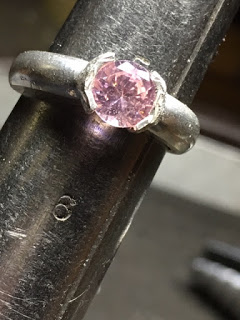
There are many interesting names to this kind of stone setting, " Half-Bezel ', " Double-Curve Bezels " and lastly, " End Bezels "! Whatever name you wish to identify this setting with, it still sets nicely.
Why do I like this setting? It has & gives you ‘more exposure’ to the stone than the Full-Bezel. The “Full Bezels” literally cover up about 33% of the stone in the setting , I want the client to see more of the stone, but not the metal.
This kind of setting warrants Bright-Cutting during the ‘finishing stages’. In the following many photographs is the 2nd stage of setting! As I don’t want to burden you with how the stone is actually set, but the finishing is 75% of the setting process.
This is so much more reading and here again, as always, the ’Onglette Graver’ cutting is what will separate you from the other designers. Bright-Cutting can be so 'creative’ when you achieve the skill required in gemstone setting. This will make all of your jewellery so much more beautiful…:>)
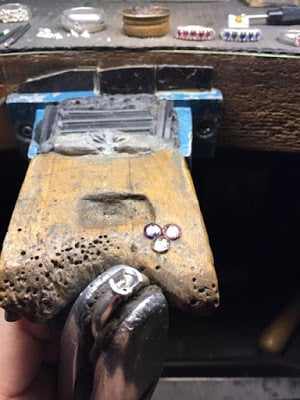
On this opening photograph, you can see a two (blue & red) rings waiting to be Bright-Cut in the background. These are now my next ‘setting essay’ also waiting to be written about Bright-Cutting!
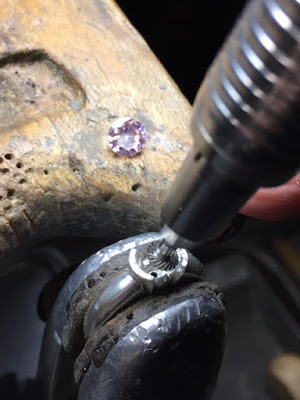
I am now using only my 45-degree angle ‘High-Speed Bur’. Although it’s very aggressive in its cutting, it’s the ‘best bur-in-town’ for excavating any Bezel metal. This bur automatically gives you the correct angle as of the Pavillion of the large gemstone.
To prepare for the 'hammering process’ I want my hammer to hit only on the outside edge of the frame at exactly a 45-degree angle. Please be very gentle in this sort of rough-filing!
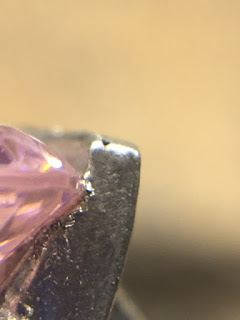
In this photograph, you can see just how the appearance of inside the bezel is ‘after’ the HSS bur carving. I’m working from the bearing cut, then down towards the bottom of the bezel-wall.
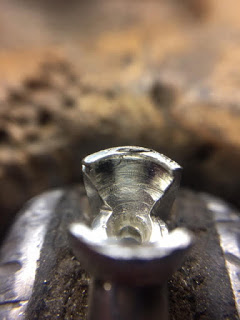
Don’t worry if the appearance of the tip of the bezel and how it looks. You must see a ‘flat top’ area, this area will gently be formed & moulded ‘over’ the stone by the numerous hammer hits!!!
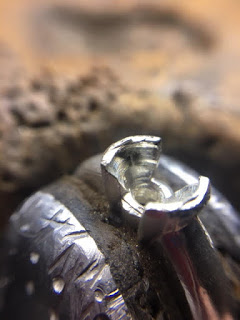
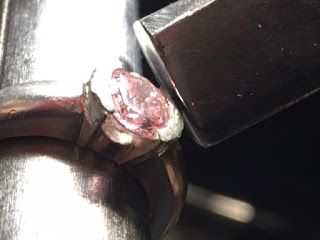
I know that this seems awfully rough method of tightening, but it works great for me! I’m literally ‘crimping the metal’ at the 4 ends of the wall, this is just to secure the stone from moving! I’m only ‘tightening’ the four corners as these 4 corners will gently hold the stone in place during the heavy hammering hits.
Please be darned careful in this process as the stone must be level and never slanted/crooked!
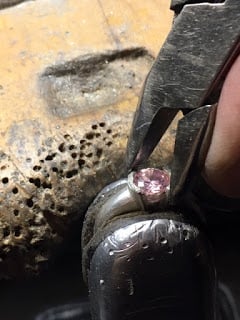
Please always hammer on your mandrel! As if you use your ring clamp, the powerful hitting forces will be immediately absorbed as it hits your metal ring. Hence, this will be a poor and an inaccurate method of moving the metal over the stone.
You don’t want a serious amount of metal to be moved over the girdle of the stone, what you see here is sufficient. Do you notice the height of the metal holding the stone? This is so important in the next stage of setting.
Just a quick note, here is the actual ‘hitting 45-degree angle’ of the hammer. The hammer must be so very smooth on the ‘face’, as there must never be any indentation on the hammer face, why so? The hammer marks will be quickly transferred to the bezel tip and be very difficult to be removed.
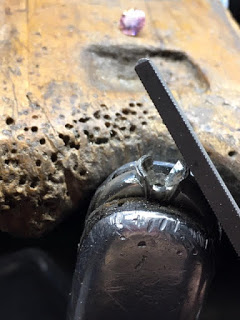
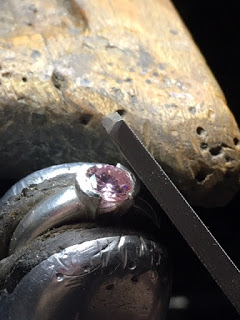
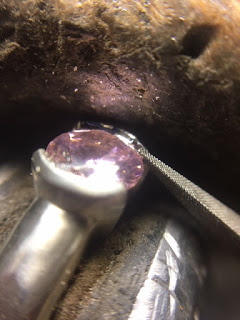
Cleaning with a 20cm. or an 8-inch file but with a safety-sided feature (as shown) again filing at 45-degree angle.
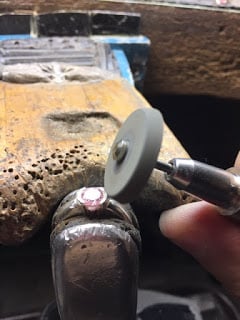
I’m using a ‘Medium’ (texture) grade paper sanding disk as this is now a part of the ‘cleaning process’.
I’ll be now using a Pumice wheel of #180 grit , following the sanding-disk operation. This will be almost the completion of this setting process.
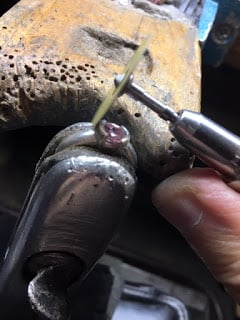
I’m now using my Onglette #2 Right-Sided shaped graver to cut only on the Right Side. This will give a nice reflecting surface to the inside of the Bezel wall.
I’ll be using a fine Triangular file #4 cut to only clean the ‘ends’ of the Bezel wall.
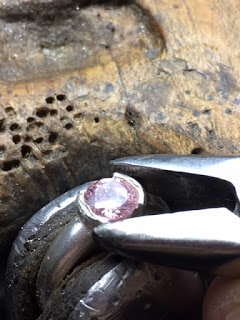
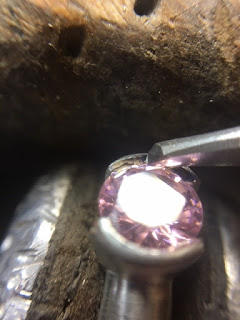
These are the finished views of the Bezel Ring. you now have a well-defined Bezel wall tip!
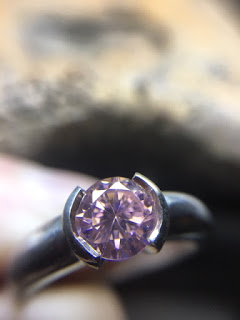
This ring will shine then afterwards, you won’t be seeing two massive amounts of curved metal holding the stone.
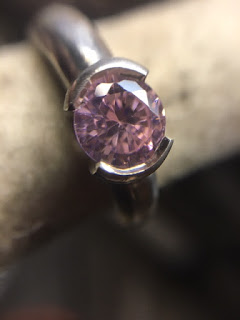
I preferred to use a 'coloured gemstone’ to give it more eye-appeal than a simple ‘white’ stone! Nice comparison from Pink to the White (silver) metal, agree?