Gypsy/Flush Diamond Setting, (ver.1.02)
Let me first state that this technique is rated at a 5.75 on my “Difficulty Scale of 10”. (Ten is being the most difficult.) The best part of this exercise, is looking at the completed ring, ready to give to your client.
This essay was posted & submitted a few months ago, but I’ve carefully updated many of the photographs, only this week! In the many weeks & months to come, I will be constantly upgrading some of my previously written essays, by using basically the same (with revisions) text but more interesting photographs.
During this technical essay on Diamond Setting, if there is a sentence, or even a paragraph worth remembering. I will “bold” a technique, that is so very important.
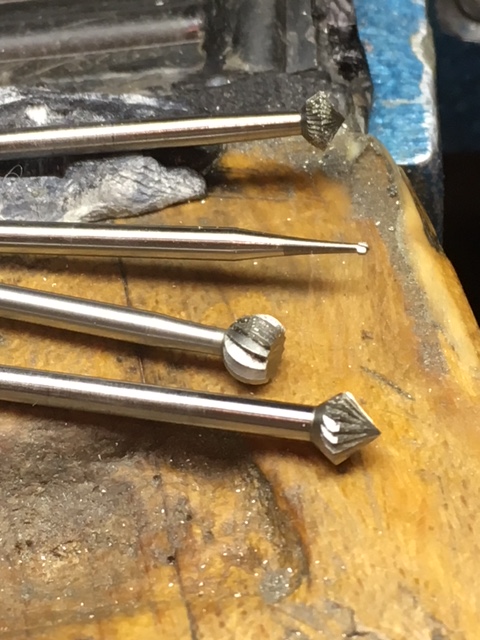
What setting tools do you need?
A=>156C “Carbide, Under-Cutting” bur at 90-degree angle._
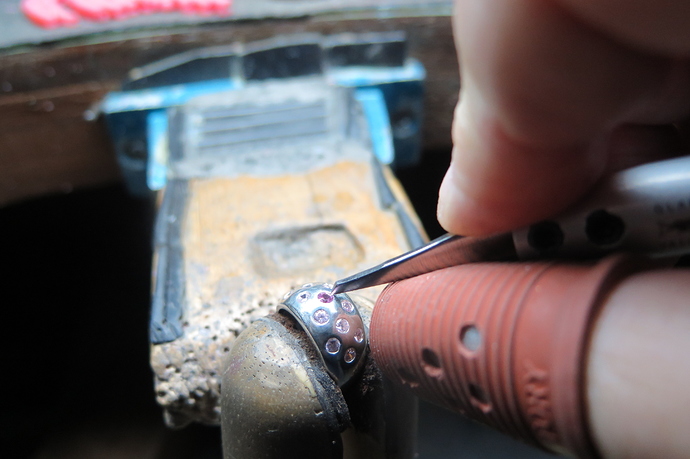
B=>Wax-Dob. This is used for picking up the small 3.0mm stone.
C=>Riveting hammer with a clean ‘hitting’ face.
D=>My favourite Pumice wheel, “Flat-Face at #180 grit.
E=>The Onglette #2 graver, modified to cut only on the “Right-Side”.
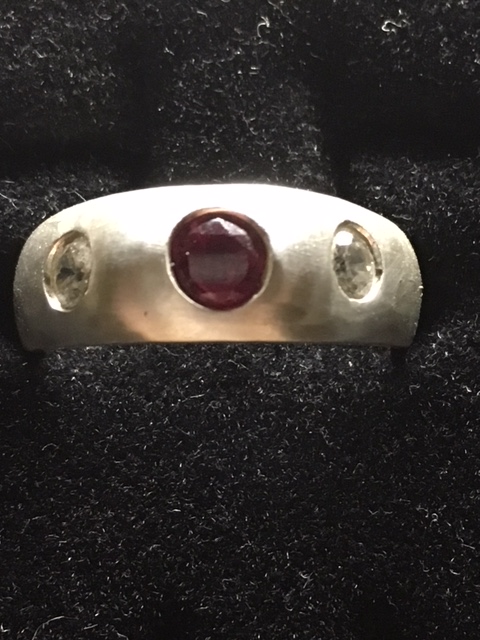
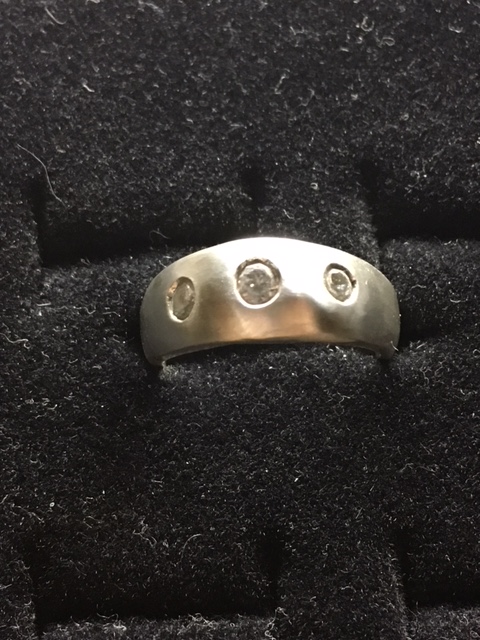
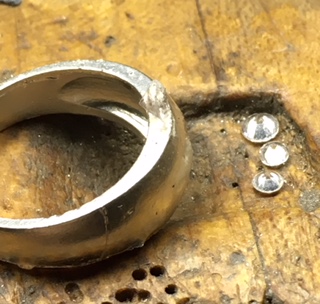
What does the “Demo-ring” look like? On the right is the ring just out of the casting room, the ring of the left is the ring ready for stone setting.
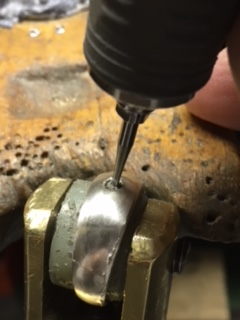
The very first thing we do is to “counter-sink” the opening from underneath! This will make the opening uniform in shape & enables the dirt & skin particles from collecting. This might sound ‘gross’ but this is what really happens! I usually speed the round bur to gently smooth out the hole. If you wish to polish your inside and underneath section of the ring, this is the best time to do it!
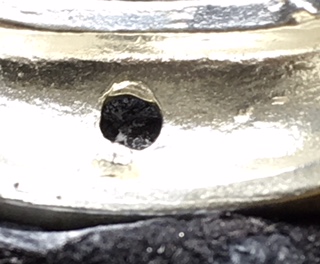
On this demonstration, we will be using a 3.0 mm cz. If you would use a larger stone, there would be a danger of the ‘Culet’ from protruding from underneath this ring! When I’m hammering on a steel mandrel with no groove/slot, the chances of breaking the “Culet” are so very good.
Remember, the larger the stone, the more thick the ring has to be… your decision!
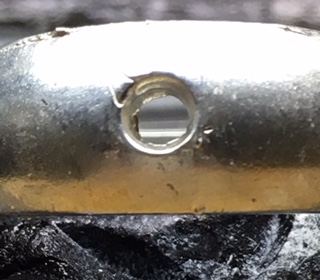
How deep do we make the “bearing cut”? I’ll show you a little diagram to help you, here is the text version.

You should look at your bur for the 3.0 mm stone, first of all the bur should not exceed 75% of the diameter of the stone.
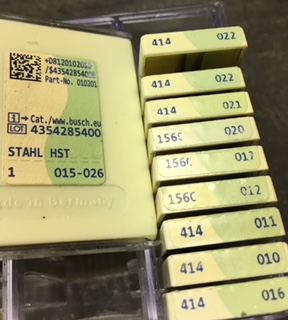
Let’s suppose for this demonstration, the bur size is #022, or 2.20mm’s in diameter.
Do you see where the teeth of the bur end, that is just near the shaft of the bur?

Now imagine that the top of the teeth is the “Table” that is how low the stone will be, interesting formula? The edge of the teeth on the bur is just where the bearing-cut will be. With this approach, you’ll never go wrong, no more using your dividers, no more making ‘depth-mistakes’.
Prior to starting the setting, I’ll just lightly buff the top of the ring setting area, why so? I don’t want any strong bench-lights reflecting in my eyes. I can use a simple paper-emery wheel to do just that!
Why did I ask you to select a smaller bur? The answer is to navigate around the opening without touching any other part of the hole.
The bearings must at the same depth at all areas around the hole, if your bearing is tilted and not being carved at the same depth, then will your stone sit crooked.
How deep into the wall do you cut? Another easy answer, drill just enough so the teeth of your bur don’t get too deep into the inner-circle of the ring.
What I do is to cut three (3) times around the hole, cut one third, turn your ring slightly and cut, stop again, turn the ring once more and cut for the third time. Each time use your 10x power loupe, examine for your depth IN and AROUND the hole.
The bearings must start and finish at the same level/depth as you turn the ring. After all, “the stone has no brains”, it just rests where you cut!
Here is the tricky part, if your stone doesn’t slide in, here is another great idea! Get a slightly larger bud-shaped bur and cut an opening at only at the rim of half of that hole.
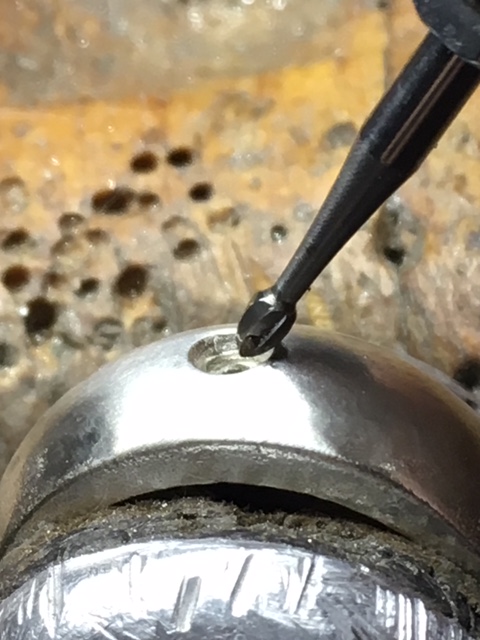
Your result is that you might have an Oval-shape only at the top of the rim, then you can slide your stone in easily and with no effort.
You can now carefully & gently push your stone in with a Copper or Brass pusher to just level it, into the ring. If you hear a little 'snap, or a click sound, your stone has found it’s permanent ‘home’.
Don’t use a metal-pusher or you could break your stone. Please make sure that your ‘table’ of your stone is at the same depth or even lower than the metal. The answer is given in the next paragraph!!
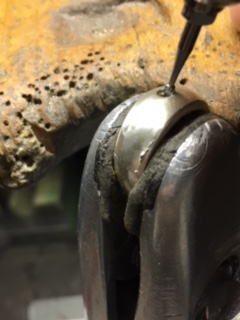
Now that this stone is now ‘resting in its new home’. We may now start to hammer the metal toward the edges all around the stone.
You must hammer-hit the metal to move the metal towards to facets of the stone, never hitting it ‘down’. Start at the hours of the clock 12:00 to 6:00 then 9:00 to finally 3:00. Examine to see if all of the metal has joined to the facets, then continue all around ‘the clock’.
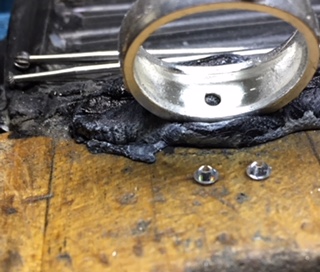
Just how do I know if and where the hammer ‘hits’ are making contact?
I use a black marker and liberally black paint the area where you think the hammer will touch. In fact go to the whole route and just paint all over.
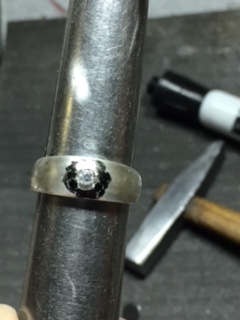
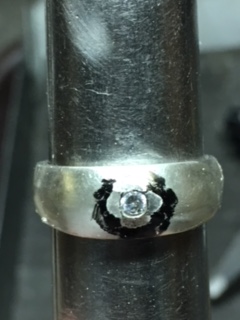
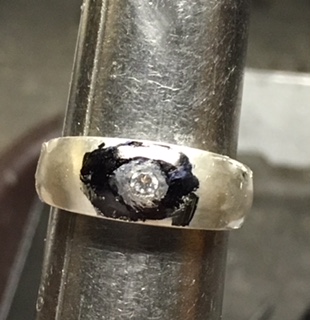
Every time the hammer hits the metal, a little amount of the black pain is removed. Now you know EXACTLY where your hammer is making direct contact, isn’t that just a nice little exercise?
If you hit ‘down’ in a vertical position, the chances are just fantastic in breaking the ‘table’ of the stone. This is only if your stone is set higher that the surrounding metal!
We must now ‘Bright-Cut’ all around the inner-circle. You can (if you’re right-handed) cut towards the left. Turn the ring to the right, cut, and turn the ring to the right, cut until you’re finished.
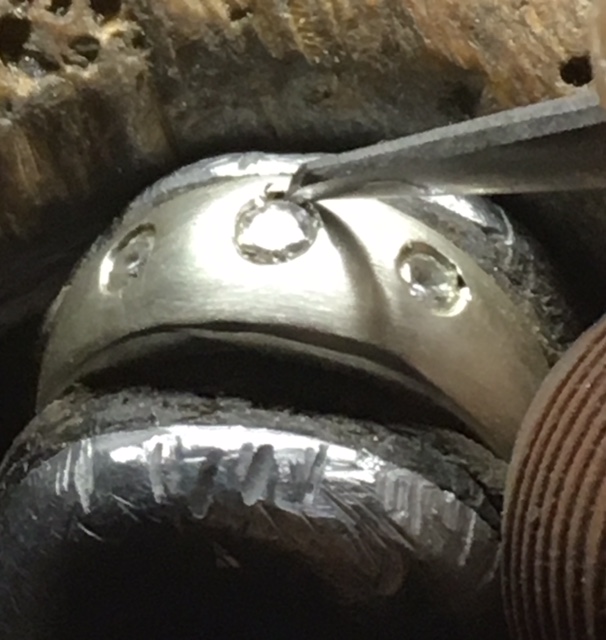
Keep the Onglette graver always in a near vertical position, therefore letting the ‘barrel-shape’ angle of the graver give you the correct inside-angle.
After some experience, you will not see any of that ‘faceting’ on the inside of the newly Bright-Cut surface!
Use your “Flat-faced, Pumice #180 grit wheel”, now carefully remove all of the hammering marks that have just taken place. For this setting project, keep your pumice wheel edges nice and sharp.
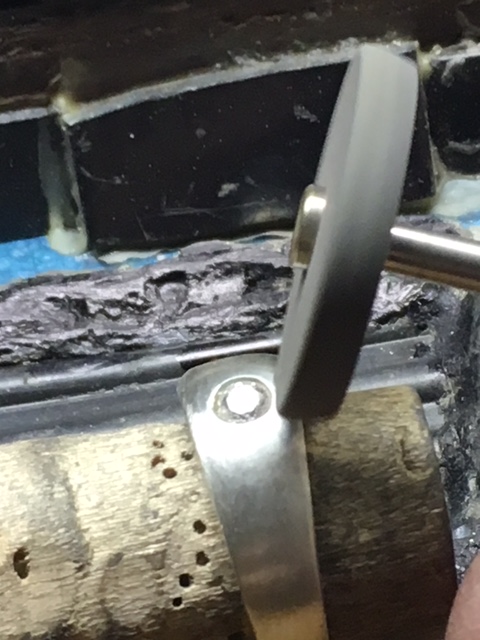
Avoid removing too much surface metal as you now will have a fantastic looking ring when completed!!!
Try not to have a flat surface on the ring, but gently sculpt the surface with your Pumice Wheel into a slight curvature to this ring! This ring should not have any flat areas!
Keep setting & practicing until this project ‘feels easier’ with you, as it will in a very short time! It is much easier to set with a larger stone as you can get used to your new tools. Then slowly start with a progressively smaller stone. I find no problem in Gypsy-Flush Setting 2.00mm stones, but that’s after my usual 2,000 rings of experience.