Neil…The nice thing is that you can start all over making whatever adjustments you think will change the outcome. My guess is that those pits will just stretch and get longer, but never go away. That being the case, you can just not use that part of the ingot or try and fill it once you are done doing any rolling. Keep in mind that whatever you do prior to rolling, the ingot has to be able to fit into your mill. My big Durston loses gear contact at about 10 mm. I try not to go over 6mm for fear that I might damage a gears. Julie offers a good explanation about their origin, but in the end, they are just pits that need to dealt with. Keep us posted…Rob
Julie, I think those little pits were bits of graphite from when I stirred the melt in an older graphite crucible. I drilled them out and after some forging the pits were gone.
Annealing the 200 gram (6.4 OZT) ingot with a Paige MA-2 tip worked o.k. I tried to buy a Paige melting tip for my Meco but Paige is out of business. The owner knew his stuff and made good products but he had problems. It is a shame how that turned out. Impgen has a melting tip for my Meco, but costs over $200 and no mention is made of its melt capacity.
I’m wondering if I can put the ingot in the cast iron mold and remelt it in a kiln so the silver flows and fills the mold evenly. For another day.
Rob, the ingot was 11.5mm at its thickest, so would not fit in the mill. I have it forged down to 8mm but want to do more before rolling it out. You are right that 6mm or less is better for the mill’s gears.
Julie, I do use large pieces of sheet. I used some of my last to make a 3" diameter disk laser engraved with my granddaughter’s picture and “Olivia’s First Christmas” above that, “2025” below, as a Christmas tree decoration. It came out nicely. A 3" square piece of purchased 20 ga. Argentium would weigh 2 OZT (and cost $195!). Rolling out a 3" piece (plus amoeba-like excess) would likely take 3 OZT, which is no problem with an electric furnace.
I used to buy Argentium in 6x12 inch sheets, but now could probably fly to London and back for less.
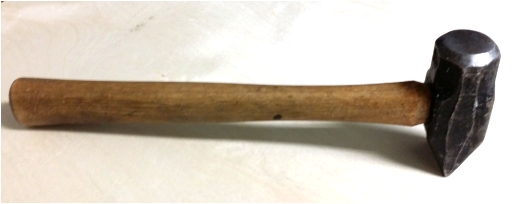
If I had the time / energy, and if I could find a strong enough motor that does say 30 rpm, I’d be tempted to rig up an eccentric cam to raise & drop a 2 lb. hammer like a mini drop forge. ![]() Hours and hours of forging is not my cuppa.
Hours and hours of forging is not my cuppa.
2 Likes
Neil…I have become obsessed with power hammers and how to scale them down to do just what you need to do. I will send pictures of I ever figure it out…Rob
Rob, I’ve got it all figured out, having learned applied engineering in my youth from Rube Goldberg. Young’uns here should look him up and get a proper education.
This is my go-to hammer for correcting all manner of things including door-to-door salesmen who ignore ‘no soliciting’ signs.
It just needs a hole at the end for a rod through it to act as a fulcrum and a motorized cam near that to raise and drop the 2 lb. head.
The other part is a scew-feed mechanism to move the ingot under the peen, with a reversing switch so the whole ingot gets what it has coming to it.
I just need the right parts and a little time to put it together.
![]()
The funny thing is, it might actually work.
Neil, this is very close to Boatyard Engineering. We used to develop this kind of tooling just cuz. And you are correct. Almost nobody knows who Rube Goldberg was or why we still feel his influence today.
“I just need the right parts and a little time to put it together.” I think the hardest to find parts will be the four fingered white glove with the three lines on the back.
Don
1 Like

Hi,
brehpohl book also explains the “why” forging and rolling to a 50% reduction is important…metal structure, etc…something about how rolling creates a “shearing” effect to the surface…as you roll/ forge, this effect is created deeper and deeper into the metal thickness…
if you roll less than 50%, your ingot is more compressed at outer portions of ingot…as well as this compressed area has been sheared/ moved/slid, stretched sidewards, whereas the internal mass has not moved the same way…
julie
1 Like
Hi Neil,
that looks like a great sledge hammer!… am particular to that type of head…compact..center mass…easier for me to control…
Julie
1 Like
Hi Neil,
I once called Miller-Smith to ask about torches…and tanks…they are so informative!…sadly I never seem to retain the details of good information…i always end up researching again later…
a few things that i vaguely recall from the conversation was that the torch heads are designed with different flow rates…and the fuel and gas containers have their own flow rate too…and it is important to know about this when using the torches…
ie: i needed the larger smith versa torch to melt more than like 3 ounces…higher flow rate torch, or some such…
and…then…my larger smith versa torch had a flow rate that was too high for a disposable propane canister…
and so, i needed to use it with a larger propane tank…outside…and get a propane regulator, etc…
it was a very enlightening conversation…i took notes as fast as i could…but my notes are hard to read (haha)…
my above comments are just sort of general and not meant to be instructional…but just as a topic for further research…
Julie
Julie, that agrees with what I’m experiencing.
The fuel setting on my Meco is barely open, the oxygen concentrator is maxxed out, and if I feed any more fuel the flame gets huge and entirely yellow.
A better oxygen supply might help but I think the MA-2 tip is not designed to take all the Meco can deliver. My memory is that the MA-2 is intended for annealing. (Maybe that is what the A is for).
Now that the ingot is down to 6mm thick (from 11.5) the silver does glow red. It works fine for reasonable annealing, would not melt 200 grams.
It is looking like I will have this sheet sooner than if I ordered it from Rio, but that’s down to UPS Ground, not how efficiently I’m working. ![]()
Neil…I keep a small O2 tank with a regulator and check/flashback in my shed and use it when I am doing a bigger melt with my Meco. This tank fill is at least two years old. I use the Paige MX tip, but I have also used the Little Torch melting tip. They both work well. I keep the O2 pressure in the 5-6 PSI range. I bought an electric melting furnace a couple years ago because I thought that I would be doing bigger melts, but it doesn’t happen very often. It too works well. The hammer that I am building in my mind late at night when I can’t sleep is like a manual coining press. It is a 1”Xmaybe 24” - 36” long solid steel rod that runs inside a hollow piece of thin walled pipe. There is a pulley welded to the top of the pipe and a piece of cord or belting that is tied to the top of the steel rod and goes over the pulley. The rod is manually pulled up and allowed to drop by gravity on to whatever sits on the anvil. I have yet to figure out how to attach it to the anvil in such a way that it can also be easily removed. More when I know it…Rob
1 Like
Rob, were you anticipating? ![]()
Yes, I will make another attempt, but this was a 99.9% success.
I had a piece of 14 ga. sheet I could cut at least a 3" x 4" rectangle from. It looked very nice - no cracks, pits, etc. and I should have taken a picture of it to post here.
It was very slightly domed in the center so I annealed it and had the dumb idea to press the dome down with a charcoal block. It was a dumb idea at least because this was Argentium which you don’t mess with when it is that hot. It did crack. No biggie since this was just to learn how to make sheet with my equipment and scrap. And to learn what not to do…
There was one thing I don’t understand and maybe someone can explain. I have rolled sheet metal lots of times. The metal always curves. This time I got ripples like waves on water - several curves, not one. That made the high spots too thick to fit into the gap between rollers.
So going against what I’ve read pretty much everywhere (roll in the same direction) I rolled diagonally from each corner. It worked a treat.
Other than (re)learning not to mess with very hot Argentium, I really learned to not pour thick ingots! My next attempt will be to use the larger mold so I start out with a wider ingot, and keep it to maybe 4 - 5 mm thick from the start.
Neil…If you look at the point where the two rollers contact the metal, it is very narrow. So all that force is directed to a very small spot. It is almost a shearing action. Any misalignment of the rollers will cause the metal to bend up of down. Any variation in the gap from side to side will cause the metal to curve as it passes through the rollers. I have this problem right now and need to fix it. My ingots seem to act this way when I first start to roll them, but as they get thinner and the internal forces settle, the ingot straightens out. I think that it also helps to try and do the roll continuously with out stopping. At 76, this is hard for me to do without help. It might also help if someone could guide the metal in while you do the rolling and pull the metal as it comes out of the rolls. Keep in mind that there is clearance between the gear teeth. Any variation in this clearance could create a slight change in the gap between the rollers. These movements can also be caused by an incomplete or unequal anneal. I guess that you put weight on the Argentium ingot when it was still too hot. I only use Argentium for ear wires, but I have seen this happen when I was working with a piece of 18 gauge Argentium for a practice project. I had to remind myself why it happened as it doesn’t happen with sterling. I too will run a wavy piece diagonaly to try and smooth it out after a final anneal, usually at the last roller setting. This is when I wish that I had a wider flat section to my rollers. Julie has all the scoop on what is going on metallurgically, I just know what happens, possibly why and how to fix it. Keep us posted on your progress and good luck…Rob
I don’t use any thing but Sterling in the mill and I experience all of the issues described so far. The wavy sheet, the curling as it goes through the mill, doming in the center. I have put some of it down to variable speed as I hand crank the metal through the mill. The solution to the waves may be an electric drive on the mill but I wonder if the people with wheels instead of cranks have the same issue. Or I could just take very small bites. I have never been overly concerned about the curling problem. It seems as I try to guide the metal through the mill if the work is held up on the in feed it will curl down on the out feed and down in the in feed, up on the out feed. By the time I get to 20ga the curling is mostly gone. I have less curling if I leave it alone. The doming problem for me may be an issue of inadequate annealing. The edges take up heat quicker than the center. If it is rolled before the center of the work is normalized to the same degree as the edges will the edges roll through the feed faster than the center and then become harder than the center? The edges now move together and the softer center gets dragged along. I could test this by drawing/scribing a line across the work with a straight edge and then testing it with the edge each time it rolls.
I have to believe that nothing is new to any of us and all these problems have been noted and solved by others before us. But it keeps things interesting.
Happy New Year,
Don
“I have less curling if I leave it alone”
By this I mean that if I don’t touch the sheet, rectangular wire, ingot, what ever I am working with while it goes through the mill I have fewer problems as I am making the end product.
Just clearing that up.
Don
Hi Neil,
some morning thoughts…
In addition to checking your roller gaps, did you forge to around 50%…? (ie: optimum metal structure), and then…perhaps take smaller bites? (ie: roll more often, less reduction each time)…I love tedious minutae, so i take small bites…i never have to work too hard to turn the hand…i could do it with one hand…
as others mentiioned, the curving often mysteriously disappears during the reductions…it kinda makes me think that internal metal structure might have something to do with it…(ie: the internal structure of the metal is different than the structure nearer to the surface, and thus behaves differently under pressure…?…and same thoughts for incomplete annealing…and/ or coupled with roller alignment, etc…
julie