Tools that are needed for easier Diamond Setting**!”
This essay has taken me initially 8 weeks to ‘write & edit’. It was first written in 2005 and has been updated numerous times! This is the very first time using photographs as the first writing I didn’t have the ‘photographic library’ as I do now.
From the Diamond Setting bench of “Gerry Lewy!”
Optical – Visor, w/ #5 lens attached.
Saw frame with adjustable frame length.
Saw blades of number # 4/0.
Oil stone, double sided, “Arkansas”, 8 inches in length.
Bud burs, 3/32’’ shaft, numbers # 006 - # 012.
Ball burs, 3/32’’ shaft, numbers # 006 - # 032
Under–Cutting burs; aka “156 C” # 010 - ???
Cup Burs, aka “77 B”, #010 - # 022
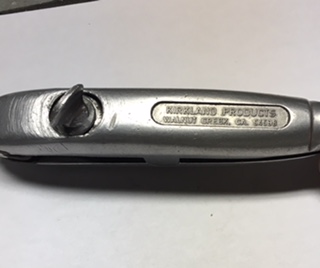
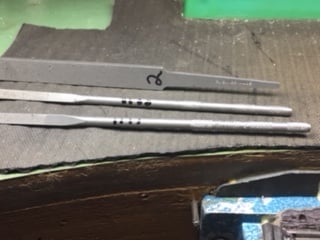
High Speed Steel bur @ 90-angle, 4.50 mm.
Wooden Bur boxes
Pillar files, wide, #2 - #4 cut, 20 cm’s. In length
Triangular files, #2 - #4 cut, 20 cm’s. In length
Blue Gray pumice wheels, #180 grit, Tapered & Flat edge
Pink Pumice, wheels (Flat &Tapered) #1,000 grit
Emery paper “Snap-On” disks, (Medium grit)
Pliers, small sized, with pointed jaws
Pliers, Large sized, pointed jaws
Side Holding, metal ring clamp
Setters Hold-It, mini-vise
Tube–Setting, clamp
Wooden ring clamps
Nylon Brushes and more.
Lubricating oil, light-viscosity
Emery Paper (as described)
Polishing paper (as described)
Paint stirring sticks, for the Polishing & Emery papers
Onglette, Gravers # 1, and # 2
Flat, Gravers # 40
Mandrel, with groove
Ten Power loupe
Pair of Safety glasses
Plastic Peg Board
Elbow Cushion
Thumb guards
Mixture, of Bee’s Wax & Charcoal
Florescent light bar
Hand-held Hammer
Brass, Copper & Steel pushers
Ergonomic chair
Steel, Ring Mandrel with groove
Flex-Shaft, hand-pieces
Flake Shellac
Ultra-Sonic cleaner
Steam Machine
Reciprocating, Flex-shaft Hammer
Butane, Mini-Torch
Alcohol lamp
Interchangeable, Graver handle
EXPLANATION & DESCRIPTION OF MY
DIAMOND SETTING TOOLS!”
My personal choice of tools and why!
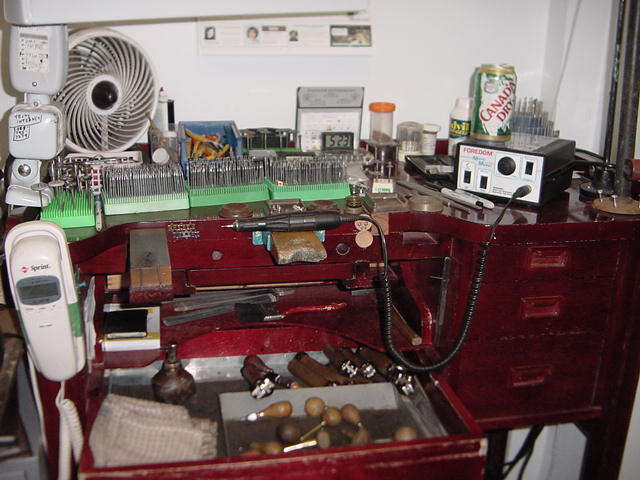
I have been asked of my choice of tools, on many occasions.These requests came from my students, or even some folks on another jewellery resource educational programs. After careful deliberation, I have compiled a detailed list of some necessary items that every setter should have within arms-reach. All of these items should be, as I just stated, “within arm reach”! Not forcing your hand or your fore-arm to mess up some diamonds laying systematically on your bench. But your tools should be carefully laid out, basically, on the side of your bench-top.
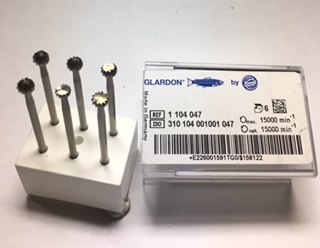
High Speed Steel burs
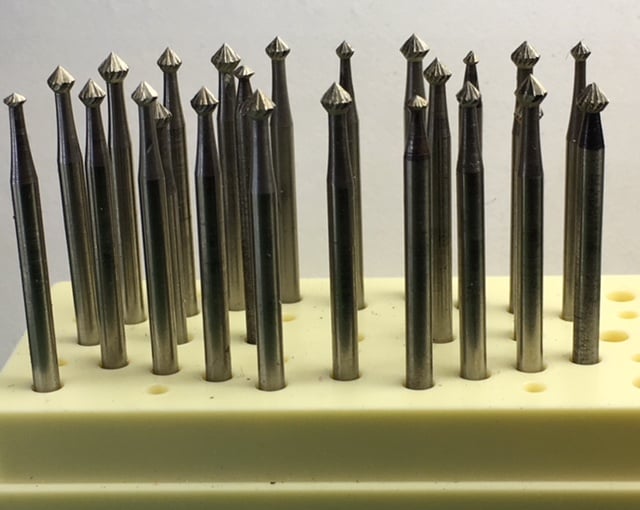
This fantastic bur does what that the ‘156C’ cannot do, it cuts deeply into the metal at a ‘controlled rate’. There is no guessing or need to be repeating each cut. This one bur can in one simple cut, make a place for the Pavilion to rest against. The teeth are so further apart, it literally ‘chews away’ at the metal. This same bur will make a ‘bearing cut’ at the same time in cutting. The HSS bur is “Case-Hardened” and is meant for long-term, aggressive usage!
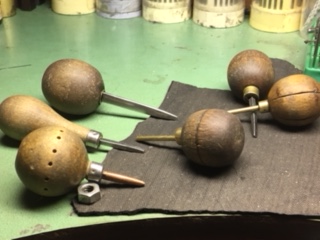
Different types of Duplex, Flex-shaft handles for Diamond Setting! Style #30

This handle in the center pf the photograph is great for jewellery repair & manufacturing, but is it good for Gemstone Setting? NO! Here are the reasons for and against!
Against: It has very limited, or no freedom to move the bur around the item for setting. It is literally physically ‘joined’ to the heavy shaft leading from the motor. A very poor choice of a handle for setting! This handle does not come with a “Duplex, Flex-shaft!
On a “Scale of 10, For Setting”, I’d give it a 3, maybe! It has a very wide handle for the setter to grasp and the fingers cannot get too close to the setting.
Duplex, Flex-shaft; with finger tightening collets. Style #8D
Pro: This is a very reasonably priced handle shown on the top of this photograph. Under $100.00, for a beginner in setting, I suggest this for a start. Your fingers can almost get close to the actual stone-setting. It is quite easy to hold and the ‘flex’ gives the beginner-setter more hand-freedom. Out of a “Scale of 10”, I’d give this handle a definite 6.5!
Against: It still has ‘some restrictions’ in the movement. If the Flex-shaft needs repair, it can be quite costly, as much a new handle. It is not meant for continual use, the Flex-attachment does and can overheat doing long-term setting.
“Marathon”, Micro-Motor & Handle!”
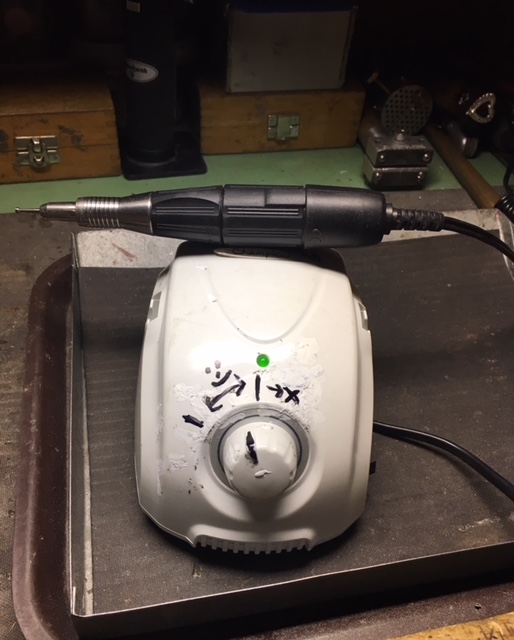
The only apparatus you need to buy! No heating in the shaft as there is nothing to heat up!
Very little need for repairs. The setter’s fingers can get relatively up-close during the setting processes. There is no need of any topic of ‘limited movement’ as with the previous handles, TOTAL FREEDOM AT ALL TIMES! The ultra-quiet, ‘internal cooling’ fan is in the handle. I will rate this at a definite 15, on my “10 Scale of Approval”!
Against! I have not as yet had any problems in my many years of owing this great setting motor and accessories. Just a wonderful tool to own, as I have two, one for travelling to meet my students and another at my office.
“Disclaimer of Chosen tools!”
I will use the correct names of manufacturers during this detailed selection of tools. There are other manufacturers with brand names, but the choice is yours to make. I will only suggest a setting tool that I am currently using. Do not take “my choice” as the only tool, as your new preference. Experiment, modify, now you have ‘base’ to start from. I am not here to teach you, but I am here to assist you in making the right selection when purchasing the correct setting tools. If I make your purchasing easier and making you the more ‘informed buyer’, so be it! Then this essay has been worthwhile. If I show you some easier techniques in setting along the way and you learn them, fantastic! Also if I am writing in too much in detail, well that’s what this discipline is, ‘full of details’. I’ve only now touched the surface. You are using very sharp instruments, by all means use safety items that I will be explaining further on in this essay.
Optical Visor.
I suggest now that I would normally use a number #5 lens, why? If you prefer a number #7 you will have to bend over the bench peg closer to see. This will give you neck strain, and upper back pain will shorten your work time at the bench. I notice that some setters are using only number #3 lens.
This again is not strong enough and the length from your eyes to your bench-peg is too far. You might be having to keep the “setting object” at a greater distance. So let’s just stick with the favourite lens of number #5.
Saw Frame! This well used item should be finger tightened, not with the pliers bolting device. If you must tighten the saw blade, try only finger tight. You might purchase a saw frame that will allow you to extend the length of the frame to make sure you are grasping the blade fully.
You should oil the blade holding-clamps near the “wing-nut”. Occasionally clean out the inside of the grasping areas of the blade, as dirt collects in these jaws and do not allow full gripping action.
Saw Blades.
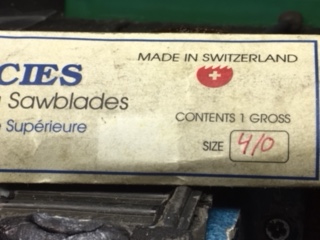
I will only use #4/0 blades because for the width/thickness and the number of teeth per inch. I always buy one gross, (twelve dozen). In case of an emergency if you only have 12 units you might break a few at one setting and be totally short during the off hours of the local tool supply store. Buying one gross could be cheaper for you as well!
Arkansas, Oil Stone
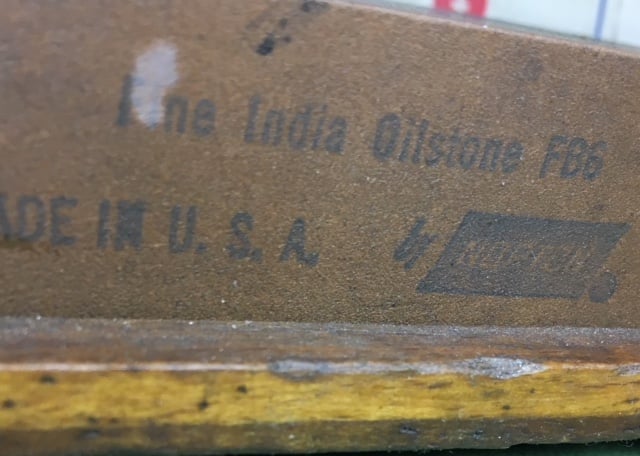
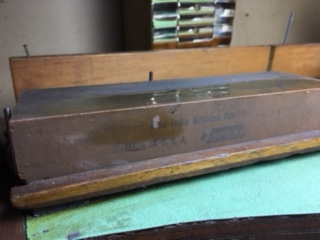
Here is the correct name of the right tool to use. Buy only a “two-sided” stone. Each side has the same grit and texture on BOTH sides. When the one side is worn with multiple grooves from your graver use and with ridges from your other tools, turn it over and “voila! New stone again”!
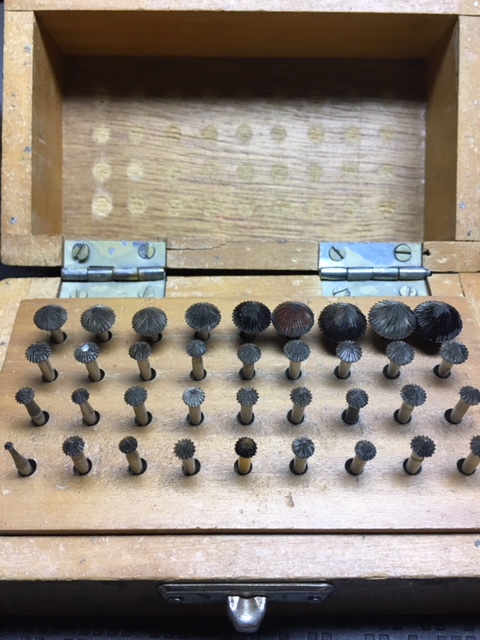
Wooden Bur Boxes.
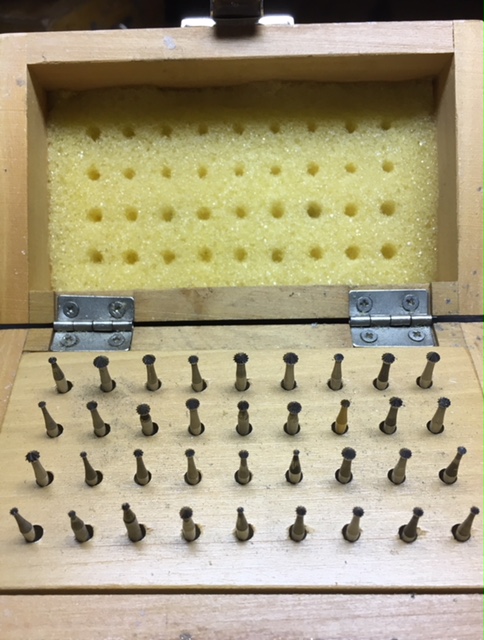
It is here I use many boxes, one for each selection of precision type of burs, .05 mm - 1.5mm twist drills, large bud burs (#031 – # 045), large round burs (#030 – #050), large undercutting 156C, and then two boxes of new & H.S.S. 90 angle bearing cutters. Six boxes in total kept within reach. There should be a fine layer of padding in each box, try and keep your burs moist with little dabs of oil, at all times. Rust is our enemy!!
Lubricating Oil.
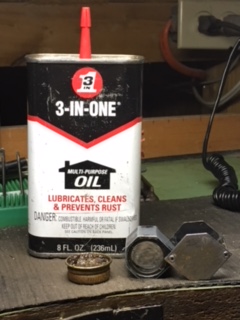
I use either “Norton” or “3 &1” oil that can be found in any local hard-ware supply store. If failing this, try ordinary motor oil, with a slightly thicker viscosity. Keep all of the drills and burs well lubricated, I’m not asking you to do this, “but pleading with you”. These little steel burs just love to be well taken care of. Some of my burs are $10.00 to $30.00
EACH, then I make sure my initial investment is nicely looked after. “Oil is cheap…not the burs!!”
“Half-round, large burs”
What is this little item? You will see my new addition to this tool selection, it’s so simple. It’s a wonder that no one else has thought of this. A half-round, grind off the top part of the curve bur is used as a Cabochon fitting bur. I would use my bench-grinder for this process. The gentle curve on the bur, should be the same angle as the sides of the Cab. Stone. With this new designed bur, there will be no wasted metal being removed as to the correct inside concave angle to the wall of the bezel.
Nylon brushes
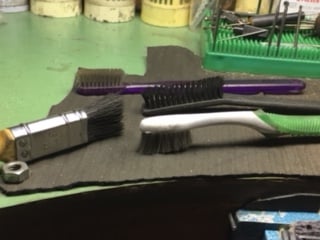
I use four kinds of brushes, one is very common, how about a simple toothbrush and a “paint-brush” with a 3/4 inch width. This soft bristle is used only when you are cleaning gold ejecta with the diamonds still sitting loose in the gold.
This will clean the surface but not jar the unset stones. When you are cleaning the bearing cuts in larger claws, you could use a toothbrush. Not tomention that before each diamond is inserted into the gold for beading or claws setting all metal MUST BE REMOVED!
Pumice wheels! #180!
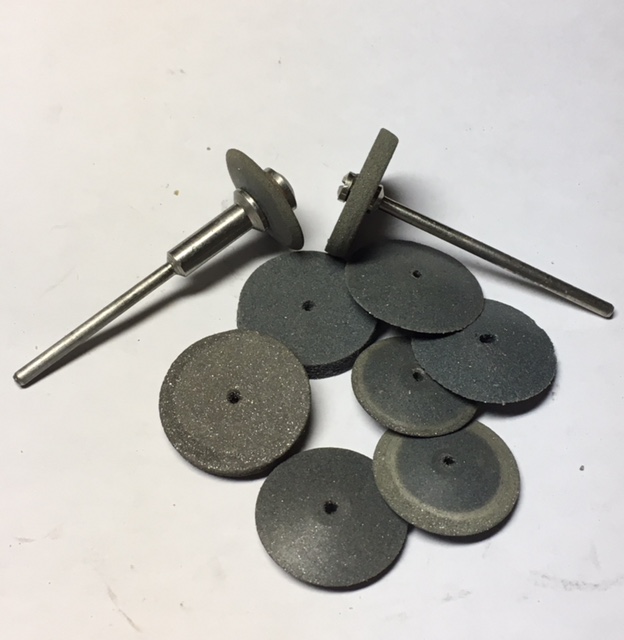
When I finish setting, I will always look after my finished setting project with a thorough 10x power inspection. It is a part of my “quality and pride”. I always entertain the idea that someone else will inspect my setting and be critical. I don’t wish to ‘just set and walk away’. The pumice wheel is what separates the “setters of quality”, to just stone-setting. I will buy $250.00 per year, just on purchasing the different kinds of pumice wheels. There are two wheels in my bench, Flat Edge and the Tapered Edge.
Each of these two designs are very essential in cleaning the gold. I will use these to prevent severe cloth-wheel polishing to clean my work. If I want sharp edges on my claws, the only method is to enhance the design is with these two little ¾ inch, #180 grit, pumice wheels. Their colouring is a “bluish gray”.
Emery Paper Disks The disks I am comfortable with the Moore’s Discs “Medium"Grit.
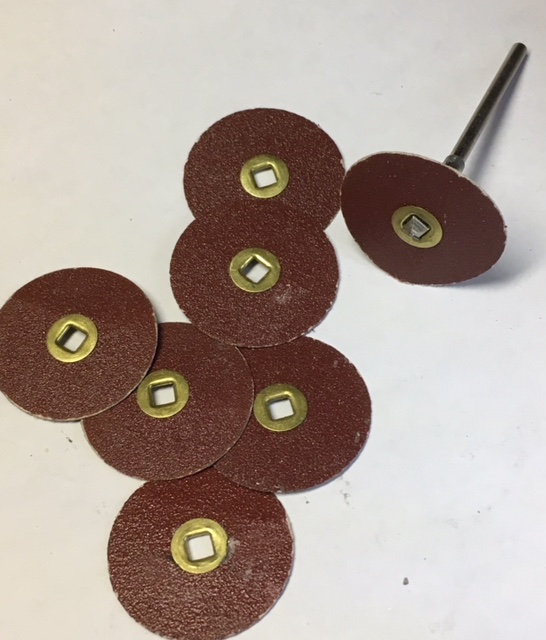
I find that the finer grit do wear away to the paper base too fast. The “Course Grit” take too much off the gold at one clean-up. Now with the “Medium” grade, you are able to control the sanding process.
Do not speed up the motor speed to just to remove any marks on the gold. I would use a slightly slower speed, this way you can moderate the cleaning on the finer sections near the diamonds. “Control, is the name of the game”! You have more control of the emery & sanding process
Pink Pumice Wheel
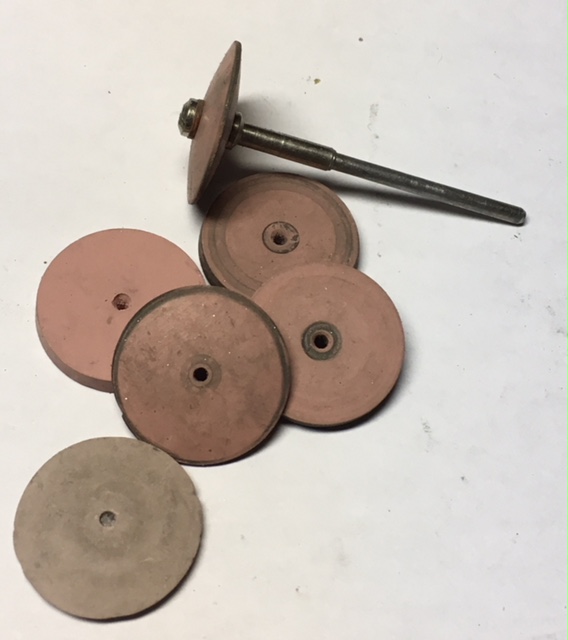
Another pumice you could buy is a “Pink” @ #1,000 grit, coloured wheel. This is used only for trying to assist the polisher to get into areas where he can’t with his thick buffs and split-lapping wheels. This wheel has a grit of #1,000, instead of the #180 grit as described before. You should be very selective in the type of wheel & shape you need, fine point or the flat-edged wheel. The final results will be absolutely fantastic!
Metal Ring Clamps
Many years past I bought some metal ring-clamps. Bad move! I found that my hand could not perspire. When you are gripping sometimes with tension, the hand has an awful means of getting rid of the build-up of perspiration, but with wood there is no effort in accomplishing this natural action. Metal can be heavier and cooler to the touch. The “locking devices” can interfere with your hands is not satisfying to the setter for long periods. There is one kind of ring clamp around, it has a “screw and hinged” (similar to a hands or fingers. So who wants this? As for wood, the tapered insert that is used in between the wooden clamp jaws have a tendency to break the brass-holding secure-rings that wrap around the clamp. If you are not tapping it into the clamp securely, the ring will become loose. The life of the clamp is measured in weeks. Why? When you attempt to hammer-tighten to push the ‘triangular peg’ further into the clamp, just to secure the ring, the clamp actually breaks. My personal experience now stops me from buying this clamp again. Good-bye clamp! I know, I have one of these for display purposes only! If you prefer the screw tightening metal clamp, you can modify the screw as this might cut into your hand, I just made mine smaller.
Ten Power Loupe
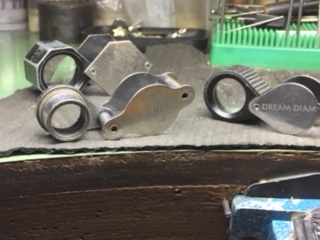
There are many brands and designs on the open market. I would suggest a “Triplet Magnification Loupe” This style of apparatus has three lens in the eye-piece. The other kinds are just hand magnifiers, nothing else. There is a common aberration of the lens with these mediocre styles of lens. Basically, you get what you pay for! For an honest, dependable magnifier, use the “10x Triplet”, nothing else!
Elbow Cushion
If you don’t work without an elbow cushion, you will endangering your little bunch of nerves in your elbow-slot. This area is called the “Ulnar-Nerve” if you are continually leaning on them, you will definitely find that your fingers are tingling and some numbness will occur in years to come. I wrap a few cloth hand towels or face cloths in a little bundle and have them permanently sitting in my corner of my bench-pan. As I am right-handed, there is where my left elbow will be resting.
Plastic, Peg-Board .
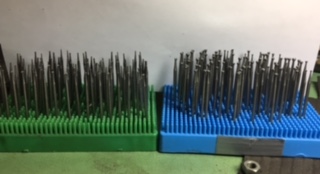
This is one of the simplest space-saving requirements for any jeweller or diamond setter. Simple, basic, clean to use, and orderly. Did I say orderly? I have only 7 of these little pads on my bench. I never allow loose burs of any size, to clutter my working area. It is here, that I use these boards to hold my burs in sequential order (if needed) and each of these boards have only one shape of burs. I know at a moment’s instance where each bur will be located. For an estimated $12-15.00 each peg-board, its money saved in time lost in locating one bur among hundreds.
Bench Grinder!
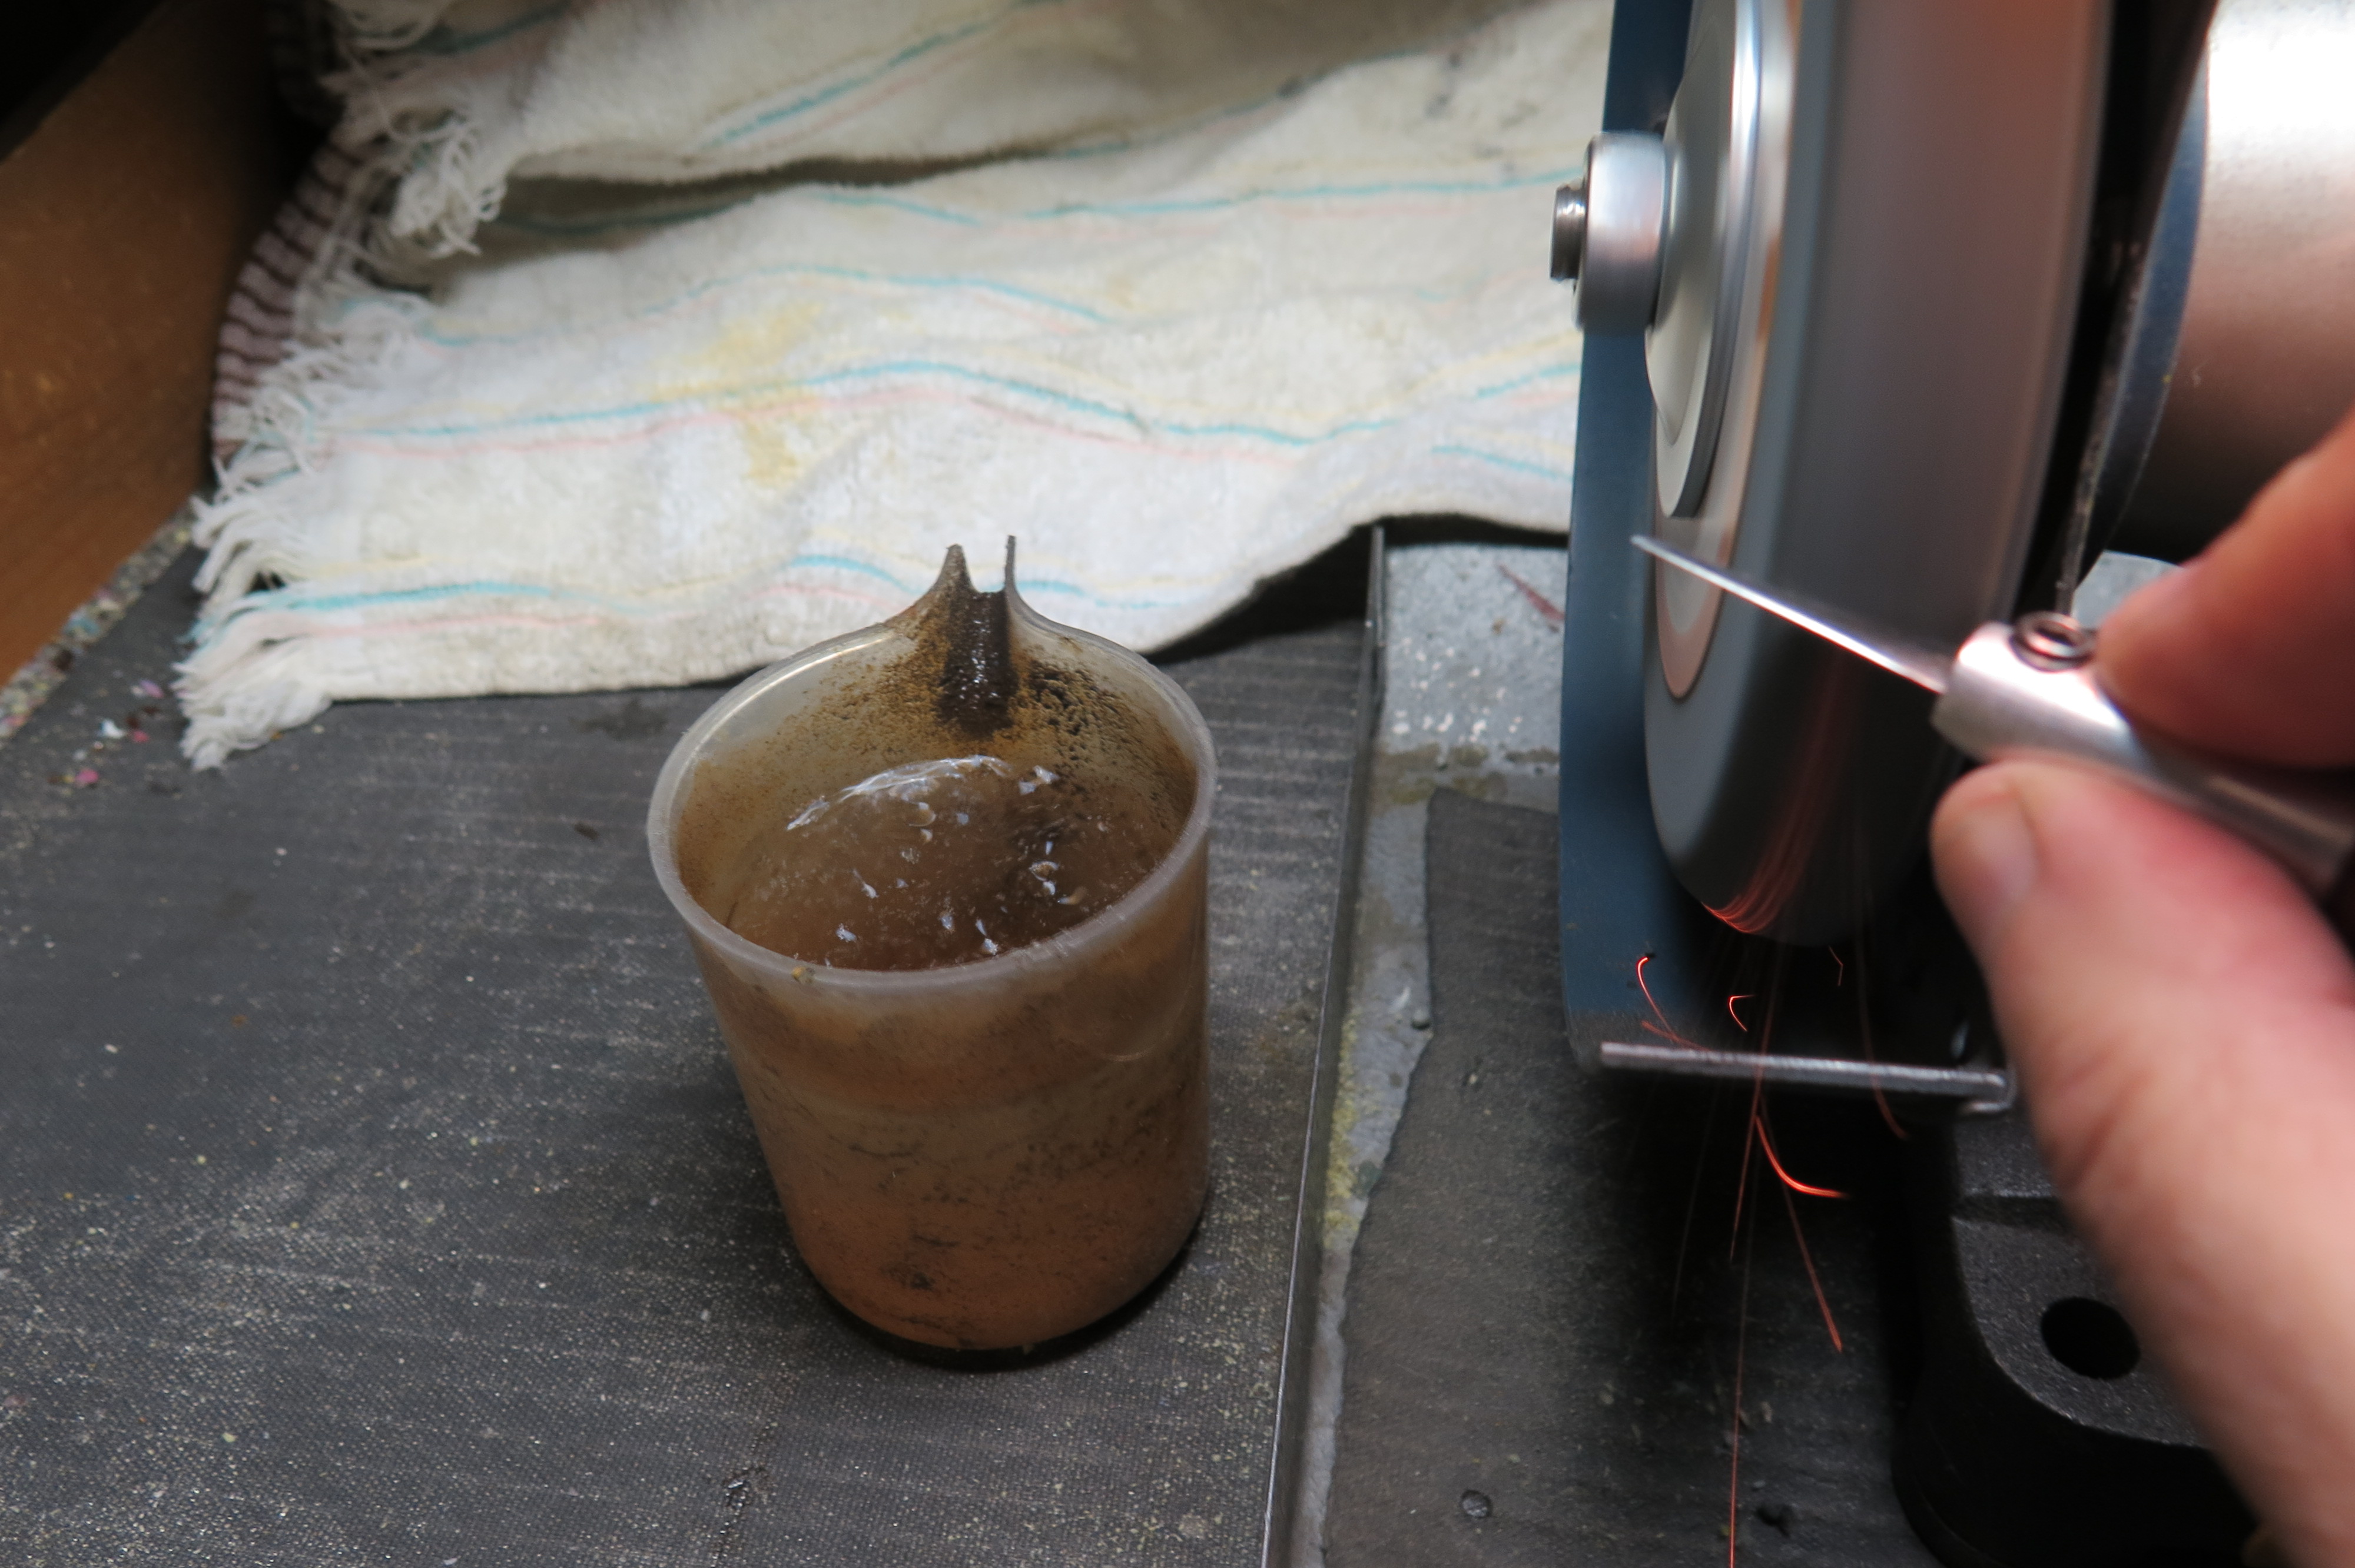
You can buy any of these 3,450 rpm, 5” inch wheel grinders at any hardware store. I have mine close by my bench. Along side of this, is a little receptacle of water to cool while I am grinding my delicate gravers. I prefer to keep the wheels’ rotating axis at near eye level.
Thumb guards
If you are a novice at using the Onglette or Flat-gravers, trust me on this extra feature for your “thumb safety”. If you go to any office-supply store, please, for the protection of your “thumb pads”, buy these little rubber protectors. They will definitely protect your thumb-pad skin. These guards are a real necessity! The reason is that the thumb has a tendency to move under the sharp knife edge of the graver causing line carvings in your thumb. Sometimes the graver might break the skin and while working, dirt enters your finger and you might even get an infection. Do you want this to happen? T**he thumb is #12 for the Ladies & #14 for the Men.**
Small Jaw Pliers

Many of my students go to their local hardware store and pick up some cheaper pairs of pliers.Why buy the expensive tools if you can use the less expensive, non-jewellery store supply? I always believe in modifying the initial design. I will observe their introduction in using the bench grinder in modifying the pliers’ jaws. I will ‘finish off’ the rough edges from the rough grit of the wheels. You should also do this with an emery paper of #240 grit. Smooth away all of the sharp edges. Your sensitive skin will be cut easily if not attended to at this point. I will use these pliers for the average cluster mounts and or engagement rings. I only have at least 12 sets of pliers in my inventory. Each set of pliers are used for many kinds of setting. You have to be 100% prepared.
Longer Nosed Pliers I would use these pliers only for hard to reach and delicate areas not easily accessible as with the “short-nosed version”. If for some reason the outside of the pliers are rounded, I would use this section for reaming open a bezel and to almost stretch the “bezel walls” further apart. Another idea on pliers; With a Corundum Separating wheel, I make little grooves near the tip or points. This is when you are pulling or just moving the plier tips, the jaws while in motion won’t slip off and damage the claw while securing the stones. When I’m finished, I’ll just smooth over the ‘disk-cuts’ with a pumice wheel.
End or Side-Cutting Pliers
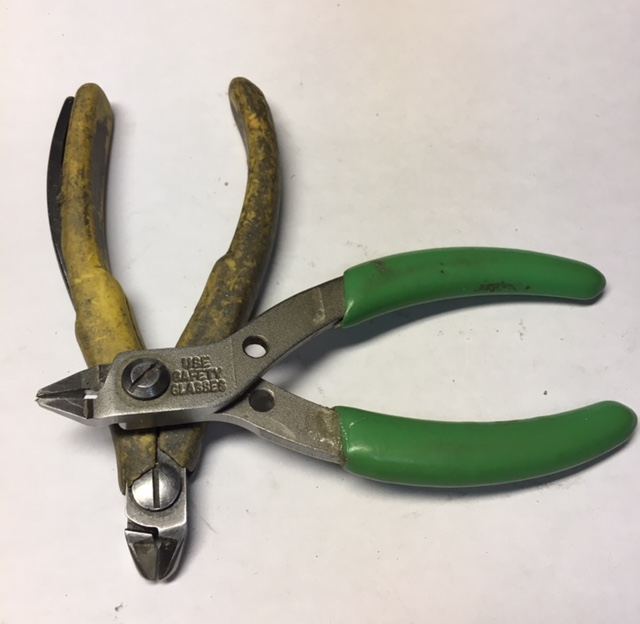
These cutters can be used in lieu of the sanding disk. You will have more control as to the length of the claws that should be shortened. I use only “Lindstrom”, very strong, the jaws will maintain cutting edge. You can use either, whatever you are comfortable with, is best for you!
Hammer
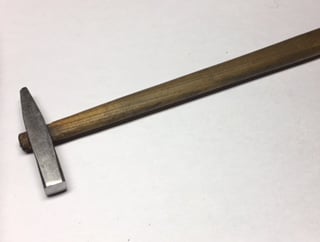
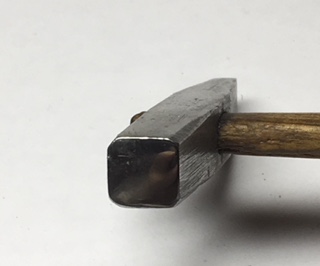
The weight of a comfortable hammer is about 85 – 100 grams, but with a wooden handle. You should notice here that the “swinging action” from the wrist must be light enough but with enough downward force to give strength in the hammering action. The “front face” of the hammer is very important, it should and must be cleaned off regularly. If there are any pits or defects in the “face”, these will be easily transferred on to the Gold or Platinum bezel. Clean with an Emery #240, Emery #480 paper you’re your Polishing paper #600 then lastly, Polishing paper #800. You must check this at least every few days or under busy setting conditions
“End-Holding”…metal ring clamps!

These ring clamps must be metal as in this style along with a metal screw. The ring will never get loose during the setting procedure. I use this clamp when I am ONLY setting stones on the side of the mount and then the locking-screw is plier tightened, the ring will placed in a horizontal position. No movement, no slipping, no way!
Tube-Setting clamp
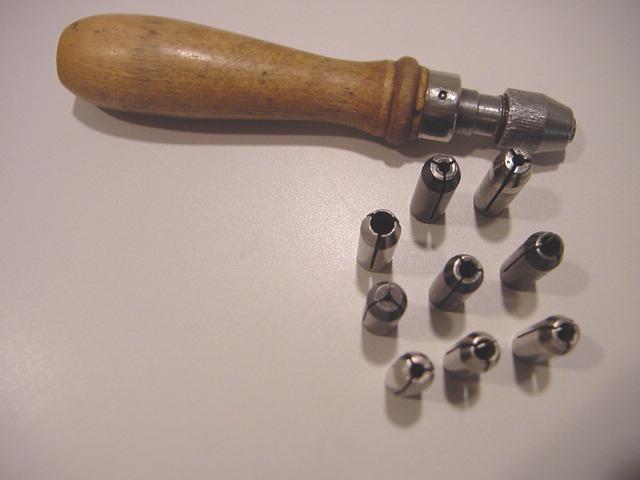
Holder with a wooden handle. I use this for tube & bezels and ‘earring studs’ or individual settings before soldering into pendants. Each individual holder kit comes with a wide selection of various chucks.
Oil Receptacle
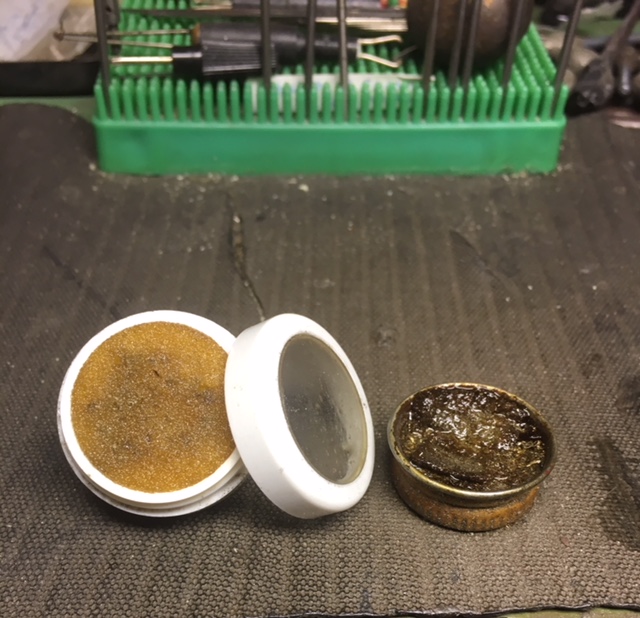
This item should be situated next to your working area. What I use as a container, is a womens, make-up container, these have a screw-lid. Place a small piece of cloth in the plastic-container to hold the machine oil these can be bought in any women’s make-up store. Screw on the lid and then the oil won’t evaporate or start dripping around your tools.!
Steel Ring Mandrel (This must always be with a ‘recessed’ groove)
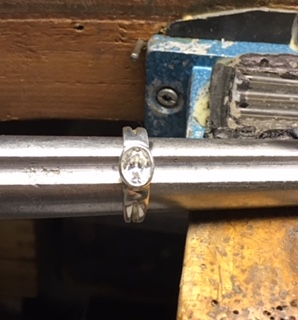
When is this used and how? This little item is used when you are hammering on white gold for instance. It frees up one of your hands, as when you are applying the ‘reciprocating’ hammer. You can have the hammer blows’ deal directly to that “impact spot” on the gold and at the same time holding the diamond securely. You need to obtain a mandrel with a groove, if when setting a deep stone, then the culet won’t get broken.
Brass, Copper and Steel Pushers are used to stabilize a diamond before the setting is done. Another tool is a Brass pusher, to “Gypsy Set” a diamond on the Gold or Platinum. Make sure that the “face” is flat and without any noticeable marks or defects. The reason being, is that these marks can be transferred onto the gold and will be rather difficult to remove.
Steel Pusher
This one implement was be used with greater care when pushing metal tight over a stone. The chances of slipping are great and slipping ‘might’ occur. If you need to use a steel-pusher, have the tip serrated as to not let any problems start. If this pusher has a smooth surface, the tool will slide and hit the precious stone.
B r a s s P u s h e r:
What length should the Brass or Copper shaft be? You can your purchase this “3/16th” inch diameter rod at any electrical supply store or automotive shop, in the “welding section”. Once you have a good size round wooden handle that fits your palm of your hand, drill a hole that will now receive this brass rod. I would now shape the tip, so it looks rectangular in shape.
As while you are holding it, it should not extend further than your tip of the middle finger securing diamonds prior to bead raising, moving over Gold in Gypsy Setting/ “Flush Setting! Pressing down Platinum, not do use steel on this metal, highly unadvisable. It can be used only to “lightly” push over soft gold claws.
Remove all marks on this ‘new’ hand-made tool. This process may be used for preventing slipping while tightening!
Copper Pusher
The description of this construction, is the same as in the Brass Pusher. The uses for this tool is as follows. Securing softer stones in setting Emeralds, Aquamarine, Blue-Topaz, and Turquoise. This Copper is, ‘softer’ than the aforementioned, Brass. The very fact that this tool is softer on the more precious stones lends you the reader setter not to be any more concerned in setting the softer stones.
F I L E S!
All files should be of 20 cm’s (8 inches) in length
Pillar: # 1, & # 2 cut. Triangular: # 2, & # 4 cut!

All of the following files are of the same length, that is, 20 centimeters. I will use only the metric system in my measurements. The width of the Pillar files I generally use is the 12mm size (½ inch wide). Now that we have decided which files to use, and described their measurements, let’s explain each of their uses
Let me first explain why this wider “Pillar” file is better, as the narrower is sometimes used. You will notice on the narrower file there is a great tendency for the file to bend during the forward filing stroke. This does not lend to good filing habits. You do not have enough “strength on the forward stroke” pressure action for the removal of the metal. Why must you always compensate for action taken by a file that is not up to your filing needs? This is one good reason why the wider “Pillar” and thicker file, are more suitable for any filing motions. I also use an indelible ink marker number at the base of the file to indicate what grit this file is. I use this “marking” system on all of files for easy retrieval. In the process of filing, I would use the rougher number #1 cut and then switch over to the number #2 cut for the final cleaning and removal of unnecessary amount of gold.
We are now ready now for the Triangular Files! For trimming;
Again, all of my files are one standard length, 20 cm’s, or as it’s known in as 8 inches. So what can the Triangular file do that the Pillar cannot finish?
For one thing it can get into areas where a thicker Pillar file can’t reach. It can do intricate trimming, filing end-bezels on baguettes, trimming Solitaire Engagement claws, filing ‘shared’ claws below the setting areas. How about fancy cut “Vee” claws on Pear and Marquise stones, reducing the sizes of thick claws before using the 77B (cup burs).
For this purpose of cleaning, do not use the #2 cut. Realizing that the #2 cut will leave further serrated files marks wherever you touch the metal. On this point please use only the #4 cut of all files, for all the final cleaning.I suggest using only #005 -> #009. In this series of explanations, I will show you, the reader, that there is a total different use for these burs.
Bud Burs,
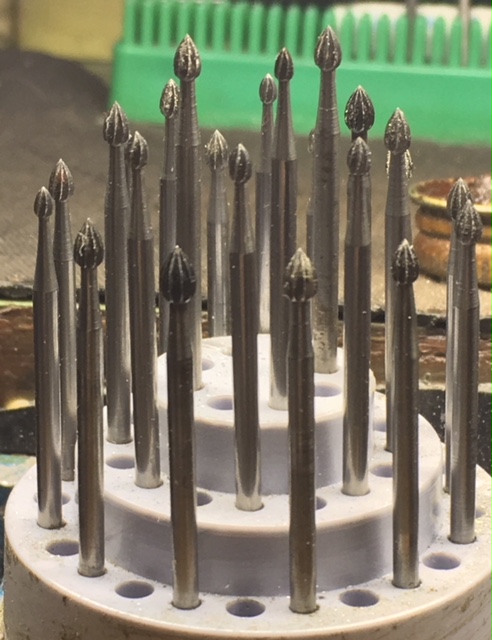
I use a small bud bur to ‘deepen & accentuate the separation’ between ‘shared claws’ that are opposing each other. You are basically making the claws ‘longer’. This bur will take the place of a very thin file, if none are available. If claws were not in great detail after casting I will use these burs again for this very delicate cleanup. These are called my “Buddy-Burs”.
I even sometimes use a bur, e.g. #006 to initiate a bearing cut in small claws for “earring” and allowing a quick placement for the 156C undercutting bur. Slightly ‘move’ a hole in one direction if it was incorrectly drilled open. I will then lean the cutting of this small bur, just on “one side of the hole” and make the cutting wider & larger than the hole that is now being “moved”.
I will use a bud bur and use the many sections of this bur, and gradually open up the base of the hole, to now facilitate the ‘in-between’ size of the diamond. With all of these helpful hints for this bud bur, now you know why I call this bur my “Buddy Bur”!!
Round Bur: Using sizes #006 ->?
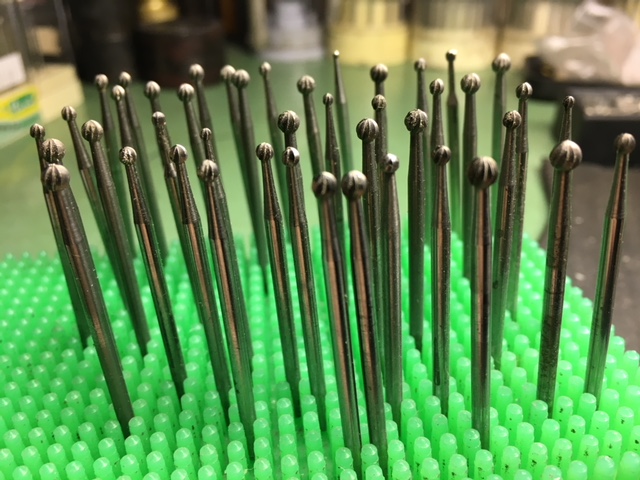
Yes, we all know what a round bur can do, there are some other uses also and here are some! When preparing a channel setting, I will use a smaller bur than the diamond. This way it’s to make a ‘seat’ for the stone to sit on,and clear a path for the next step of the channel setting. When I am to prepare a large “4 claw or a 6-claw setting”.
I will always use a large round bur increase the depth into the gold this is to preventing the Diamond Culet in touching the base of any Engagement ring. There must be no contact at all, if there is any contact the Culet will break and then the stone MUST be re-polished.
In a “free-form” ring, I will generally use a smaller round bur to make sure that there is no ‘little extra’s’ of gold laying around the setting area. I will most of the time speed up the little round bur to simulate polishing or grinding the metal prior to setting. This will give the “polishing stage” an easier chance to clean and finish the hard-to-reach areas
Even if there are some minor ring ‘details’ that need to be pierced through from a poor casting, I will use the finer #007 round bur, to accomplish this clean-up. With a very delicate mini-cluster 4-claw area, I will use on most occasions, the small #007 round bur. This is to make sure that the inside of the small cluster settings are free of ANY amounts of gold that do not belong.
The main purpose of this bur, is to create a ‘groove’ in the metal, this to bear the “weight” of a stone. This so called ‘groove’ will make a place for the pavilion of the stone to sit in the claw, in question. The size of this bur is to the diamond, should be no more than 75% size of the stone to be set. The corresponding height should not exceed 30% from the claw tip.
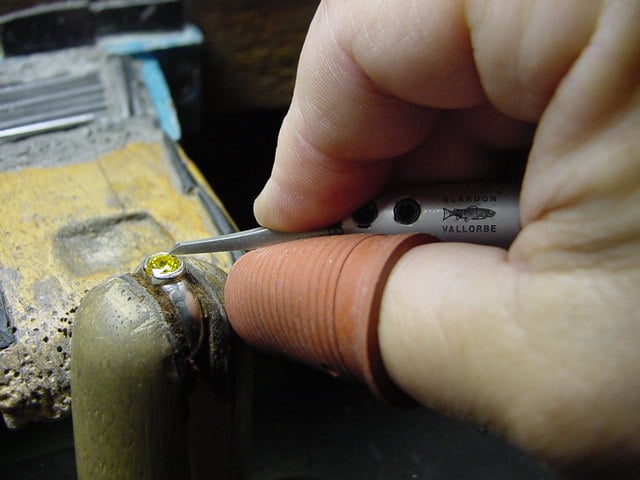
All measurements can be made visually. While making a bearing cut, it is imperative to keep the shaft of the bur vertical at all times during the ‘grooving’ process. If this is not done, you will not have the diamond sitting in this ‘bearing cut’ correctly and sufficiently to have you named as a “Quality Setter”.
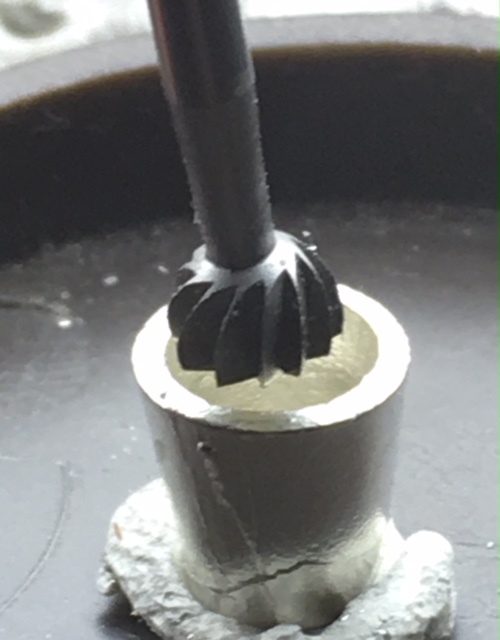
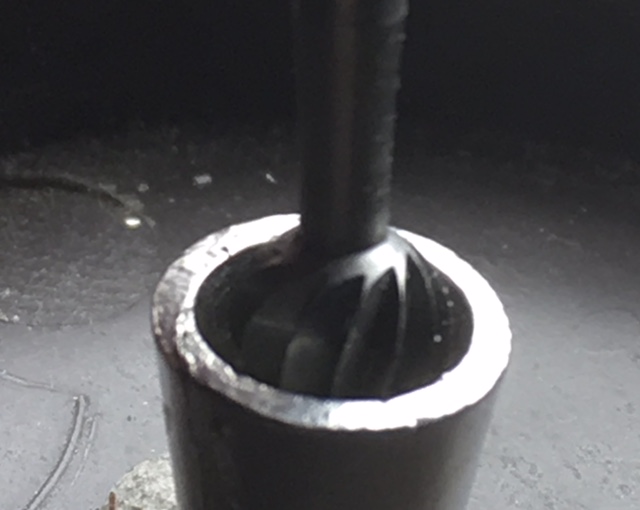
HSS burs; “Maintenance”!

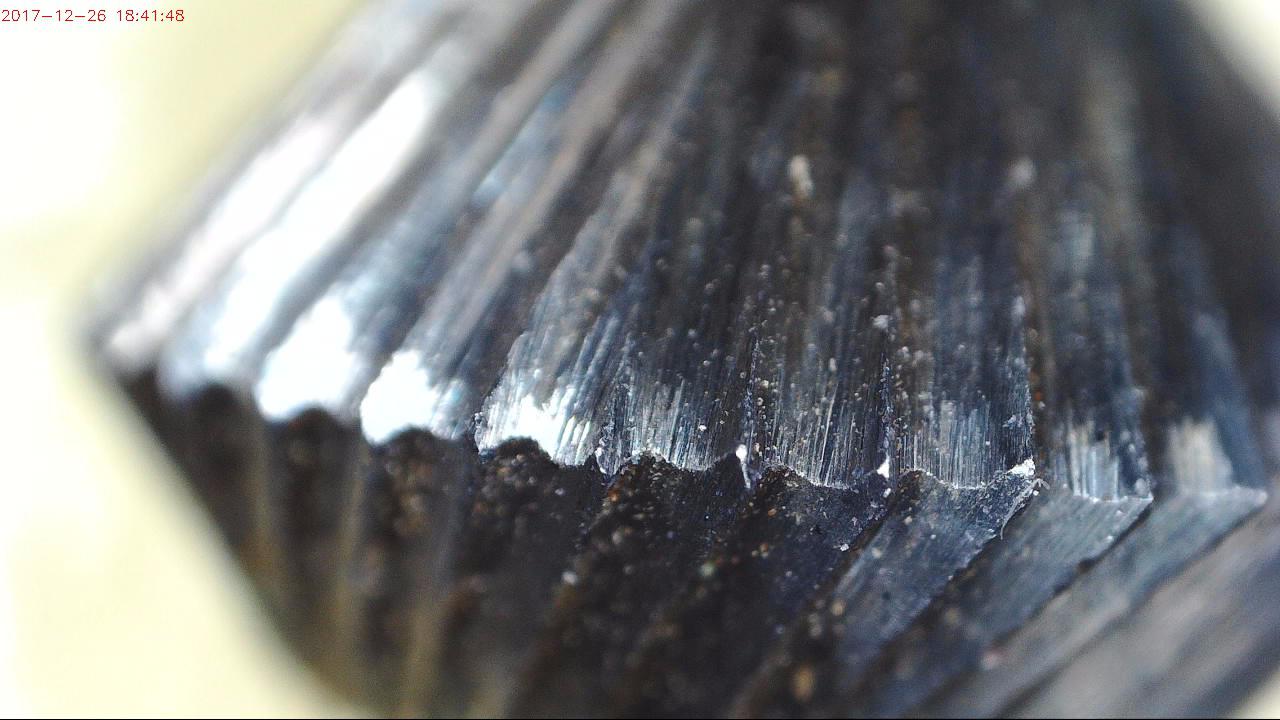
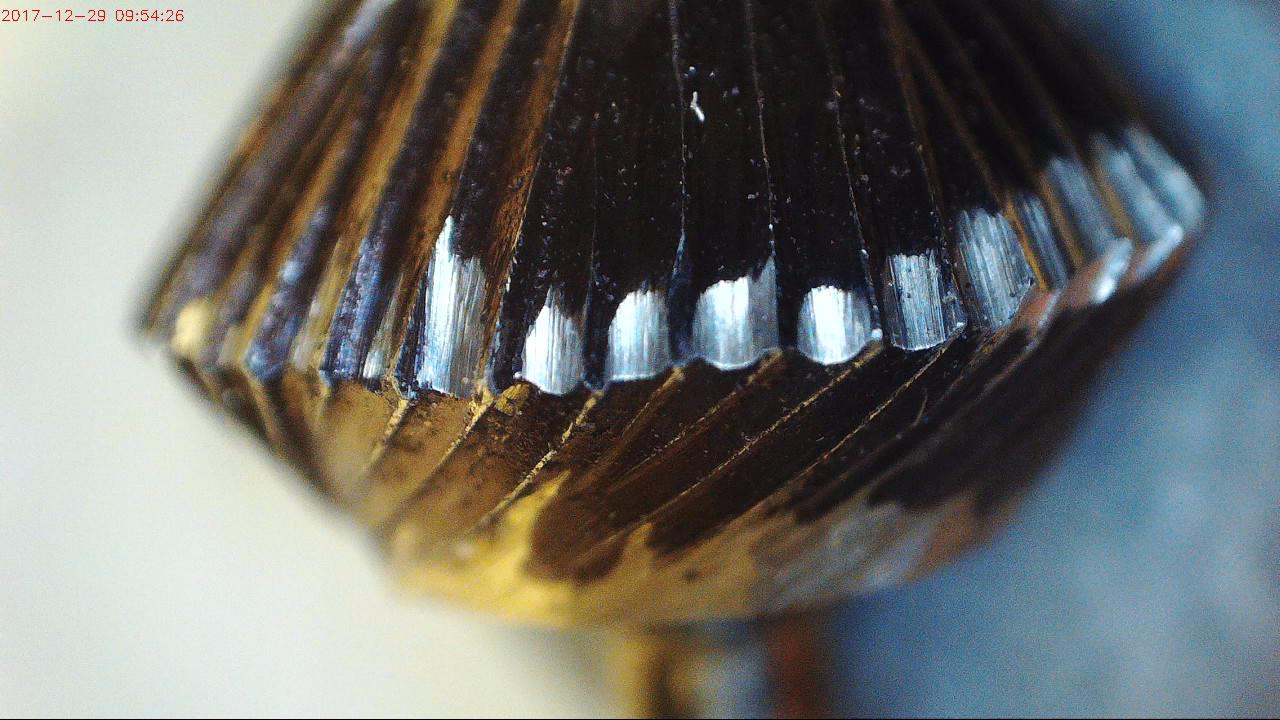
If any of the teeth of any bur have “shiny teeth/edges”, this means this bur is not useful and needs to be totally recut! This being said, the “shiny edges” mean that the sharp teeth are worn down will not cut gold efficiently. They are only sliding around the claw. One of most well used tools is my “oil receptacle”, this gives the metal a chance to be removed while rotating against the metal. If you speed up the motor, this action will definitely heat up the bur. The resulting action will soften the ‘hardness’ that was made for us to use.
If you are not sure if the bur is cutting, look through your 10x loupe and check for build-up of gold on the bur and make sure that the teeth are sharp!
BTW, these 3, HSS-bur photographs were taken with my new “Digital Microscope”, using 220x & 100x power magnification.
When ordering the regular Carbide burs of any shape and of any bur size, don’t just buy one a “six pack” of burs, I usually buy one dozen of EACH size and stock up!
As this essay is quite lengthy, I have decided to split this extensive ‘setting essay’ into three sections. This completes the first section.
