(I prefer to ‘under-line or highlight’ certain areas of this essay, why? This essay has very important setting notes! =>There are many setting techniques that you must now need to know.)
I just never attempt to have one little technique get forgotten, nor would I ask you to do some research, in problem-solving the missing information. I have no intention to have you guess. My feeling is that I am guiding you, but not misleading you. (I edit my essays about 15-20 times before posting)
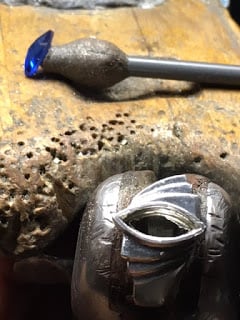
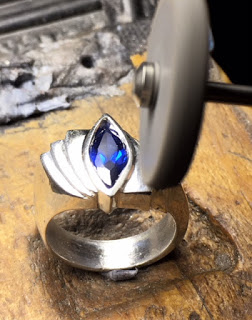
I’ve been asked on many occasions to explain just how a Marquise stone is prepared and then set into a Full-Bezel. Apparently, when I ‘located’ a stone of my liking, it had the correct width, but the length is 1.75mm’s short!
We setters, just have to make do with what we have. In this case, I completed the setting process but with little bezel-gaps at either end.
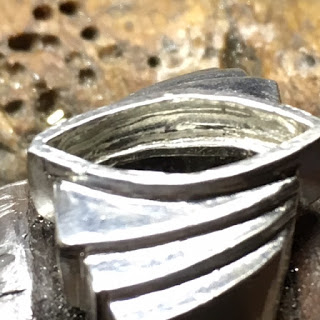
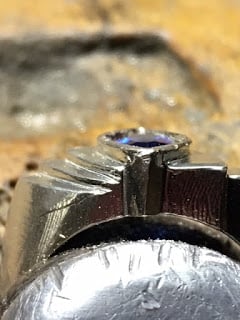
The very first thing you should do is to observe the width of the girdle of the stone at its widest point. I always check the measurements by eye, I’m using a #007, round bur drilling deep INTO THE “VEE” ends! Just how deep into the wall of the “VEE” do I drill? Easy answer, deep enough that ¾ of the round bur is embedded into the center of the “VEE”…as shown!
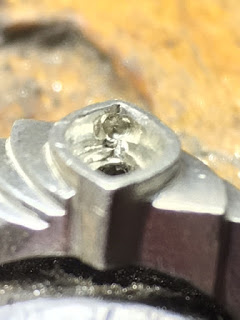
At no point do I want (or you) to have the point of the stone actually touching any part of the " VEE"-corner metal !
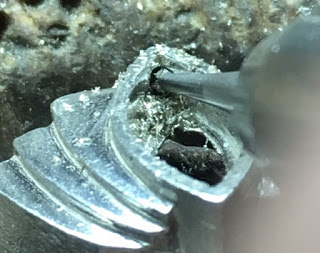
In this demo-exercise, this “Vee” drilling is still so necessary, but it’s good to know for the other setting projects . Under a powerful pair of Opti-Visor lens magnification @#7, start making a “beginning-cut” of a ‘rough looking bearing’. From this point, all carving must be at the same depth from the bezel-wall tip & all around the inside of the bezel frame.
I use, as often as I can, select a HSS a.k.a. “High-Speed Steel” bur with a 90- degree pavilion to match the lower angles of the stone. I’d use this ‘aggressive cutting bur’ at the widest section of the stone. It is only here where the Pavilion with make contact to the Bezel-Wall.
Where ever you make your bearing-cut, remember it’s here that your stone will sit. The amount of concentration in this preparation of cutting angles using the round or HSS bur, is so-o important!
Use your 10x power loupe at all times, “don’t think that if it looks good, it’ll look good to go!” But be aware of little pieces of untouched metal sitting and not wanted! I don’t want, or desire any problems once the setting starts.
There must be a certain depth of the bearing-cut, let’s suppose we actually cut & lower the bearing-cut to be at least ½ the distance from the Bezel-Tip, to the base of the Bezel-Wall. The top of the “Gemstone-Table” must be at the same height as the top of the bezel wall, when completed!! I’d try to leave when finished, at least 1.0 mm as a ‘safety barrier’ in case the bezel gets worn down from constant wear for many years to come! “ Don’t think for ‘today & now’, but for the future use ”.
If the stone has different thicknesses on the girdle, plan to put that thickest section of the stone against the bezel-wall, ‘mark’ that area with a black, felt pen! You just might need a larger round bur for this section. Drill into the bezel-wall, but this time go deeper into the BEZEL” . Now with the HSS (High Speed Steel) bur, angle your cuts to make allowances to the Pavilion shape of the Marquise stone. With this ring we are dealing with so many angles of the girdle & thicknesses, lengths & widths. This ring can be a ‘real setting’ challenge!!
There are going to be many times you might be needing numerous burs and all of them are of different sizes. Why so many? In the process of selecting burs, you might need one bur to match the different widths of the girdle. I might even have 2 sizes of HSS burs just to make sure the pavilion of the stone is sitting correctly in the bezel. I would not hesitate in using many round burs, as I want the stone to fit with no problems!
No stone is manufactured perfectly , there will be little subtle differences in the facet-shaping & cutting of any stone. We must be made aware of all these “weird shapes” given to us to attempt to set it .

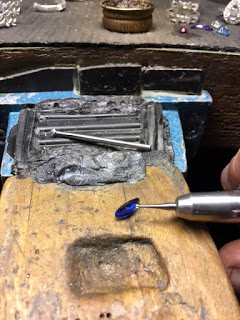
Many times you should place the stone into the ring, just to make sure the stone-table is not sitting twisted & not crooked. If the stone is still ‘moving or rocking’, take the stone out and re-drill the ‘bearing & the pavilion-cut’!
Your stone might be rocking & pivoting on a rough piece of metal still left behind somewhere in the bearing cut . I would use a slightly smaller HHS bur to cut just exactly where I want the bur to cut. A larger bur won’t give me that opportunity, it’s too wide & might damage other parts of the Bezel.
When you start the hammering, it will squeeze the stone and “this is can be a total disaster waiting to happen!”
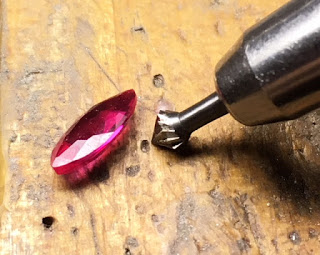
I’d even use a larger round bur to make a girdle-cut, what size? Again, measure and place the bur of your choice, against the stone. Let that stone just sit and now after multiple times, examine each preparation step with your 10x power loupe!
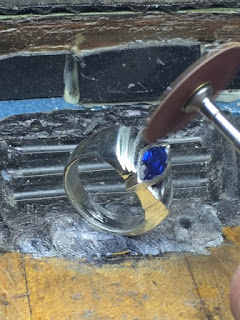
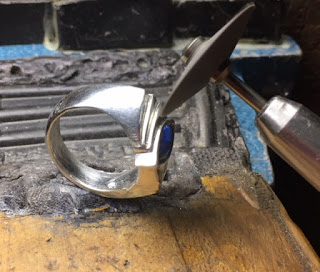
To tighten the stone, I’m now showing you two methods to hammer the bezel-wall . I could use a “riveting hammer” or my favourite “reciprocating hammer”. The hitting surface should be filed at a “ 45degree angle away ” from the stone girdle, why so? When you are hitting the wall-tip, you won’t hit the ‘table’ of the stone instead. You are now hitting & hammering at a constant 45degree angle.
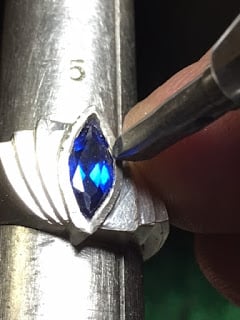

Start the initial stages of setting this stone at the widest part of the stone and carefully hammer towards the points of the stone . You will now be just ‘securing the stone’, until the stone is tight! Then you can use any method to hammer the metal ‘towards & down’ onto the “Star-Facets”. Once the stone is tight, then now you can hammer all around the bezel-wall. Again, at a 45-Degree angle. Use on your method of hammering, my way might be best, or your own method. Being comfortable is #1!!!
Where the ‘ empty space ’ is near the the “VEE” of the Marquise stone, I’d keep hammering, as if the stone-material is there! If you prefer to use the reciprocating hammer instead, please be careful on the “TENSION” screw as the hitting of the metal doesn’t squeeze the bearing-wall & stone!
Keep checking to make sure the stone won’t get stuck at an awkward angle! If it is stuck, take the ring out of the clamp and reset…NOW!
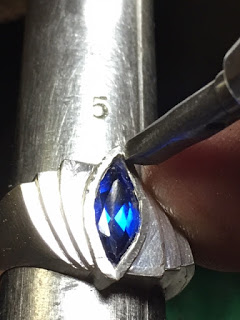
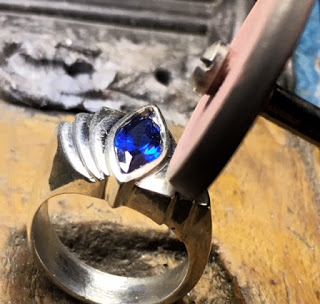
The stone is now IN, now what? It’s time now to use your Onglette graver #2, to start the “Bright-Cutting process”. You can see just how the metal is slowly being cleaned & shaved away from and what is remaining is a ‘mirror image’ all around the inside of the Bezel-Wall. “Bright-Cut” even where there are two little empty spaces due to the short, stone-length.
As you get near the point of the joining bezel walls, I’d use my Flat Graver #40, or my graver Glardon #10.


As you get closer to the ends of the Bezel opening, I’d still Bright-Cut. As this makes the cut look like there is a stone close to the ends of the bezel. For the actual ends, of near the “Vee”, I’d use a Flat Graver to cut right to the point and as where the two side-cuts are joining each other.
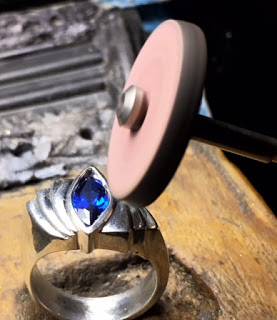
We’re nearly finished ! At this juncture, I would use my many types of pumice wheels, from #180 & #1,000 Pink & Blue Pumice, “Tapered & Flat” faced wheels. All levels of intense ring-cleaning now starts to take place. I use an “Emery-Disk” Medium grit, to start the cleaning of any ‘file marks’ or ‘hammer hits’.
Here are the Pink and Pumice wheels doing just what is necessary to make this ring a fantastic looking item!!!
I don’t want any ‘rounded corners’ on the ring patterns, what is needed afterwards…is to carefully polish the ring.
On a rating of 10 in my “Difficulty Scale”. This is a definite 6.5 plus!