This may be a stupid question, but can you flush set stones which aren’t round? I have two small marquise sapphires my aunt wants put in a ring (they are in studs and her ears aren’t pierced). Anyway, I haven’t found any info on this. I have thought about attaching a marquise shape in wire and doing some drilling underneath for the culet, so it’s sort of a cross between a bezel setting and a flush setting… is this daft?
1 Like
Yup. Flush setting marquis is “daft” if you are not an expert stone setter. The pointy tips are VERY prone to breakage. Even when setting Marquise in crowns. Sometimes those ends will shear off if you just look at them. Well not really. But still…proceed with caution.
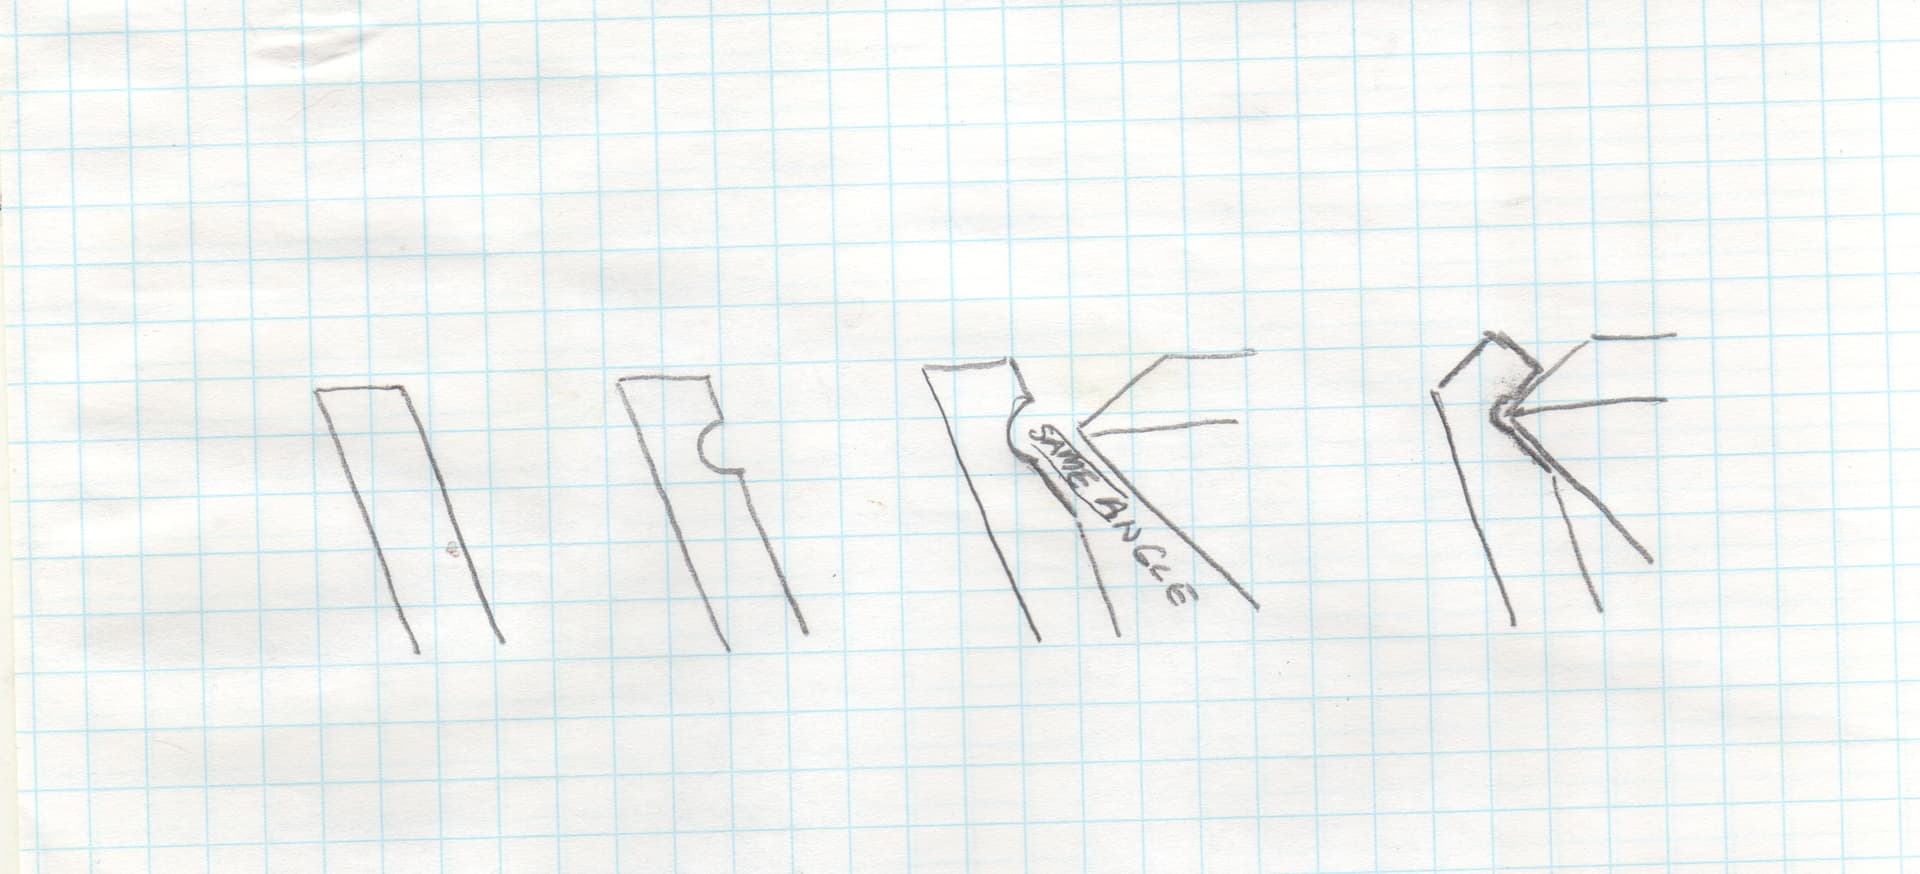
When setting them the points should never have direct contact with the metal. When ever I cut the seat for a V-cap I always use a very small round bur to where the tip meets the V-cap so that the point can float free. The same holds true for pear shapes, princess cuts, etc. When worn in a ring both pear and marq. shaped stones should always have a protective v cap. This also holds true for bezel setting. A single prong or exposed tips should only be used for earrings, pins, or pendants. Here’s a rough sketch from one of my setting classes on how clear the tip of a setting for pointy bits.
-Jo
3 Likes
Thank you Jo. I understand you, though I’ve never heard the term V-cap. I’ll bear this in mind…
I am fairly certain that Blaine Lewis of The New School put out a DVD on Flush Setting fancy cut stones.
I am pretty sure I had the Video here at one time, although I may have loaned it out.
Flush Setting Square, MQ, Pears, Trillions, etc is far from being one of my favorite setting jobs. It always forces me go slow down, and always makes me really nervous, but it is doable with great care.
It is definitely a somewhat advanced setting technique, but nothing one can not learn.
2 Likes
Thank you, I appreciate that. I’ll see if I can find that video, or similar - it’s good to know that at least someone does it. I know it’s not going to be fun, but the sapphires have great sentimental value for her; also, she’s not a jewelry person, so if I don’t do a world class job it’s not the end of the world. I have my limitations (both skills & tools) and I’m pretty clear with people about that. So far so good ![]() Cheerio, Sue
Cheerio, Sue
Sue,
Good question! The biggest problem with Flush Setting Marquise and other pointed non-round Gemstones is cutting the seats properly, it can be quite difficult and time consuming to cut a proper seat for these stones. Then when you add the additional hurdle of using Sapphires, Rubies, Emeralds and other non-Diamond Gemstones, which typically have a more rounded or full pavilion and thicker girdles, the difficulty is compounded even more. Yes, it can be done, I have done it many times and they really look lovely if done successfully, but they can also destroy the look of a piece if you’re not careful. The most common issues are: the seat was cut slightly crooked/cocked in the mounting (very noticeable), the stone is crooked/tilted in the seat (very noticeable), the stone is too deep or not deep enough, the stone’s culet pokes through the back of the mounting, etc. - unfortunately, all of these issues happen very frequently are usually very difficult to fix, oftentimes the only way to fix them is to fill-in the seat and start over, thus opening the door for pitting… Flush setting works best in softer more malleable metals: Platinum, Yellow Gold, Silver, Copper and not as well in harder metals: White Gold, Brass, etc…
For a Marquise Sapphire, what I usually did to start is: First, measure and take notes of the overall length, width and depth of the stone and then the depth of the stone from the top of the girdle to the culet - this will be your most important measurement (if the metal that you are flush mounting the stone into isn’t at the very least 2mm+ thicker/deeper than this measurement, then you’re going to have issues, you can do it with 1mm difference, but everything has to be absolutely perfect and there is zero room for error). Once you have these measurements, then pick out a slightly smaller Setting Bur than the width of the stone. Then after you have measured and marked (you should mark the length tip to tip and the width edge to edge, slightly smaller than your stone) exactly where you want the stone to sit in the mounting (considering the depth of the metal, width of the metal, length & width of the stone and it’s placement/orientation when compared to other stones, designs, etc.), drill a pilot hole through the centre of the marked area. Then you will use the Setting Bur that is slightly smaller than the width of your stone and bur down onto the pilot hole the beginnings of your seat (I usually only bur down about half the depth of the pavilion to start, as you will later use other burs to open up, lengthen and round the seat to fit the stone). Once you have this Setting Bur seat, then use a Krause Bur to gently cut an angle from the pilot hole to just short of the tip of the stone’s marked area on the mounting (this angled cut doesn’t have to be perfect, it’s just to help guide the other burs that you’ll be using to finish the seat), then gently widen the angled cut from the point and back to the setting bur seat on all (4) sides of the points, staying just short of the stone’s marked area. Then lay the stone on top of the seat and make note of how it sits in relation to the marked area, then using the Krause Bur, slowly widen the length & width of the seat opening, so that the stone sits closer to the edges of the marked area - yet still staying just short of the marked area). Place the stone back on top of the seat and make note of how high the stone sits above the metal’s surface. Then using a small Round Bur (size depends on the size of the stone and the curve of the pavilion), slowly round down just a little at a time the inside length of the seat, starting from the bottom (pilot hole) and gently moving up to about half way to the points. You will then alternate from a Krause/Cone Bur to a smaller Round Bur to slowly Round Down just a little at a time from Half Way up to Almost the Edge of the Points (the key is to do this just a little at a time - you don’t want to take too much metal away, you’re just rounding the seat up to the points), then using the small round bur, slowly widen & round down the rest of the seat almost to the edge of your stone’s marked area - your goal here is to open up & round the seat down just enough so that the stone will sit directly on the edges of the opening, with the girdle resting just above the metal’s surface, if the stone rocks, round down or open up a little more the area that’s causing it. This is also when I usually open up the pilot hole a little more to give the stone a little more room in the seat and make cleaning a little easier. Then you will start to fit the seat to the stone, I will usually use a small Inverted Cone Bur and slowly & gently widen the edges of the seat until the stone will almost fit down into the opening (check the stone on the seat often) - the Inverted Cone Bur will slightly undercut the edges, so you don’t want the stone to fit down into the seat just yet. I then use a Burnisher to slightly smooth up (above the metal’s surface) the undercut edges and test the fit of the stone - this will tell you how much more rounding down and adjusting that you have to do for the seat to be proper fit for that individual stone, you want the stone’s girdle to sit Just below the surface of the metal (not just below the burnished up edges) and the stone’s table to be almost even with the surface of the metal, you also want there to be a little space between the bottom of the stone’s pavilion and inside surface of the seat, in other words, the girdle and the edges of the pavilion next to the girdle should be holding the stone in the mounting, not the bottom of the stone. Once you have the stone sitting properly in the seat, girdle just below the metal’s surface and table almost even with the metal’s surface, with no rocking, then take your Burnisher and gently smooth over the burnished up edges - start on one side and burnish just 1-2mm over and then go to the opposite side and do the same - always pay attention so that the stone doesn’t sink down more on one side or the other. Then slowly work your way around the stone, always moving from opposite side to opposite side to keep the stone level and on over to the points. Once the stone is snug in the seat, I will then take a broken bur that I have sanded smooth and polished or a small round slightly-flat Chasing Tool and lightly tap the tool with a Chasing Hammer and push the metal a little tighter around the edges of the stone - I am using the tool on the metal a little further back away from the smoothed over burnished edge, this will push the metal over to the stone and tighten the burnished edges onto it. Then you will clean up the metal (depending on how smoothly you pushed the metal over), with Fine Sanding Disks, a Burnisher, Rubber Wheels or all of the above and polish it!
Sorry that this is so long and wordy, I tried to be as detailed as I could on my steps and I really had to think about them, because I always just did them automatically, without thinking. Hopefully this will help, this is just my way of doing it and hopefully others will share their way of doing it too… Good Luck!
Jonathan
8 Likes
Thank you so much for taking the time. This makes a lot of sense to me. I will save this job for a very rainy day and take my time. I’ll also need to get those smaller burs. This would likely be the only time I ever do this! It’s a labour of love. Goodness knows what I’m going to do with the tiny diamonds that surround the sapphire, I’ve tried flush setting that size (1.25 or a little bigger) and so far it hasn’t worked for me. My aunt gave me an old 18k band she found in her father’s things, so I’ll be using that metal (though it will be on top of silver). I took another look and they are actually pear shaped, which is a tiny bit easier than marquise I suppose. Thanks again!
1 Like