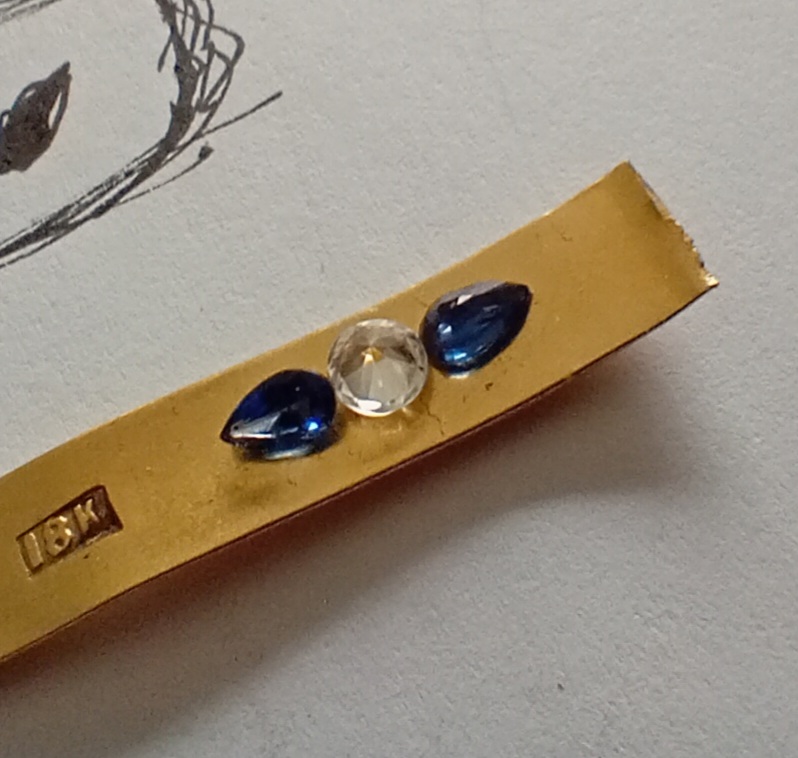
I’m finally ready to tackle this one. I have been practicing the pear shape flush setting on silver, so far so good though this is a custom job for a family member (with sentimental stones) and I’m unlikely to add this sort of thing to my repertoire. I appreciate the tip from here about getting Krauss burs.
The band will be silver except for a gold layer at the front, with the stones. The sapphires are just under 3x5 mm, the zircon is 4 (though I have some 3.4 as well, not sure yet). My question is, how much distance should there be between the zircon & the sapphires? I want them close together but I also want to have enough gold to work with to set them properly. Many thanks, Sue
Sue,
Well, you have to have enough metal to Push over each stone at their closest point to compleat the Flush Setting of each stone, so I would say a minimum of 2mm (though a little more would be better) - it’s possible to do it with 1-1.5mm, but you’ll be asking for trouble and will most likely break or chip one of the stones (Zircon), so I wouldn’t even try it until you are far more proficient with the Technique…
Also, it will work out best for you with your Flush Setting, if the Gold Layer at the top of the Silver Band is Flat or at the very least mostly flat, otherwise, there will be issues with pushing the Gold up over the sides of the stones and you’ll end up Setting them too deep to compensate for the lack of metal on the sides.
I always Flush Set the stone into the metal all the way up to the meeting point (the thin strip in between the stones) and save that area for last, as this will prevent the stone from moving around at this crucial point in finishing the Flush Setting.
With a 2mm separation, you should be able to very lightly score or make a very slight cut (not too deep, just a light scratch) into the middle of the 2mm of Gold, which will give you a “line” to follow to push the Gold over each stone - this light “line” will disappear as you push the Gold over and smooth the surface to the stones. You will need to be careful not to hit too hard with your Hammer and Pusher, as this will be a thin area and the Gold (especially 18K Gold) will move very quickly, so Light Alternating Taps - Starting in the Middle, Lightly Tap on one side of the “line” and then the other side and gently go down each side doing this until you meet the previously pushed-over Gold. You will be making a slight “channel” or “divot” along the “line” as you are pushing the Gold away from it on either side, but as I said before, this “line” should disappear as you are smoothing the Gold over each stone. Once finished, you should have a nice, smooth, even layer of Gold over each edge of each stone.
You are smart in using 18K Gold to Flush Set the stones into, as this will be so much easier to do with that soft metal - just don’t be in a hurry, as the Gold Will Move Very Quickly! Good Luck!
Jonathan
Thank you Jonathan. I was debating about making it just a band, or a separate piece set onto a band, for the reasons you say - a simple band is more straightforward with round stones. Though come to think of it, perhaps if I first created two flat planes on either side of the zircon, before carving out the settings for the sapphires, that might help.
When you are flush setting 3 stones together, as I understand what you are describing, one can put the stones as close as you would like. Keep in mind that sapphire is so much harder than the zircon that they could chip the zircon if you aren’t very careful. So it’s best to leave a small space between the stones, no need to go as far as 1.5mm. Putting them closer will mean a different treatment to the finishing look. It will have a single unit look. spreading them out to 1 1/2 to 2 mm the look will be three separate stone flush set. Sometimes the space between the stone will be hard to get to look right.
When I set stones in a mounting, I try to leave a millimeter between the cullet of the stones and the inside of the ring, so you might need much more depth than you think. Both Zircons and sapphires can have deep pavilions, you gave us the diameter of the stones but not the depth of your stones. Not leaving the space under the stones can lead to damage from finishing and from ring mandrels.
Although you can start with the top flat and cut your seat into the metal, as Jonathan mentioned, by hammer setting around the stones, starting on a flat top, it will create that divot, which will need special attention to blend and have the whole top looking flat.
I might approach carving the top out of wax. That way I’d leave extra metal around the stones to account for the hammer setting, a 1/2 a millimeter going around all the stones. It compresses down in hammering to the rest of the top and is filed flat. By using a heat pen with the wax, you can set the stone just the way you’d like, although I’d use a different stone rather than the zircon, one that is the same size and will take the heat. Because there is shrinkage from the wax to the metal, you’ll have to recut the seats once you have the casting in the metal, but it much easier than cutting the seats in metal.
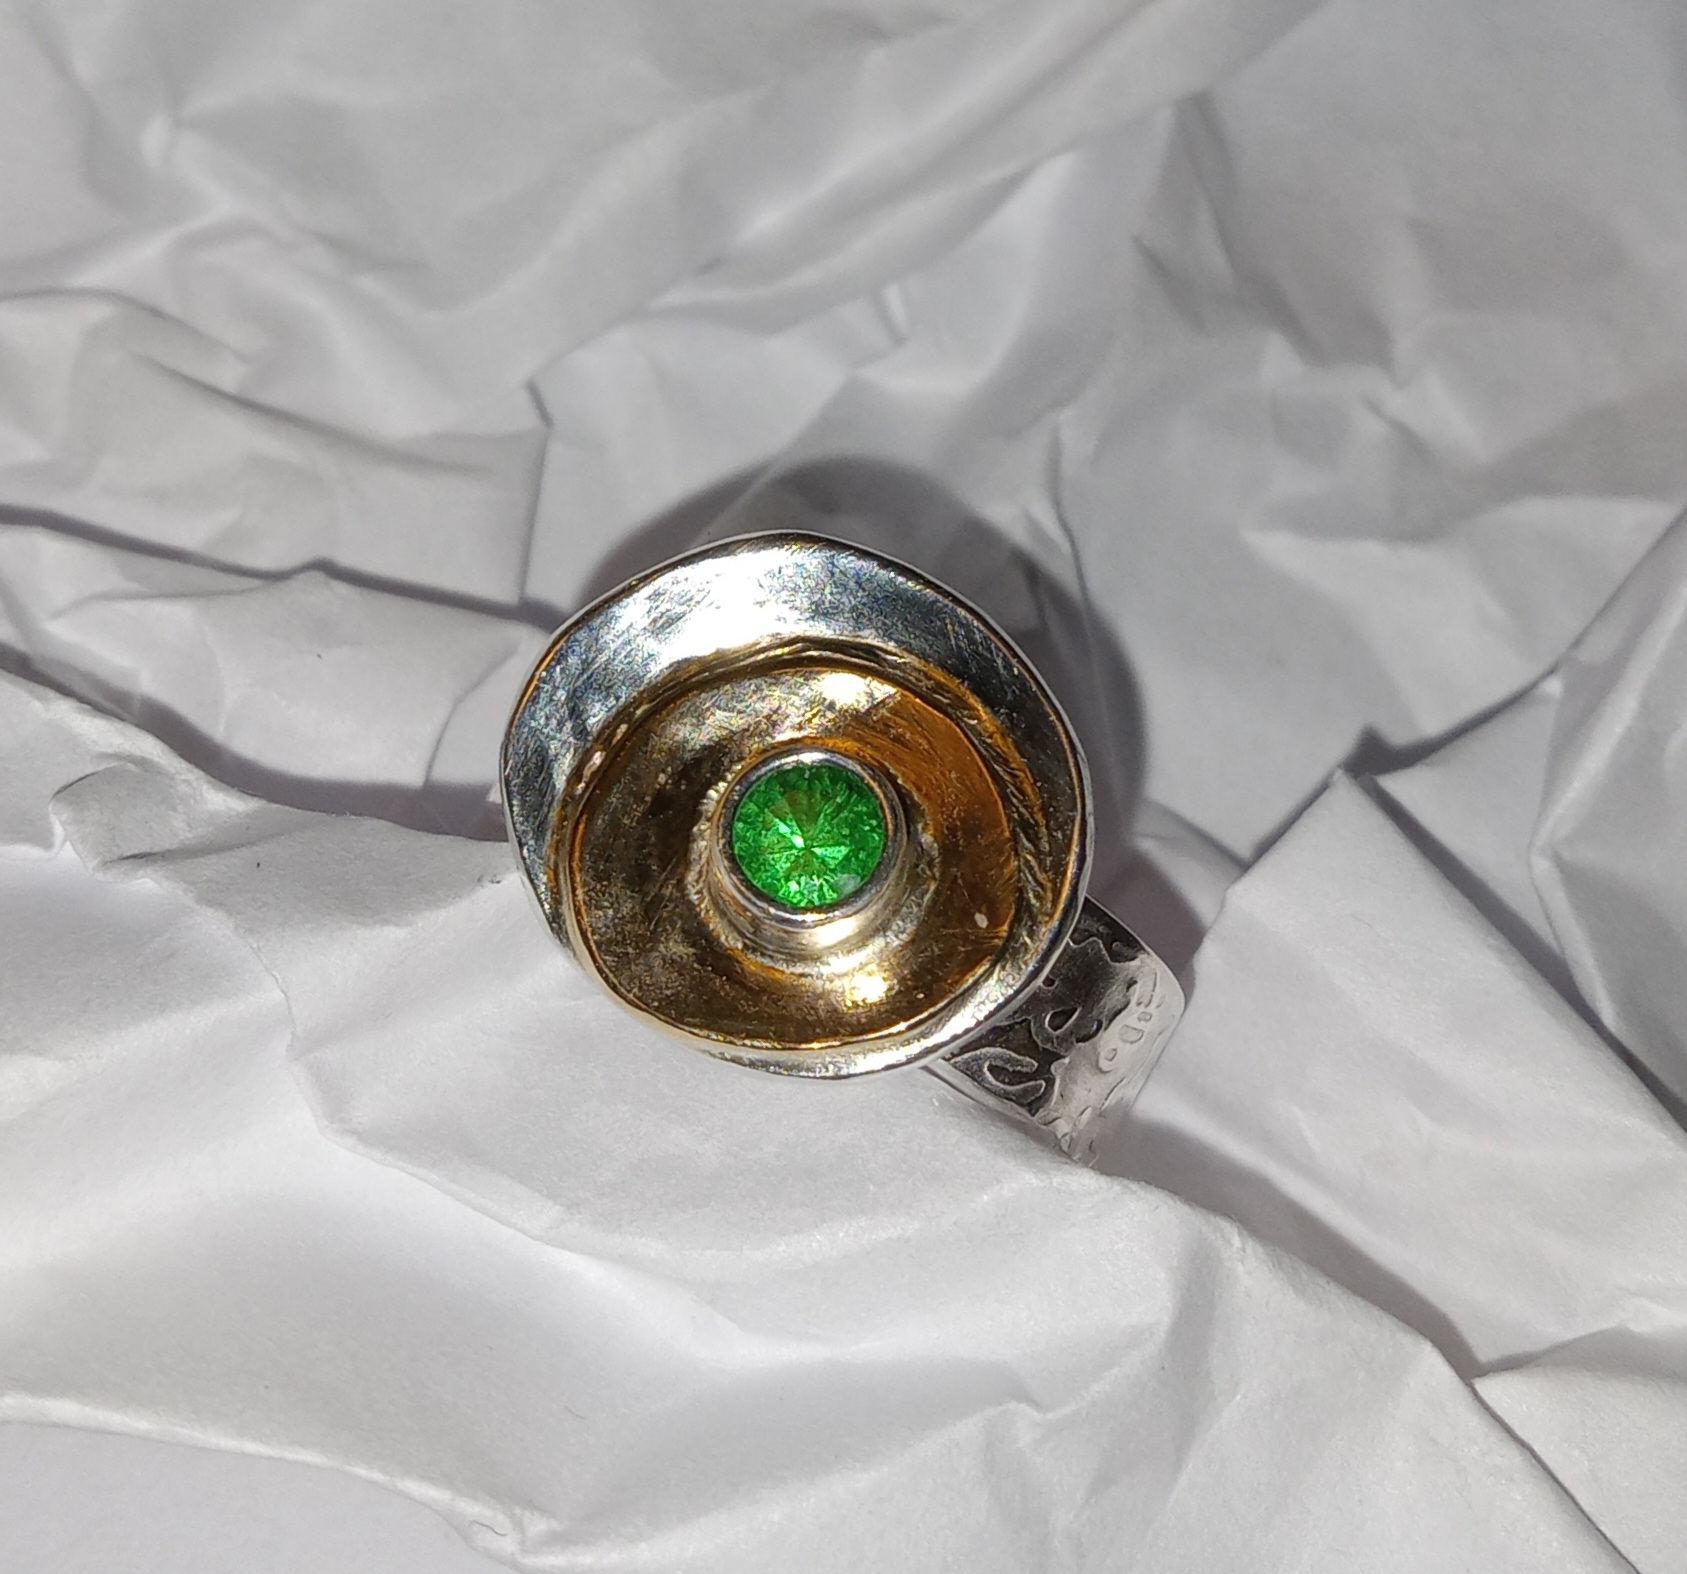
The ring below has more of a bezel setting look rather than a flush setting look, but I think it shows how the three stone can look like a unit.
Thank you so much. Casting is not an option for me. But it’s a good point about the zircon - I have some other 3.5mm round sapphires I could use instead, not as dark so it might look nice, and also a 4mm green one. The two sapphires in the photo are about 2.3mm deep. I had also thought about carving out the seat but also adding a bezel to raise the edge, though that is a very small fiddly scale for me to work at. I have thought about the fact that getting the space in between might be difficult to get smooth, and I may simply texture the gold to get around that. I am not a “fine jeweler” (I’m self taught) and this is a one-time sort of thing for me.
Thomas,
I agree with you wholeheartedly, the Stones should be as close to each other as possible and if Sue had a lot more experience in Flush Setting and Hammer Setting, I would have recommended doing them closer, but she doesn’t, this being more or less her first time with this Technique. So, to give her the greatest chance at a success, rather than setting her up for a more likely failure (using sentimental family stones), I thought that she would do a much better job with them a little more separated, thus removing some of the risks of damaging the stones.
I also agree with the issue of the “divot” that will be created when Flush Setting on a flat surface, though with her mounting the stones on a raised bar of 18K Gold and not directly into a Band, I think that this will be a relatively minor issue and one that can be dealt with as she progresses through her project.
Sometimes, when we more experienced Jewellers give advice on how to do certain Techniques or as to how the finished piece should look, we have to stop and consider that not everyone has the training or the time on the Bench that we have and so we have to adjust the Technique to each situation. Yes, failure is a great learning tool and you will never progress if you aren’t willing to try new and more complicated Techniques, but you also can’t always do this when working with “sentimental stones”… Sorry, I’m not intending to sound “preachy”, I’m just trying to make a point of some of the Techniques that we talk about on here are much more difficult than we think that they are, most especially to those people who have less overall experience - what seems like a “walk in the park” to those of us with (10-20-30+) years of experience, may look like an “orbital moon landing” to those who only have a few months or years under their belts and little to no formal training. We all started at the beginning, but some of us have had the benefit of formal training, while others have not. Just something to think about when we’re passing on our more complicated Techniques via words on a Forum…
Anyway, I love the Ring in your photo, it was beautifully done and the separation in the Bezel, allowing the Diamond and Sapphires to almost “kiss” each other, is truly lovely. Thank you for sharing such a beautifully mounted Ring!
Jonathan
Back to your original question about how much space between the stones? I was taught there needs to be .5 mm minimum between two flush set stones, because you’ll need a minimum of .25 mm to manipulate the metal to flush set. You don’t want to hit a stone when you’re trying to burnish the metal to set them. Like I said that’s how I was taught.
You’ve set yourself for a pretty good challenge! This will be a great learning experience! Any shape other than round is always a challenge.
Also, just to clarify, what Jonathan said is better! 1.5 mm - 2 mm will be much easier to set. What I wrote is what I was taught is the absolute minimum between stones.
Thank you Jonathan Someday I’d like to find a mentor/teacher who can help me take my work to another level, but for now I am too busy just making enough for the markets, festivals, and “handmade, local” retailers I sell in (it is my full time job now, for which I feel very fortunate). So, I have limitations that way, plus I only have a butane torch. But I take on projects like this to learn new skills. Working within my skill & equipment limitations I basically try to make my own twist on fancier things. I sometimes hesitate to ask here but I learn a lot, even if I can’t apply all of it (yet!).
I am considering changing my plan to make something a bit more like this one below, though I have to check with the person as she barely wears jewelry and it may be too “different”. Thanks again!