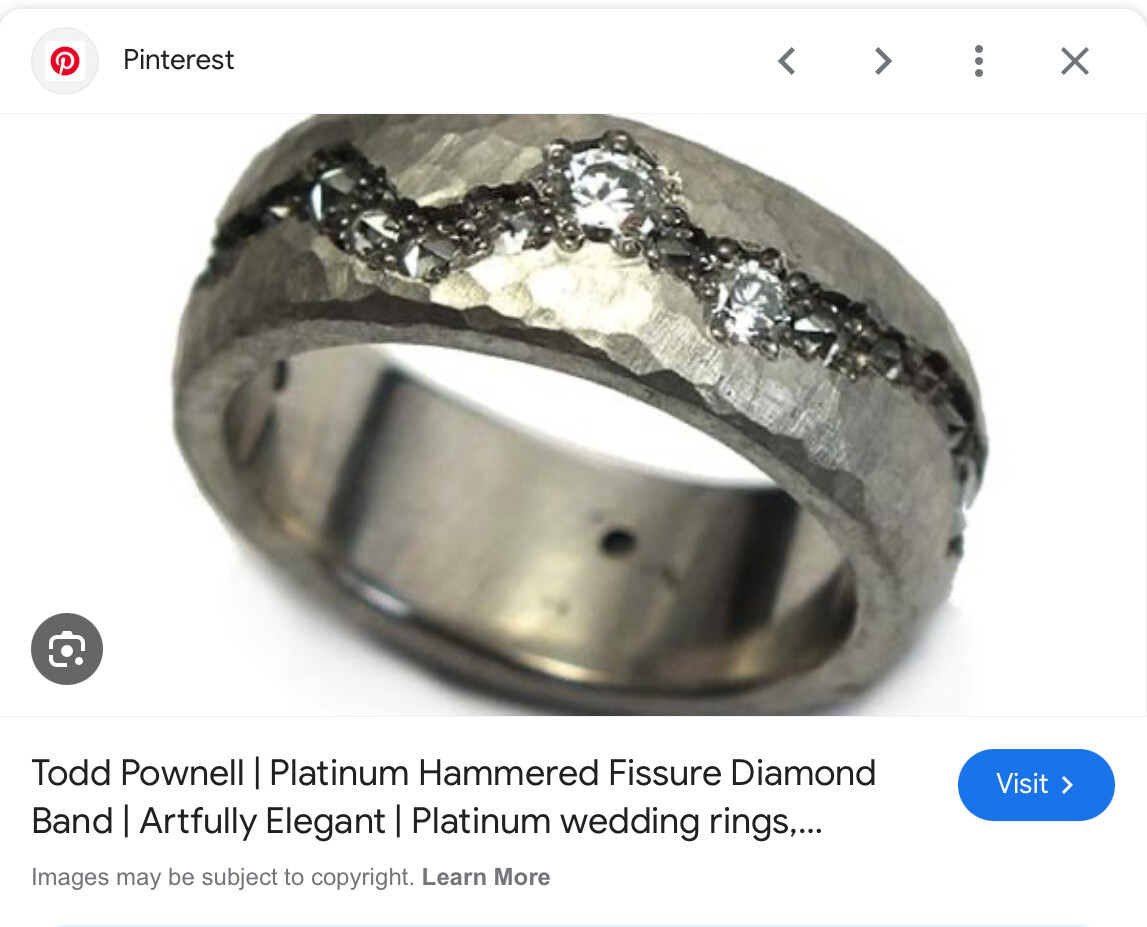
I’m really taken by these beautiful fissure rings. How would one go about making something similar? What method is used to set the diamonds?
Thank you
I’m really taken by these beautiful fissure rings. How would one go about making something similar? What method is used to set the diamonds?
Thank you
The stones look like they are bead set. As for the ring, I think it was carved that way, then blackened when it was done.
Looks like it could start as a wax casting and then be bead set as the previous commenter said.
Definitely bead set stones. I see no sign of graver work, so its likely that the beads were caste in place, but judging solely from a photo is risky.
Hello Learned Jewelers,
I probably shouldn’t even be commenting on this, never having bead set anything, but I don’t see any marks of a graver on the outside of the “bead,” so I’m wondering if this was bezel set by using a round stone setting bur and then the beading tool mashed into the wall of the cylinder, drawing a bead from the surface of the cylinder down onto the crown of the stone. So I’m saying maybe the bead wasn’t raised in the typical way, but just shaped out of the edge of the cylindrical wall…if so, it was pretty slick.-royjohn
This could be designed in cad and the prongs are all be pre-placed for casting. You can see porosity as an indicator. The priongs likely stick up and are trimmed after being closed a bit, then beaded heavily.
Thank you everyone! The consensus is that it’s bead set. I am inspired to learn to bead set then!!
Exactly ~ This isn’t how one typically bead sets. This style gives a very organic look and is relatively very easy to accomplish as Royjohn stated. The other diamonds that look like rose cuts, are set in the same manner, giving the textured fissured look. Actual bead settling is quite different, and well worth learning, though.
Tjones,
Thanks so much for that clarification/reply! No one else said anything, but it was pretty clear that there was no mark on the outside of the bead indicating it was raised from the outside of the hole with a graver. I’m guessing that the first pressure with the beading tool could have been straight down and then outward at 45 degrees or so and twisting to form the bead, but I haven’t tried it. Looks like a nifty way to start to learn using a beading tool…for gypsy setting (flush mounting). I think I’ll try it! This week’s project is getting a set of shelves up on the wall behind the bench where all the setting tools I bought will go. This will clean up the mess in my tray and behind the bench in a pile and make actual work at the bench a reality, I hope. Got lots of spare commercial cut stones to put into some silver and get rid of…might even get a before and after picture… -royjohn
Hi
and…it kinda looks lkke the smaller stones are set culet up…
julie
good catch! the culets are definitely up on some of the stones.
My apologies. It looks like the beads were there in the wax from the beginning. In my world we call this bead set. Technically it is not bead set. ( beads are raised with a griever)
Technically, would this be called pavé?
No reason to apologize, you are right, the stones are set with beads. In my mind when someone talks about bead setting, I think of what I know as bright cutting. Where the beads are indeed raised and metal is removed by cutting with high polished gravers, exposing a nice series of beads holding the stone or stones.
Pave´, is the French word for paved. I was taught that when one Pave´s, you set a whole area with stones so that it looks paved, with “diamonds”. One or two rows would be bright cutting in my way of thinking. It’s my understanding with Pave´, the stone are set close enough to each other, that other than the beads, only the diamonds are seen.
Here is an example of one of my rings where one side is pave´ ~

Here is a pair of earrings that have bright cutting, bezel setting and pave´. ~

If I were making the Fissure ring, I’d start with a platinum band that was thick enough to accommodate the larger stones after hammering, so the culet of the stone won’t protrude through into the center of the ring. Platinum is very malleable so that’s why you would first hammer the ring. One doesn’t want to be hammering around stones. Next layout the pattern of the stones, and then drill the holes and cut the sets for the stones. You’ll notice that the larger stone are set higher than the smaller ones. By flipping the small stones, they can be set deeper into the mounting giving the illusion of a fissure. The small stones are set relatively close together, so the metal platinum wall between the stone is thin and will easily form beads using a beading tool. To give it more of an organic look, you can use as many beads as you’d like.
To finish the ring, because it’s hard to get a shiny hammered finish with platinum, you could leave it with the patina from hammering or sandblast the surface for a more uniform mat surface. Last, blacken the fissure.