It appears to me that there are still some interesting facts in Gemstone setting that ‘we’ haven’t touched upon.
This essay is a definite 'must read & practice! The proverbial “Difficulty in Setting Scale” is @ 4, out of 10!
What setting tools do we need?
1) Triangular file #4 grit @ 20cm’s . 2) Pumice wheels of #180 grit & (my favourite) Pink #1,000 grit . 3) Pillar file #2 cut @ 20 cm’s, or 8 inches. 4) Emery Disk named ’ Snap-On’ 7/8th inch in diameter of " Medium " grade.
Pumice wheels should be both Tapered & Flat faced, why so? Then read further!
There will be situations where your file cannot actually file smooth! If you don’t use the pumice wheels, you will have little grooves, or striations remaining and these are created from your the file every time you apply a ‘forward stroke’ with your files . No other tool can file perfectly smooth , it still needs some drastic finishing measures in the process!
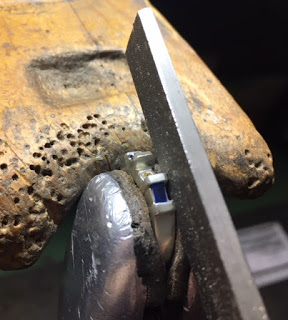
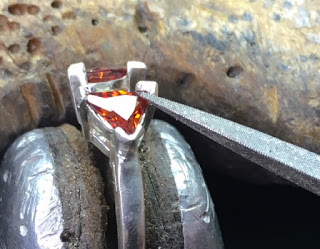
With the use of a Pillar file, you can see just how parallel the sides of the file are made. I prefer this Pillar file, as you can only now file the ‘two end-bezels’ at one forward stroke!*
The ‘parallel design’ of the Pillar file is better with this setting. When you attempt to file, you won’t have any deviation of the width of each ‘end-bezel’. BTW, this thicker file (will never bend in this delicate filing process)
The measurements of these two files are as follows;
The "Triangular file" at the top of the where the teeth start is 1.50mm’s but at the handle is 3.75mm’s . Now you can observe the ‘tapering & contours’, this file is not good for this style of the ring!! ;>(
BTW, both files are 8 inches in (total) length!
The "Pillar file" is the best file for this ring, why? It is not tapered and both sides of the end-bezels can be filed equally. The width is 12.00mm’s and the continuing thickness is only 3.75mm’s from the tip of the file to the handle.
In the following photograph, you can observe just how the Triangular file is almost and completely useless in this one delicate filing procedure. The tapering of this Triangular file eliminates any chance of filing two end-bezels with equal widths. This is so very important and these are totally required!!!
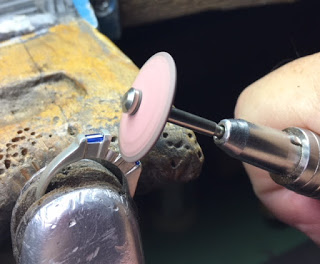
For the use of the Pumice wheel at #180 grit , I prefer if you could use a flat-edge patter on the wheel. Just remember, that every touch of your file, MUST be followed after with a Pumice Wheel!!!
Where you finished with your #180 grit wheel , you can now be using your (PINK) #1,000 grit pumice wheel. This wheel just nicely “Rouges” everything that your files and your #180 grit wheels touched.
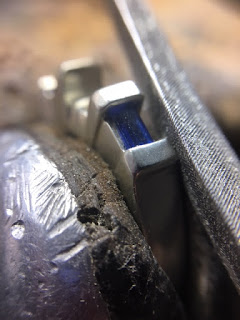
On the inside of the 'end-bezels’ and this is where your solitaire head will be soldered. You still need a very clean area and with NO MARKS!..(anywhere!) I again used both pumice wheels, of both grits.
Get used to this finishing process, as this must become ‘second nature’ to you!
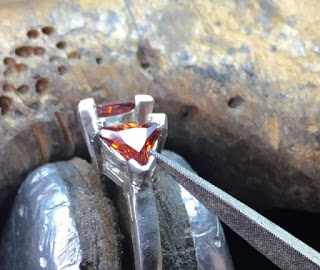
In this application of using a slim-shaped file , you can’t use your Pillar file. I heartily suggest that you should & must use the ‘tapered design’ of your Triangular file. This is the only file that you can use in these delicate areas!
As you can see I am using the ‘very tip’ of the file to get into these delicate areas. Can you imagine if you were using your Pillar file? You’d be having ruined ‘VEE’ shaped claws.
BTW, I always Bright-Cut the very inside of the “Vee” shaped claws. This again will be discussed in great detail in the next few essays.
Please do not use any other file in your collection!! Again, please use your Triangular file in these ‘very close & hard to get into areas’!
I suggest to you at most times to experiment with your multitude of files to see which file is best for this procedure of angling the ‘vee’ shaped claws. These claws must not be filed or trimmed…‘IN-LINE’.
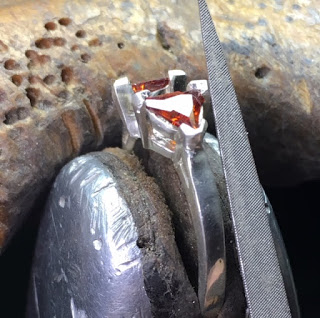
This Triangular file is now trimming the metal, at a 45degree angle . Can you see just where the file is being used? It is near the 1/3of the narrow-tip of the file.
I would file each claw at one claw at a time , YOU must see where the teeth of each side of the file as they are making contact…at all times! You can’t have your vision obscured by a large (Pillar) file.
At each file contact must be followed by using your pumice wheels.
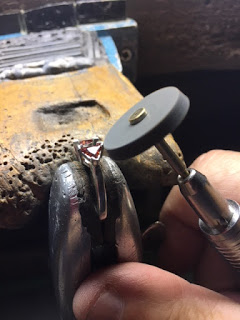
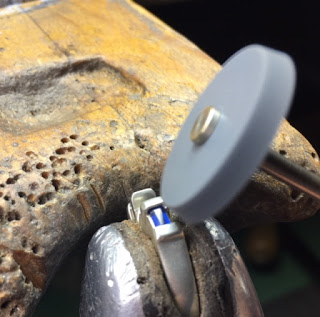
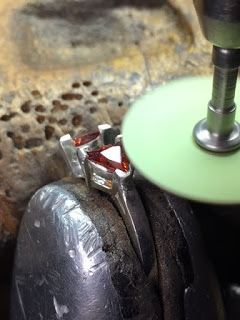
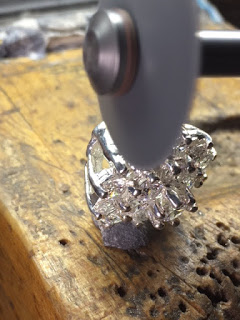
In this photograph, you can see that I’m using a tapered pumice wheel to file the sides of each ‘Vee’ shaped claw. This is somewhat difficult, this takes loads of practice in applying this delicate procedure to the claws & ring.
I’m using a “Tapered, Pumice Wheel” at #180 grit!
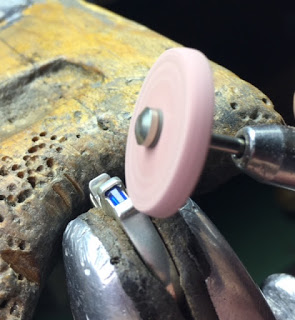
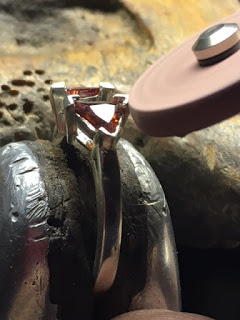
Now I’m using my favourite, (now yours!) Pink wheel at #1,000 grit!
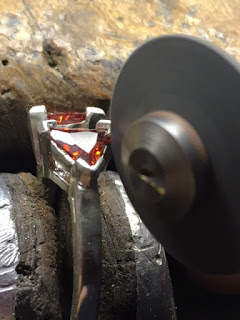
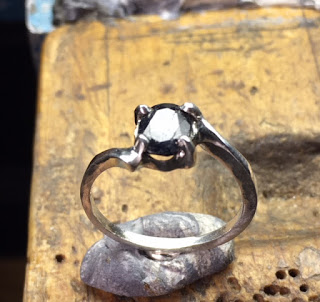
I see that the claw tips are too high and this will catch all kinds of clothing, not great to wear!
I’ll be using my "Snap-On" Emery Disks with a 7/8" inch diameter to lower the height of each claw tip. This is done only at one claw at a time, don’t let the rotating-disk prevent you from seeing where you are touching the metal.
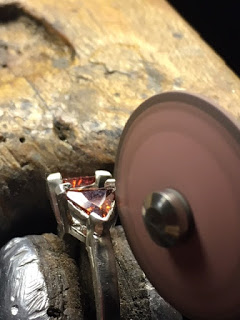
Just after the Emery wheel, I’m now using my Pumice wheel of #180 grit. With this still ‘rough cutting’ wheel, I can still lower the ‘claw height’. This decision is up to you, as to how low you need the claws to cover the stone.
Remember, you still need to (cloth-wheel) polish each ring or claws. Please don’t overdo this important pumice preparation.
In this delicate casting, I saw many errors in the casting of this ring. I must deal with these problems…NOW!
I’d be using extensively the following tools; The Emery disks @ Medium grade, plus the Pumice wheels #180 & 1,000 grit! Not too mention the Triangular files of #4 cut!
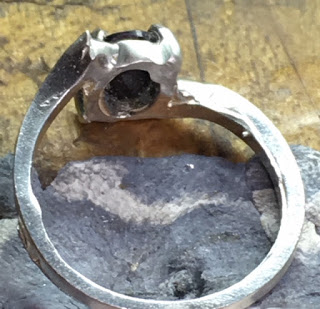
This little ‘groove’ on this one claw , is a part of the design & I preferred to have this little ‘groove’ remain during the cleaning process.
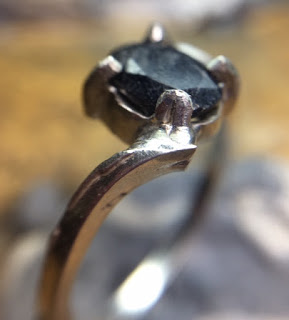
As this stone is just so darned ‘soft’ (6 on the Moh’s Scale) I found this after that some of my claw filing caused some ‘scratches’ on many facets. OUCH &YUK!
Please examine each stone you receive or buy that the stone is hard enough to file against. You can have ‘considerable contact’ with the files & pumice wheels with no thought of ruining the ‘Table, or Crown’ facets.
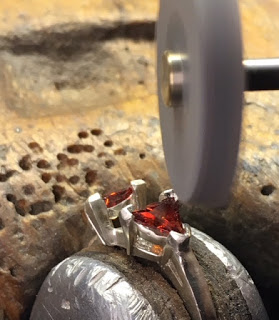
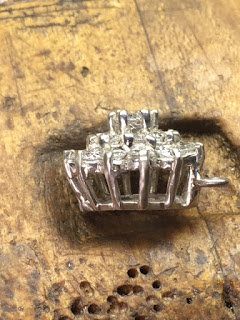
In this photograph, you can see how the Tapered #180grit Pumice wheel assisted me in my clean-up on this pendant.
This is a ‘before’ photo using only #180 grit wheel. Only a slight improvement from the raw-casting to the setting then…(scroll down!) …:>)
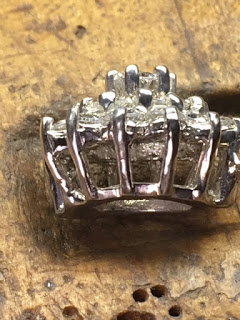
This is the ‘after’ photo using only my #1,000 grit pumice wheel . Can you imagine how this pendant might look after the total Cloth-Rouging of the metal? WOW!
This exercise in Filing claws is relatively quite easy to master, all it takes is about 200 rings! Be so very careful when you are cleaning around the claw tips. I even today, leave the claw tips slightly higher on each stone, why is this?
This allows much metal to be filed while you are ‘removing’ metal with the pumice wheels! Hoping that you learn from some of my ‘staged’ mistakes.
After some 55 years setting stones, it isn’t easy to ‘stage mistakes’ even for this essay…:>)