I friend of mine who has an antique and collectable coin auction business heard that I was doing jewelry fabrication. She contacted me about the possibility of doing some open bezel with prong settings to turn some of them into jewelry or to have the service available for customers who are interested.
I have not had much success with finding any good tutorials online - just jewelry stores who want to sell their own settings and services. Can anyone point me in the right direction?
Appreciate any help…
Linda
Hi Linda, first thoughts might be, do a google search with your friend and find coin frames that you are looking for and then look for them to gain the prices they are selling for in your area. There will be an Industry mark-up for this sort of thing. So your next question will be how do I make a coin frame for X dollars (and keep my friend) after the metal has cost me so much money.
I make my coin frames with five claws, that way they are unique and command a premium price.
Thanks so much for taking the time to reply. I apologize if I did not explain my question very well. My problem isn’t with establishing prices for my work. I was looking more for technical help. My friend’s business is well established and fairly “high end” so I doubt that she’s looking for inexpensive options. I’m not sure that this is a fit for me or her, but I do want to explore the idea.
I did the Google search before I even posed the question here — I’m a bit of a geek. LOL!
Most manufactured coin bezels are stamped, thin and one piece. One way to make a nicer one is to make a bezel around the coin, with the height of the bezel about three times the thickness of the coin. Solder that onto a flat sheet, which will be the top of your coin bezel. Trim the sheet up too the outside of the bezel. Mark a perfect circle for the hole with your divider on top by tracing around the outside of the bezel. Drill and the saw out the hole. File or ream until perfect, up to your line. Fit in the coin and mark it’s height on the outside of the bezel using your dividers. Then mark where you want prongs, usually four. Then lower the height of the bezel to the coin height you marked between your prongs. To set it you’ll just lay the prongs over the coin. You can get a lot fancier than this but this is one way to do what you’re asking to do.
After polishing you can mold it in no shrink rtv rubber for future use, but make it a hair big if going that route to allow for inevitable shrinkage.
I’m sure you know but it’s worth saying that you never heat or polish a coin. Some you shouldn’t even clean. So setting is the very last thing you do after the piece is totally polished and ready to deliver.
Hope that helps a little,
Mark
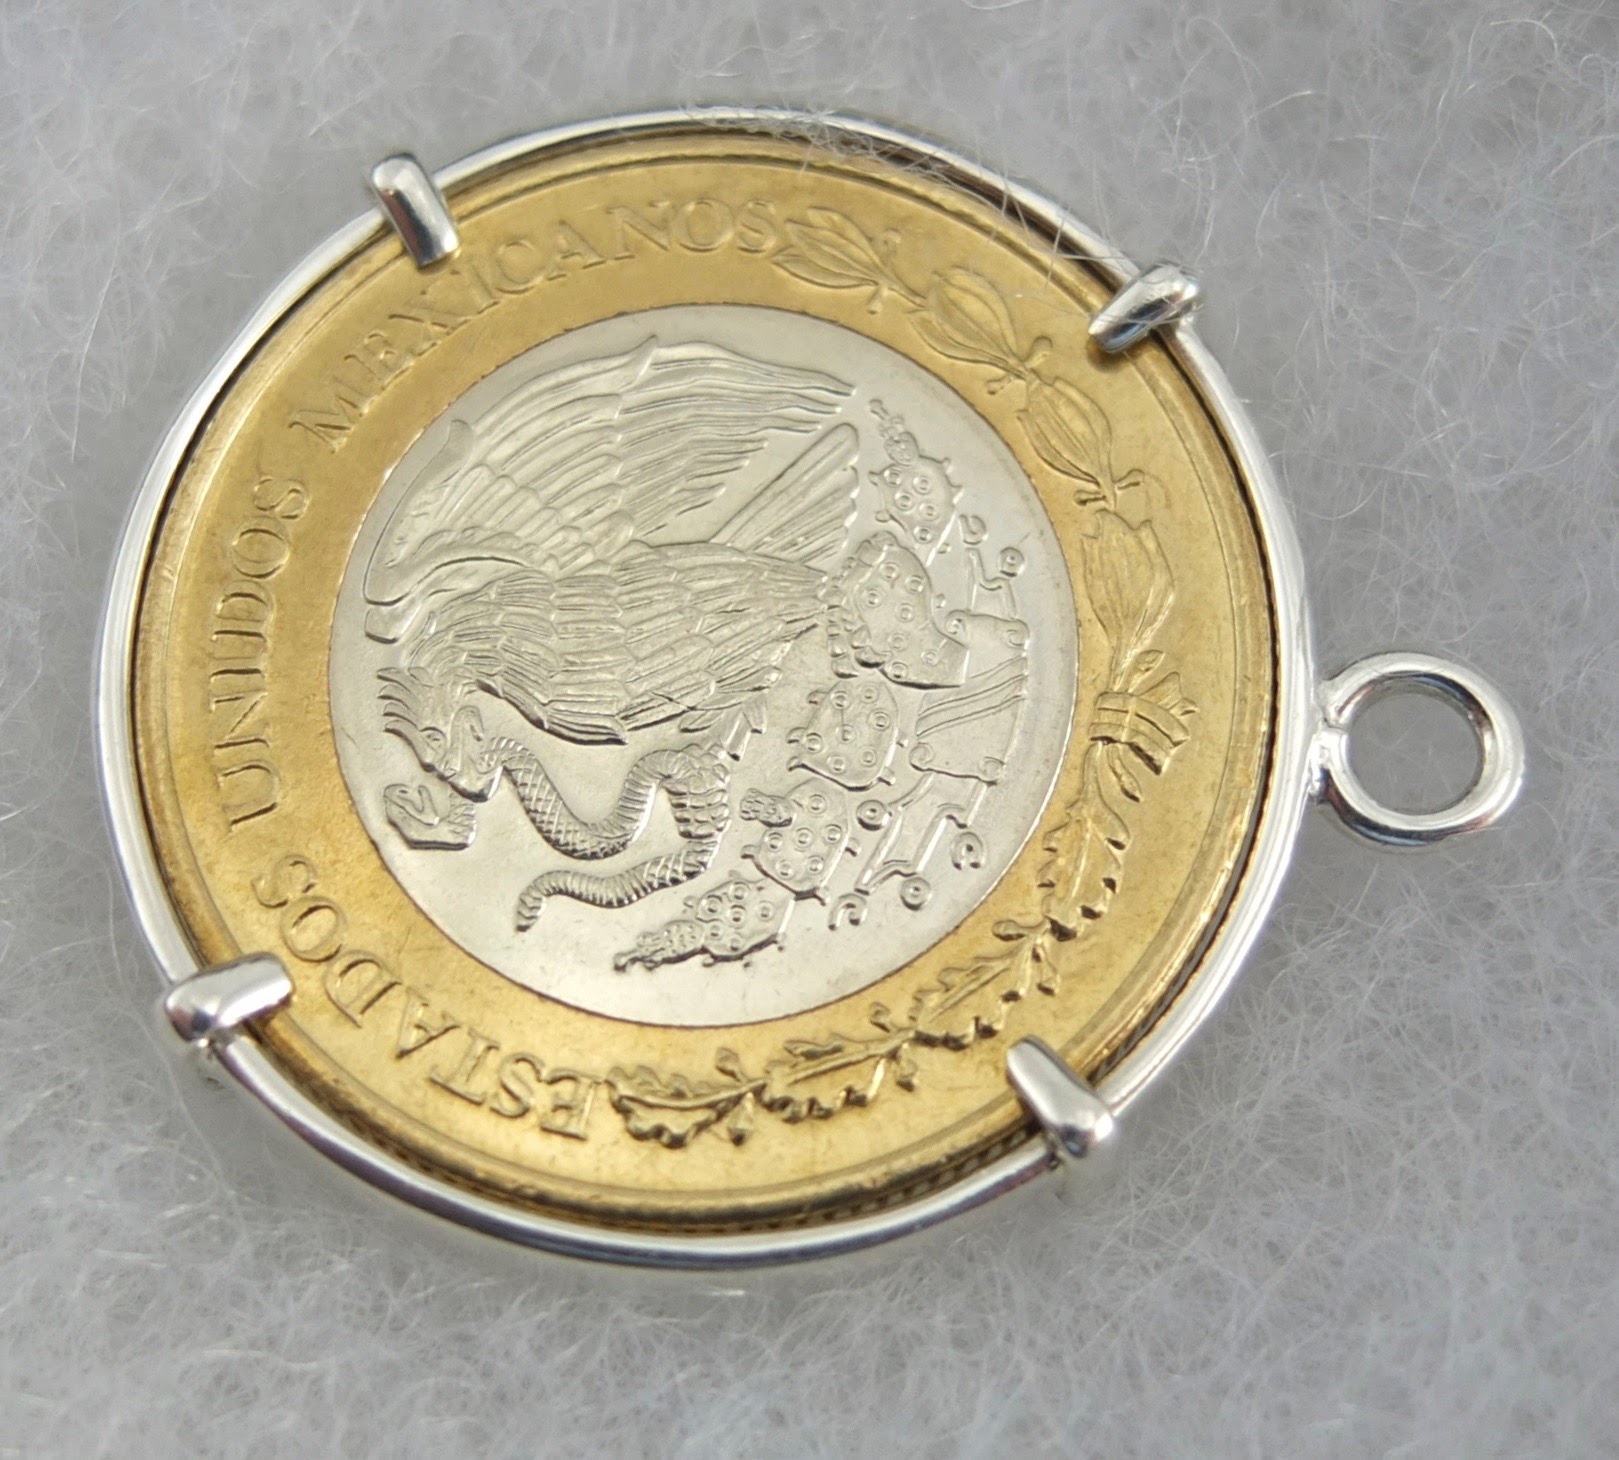
See the attached. This is fairly easily done. Wrap the coin with .5 - 1.0 thick material (silver in this case), add tabs that will close on both sides, set the coin and you are done…Rob
Anything to mention for non-round coins like clipped treasure coins? I imagine it’s the same idea, just not a round shape when done.
All this was great info and confirmed what I thought I should do. I am concerned about setting the prongs to the correct angle, that’s all. Should I file grooves into the bezel for them to “nest” at the correct angle?
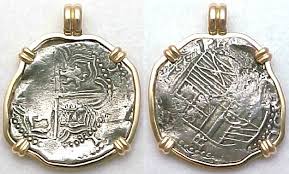
Here is a photo of a coin from the Atocha (very popular in Key west). Just anneal and bend to fit or do something creative. Doesn’t seem to be any hard and fast rules. WooHoo!
1 Like
“File to fit/nest” I’d use a lateral cutting bur, as in a ‘Bud bur’. Round burs make only round indentations, but not useful bearing-cuts for a wide & wide coin!
BTW, try not to ‘score’ as in filing the coin. I’d prefer to file the claws ahead of setting or pushing over the prongs. I’d even, as a second thought, lightly polish the claw-tips!
Another point, is to use a Copper or Brass pusher, do “we” need any marks on the soft coin?
I’m Gerry, On my iPhone!
You will note in the picture that I posted that the prong material is half round. You can file small grooves to locate the prongs. This keeps the line between the side of the half round prong material and the bezel cleaner when you solder. Just shape the bezel to the coin as you build it using pliers, a small anvil horn or, if you have one, a forming press. You may also have to adjust the height of the bezel if the coin is not a uniform thickness where it meets the bezel. This is as much an aesthetic decision as a technical one. I always solder on a small jump ring. Then I can be creative about how it is hung. You can also solder the bale directly to the bezel as in your picture example. These are a lot of fun to make and fairly easy. Good luck…Rob
I made something similar for a friend all silver though. Really like the gold contrast on these.
2 Likes