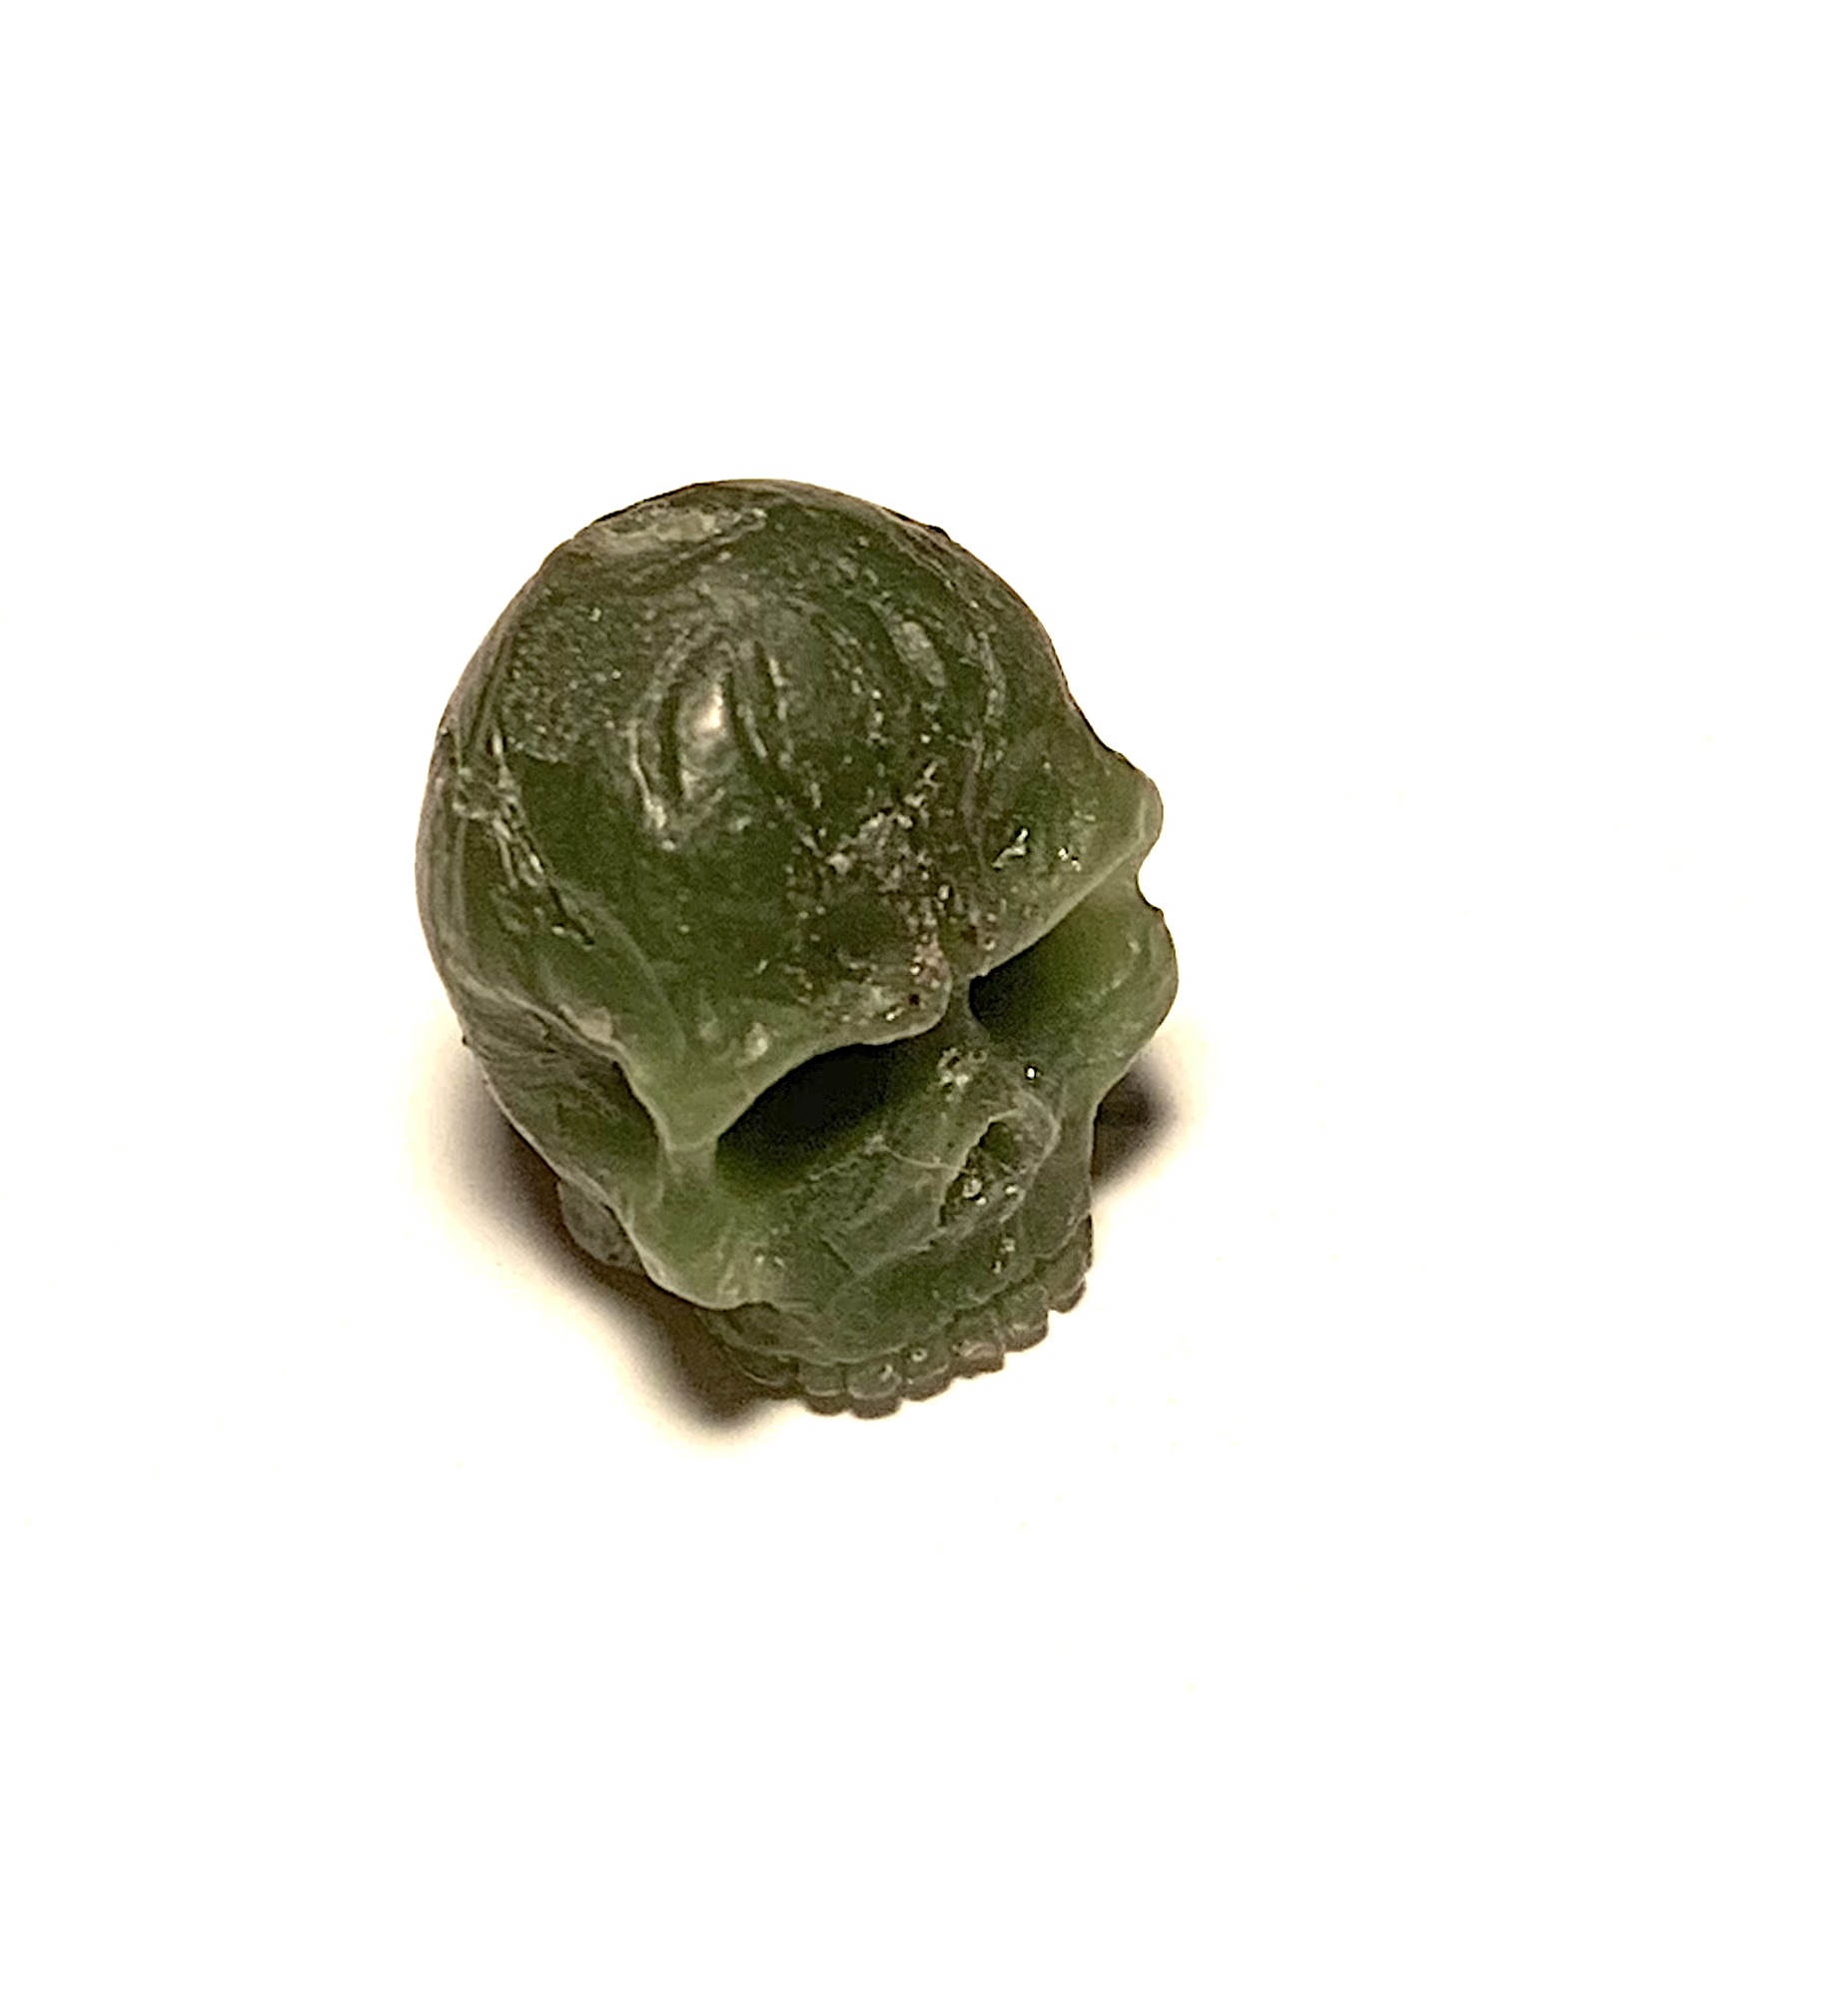
Does this look right? It has a rough sandpaper like texture. Suggestions on cleaning this up?
Richard
Does this look right? It has a rough sandpaper like texture. Suggestions on cleaning this up?
Richard
No!! I assume the wax was smooth if not like a near polish. I don’t know what happened, overheated metal (silver - sterling??) maybe, your investment. The entire surface looks roughened like the investment had coarse sand but the pitting looks sharp so I
am at a loss. I am not a longtime jewelry caster (my deceased wife was) but I cast bronze art pieces (100 lbs per crucible using ceramic shell to cast into). With wife castings (high k gold and sterling) and the bronzes I do, I/we never got such a “finish”
so I hope others on this list can give some direction.
Hope you figure it out. As to clean up, if it were mine I would spend time making another as it will be a lot of work and the piece will not be like the original (this is just my opinion). Good luck
John Dach
(see Cynthia’s work and art and my foundry info at http://MLCE.net )
Thanks, the wax was smooth and look like what I wanted it to. Another group talked about temperature of the metal when poured but I do not know how to figure that out. maybe that is my dilemma.
Richard
Jeepers Richard,
I think that looks pretty cool with that surface. Is it repeatable? Probably not the surface you hoped for but put a shine on it and post another picture. Some mistakes are happy results.
Don Meixner
One thing I noticed, what kind of ‘finish’ did your wax have prior to the actual casting process? Did you lightly Emery paper the surface, not using a course wax “finishing file” but using a #400 or #240 grit Emery paper wherever you have a flat surface. This will be now a ‘learning curve’ for everyone.
That is what I am doing now. Going with it and see what happens. 
I left a bit of roughness, but that is interesting point. Roughen up the wax with emery before casting?
attached is one of my wax models. When I was vacuuming the flask I was also tapping the Bed to help release the bubbles and this head floated to the surface…
Richard
I was not meaning to ‘roughen up’ the wax, but to mainly smooth off the inherent granules being shown. If you wish to use a #600 grit, then please do so! Just a 'trial & error" experiment.
If your wax was smooth and you ended up with a rough surface on the cast I would suspect shrinkage as the metal cooled and froze. Metal pulls back from the investment as it shrinks. You may not have had a large enough sprue feeding new metal into the casting as it froze.
Your skull is spherical in shape and these can be hard to cast as they like are solid balls.
If your skulls were about 1-2 cm in diameter (as I am guessing) then I would use a full 3/8 inch diameter sprue feed into the back of the skull.
You can also try a relatively cool flask temperature when you pour. I pour bronze with my flasks at 400C. The cooler flask tend to freeze the surface quickly as the casting freezes from the outside in.
For the first time it must have been exciting. It took me about three years to understand molten metal and figure out how to get repeatable results. Leaving offerings to the casting gods some times helps, too.
You “could” get a pyrometer but that is expensive. I have one for the bronze work and it does help me make better castings. For the jewelry, Cynthia never used a pyrometer as she “knew” what the metal was supposed to look like when it was hot enough. From
what I know, I would say the metal was too hot and that the added heat caused a reaction with the investment. It shouldn’t but…… If you can, maybe make 3-4-5-? investments of some piece that has been molded (rubber) so you have very similar pieces to cast,
then sprue, invest and do a burnout with all of them in the kiln, have metal pre weighed out for the number of invested piece you have (and each piece
has to be in it’s own investment canister ). Once the burnout is done, lower the burnout kiln to the temperature you are wanting the invested pieces to be at when casting or the temperature you want them to be at when taken out of the over and
“cooling” while you are melting the metal for that can, pout the metal and be VERY AWARE of what the margins of the molten metal looks like when you “think” it is the right temperature ,and pour it. Start off either with he coolest pout and work up hotter
or start at the hot end and work to cooler metal temps. Keep track of what can is what. You should be able to gather some very helpful “proper metal temperature” information for future pours. Also remember the thicker piece usually needs a bit cooler metal
heat, a fine highly detailed piece needs a bit more and this “how hot” thing goes for the investment temp too. Thicker/heavier usually requires a bit cooler temps for both metal and investment, fine, thin, long runs need to be hotter.
Without temperature measuring instruments, it will have to be an educational/experience learning curve. EVERY CASTING will not come out perfect when learning just like most everything in life. If you can get together with an individual or group
of folks who has/have been casting a lot, it is fastest to actually “see” and have it explained as to what to look for in a properly heated melt prior to pouring. Colleges, some high schools, rockhound groups and recreation centers are some places to look.
See about sitting in on a college jewelry class during a casting!!!
A bit of an alternative to all of this, for knowing metal temperature(as I assumed -possibly very incorrectly, that you were torch melting the metal) is using an electro-melt (electric melting unit with covered, carbon crucible and temperature
gauge). This is just a thought…. we torch melted most all of our metals for jewelry but have an electro-melt as at one point we were thinking about living aboard a boat…… day dream that never happened!
I don’t know where you are but I am in Sequim Wa, south of the southern of Vancouver Island. I would be happy to show you if your are near here…
Best of luck on this project.
John D.
Good thought but my wife used to use naphtha to “polish” the wax. We used i on Serria Red (our go to casting wax) and she carved in a highly plasticized green wax for her masters and used naphtha to get a clean, smooth surface.
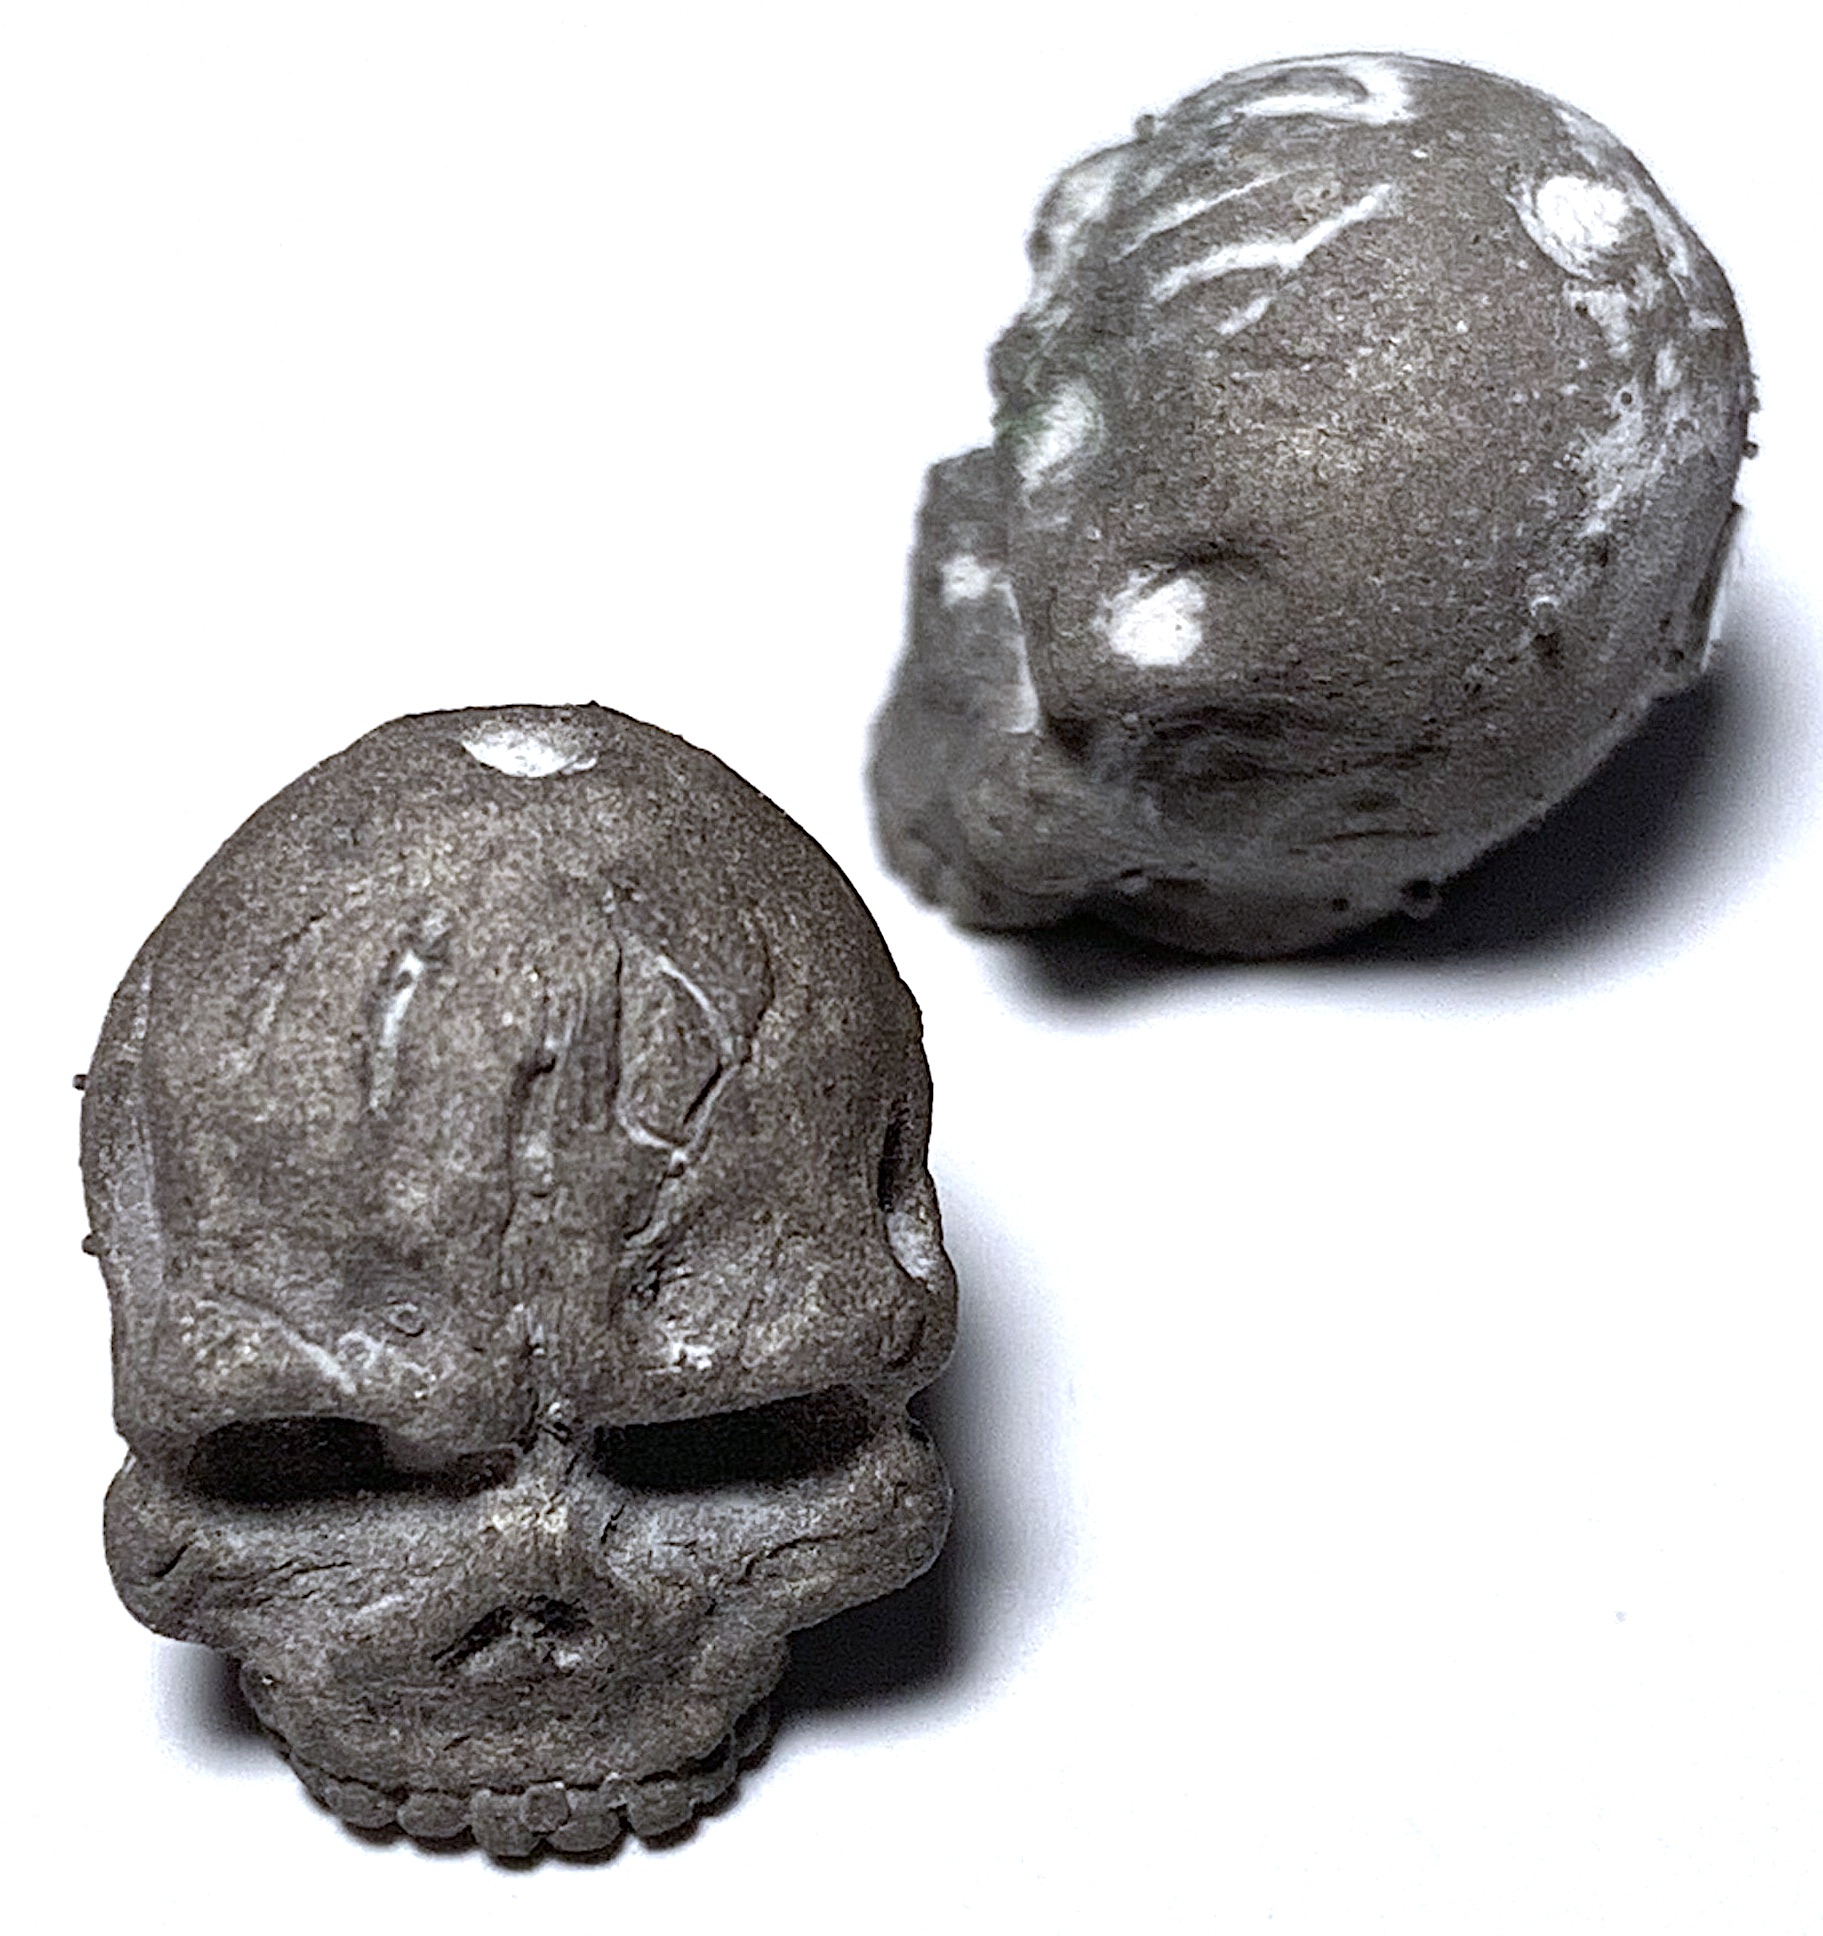
Oh! I understand. I put them in a tumbler with 600 grit pyramids. Looking good so far still need some cleanup though.
Wow, Thanks so much for the info / feedback and the offer to help. It is unfortunate that I am in Calgary Alberta. so I can’t come down and watch. However I will look into the college idea here.
Thanks again, Ill post when I am done the cleanup. they are in the tumbler now.
Richard
If you are in Calgary come see me for casting help. I live in Calgary, too. Contact me through my website. www.bronzeart.ca
I agree with WMiles; that looks like shrinkage to me as well. I’ve
also encountered this when casting heavy solid objects. More feed and a cooler mold helps, but casting them hollow rather than solid is the best solution. If that’s not practical, then you might consider implanting a “chill” in the mold. Take a bar of silver about 1/3 the thickness of the skull but half as long, clean off the surface, then heat and flux it. Push it into the skull so half is inside the wax and the other half protrudes, then invest as normal. When you sprue it, use a larger sprue than before, and let the mold cool down before casting it. The metal entering the mold will freeze around the chill instead of on the surface, so you won’t get the effect of the new metal surface shrinking back from the mold, which causes that rough appearance. The new metal should adhere to the chill, so you can cut off the part that sticks out and finish it down to flush.
Oh, that is such a cool idea. The skulls are 9 grams each. I will definitely try that on the next run. I like the feel of the heaviness of the skulls but I could also try and do a more hollowed out version. Stuff to think about.
Thank you!
Richard
Oh, Awesome, I will definitely get in touch with you. I was just at your site and I have been there before. I love your stuff.
Richard
I’ve never tried casting, but I just wonder if you were to form the pieces with a hollow core, could molten metal be poured in after the fact to add weight? Just wondering.
Mary
Mary,
If a person wanted a solid casting, as far as I know it would be done right off the bat, and shrinkage controlled with heat sinks, large sprue, I would also use a larger button and a reservoir between the button and the piece. There are a number
of ways to accomplish solid castings so technique just depends on the persons likes/choice/learning….
John D.
Thanks,
Richard