This process of setting is basically a great setting technique for wedding bands . It is rather a simple & easy pattern to create. But one thing, this is not for the hobbyist or absolute beginner in Gemstone Setting, so very sorry!
This setting process took me many years to perfect and went through many variations all trying to achieve what you are about to learn & observe today ! Some aspects of my earlier versions are still being used, but I’m trying to make it less difficult for you to learn!
The Scale of Difficulty is about an 9.5 out of 10. There will be many times you will be frustrated in your results, but this is your fantastic “Learning Curve”.
Previous experience in using a Graver: This is now estimated at 3-4 years (or more)!
"Frustration Level’ is rated at 15 out of 10!
What tools do you need:
Graver #1, or #2 with a rounded tip. .(this will be shown at the end of this photographic essay!
Very wide Flat graver (estimated) at #42 in width!
Flat Graver of #40 for all of the flat bright-cutting …all are to be shown in this essay!
"Inside-ring clamp" this ‘clamp acts like a vise’ and not allowing any side-movement while setting!
Graver #1 for initial cutting around the ‘wire-hooking, mini-claws’ that will hold the stone!
Bud-shaped burs: I suggest #006 & #008.
100% Patience is required:
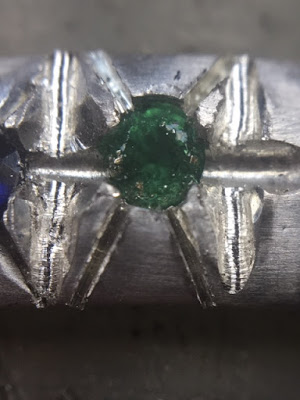
On the two vertical lines, I use a bud bur #006 just beside the round stone hole!
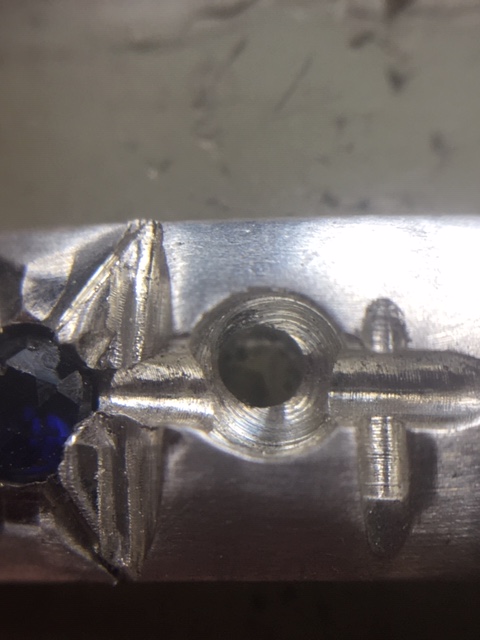
In this photograph, you can see just where the #006 bud-shaped bur is starting to cut . Please make one cut…DEEP! A lot of aggressive graver work will be stemming from this one bud-bur cut
Just continue from one side of the ring to the other, but make it DEEP! Once the bud-burring has been accomplished, place your stone in the desired hole for securing!
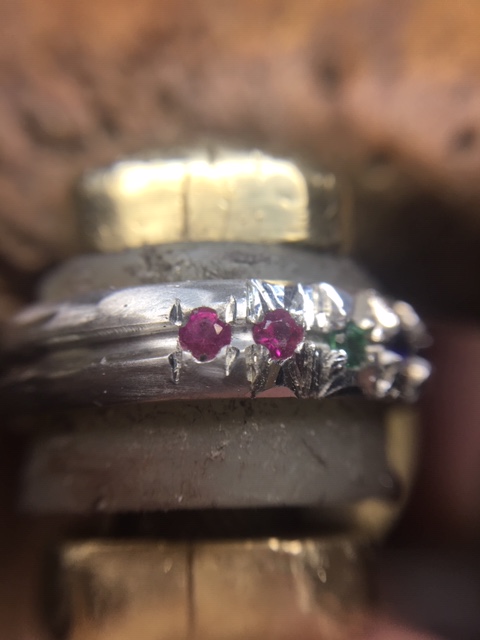
With your very wide Flat #42 graver, twist the blade so metal makes little ‘hooks’ that will curl over the four corners! Your very wide flat graver rests in the bud-shaped recess and allows you to twist metal over the stone. Once this has been done, call this setting exercise, “half-finished”!!!
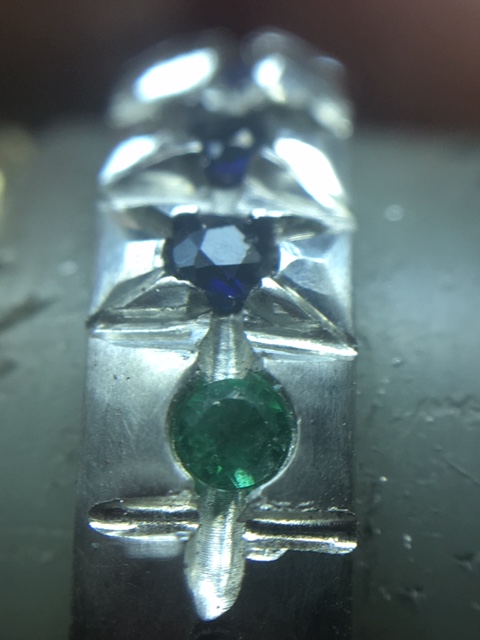
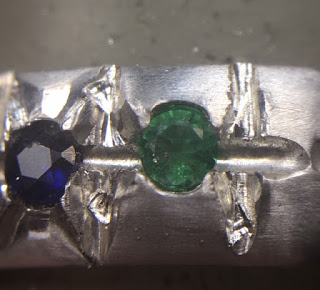
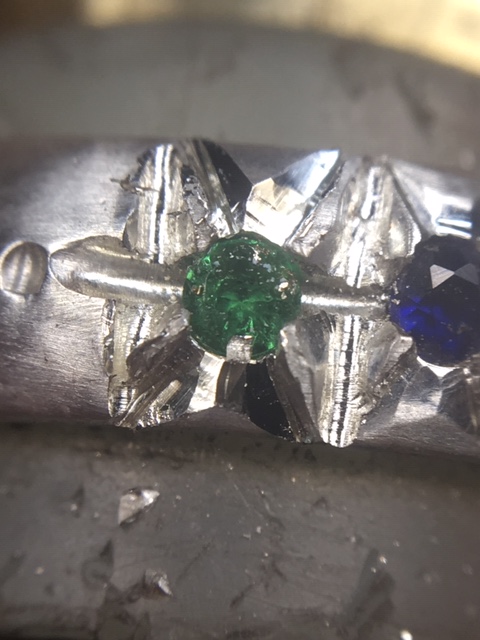
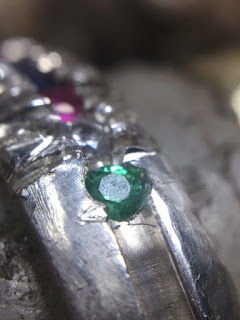
Try not to use a genuine Emerald, why so? The aggressive touching or Onglette cutting might easily damage this very delicate stone.
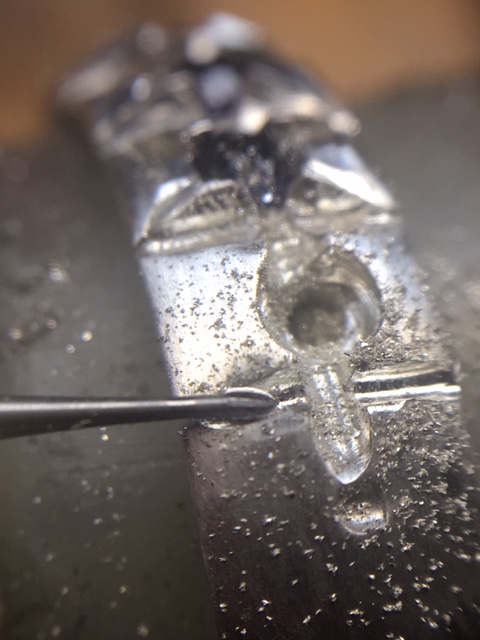
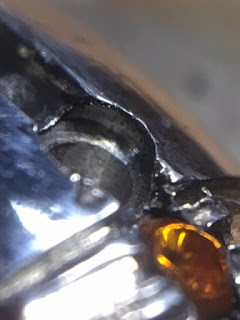
With your Onglette #1 (very thin) graver, cut right beside each of the "twisted curl-beads" . Thus leaving a thin piece of metal securing each corner of the stone!
The next step is to flange the metal with your Flat Graver #40 and Bright-Cut as being shown.
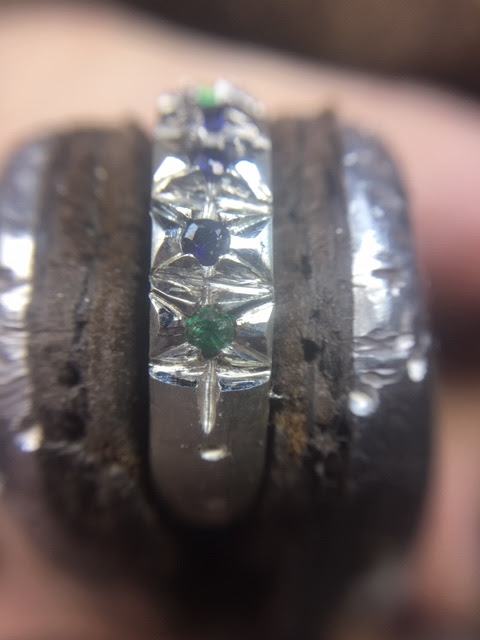
There will be many times you will have multiple areas that are very far apart. I use my #40 Flat graver and again flange or Bright-Cut every piece of metal. I’d even use my half-round Onglette#2 and cut a smooth line and separating other lines in the metal…(shown here)!!!
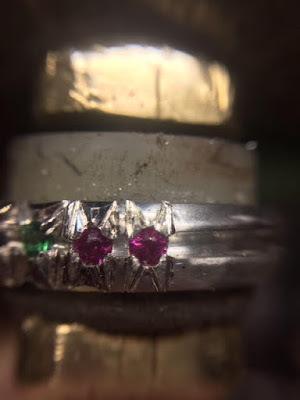
In this "out of sequence’ photograph you can see where my thin graver is now starting to cut lines.
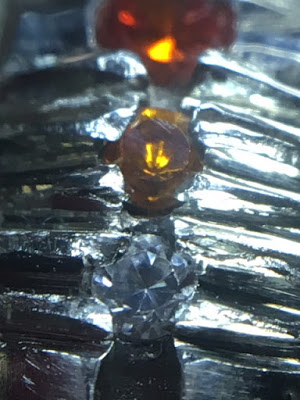
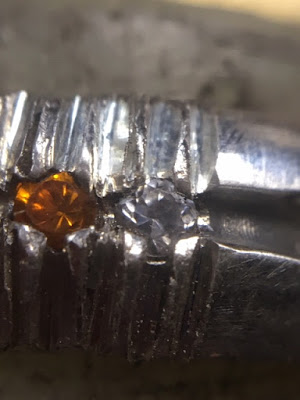
I should warn you that the holes & spaces in this picture are too far apart, this will lead to much anger & frustration. I’d ask you to experiment and drill your holes closer together. Your ‘learning curve’ is now starting, agree?
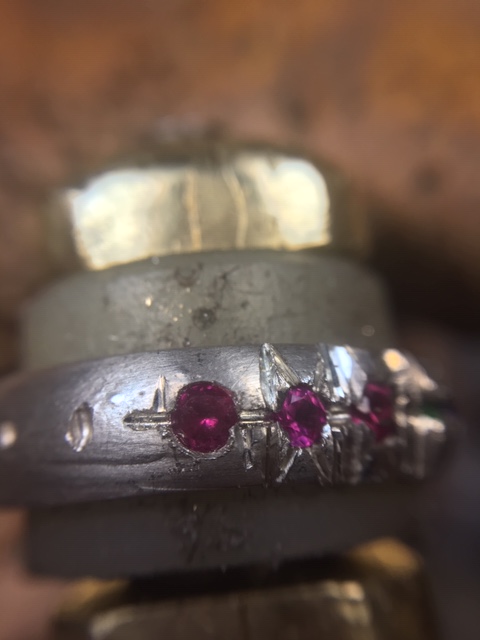
Now you can see what problems you might run into if the two stones are to far apart… . too much space and much Bright-Cutting just to cover up this error in drilling of your holes. Get the stones much closer!
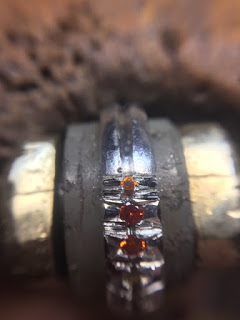
This end stone is only a 1.47mm’s in size, try not to use any stone smaller than this size!

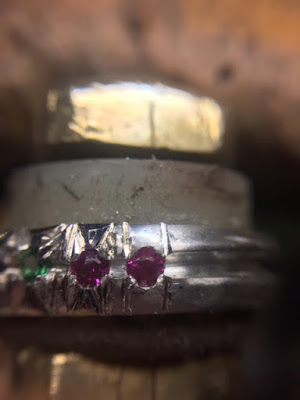
I’m now using a ‘half-round’ shaped Onglette #2, as the space in between the ‘corner curls-beads’ are too narrow to use a Flat graver. There is just no area to do any fancy cutting…:>(
If you have a ‘barrel-shaped’ stone. I truly suggest you contour the inside of the hole with many little bearing cuts! I’d be using my Hart-Shaped, under-cutting"156C" to make the appropriate cuts, this will keep the stone at a flat configuration and not getting crooked/tilted…not nice to see!
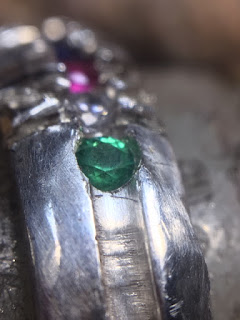
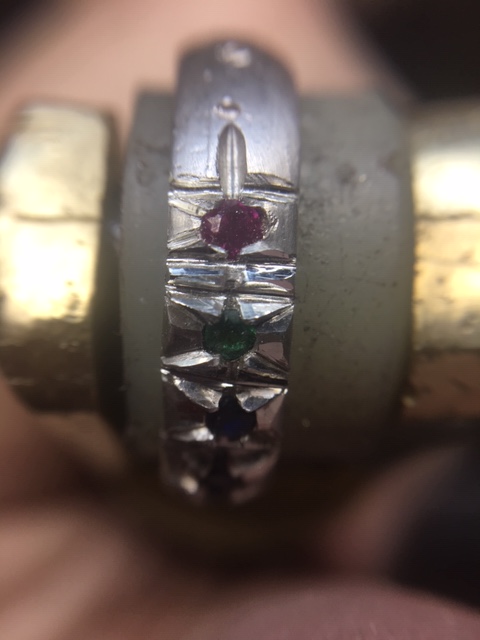
Please be so very careful with any soft stone that you must set. The chances of ruining those stones are 85% in this style of setting. Blue-Sapphire, Diamond, Ruby and Cubic-Zirconia are just easy & great to use.
In this interesting picture, you can see how the half-round graver is now starting to make those little deep polished cuts.

In this picture you can see the bearing cut, to be used only if your stone is not ‘diamond shaped’.
Don’t hesitate if you feel that you can’t use your Flat graver, then please use your Half-Round graver instead. I do, and the results are still great for the overall eye-appeal.
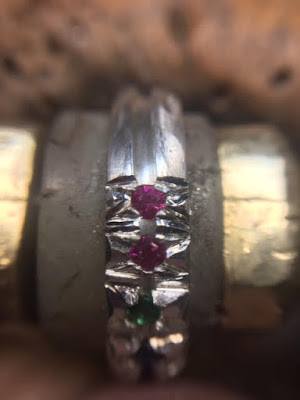
From a distance, all of the cuttings still looks great. But you still should Bright-Cut any where you can. I still like to have ‘sharp & clean’ cuts…everywhere!!!
These two Ruby stones are really to far apart, even for me! I was not 100% satisfied, but after so many years, I experimented and cut lines to remove any flat surfaces on the ring.
To avoid this problem, I suggest to drill one hole at a time and not to rush this setting project.
"Thinking ahead is such of a time-saver".
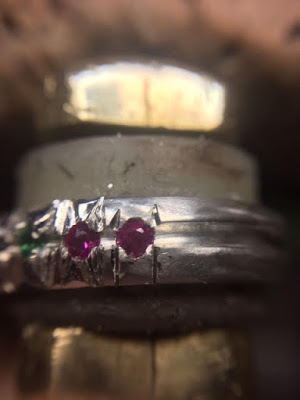
By having your two stones so far apart, can lead to much frustration at your bench. Don’t get discouraged, you are learning a very difficult technique.
From the curl-beads I used my graver and “Cut-Down” towards the edge of the ring. Hence the name of this technique…“Cut-Down”.
With my modified narrow Onglette, I cut lines into a “V” shape pattern. As shown many times in this essay before, your experience at graver cutting is now helping you immensely.
Bright-Cut every line that is seen! Even if that line is far away from the two stones. Having a Bright-Cut makes everything look so much better.
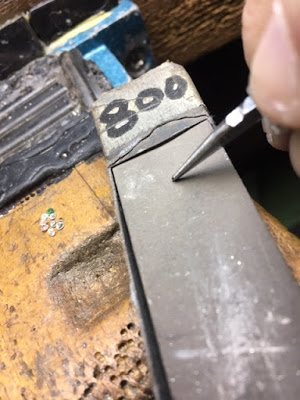
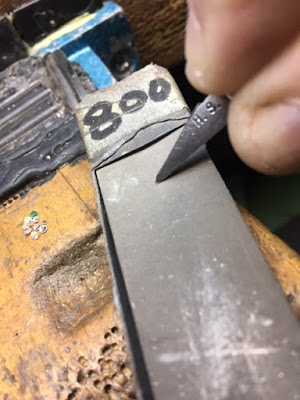
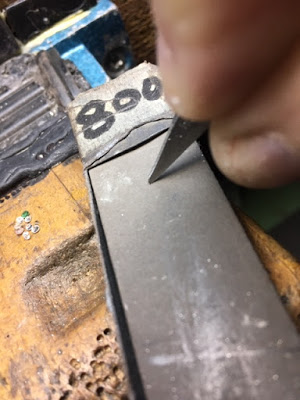
These three photographs show how the graver is held at a ‘high-angle’ and slightly rotating while being rounded on your #800 Polishing Paper.
DO NOT USE ANY EMERY PAPER, the rounded graver tip needs to be highly polished and smoothed. But never leaving a dull & rough texture, you want a smooth bright & shiny surface in between the wire-claws. Your polishing machine can’t reach inside these cuts, now YOU must to do this yourself.
To achieve this highly polished graver tip, you must be rocking the blade from one side to the other, You should now have a nicely rounded and a very smooth graver point!!!
This has been one of the most difficult setting techniques that I can think of. Explaining the important steps many times, you can now easily duplicate what I just showed you and will become almost ‘second-nature’.