“Gonzo Cutting in Walmartville”
By Hans Durstling @Hans_Durstling1
Moncton, Canada
As a jewelry maker you get asked to do some strange things. Sometimes they’re amusing (occasionally to the point of being weird), sometimes they pose a technical challenge, sometimes they’re downright impossible.
Same goes for cutting. For a local jeweler I once repair cut a sherry topaz of major sentimental value to its owner and family which under the loupe and refractometer turned out to be beer bottle glass. Whether the owner was ever told I don’t know. Another jeweler memorably asked me to recut a huge (and ugly) amethyst pear he had dropped while setting, badly chipping the stone. One chip gouged halfway down the bottom (pavilion), another ran deep into the crown. This wasn’t cosmetic. This was deep damage, top and bottom. Nevertheless the jeweler was hoping I could recut it to still fit the existing setting. It took some explaining to convey that the process is subtractive; you can only cut the damage away, you can’t put back what’s missing. Yes the stone will get smaller.
It’s the singularities like these that stick in your mind. The present nano-garnet project falls also into the memorable category, and this photo-story takes you through its stages – both in thought and in the cutting adaptations that resulted. And now the story.
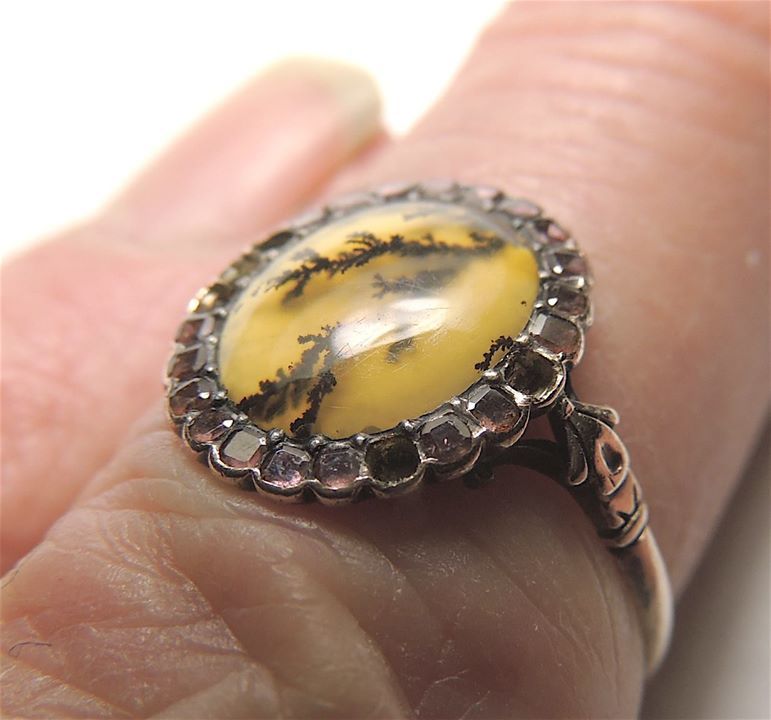
After a month of housesitting in Halifax Nova Scotia I had returned to my own domain in Walmartville (a whole 'nother story right there, or maybe better not) bearing this piece (picture above) from a Halifax jeweler - an antique ring with a dendritic opal center stone framed in minute emerald cut micro-garnets. Half a dozen of the latter were missing or fatally injured. Could I cut replacement stones in that size? Now, when asked a “can you do this” question my habitual response is to say yes and figure out the details later. It hasn’t been fatal yet although that may still come. The immediate considerations that came to mind were twofold: first, the garnets were not machine cut, but had been cut by a human. Thus if one human could do it, so could another, in this instance, me. Moreover given the age of the ring chances were that I probably was better equipped technically than the original guy. So there was no compelling reason why I should not be able to do this job. With those hurdles out of the way, all that remained was to figure out how.
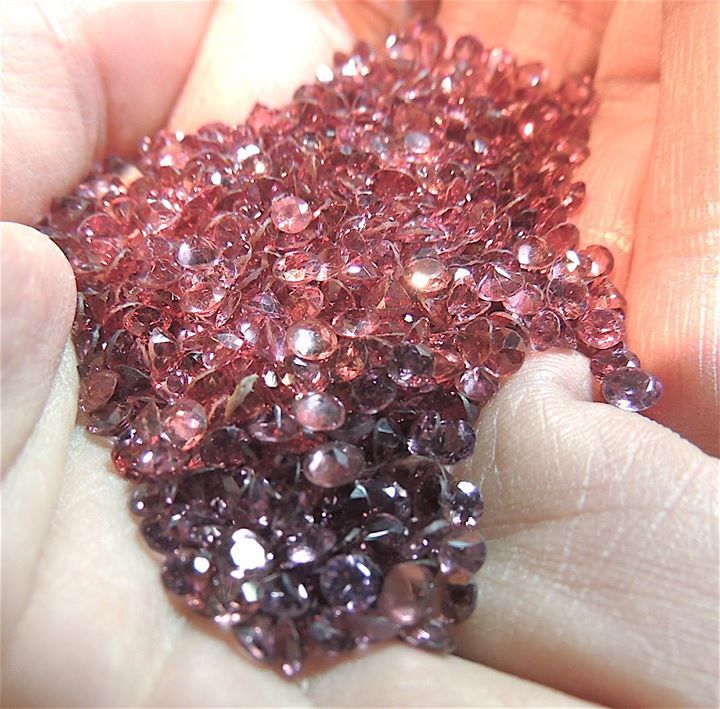
The finished stones were to be emerald cut and 1.2 mm wide. I had acquired this handful of garnet rounds some years ago, so there was at least no shortage of garnet “rough” to work from.
They were all in the 3 mm range, amply big enough to cut down to the required size. For a brief moment I thought it might be possible to cut only the crown and use the existing pavilion – but since they were to be reduced to a square that wasn’t going to work unless I cut barion facets under the girdle and that option was out since they also needed to be shallow. A 40 degree flat pyramid was all the pavilion they’d get.

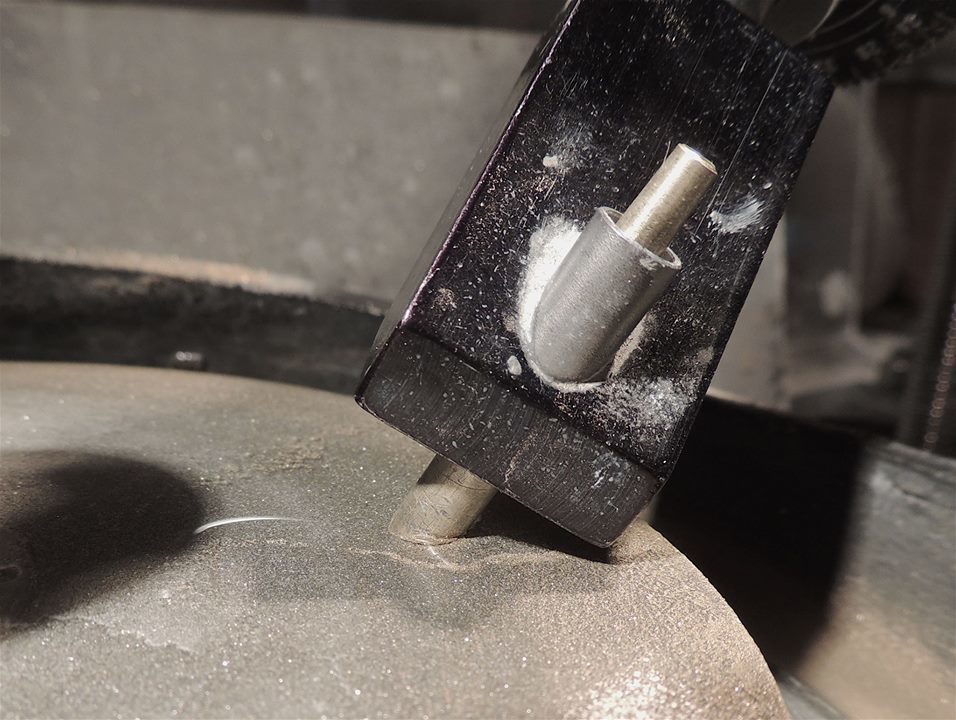
Next issue – how to hold these things. This launched a quest of trial and error, modification and refinement. Something tubular seemed the most sensible option. The photo above is the first kick at it – a 2mm stainless steel tube held in a pin vise with the garnet held in by crazy glue. At this point I was still under the delusion that I could maybe cut the stones freehand. The first run with the tube and pin vise arrangement proved otherwise. With a binocular microscope or 10x loupe on each eye, perhaps; otherwise no, not with optivisor nor any other form of assisted vision. If not freehand they’d have to be done on the faceting machine, held mechanically. Furthermore the 2mm tube was too big. By the time the stone was cut down to 1.2mm the tube holding it would have been ground away. What other holding options might there be?
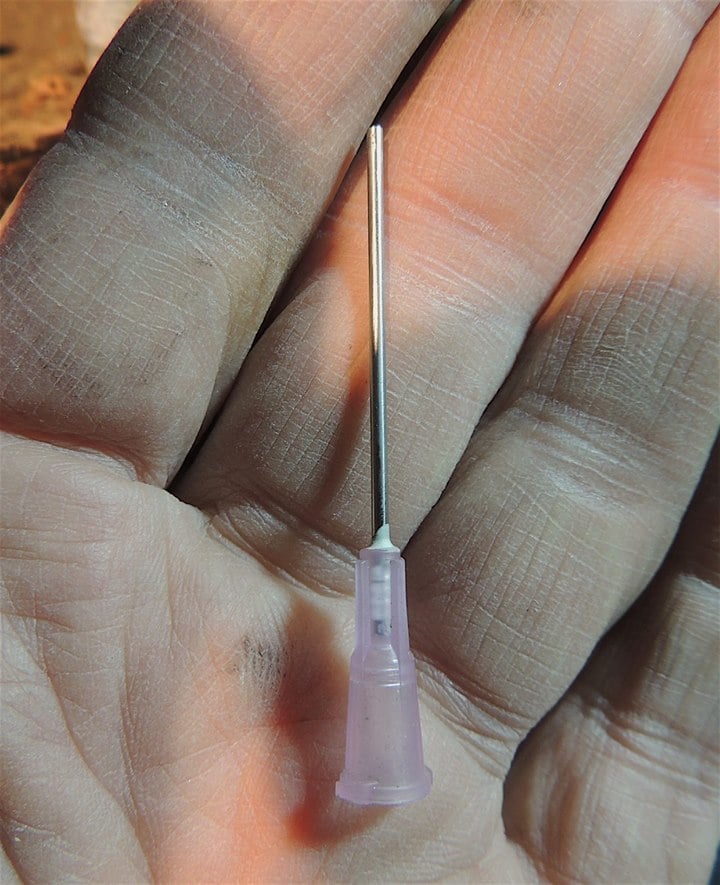
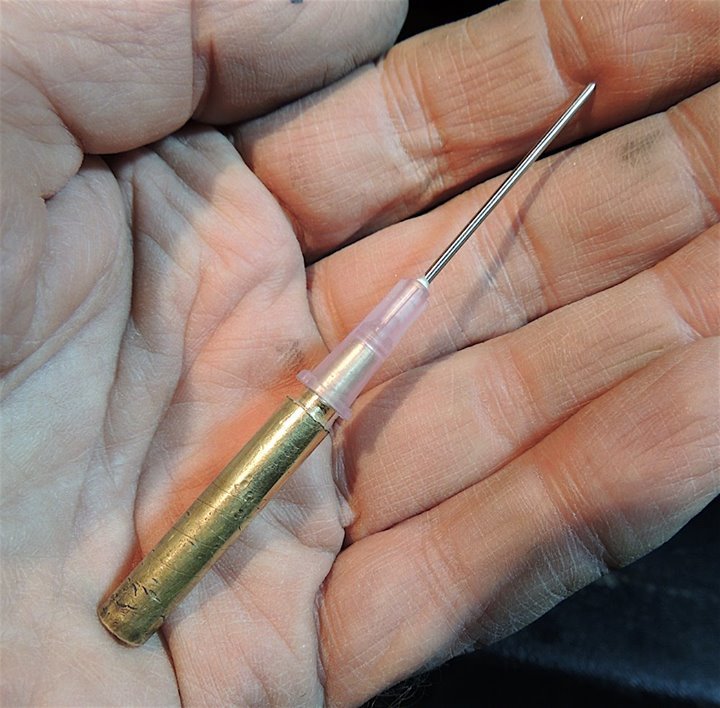
Eureka! Hypodermic needle to the rescue. Since I make up my own diamond paste for faceting, I had a selection of needles at hand. By lucky chance the biggest of these was just the right diameter to hold the finished stone. With that, it was on to the next question – how to hold the needle that held the stone.
The first solution entailed grinding a brass dop (using the faceting machine as the tool) to a cone shape that would mate with the taper of the hypodermic socket and with the garnet fixed on with crazy glue.

This is how it looked on the machine. The long needle made it springy and difficult to control; at any bump in the lap the glue bond would break. But it did hold promise, working well enough to suggest that the system might work if the needle were shorter and held more rigidly. So that modification was the next step.
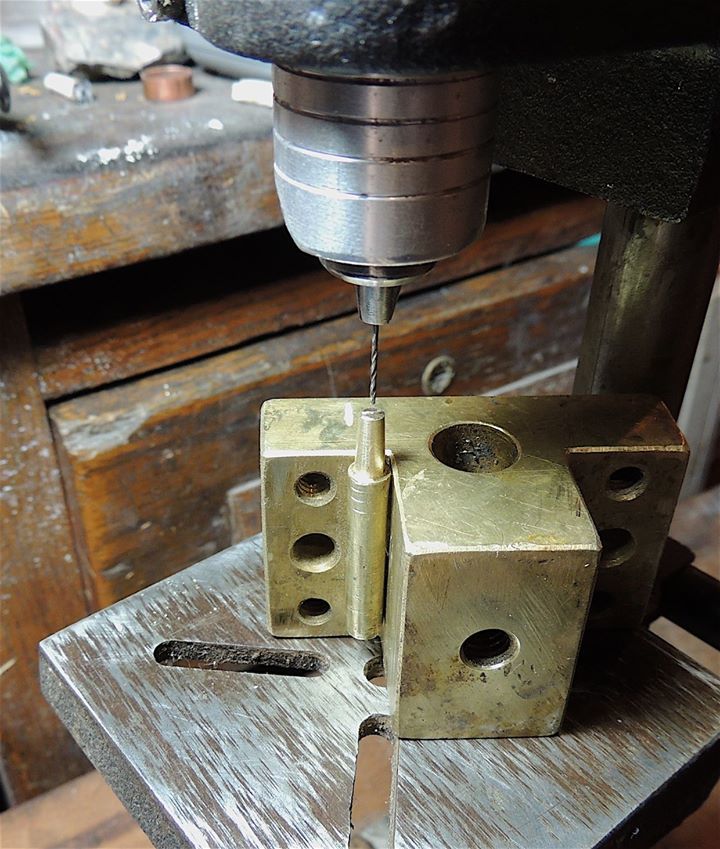
Here I’m using crazy glue and a piece of scrap brass to keep the dop vertical while drilling a hole for the (shortened) hypodermic. Without a lathe centering and aligning stuff is always an issue. Knowing I wouldn’t get it accurately dead center with only the drill press I purposely made the hole a slightly oversize, not a tight fit.
There’s some play there, as you can see by the droop of the needle. This will allow for subsequent centering.
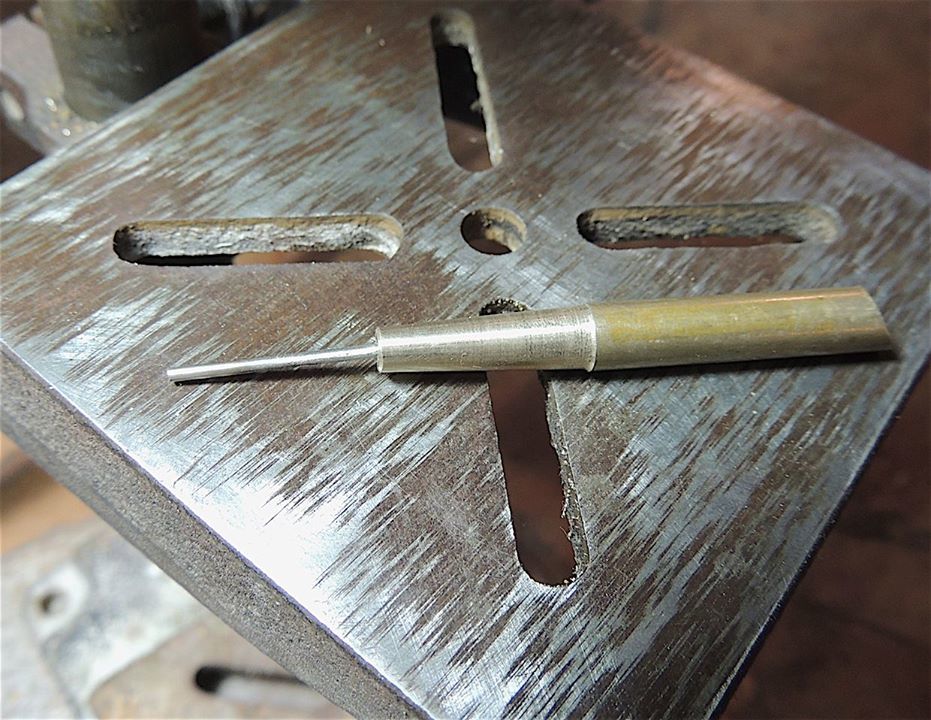
Nearby on the workbench was a dop with a cone shaped piece of amethyst already stuck on, a briolette experiment never completed. Grinding the amethyst to a point on the faceting machine gave me an accurate dead center on which to align the needle in my home built brass transfer jig.
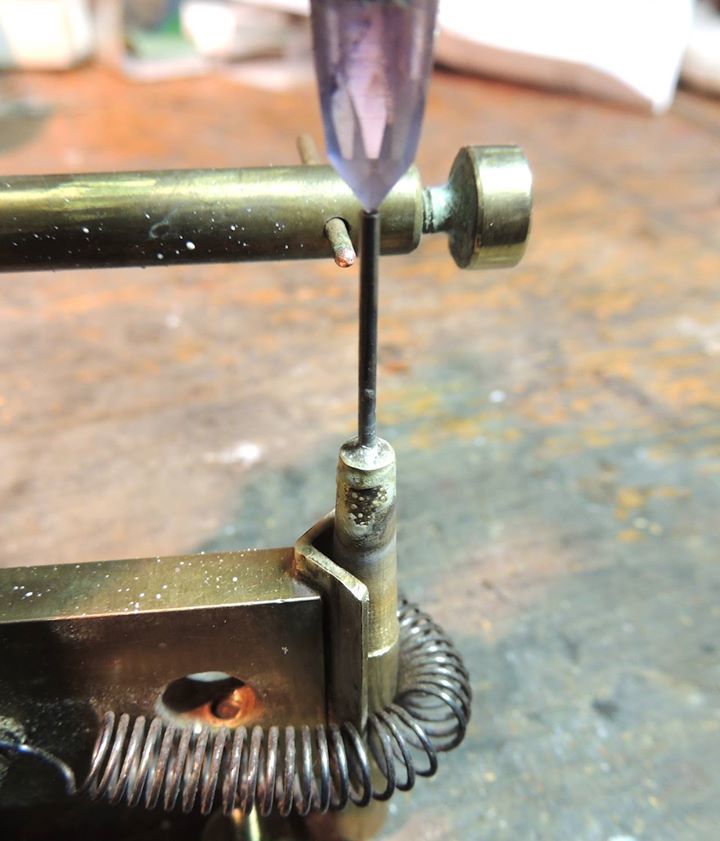
While the cone of the amethyst held it on center I silver soldered the needle in. If the base where it joins the dop is a bit off at least the critical part of the needle, the tip that holds the stone, will be centered.
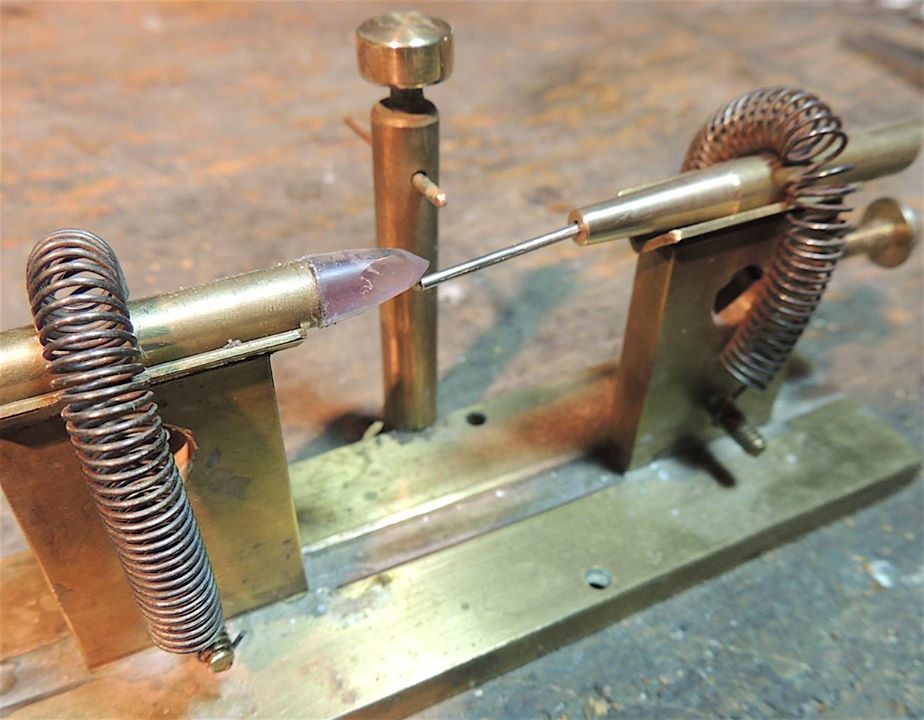
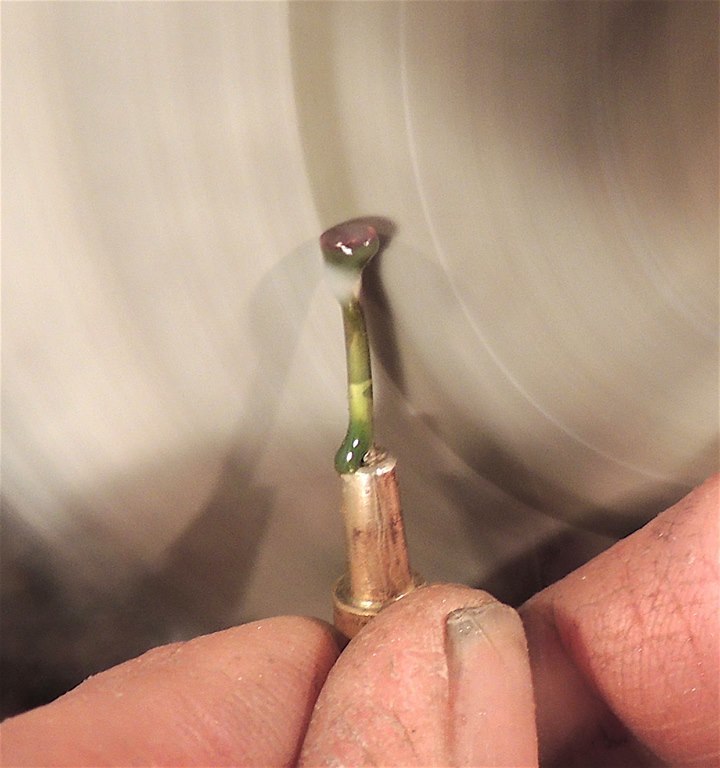
With the “rough” stone face down on a flat dop, the tube is lowered onto the culet.
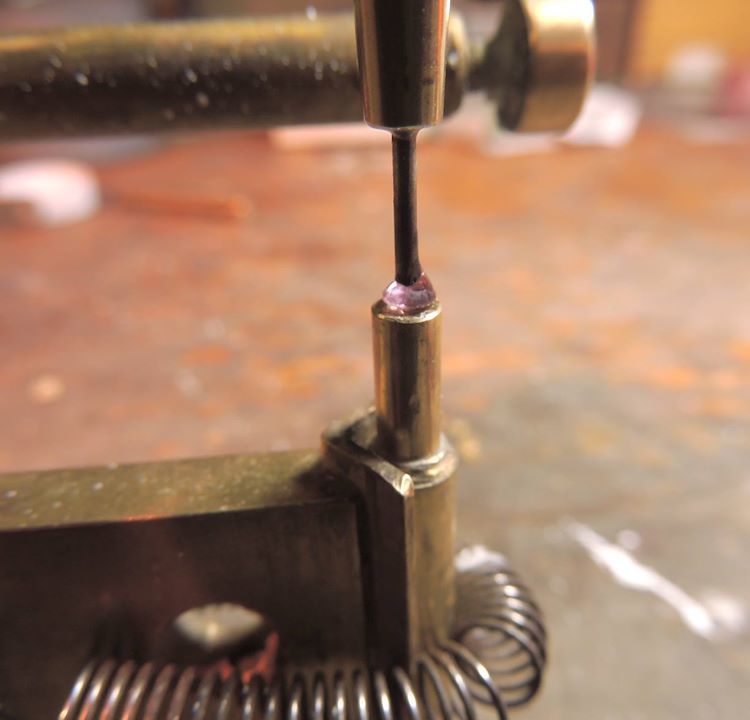
This photo skips ahead a bit. Initially I’d used crazy glue to hold the garnet in, thinking that this would give a stronger bond. It did not. Instead, it consistently broke. This had me a bit worried. If I couldn’t find a way to hold the stone all of my building thus far would have been futile. Ordinary green dop wax came to the rescue, so low-tech, so useful. From then on stone detachment was insignificant.
The outcome of the preceding thought and work steps is that the stone is now reliably held, reliably centered, on a dop of appropriate size. Therewith, you might say, endeth chapter I. Time for a coffee (two cream no sugar; and thank you).
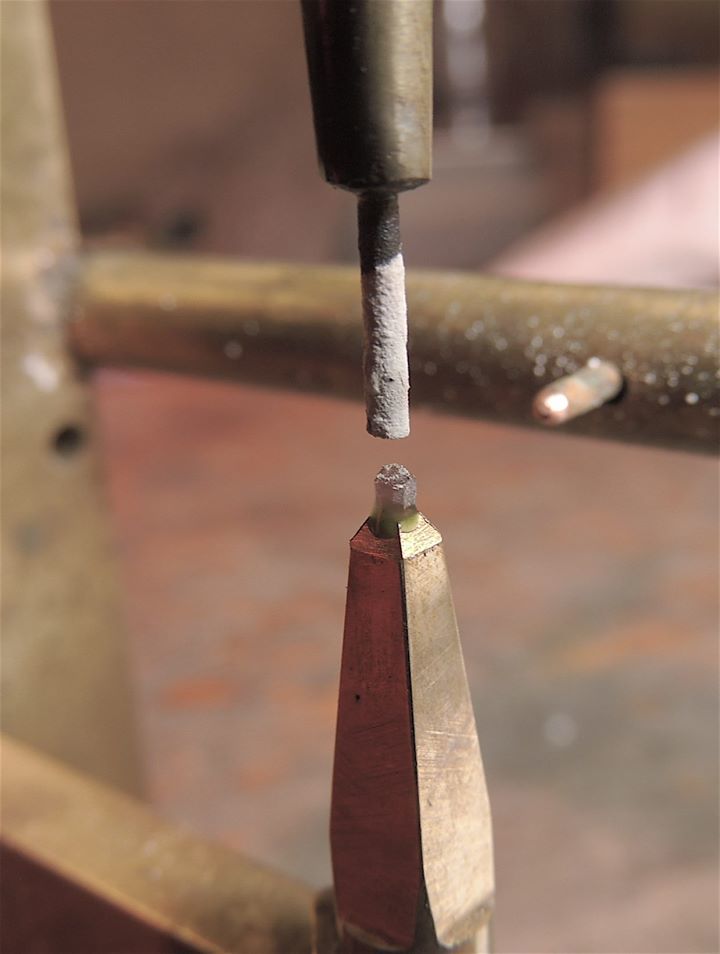
To resume the story, once it is firmly held, the garnet can be preformed - cut down approximately square and to approximately the right diameter. The technology in this instance is a flat disc faced with a rubber backed twill work shirt embedded with 320-ish diamond grit. That again is another story. The important part is it gives a smooth non-bumpy cut.
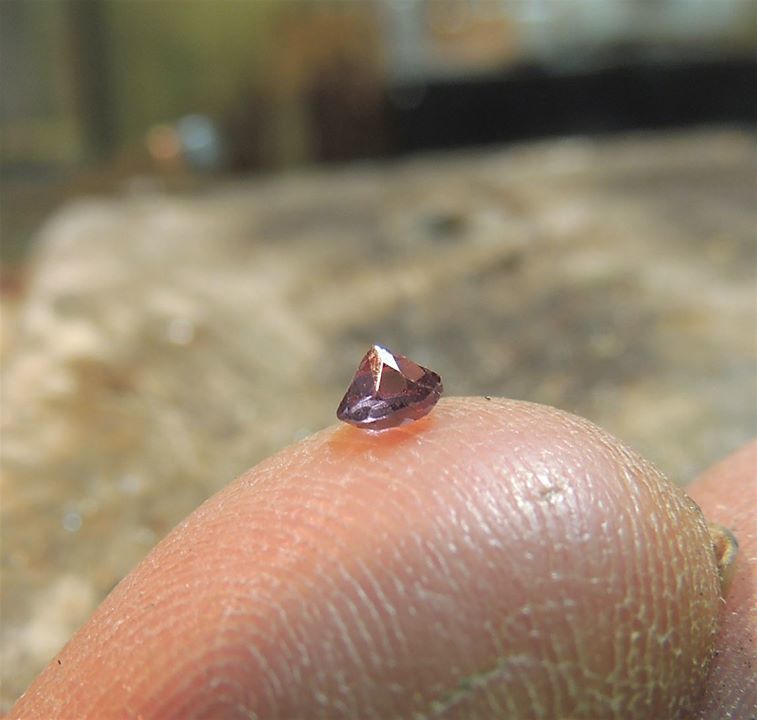
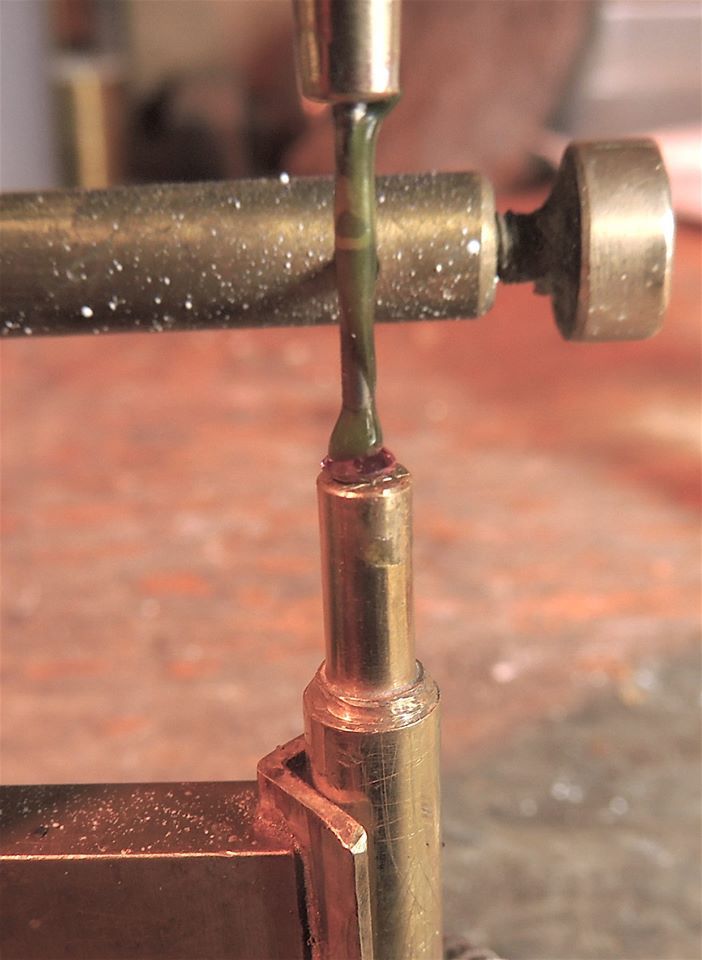
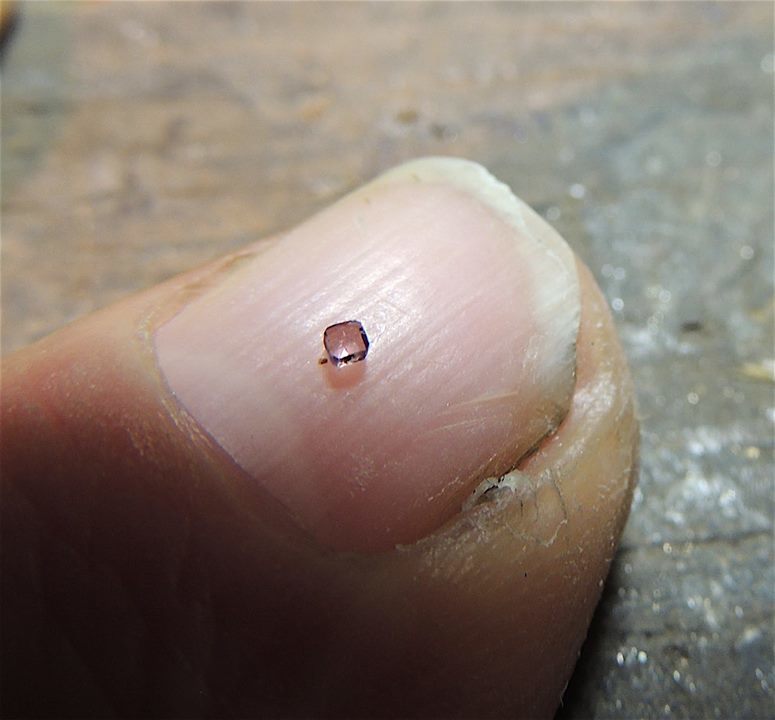
After preforming the garnet was cut on the faceting machine in the ordinary way, crown (top of stone) first, using slow speed, smooth non bumpy laps, and the 10x loupe for every facet. I mentioned earlier that by lucky chance the diameter of the hypo tube was exactly the required dimension for the finished stone. Thus the tube offered a ready made visual gauge: I cut each side just until the lap barely, barely touched the metal. In the photo you see the outcome on my fingernail, with the crown – the finished part – down.
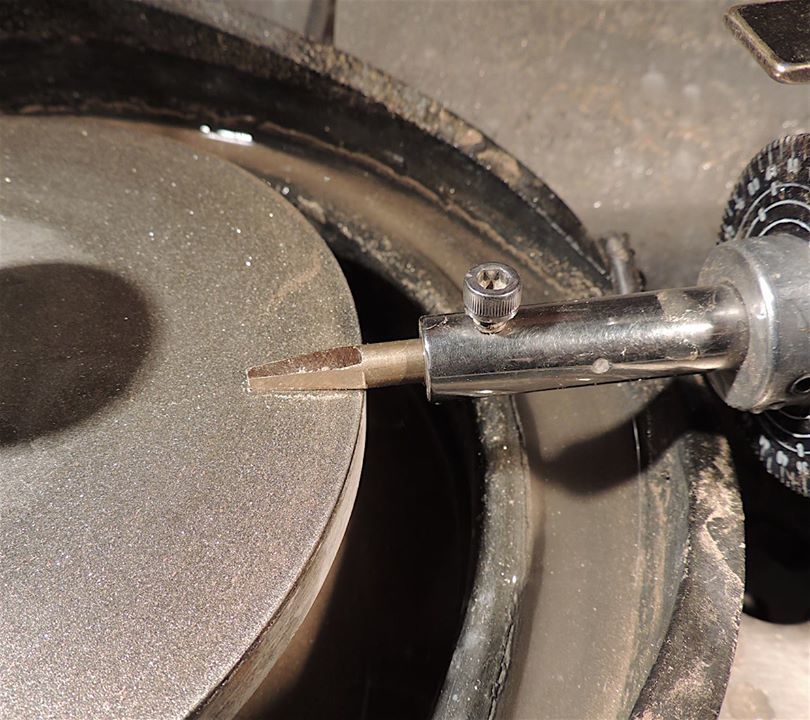
Simple shape notwithstanding, cutting the bottom contributed its own set of issues, chief among these that I would need to maintain orientation, i.e. keep top and bottom lined up. Yet at this size scale it would have been all but impossible to do a conventional transfer (faceters will know what I mean). In any event this was a battle I did not wish to fight. Instead I chose to go visual. First I ground a beveled key onto the quill end of the dop, again using the Ultratech as machine tool. (Picture above). This would ensure that the dop always went into into the quill in the same orientation.
Next the stone end of the dop was shaped into a long, tapering, four square obelisk. (photo above) Thus I could set the stone face down on the flat, square, top of the obelisk dop, align it by eye to the four sides, lower the previously used needle dop to keep it centered and in place, and so, again using green dop wax, fix it in position for cutting.
There it is on the obelisk dop ready for the very last step - cutting and polishing the pavilion facets. The dressmakers pin is beside it for scale.

And voila. After this lengthy process of conception and refinement and tool devising nine finished micro-garnets (dressmaker’s pin again for scale) are the proud result. Perhaps just as important, I have much better confidence now in working on such a minute scale – and if you’ve been paying attention, so should you.


