After 2-3 weeks of photography and another 2 weeks of writing, this essay is now completed. There is some duplication along the way as some of photos will cover 2 sub, mini-topics!
I’ve tried to make this ‘accent on graver cutting’ easy to follow, but I’m sure there will be some folks saying “what is he writing about?”. Rest assured, after reading these techniques a few times, you will find that this essay is quite easy to follow.
Have fun reading & learning!
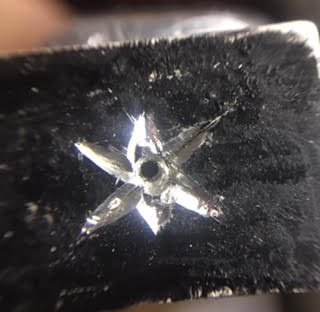
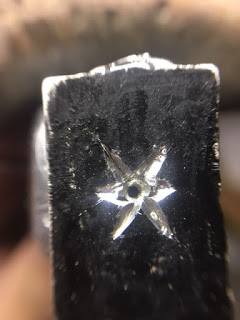
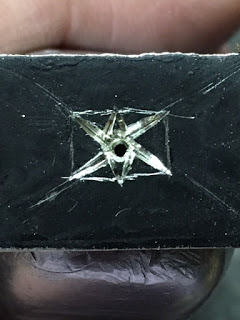
Is it a “Star-Burst”, or a “Star-Setting”?
I’ve repeated some of the photographs, why so? Some of the views needed to be again fully explained, but under another sub-topic!
No matter what name you finally give it, it’s a ‘real challenge’ to accurately cut this pattern .
In my honest opinion, I’d place it an ‘9’ out of 10 on the ‘Difficulty Scale’! I will show you a quicker route used in carving out this great looking design. Then the“Difficulty Level” will quickly drop to about ‘ 7 plus ’.
Previously ‘archived & saved’ text pages. ( please print these for your own permanent records )
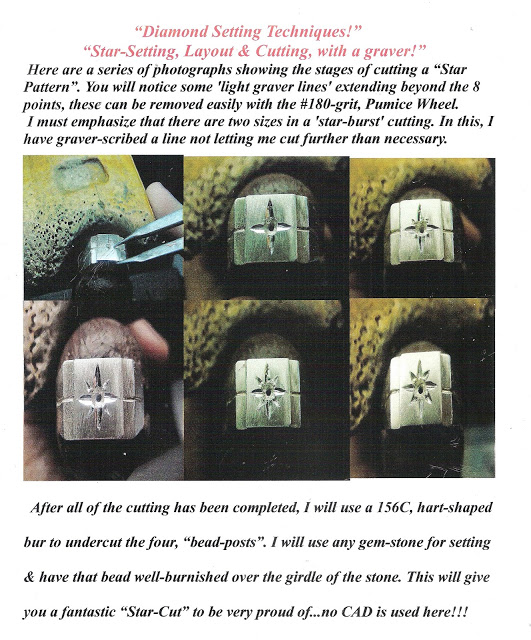
There is no C.A.D. (Computer Aided Designing) involved anywhere with this process. ‘CAD’ can surely help you, but you won’t have the Bright-Cutting features associated with any highly-polished, graver cutting!
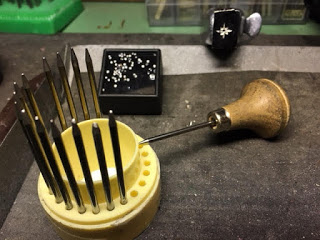
What ‘setting tools’ should we be looking for ? Onglette #1 , Onglette #2 , Flat Graver #40 (or Glardon #12) the width is imperative here! Bead-Burnisher @ 1.12mm’s (diameter). As for our burs, we’ll just use a Twist Drill @ .90 >1.0mm and a bur of your choice to initially open the hole.

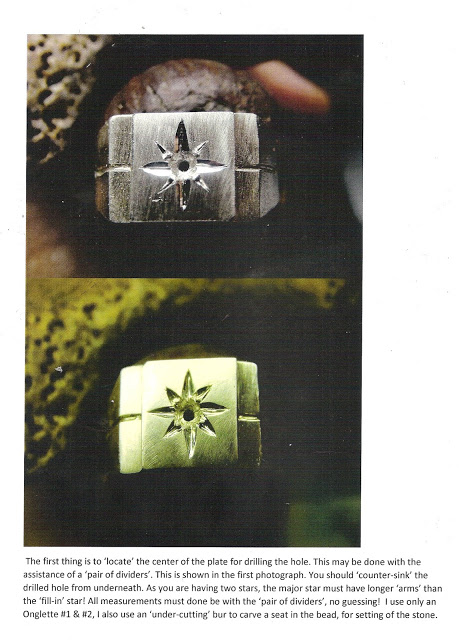
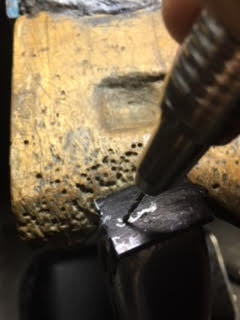
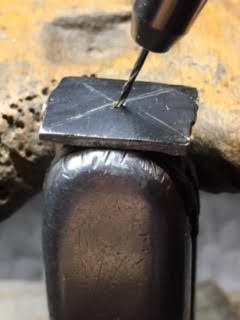
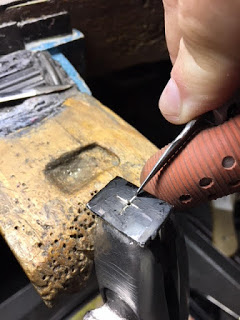
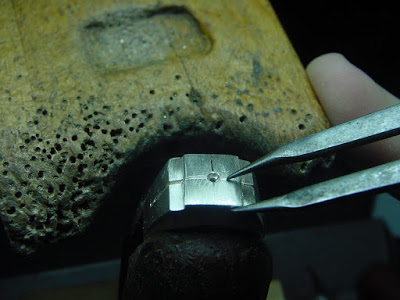
The very first thing we must do is to locate the centre of the item that needs to be drilled. Just use a little round bur of #008 to start the drilling of the hole. Oil your many burs, to ‘lubricate the twisting action’ until the twist-drill cuts through the metal. Oil cools the metal and prevents any binding of the ‘twist-drill’ bur inside the newly-formed, metal-hole.
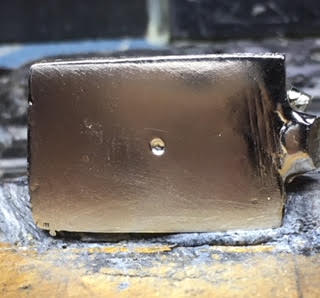
Underneath, I would like to have a ‘recessed spot’ just where the drilling hole will be needed. If you don’t drill a little surface, mini-hole. your twist drill will do loads of skimming around the ring or demo-plate. If your drill does skim on the blank surface, you might have to get another item to drill and set. The skimming just ruins the surface afterwards.
If your twist-drill seems to just slide, maybe your drill is in the need of replacing, or just sharpen it again.
Before we attempt to start any cutting, we must prepare our precision cutting gravers. I modify every graver that I have in my inventory. On both of the Onglette gravers required is the skill to perfect the overall cutting areas just to cut the “Star-Setting” design or pattern.
The Onglette #1 graver needs no such modification , as this one graver prepares for future pattern cuttings with the Onglette #2.
With this Onglette #2 graver, I don’t want any contact with the left-side of the blade as it might prevent any unused lines or cutting! I will now call this Onglette blade, a “ Right-Sided, Onglette #2 Graver" .
Now observe how the graver sits in my hands or fingers. This is the optimum position of any kind of graver, even if it’s for this operation, or just enjoying your new skill in practising ‘line-cutting’!
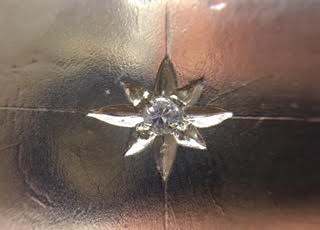
The desired spot to engrave determines how many beads are required! Either the Star-Design is on a thin wedding band or a large surface that alone is your guide. You must make your pattern just simply ‘aesthetically pleasing’.
Four, or two beads must be gauged & sketched out on your item at this point. Once you start to cut your initial pattern, no way to repair this decision afterwards! “What’s done is done”! The reason being, is that every cutting process is decided right at this ‘planning stage’.

Please determine now; EXACTLY where the 2, or 4-bead pattern is to be started . I just can’t emphasize this any further, BTW there are no 3-bead patterns, there are only 2, or 4-beads . Now let’s start this exciting process!
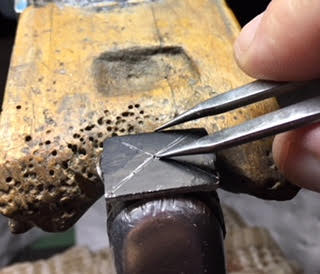
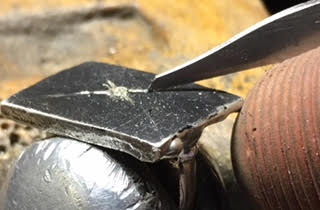
To make your rough-pattern more easily seen , I usually paint with a black marker every section that needs to be better seen . (I still do this all the time) I will then very carefully ‘mark the surface’ with a fine-pointed scribing tool!
Examine exactly just where the pattern will be engraved ! Every rough-drawing you finally make is to be made with no changes afterwards! Am I very serious on this? YES!!
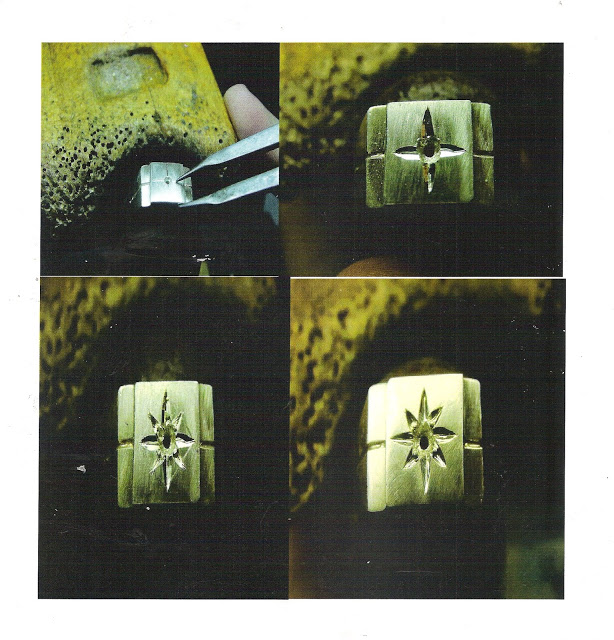
The very first cut is made with a shallow holding pattern with your graver! When you are making a long cut, do so with your graver, but holding the graver just at a steeper angle from the surface of the metal.
Each progressive cut and repeating each cut can you examine your long cuts. When you get to the point of each section, dig in .3mm deeper so your graver won’t skip & slide offand as it will leave an ugly line! You just don’t want this to happen!
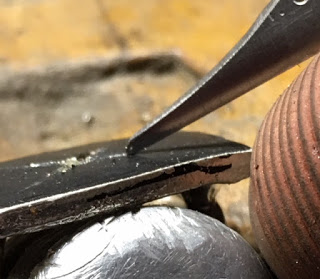
As this is a ‘skill of not slipping’! This sole skill is learned by practicing & more practicing! Each subsequent series of cutting, you may cut deeper. I like to cut 3 times for each section and each section will require a deeper cut from the first!
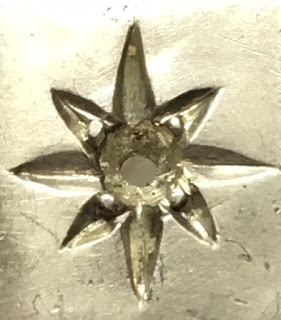
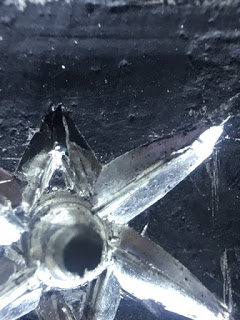
Remember, that all of the ‘unused metal’ surrounding that ‘new bead’ must be removed before the stone goes in! The only metal remaining is the metal to be trimmed to shape of a little Triangle. THAT triangle is your ‘new bead’ being created!
I always get my round bur of #006 and very carefully cut away the little pointed section of the triangular piece of metal. The ‘remaining metal’ located at the edge of the hole, will now be your new bead!!!
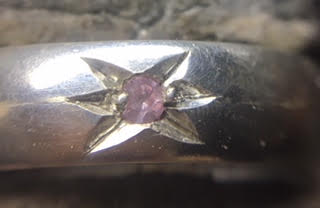
Basically this 2-Bead Setting (as being shown above) in this “Star-Setting” is not really that difficult. Practicing on flat, or curved items will greatly assist you in learning this new skill.
With all that you are learning in this essay, I believe you will now have more confidence and you should have greater control of using a graver.
If you use a C.A.D. as a pattern/designing process, knowledge of using your gravers is still so very essential.
Please use your dividers extensively at the very beginning of the many Onglette cuts. You just gotta keep the center of the hole worked on to be in the centre of the plate. Always imagine where the Culet of the stone will be placed, these basic steps are so darned important!
After ‘you feel’ that each section now requiring you to cut further , you may use your Flat Graver to create a wider cut.
The Onglette-cuts make a deep cut with some degree of being cut wider. The wonderful Flat graver gives you a sustained cleaner cut. No file of any kind can you achieve this kind of carving ability!
“These gravers are your extensions of your fingertips!” Basically, what you see is what your fingers will now achieve.
The Onglette graver has a barrel-shape along both sides of the blade. Make use of this feature how? By keeping your graver in an upright or ‘normal’ position and let the original, machine-made curves give you exactly the correct angle you need for your Bright-Cutting!!!
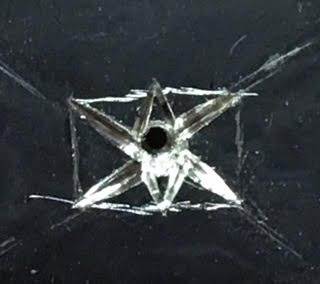
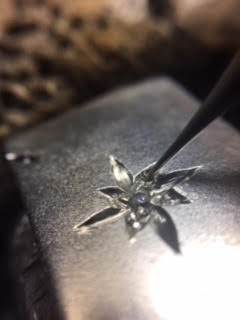
When you want to cut a sharp & nicely defined point on each section. What I prefer is you should start your cut at the joining of the two lines coming together! You are always cutting ‘into’ the center of the design!
If you decide to ‘cut out or away’ from the center where the stone will sit , you will for sure run into many problems. You will be sliding your graver all over the project you’re working on, not to mention little chance of controlling your graver cuts!

Try & not let your graver ‘slip’ and keep digging your graver further into the metal , as it looks ugly & so very difficult to repair.
The only method in “repairing a slip” is to fill in the graver slipping with solder of your choosing. Even a Laser solder is still welcomed, as this is used to repair any minor cutting errors!
BTW, the very “first graver cutting & practicing” is done on a (sample) flat surface! Devise your own “demonstration piece of metal” . Once you are satisfied on your results, then you can continue on further to the item of your choosing.
When your stone is ready to be placed into the hole, I would use a #156C 'under- cutting’ bur to make a seat for that stone. Then, and only then would I use my Bead-Burnisher (1.12mm) to ‘roll-over’ those little 2, or 4-beads to lock in the stone into the metal.
Let us suppose that your pattern that you are creating is difficult, I’d make two! Why? As if you can keep one ‘sample’ for yourself. After deciding what pattern to cut, this will be now used as your ‘experience’ for many years.
Follow these six “Always”:
A) Always make notes!
B) Always take photographs! (record your tools you used & where)
C) Always write additional notes on any new design that warrants “Star-Setting” patterns.
D) Always keep your new skill information at your arms reach. ” After a few of your ‘cutting-demo’ plates, this new skill will become much easier & almost natural for you in your future graver carving.
E) Always be creative in your reasons to cut a “Star” pattern:
F) Always experiment!!! Never think that you’ve learned everything in “Bright-Cutting” in just one afternoon, this cannot happen.