In this just published essay is another great introduction of diamond setting and how some stones were set. The photographs are well displayed (I think so).
I went into great detail not only in graver cutting BUT the whole process of setting gem-stones. The some of these photographs in this essay are literally breath-taking showing the
many setting processes. One or two segments of this essay show how some setters almost ruined one or two of the patterns. Then again, I highlighted the best of them with great adjectives as they were well deserved…:>) It will do you well to view them all.
So far the readership is now at 19,041 views.
I recently found some very interesting books that will help to inspire you to create your own interesting creations. These books are to remain without names! I’ve selected the very best photographs that I could find from these selections of books.
As a Diamond Setter, I will attempt to explain some of the techniques that went into these great creations. As well as giving you some of the reasons why some of them that could be improved upon and the reasons why. Many of them are a definite “10, out of 10”.
Here are some of my comments on the first (lower) photograph!
Just wonderful “Precision Diamond Setting”! A definite 10 out of 10, or more!
Once he finished the drilling, he put each on a wax and set that wax aside. Thus not loosing where each stone will be eventually be set.
Remembering that this plate initially just had holes and nothing else. All of this was accomplished by many years of experience in using Onglette & Flat gravers.
How did the setter execute this style of setting? He drilled all of the holes to 90% size for EACH stone prior to any form of cutting in the metal.
The setter started to initially “rough-cut” the metal, creating Beads at the same time ! He positioned each bead and then using a thin Onglette #1 and separated each bead again and again!
This setter wanted each Bead to be like little ‘posts’ when finished . This execution of cutting could take as long as two days for this singular (larger) plate.
This setter dug into the metal many times to separate that one bead from the surrounding metal . (This was not an easy task.)
Once the Bright-Cutting was completed, the setter would make a bearing into EACH bead with his 156C (Under-cutting) bur. This would therefore making ‘seats’ for each stone .
He’s then use his Bead-Burnisher and very gently push over that bead/mini claw!
Each bead had two purposes; one to hold the stone and the other was give a nice visual effect to the wearer. This style of setting was this setters own “signature”!
The setter then Bright-Cut all around the edges as he wanted the stones to appear sitting high above the metal.
Bright-Cutting for the curve, is one of the most challenging , why so? There must a continuation or flowing of that one cut all around that curved area.
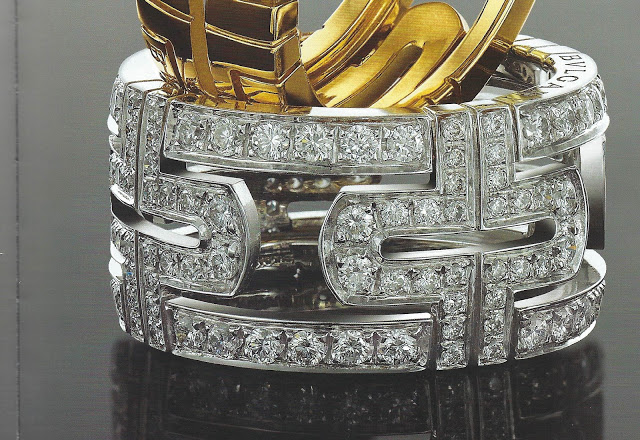
The corners must be that, ‘square corners’ and not just where two lines meet! This shows me one thing…loads of experience!
In my estimation, the cutting and shaping of the " corners " is one of the most difficult aspect of diamond setting.
Just why are there “big blobs” of metal at the points of the Pear-shape diamonds???
To my eyes there is no ‘shape or harmony’ to where the point is hidden. Not too mention no symmetry to the metal that is holding the stone.
I truly believe that there should have been a “VEE” shape end claw and Bright-Cutting inside of those claws. During my apprenticeship 60 years ago, I was taught this simple finishing process. I always do that kind of finishing even today!
On the Blue Cabochon stone on the upper left, the pointed claws just don’t seem to be touching the surface. The faceted-Ruby on the right, also has the same problem, the point of the claw is sitting in the air!! What could happen is the the wearer could catch her clothing or cut her finger, bad finishing!!
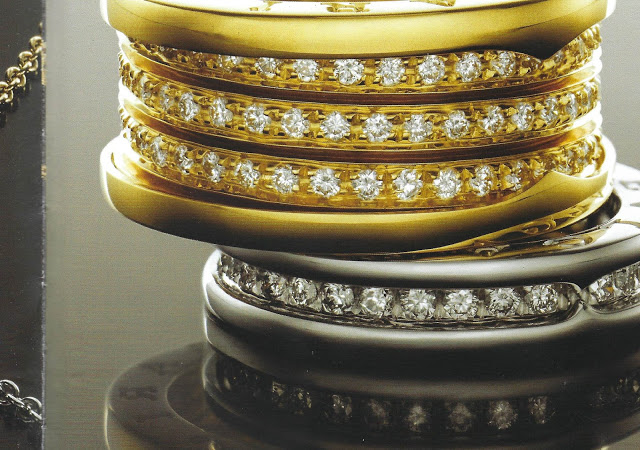
I’m happy to see that the diamond setter actually “Bright-Cut” on the inside of the 1/2 Bezel on the rectangular shaped stones on the middle settings… good setting work!
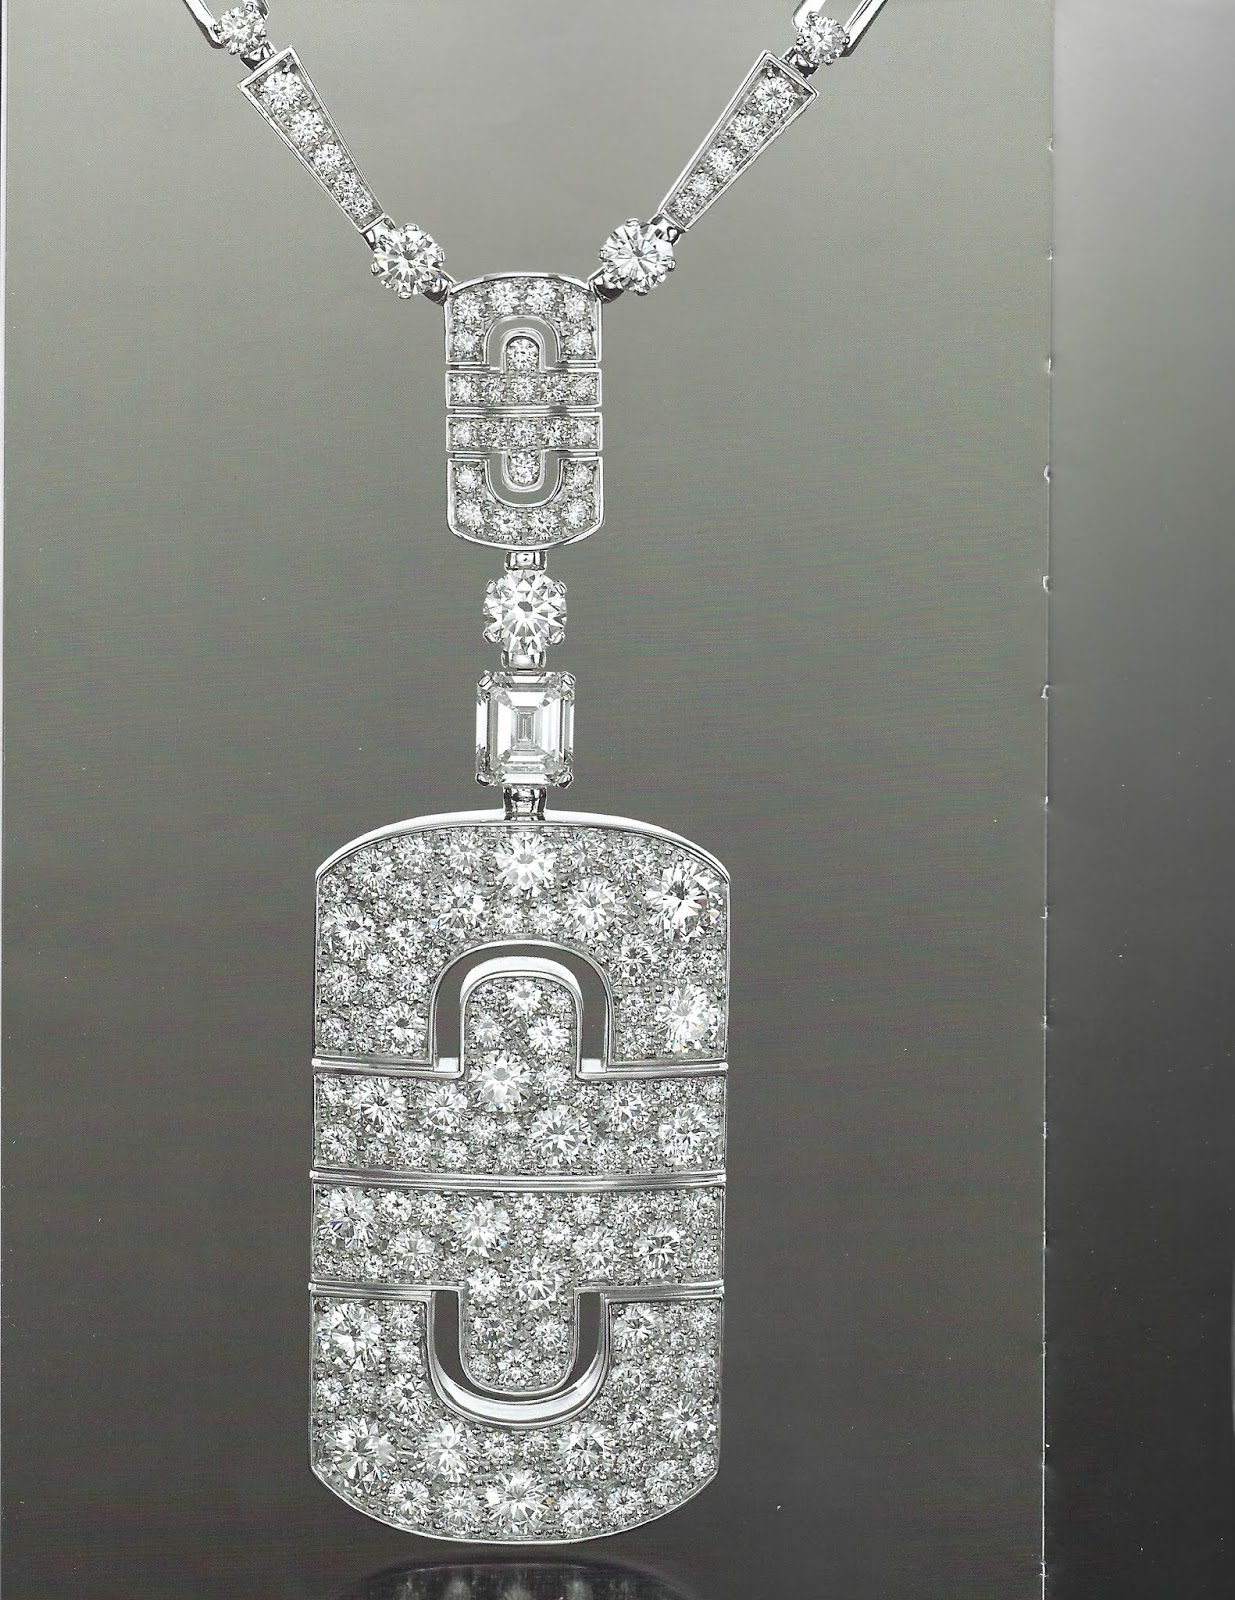
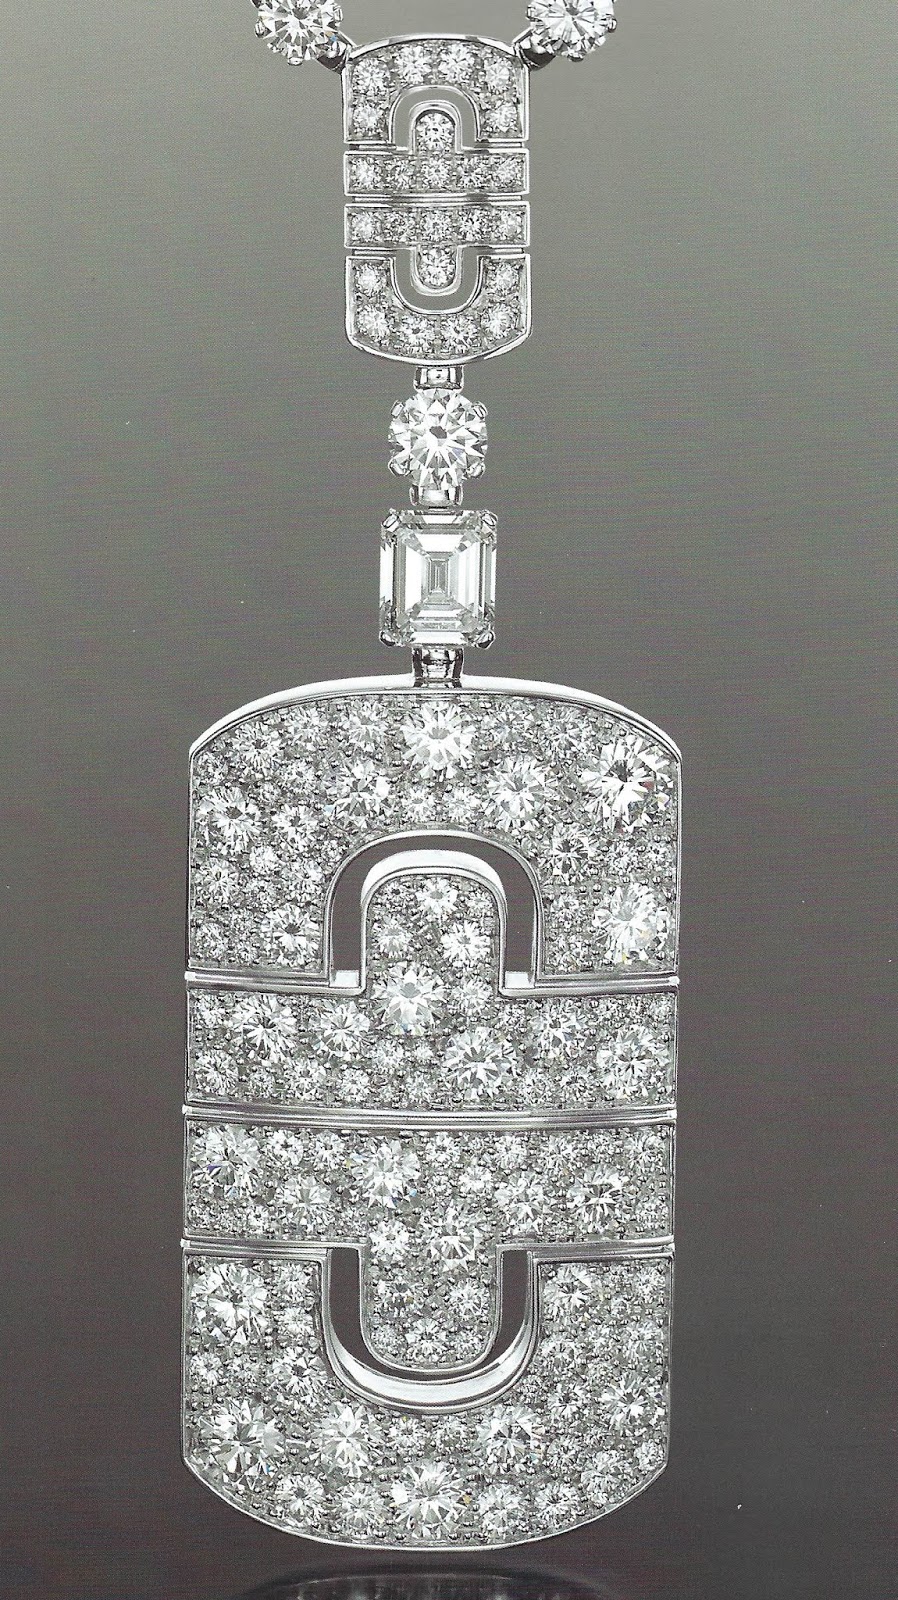
Just wonderful craftsmanship on this pendant!
The setter used a combination of " four or five beads " to hold each diamond. This decision was determined by the amount of space that was allotted to him in the pattern.
At some places a few beads were created as there was too much space in between some of the stones. I call this feature, just " floating beads " and simply filling in any extra space.
I find that these “pointed” claw shapes not to appealing to me. You might approve, but this is MY TASTE. The danger is that after a while the points may lift up and catch the clothing.
I see too much metal over each stone but some companies approve of this style just for ‘security & design’. I beg to differ!

Here is another diamond setter who left too much of ‘open space’ in between each diamond. He could at least should have created some 'independent or floating ’ beads in between each of the stones.
You can see what he did in the curvature of the designs. He also didn’t cut prior to the setting of the stones. I’ll show you in a next few photographs want happens when the stones are set first…:>(
This is a very nice design, but looking closely you will now see why Onglette graver cutting is so-o important before setting of the stones.
When I first saw this enlarged lower photograph, I wondered why the owner of the company just say to the setter; "what did you just do to this ring-set?"
The beads were not "burnished down’ or even attempted to be ‘rounded’. In the center of the two beads, only rough looking metal is to be seen! I think he was using a kitchen-knife to do the ‘pushing over the stones’…:>(
The diamonds were not set in one continuous line , ‘they seem to all over the place’…!!!
The very important “Onglette, graver cutting” seems to be too far away from some of the stones . Theses shows me that the setter had a mediocre training on ‘diamond setting’.
There doesn’t seem to be any correcting, or re-cutting in this whole area.
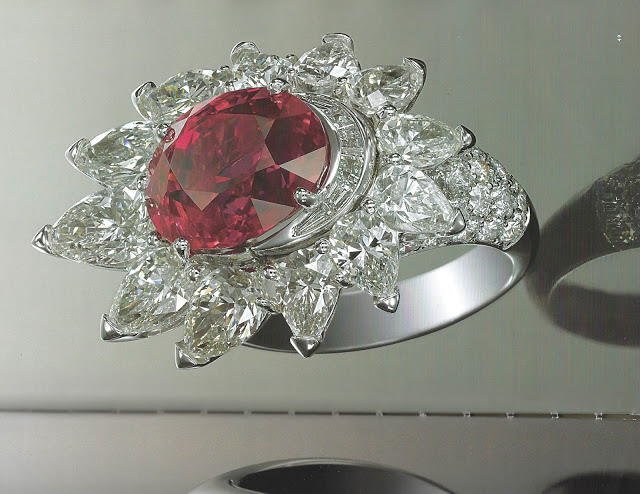
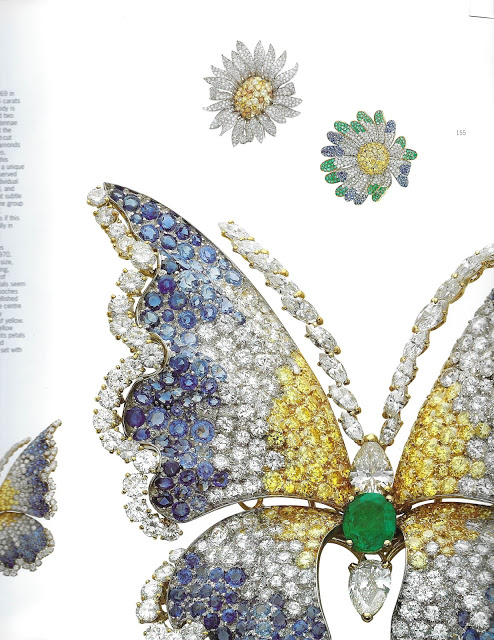
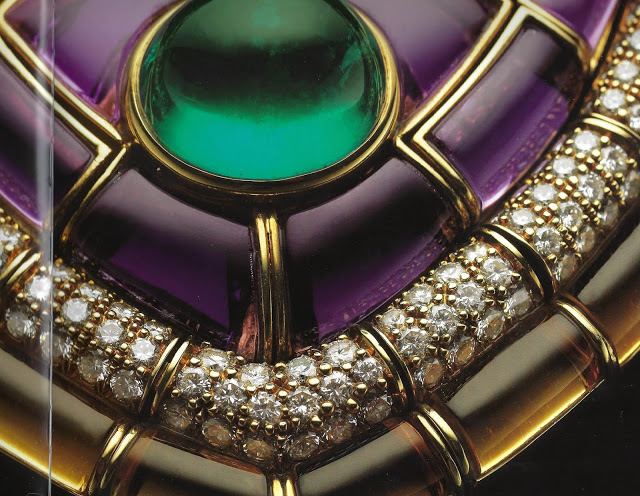
Fantastic display of colours… (no other comments are needed!)
Just a most beautiful diamond setting project! Simply SUPERB!!
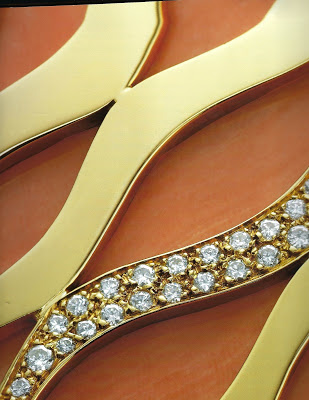
The setter used “2, 4 and even at one spot, a 5 bead” setting process! Just a brilliant setting exercise! The walls of the line-cutting are near vertical, nice to see this!
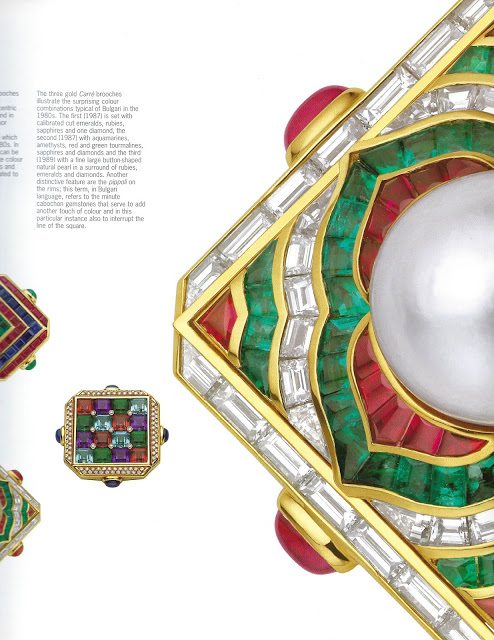
Lastly, I couldn’t resist in showing this prime example of “Superior Diamond Setting”.
I’d give this a 15, out the 10! The reasons are as follows; all of the beads are in a row! The beads are clean and round in shape! The beads are nicely separated from each other!
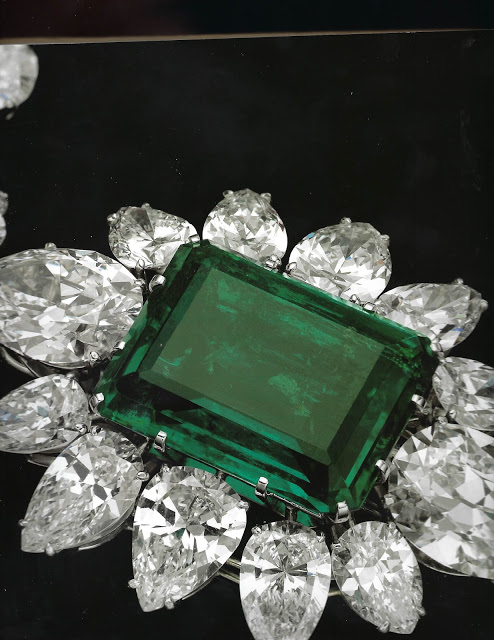
No comments, just enjoy this item, as I am.
Beautiful in the shape of the claws on all of the stones. You can see that there are no sharp pointed claws anywhere. Such a delight in seeing this kind of setting…:>)

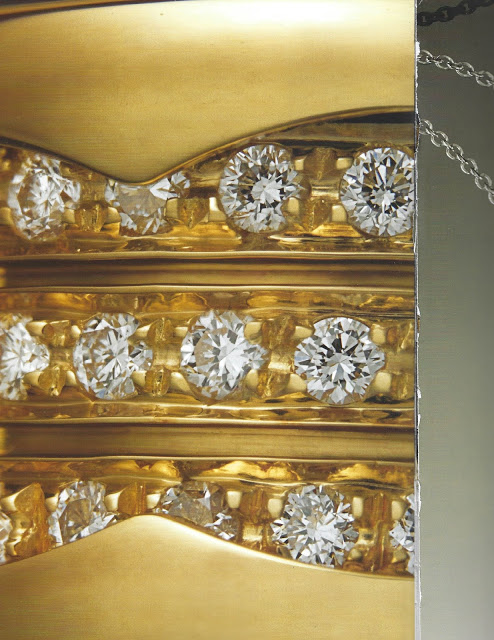
Please note that ‘every stone including the diamonds’ was custom-cut and as well shaped to each placement of that stone going into this metal setting! You will also notice that every long baguette diamond are set ’ girdle to girdle ', that is, with no spaces in between.
If you have any comments please email me
