Copper, Steel & Brass Stone Pushers!
(The following paragraphs were taken from a previously written essay. This essay was written three years (2015) ago, the fonts are slightly different, but the text and information is still so very, very important!
If you find that there is a repetition of facts, my humblest apologies . That is because setting skills & talents haven’t changed, just the year!
Much debate now centres on which pusher gives the best suits and for which job. The merits of each metal will now be discussed in the greatest of details.
The Brass pusher is often used for Gypsy Setting delicate stones such as Emeralds or other semi-precious stones. This Copper pusher will not compress the gold around the girdle as much as a harder Brass pusher might. (Note the word…“might”.)
Brass can be used with gold, but it is still softer than steel. It is best used when setting with Platinum. Use “Emery, Snap-On” paper wheel with a ‘Medium grade’ over its pushing tip to prevent deep marks. (This technique may also be applied to the Copper & Steel pushers.)
Brass, however, delivers better results than the softer Copper. Neither Copper nor Brass has the strength when applying heavy downward pressure for thicker and wider Engagement-ring claws.
The potential for slipping is greater with either of these two softer metals.
Steel is the hardest metal to use and too unforgiving to be used for Gypsy Setting. The tip, or edges of the pusher can and always will mark or scratch the stone. It could destroy a facet, scratch Turquoise, or damage a softer Mohs scale stone.
The “Serrated Edge” of the pusher will leave deep indentations in the metal and should not be used with Platinum. Often marks will remain for your cleaning after the setting and may require extensive polishing.
Therefore reduce the much-needed metal thickness when setting with gold or Platinum.
Please handle with great care with the softer metal with the steel pusher!
(Here is the newer essay that was written only a few days ago.
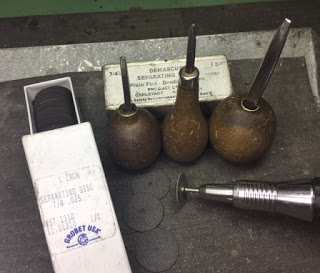
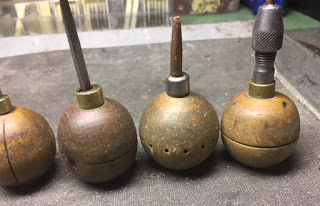
When & How to make them. I have in my collection of pushers ranging from Brass, Copper & Steel. The interesting question here is when to use them?
I believe in fabricating or ‘modifying’ any new pusher, at a moment’s notice!
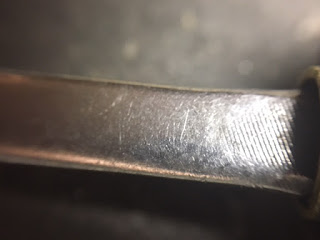
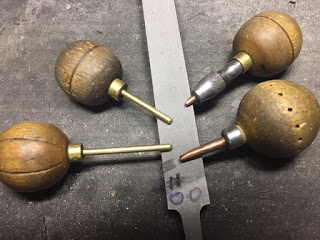
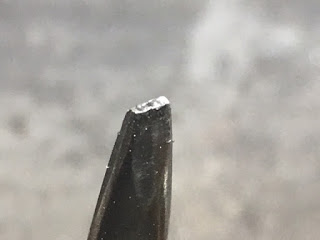
Let’s start with a steel pusher , I prefer to use a steel from a large file, just for that steel! I find that this steel is still great for many decades to come, as you can see that one pusher I continually use, is only to be on Diamonds. In fact, in this ‘steel pusher’ you can still see the old file teeth still showing near the wooden handle. (BTW, that pusher being shown here is well over 50 years old!)
Brass & Copper pushers are just excellent, why so? Many stones you will be setting requires constant thinking on what metal-pusher you need! I will just never think of relying on one metal pusher, again why so? You are dealing with so many ‘hardness’ of stones.

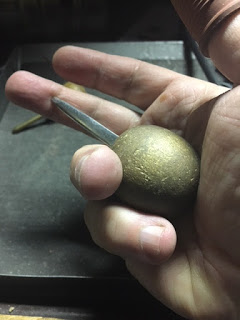
Most metal rods come in basic widths, but I feel comfortable with a 3/16” inch diameter. But these ‘pusher tips’ should sit comfortably in your hand and not to exceed the first knuckle of your middle finger!
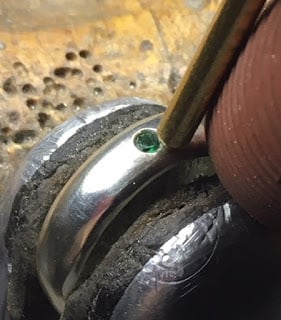
Would I use a ‘Steel-Pusher’ on an Emerald? Only if I want it to be broken and that is what happens if I do use steel on Amethyst, Emerald, Coral, Blue Zircon, Amber or Pearls?..;>(
If I do use these pushers on the soft stones, my metal-pusher might slip off the claw-tip and scrape or even ruin the “Crown, or the Star Facets” these might touch these facets by accident & good-bye stone !
I think it is prudent that the many reasons be mentioned, as accidents could very well happen!!!
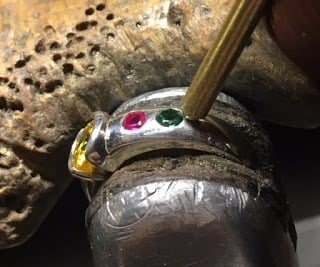
I will use Brass or Copper with these stones and you should have the metal tip ‘trimmed to shape’ as these tips will now have a serrated edge. These ‘textured surfaces’ are created by hitting the pusher-metal that you just created, with your large “Pillar” file.
The new teeth marks will give you the desired texture that you need. A light ‘hit or tap’ will give the required ‘minimum texture’ you might need now at your bench.
I again prefer to ‘roll over with the pusher’ and I need to see & observe just where the pusher is making contact!
Where do you buy these specialized & modified tools? Simple answer, you don’t, you have to make these new tools yourself!
Your local or international tool suppliers only sell the rod that is joined to wooden handles. You have to ‘trim & create’ the tip and measure it to your length from your finger, to the palm of your hand.
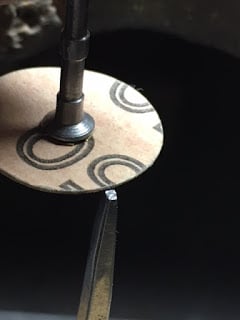
I will use a Pillar-file of #1 cut, to ‘texture’ the tip, then follow up with your Emery-disks of “Medium” grade just to smooth the surface further.
This is followed by using a Pumice wheel of #180 grit.
The basic metal tools that you buy from your supplier are just a ‘long metal rod’. You have much to do in the “Reshaping & Experimenting" department!
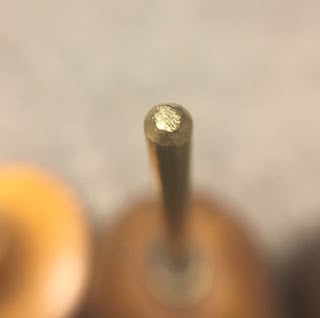
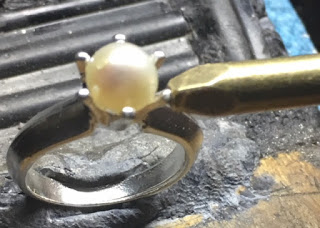
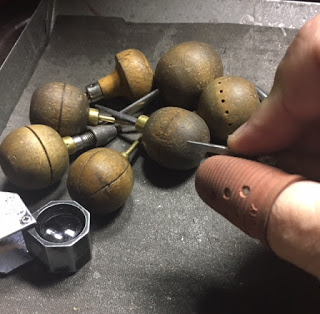
If you have to set Pearls or Opal, what tool would you use? I would test the softness of the metal and prepare to again sculpt & modify the claw-tip just to fit against the claw. I would drill a little recess into the pusher and that is just where the claw will rest while being used.
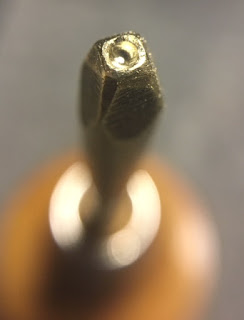
When you are setting a Pearl in a 6-claw head. I would use a Copper pusher! Here is a little solution to prevent any slippage. Have your pusher-tip drilled with a round bur just where you are applying pressure! Have this bur-recess made larger than the claw, how is this done? I’d measure the claw diameter, then have your new tip 1/2 mm larger in size.
If you use a steel-pusher ; you very well could have the ‘serrated-edge texture’ remaining on the claw. That alone will cause you much stress in trying to remove those deep marks & resulting in metal & great time lost!
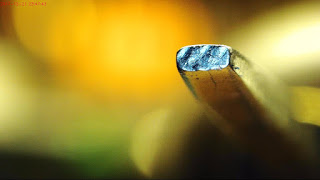
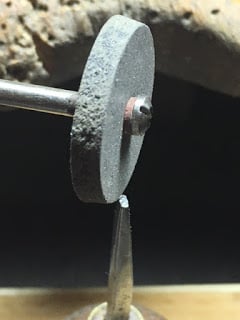
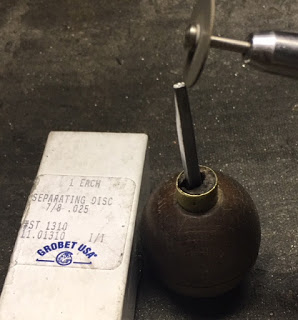
To make such a textured surface. I always use a " Corundum,
Separating Disk" these will cut little grooves into the steel surface.
If you are attempting to set an Opal, Turquoise or even Amber I would suggest to use a soft Copper metal-pusher. For you to use Brass, I’d shy away from using this metal on these very delicate stones. This is still a very hard (pushing) metal to use, some problems might occur! The problems are literally cracking the Opal, or just splitting the Turquoise. The Amber is rated too soft for cleaning, to use with your Pillar or Triangular files.
I’d keep using the new ‘pusher’ until you get the ‘feel’ of the amount of pressure being applied . Then you can graduate in using any tool that you need. I still use the “softer metal” pushers, even today!
HOW DO YOU MODIFY THEM? Great question, so easy to answer!
I’d first use a ‘very rough file’ surface to place a ‘texture’ on the tip, as I said once before, hitting it with a file to the soft metal gives you just the texture that you need.
Once this is done, softly use your pumice wheel at #180 grit to ‘gently smooth the coarse textured finish’.
On the Copper, 3/16” rod, use a round bur at about the size of the claw that has to be pushed over. If you prefer a larger claw-recess, do so! The claw has to fit comfortably against the ‘pusher‘. If you prefer to even ‘pre-polish’ the setting area and claws, please do so now!
Then once the ring is completely finished , you can place those so very soft stones into the ‘prepared claws’. Then you can gently push over the claws but put the ring into your clamp lined with tissue paper! Why so? I don’t want any marks remaining in the highly polished metal surface!
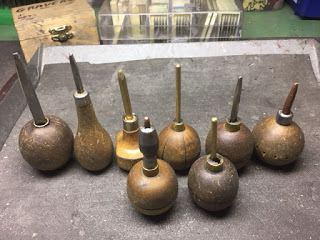
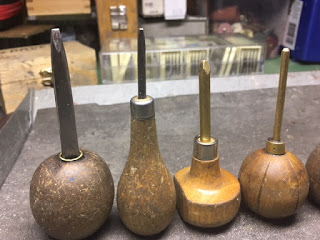
I keep my variety of ‘pushers’ all in long & short wooden handles , all of them have little “Identifying Markings” in the handles. At a moment’s notice, I can visually locate which handle has the ‘desired & required metal-pusher’.
My many steel pushers have rectangular-shaped tips, even square-shaped tip, why so? I can literally ‘roll the metal tip over the contact area on the claw’. I rarely use my “Reciprocating-Hammer” on any gentle stone.
Always keep additional pieces of the 3/16 inch rods near your bench. You just never know when you might be needing another similar (but not the same) pusher!
I have 8, metal-pushers & sometimes I feel that these might still not be enough!
Be creative in your thinking of the new tools you might need and how each might be used.
Just think that your own selection might be three or four just to get your gemstone settings completed.
Choosing the correct metal pusher is an ‘acquired skill’ and done at a moments notice! So don’t worry if you fumble or make a mistake.