Hi,
I finally got around to sorting my gravers. I could easily sort them
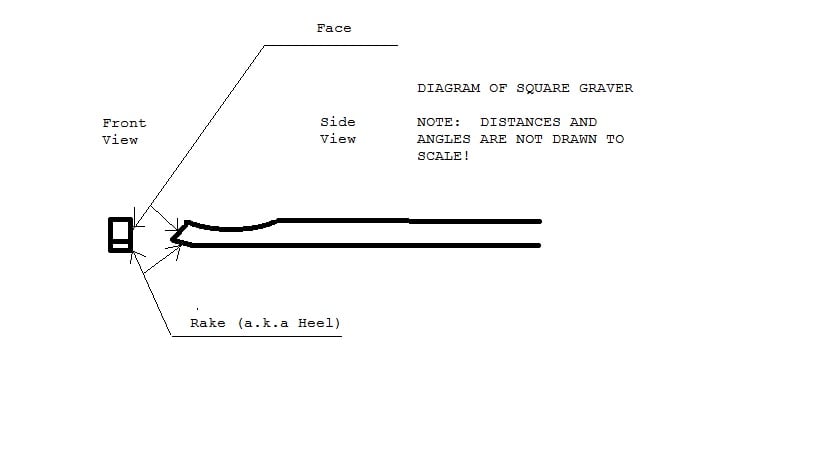
by the shape of thier cutting footprint.

But how do I sort them by size?
Art of Engraving was no real help here. They only specified
arbitrary size numbers.
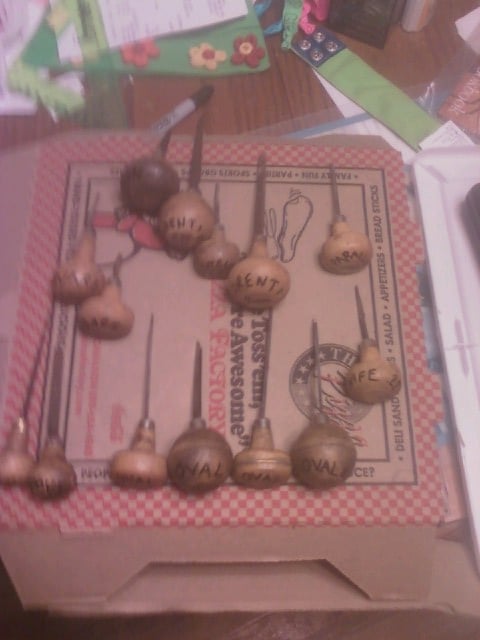
So, I test drove my graver collection which came to me from that
retired jeweler. I attached a piece of thin hobby aluminum to the
bottom of a pizza box. That way, per Leonid’s suggestion, my left
hand could stay shielded by the box wall while my right hand tried to
find a feel I could live with for each engraver.
Getting the angle right probably varies between assorted factors such
as how you hold the graver, whether you are heading north rather than
west, the type of material you are test graving, your own strength,
and of course the graver itself.
So instead of relying on a traditional numbering system for size, I
simply measured the chip being formed with my digital calipers, and
that way I could rely on the metric system instead.
Obviously the former jeweler liked florentines a lot, because he had
a full range in various widths: 1.0, 2.25, 2.5, and 4 millimeter
respectively.
I have ovals in .35,.4,.5, and .6 millmeter. I have a single knife
able to cut.2 millimeter wide. For rounds I had .3 and .4 millimeter.
I had two square gravers, in widths 1.4 and 2.0 millimeter.
And, I have a Florentine graver modified to draw 3 straight paralel
lines!
I guess I need smaller ones if I am going to engrave letters on
rings, though. Some kind soul gave me a range of graver blanks and my
next step will be to figure out how to create them properly.
Andrew Jonathan Fine