I’ve just posted my 112th essay (and hopefully more to come).
This particular essay is similar to other channel setting essays that I’ve written, but this one is so different, why so? It deals with primarily very soft and delicate Genuine Stones. Imagine that you have received a from a client who wants their stones reset into a channel that has very low-profile walls.
Here is my version of what could happen, how to correct and to continue on with setting them. There are 21 pages with 49 photographs for you to read and learn!
***Gerry Lewy ***
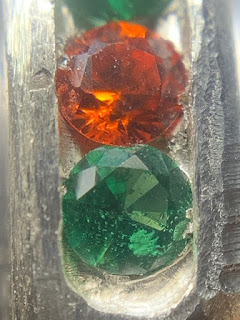
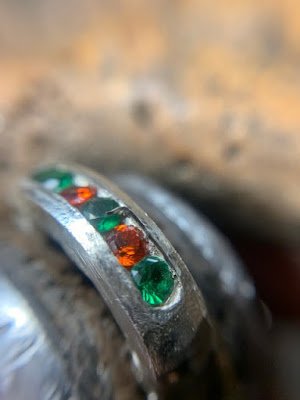
Has anyone attempted to Channel Set, Emerald & Golden Topaz stones together in one ring?
In this demonstration, things can go terribly wrong in only a few seconds if no care is given during the placing or setting of the stones.
I’ve used this pattern previously on many occasions, but there are some unforeseen problems in the selection of these very soft stones. Lets now discuss them in great detail.
The problems are as follows:
1) The “Table” => “Girdle” height measurements!
2) The thickness of the “Girdle”!
3) The thickness of the “Pavillion”!
4) The depth from the “Girdle” => “Culet”!
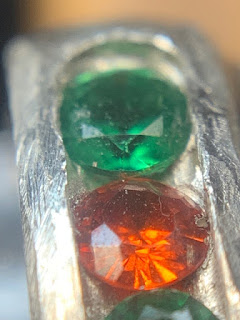
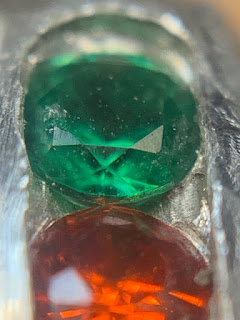
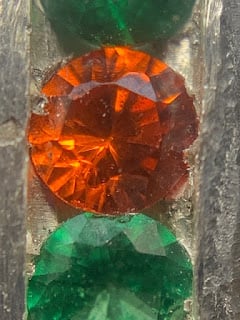
5) The subtle shading of the stones, from intense Green & Topaz to the uniform colours!
6) The overall diameter of all the five stones being placed together into a narrow setting!
These problems make this style of setting a very definite; 7.5 out of 10 on my “Difficulty Scale”!
The experience needed for this exercise: Minimal!
What tools do ‘we’ need?
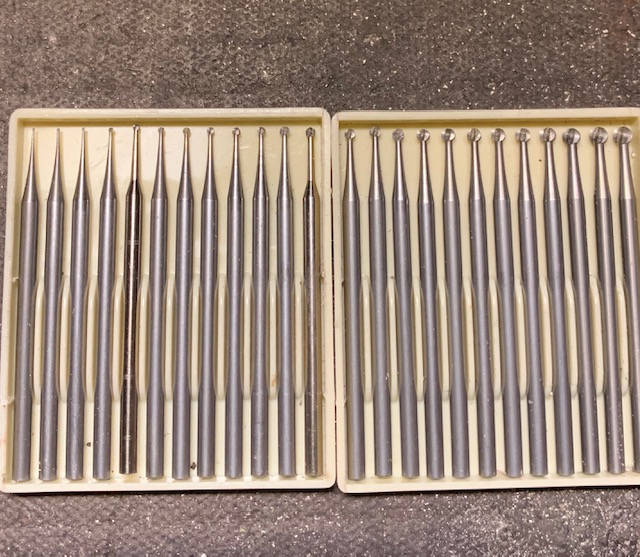
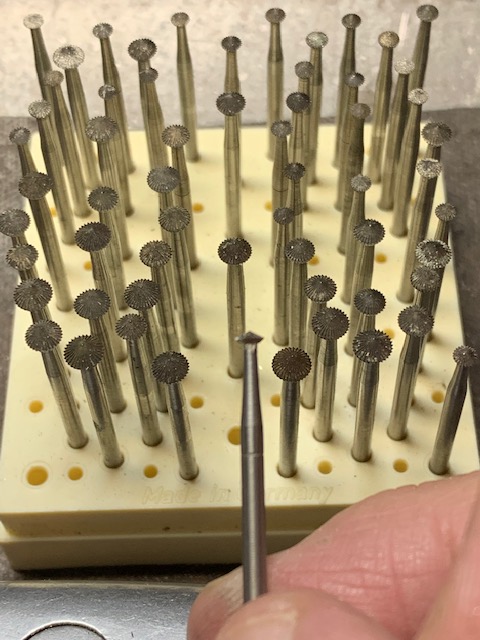
I prefer these two packets of burs within ‘arms reach’ of my bench-peg.
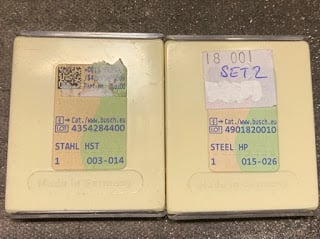
Here are the contents of these two round bur sets #003 => #028 inclusive!
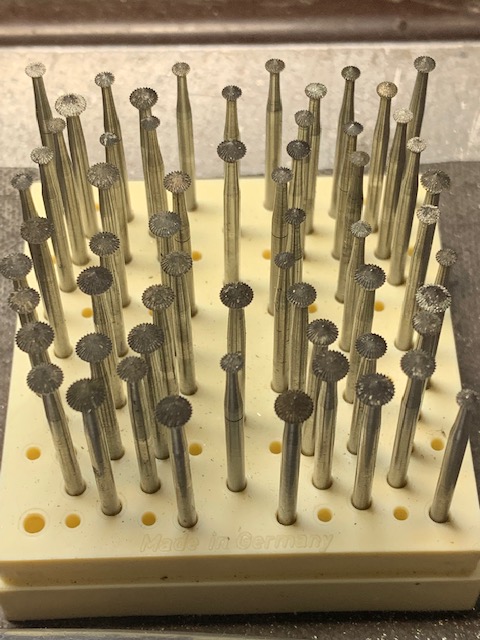
Just a few of my 90degree angle “156C” undercutting burs , some folks call these bearing-cutters or under-cutting burs! Whatever you call them, they do their job of making a seat for the Girdles of the stones. As I’ve mentioned many times before, the letter " C " denotes that these burs are made of Carbide-Steel.
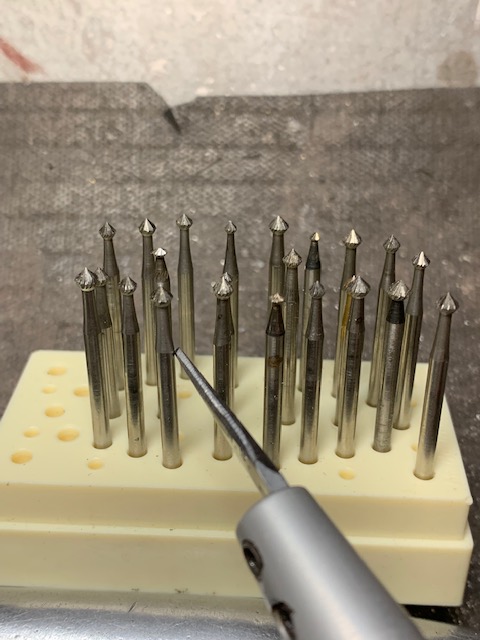
Here is a 70degree angled bur. I have no idea why anyone would buy these, as no stone is polished or cut with a 70degree angle, not even a diamond. There is as well, no allowance for the Pavillion.
I, many times use these HSS burs to both cut the bearings and as well the Pavillion grooves just to cut down my bur time. But getting the correct size of bur is very important for example, a 3.00 millimetre stone I would use a 2.50mm bur on average.
This is the original wax I have in my inventory and then I decided to use it just for this exercise.
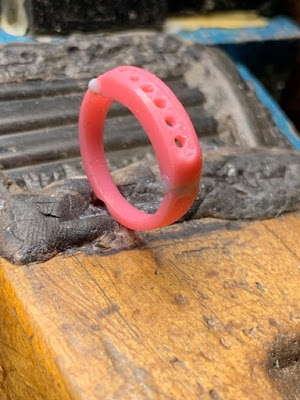
I broke off the ‘mini-claws’ just for this essay, thus leaving me with a ‘low profile’ channel-setting opening. Nothing is to stop me from using this modified wax-form, you can do the very same if you have a similar wax-frame to work with!
Here is the very same wax prior to the quick modification!
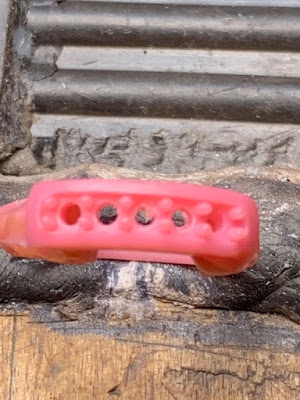
There is barely any height to the channel wall, but it’s still a usable demonstration piece!
I like the wide opening, as I don’t have to waste much time boring out the holes in the metal to take the large five stones.
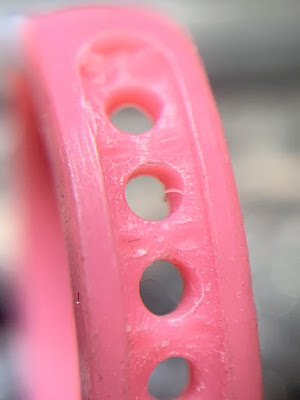
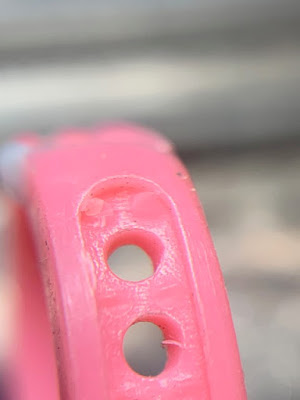
Already I can see a few problems that can be ‘repaired’ prior to any setting. Let’s deal with them NOW!
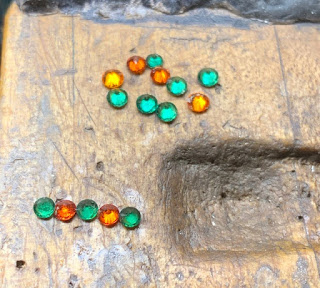
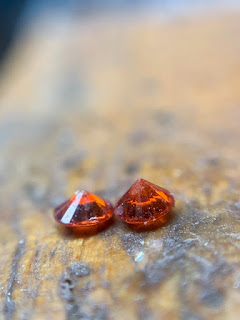
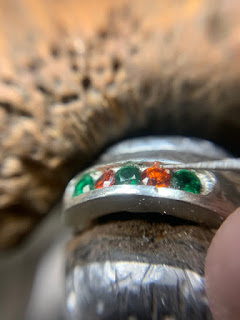
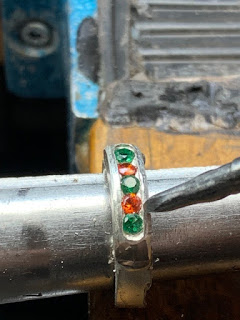
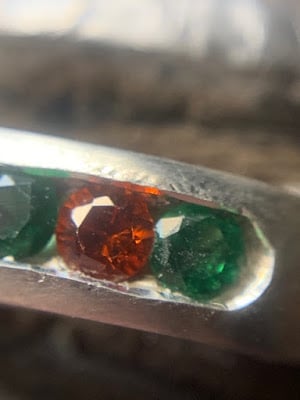
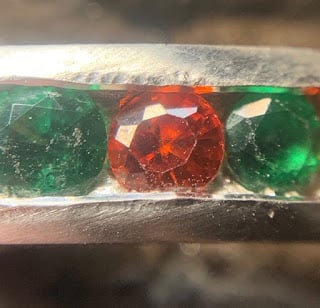
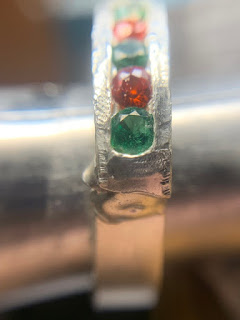
I’m attempting to separate two colour groups for each ‘group’, all must have the same ‘colour shading’.
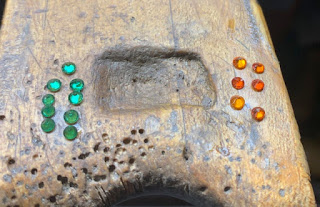
My problem now is to find three Emeralds with the same diameter and as well the Golden-Topaz all five must have the same width.
I will spend much time measuring each stone for the Pavillion depth and Girdle thickness. These points are so terribly important in setting these stones side-by-side!
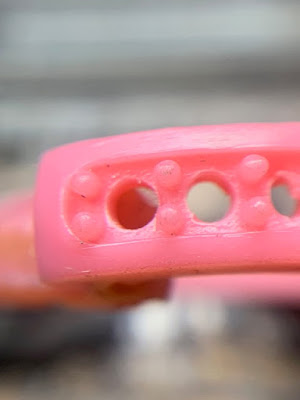
Now the ‘fun’ starts in preparing the channel. But how do I make the channel wall higher? I’ll be making the base much lower.
But first, I MUST core out the inside hole for the Pavillion faceting. I will not use a round bur but using only a tapered Bud-shaped bur.
The bur size DOES matter! I will never use a bud-bur the exact same size as the stone. In this case,
I will use 2.50 mm bur just for the 3.00 mm stone!
In this photograph, I’m using a very wide bud-shaped bur, how wide? Just wide enough as to not touch the two side walls, lay this bur horizontally and let the bur remove that metal.
With this action, it is actually making the walls higher by lowering the base, good idea?

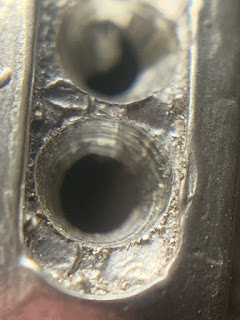
To make and remove all of the little aberrations from casting, I’m now going to use a #006 round-bur and clean out all of the inside corners where the stones will be resting.
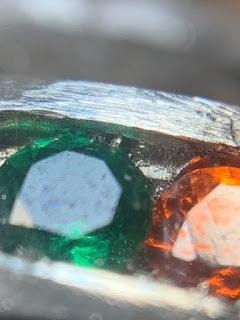
Two stones with the same colouring, but let’s not forget the Pavillion depth and the diameter.
I always have 2-3 extra stones in case of unforeseen problems just like these. I also ask my stone dealer if I can ‘return’ the unused stones, if not I’ll add them to my inventory or in case of breakage during setting.
These two stones are now IN the ‘two walls’. You can see where I did the inner cleaning. Remember to get rid of all of the extra unnecessary little pieces of metal around the inner-edges. If not, the stones will never fit in with any degree of accuracy.
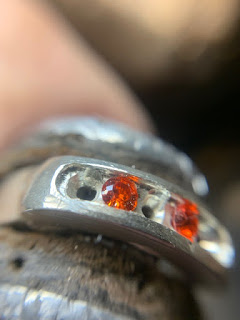
See just how high the stone is sitting, look at the "Table’ of the stone, I can even see how high the Pavillion is resting, not in the hole, but raised HIGH. This is definite “NO-NO”.

The Pavillion is now IN THE HOLE therefore, the ‘Table’ is now resting lower into the ring!
BTW, I could get the stone lower, if I could, but the low-profile walls are still a problem. The ring is now better for stone-setting than before, agree?
I have another method to secure a stone prior to the hammering of the two channel-walls.
Since I have only one metal ‘demo’ now being used at my bench. I will attempt to use another easier method by showing you (with the wax) and using this as a demonstration.
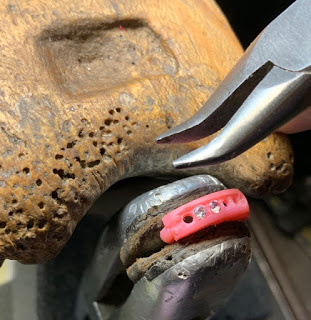
I really like these pair of pliers, as they have almost parallel jaws near the point or ends.

Using this easier method, I’m ‘crimping’ the two walls together, at once! There are no remaining marks on the metal walls. Just how easy is that?
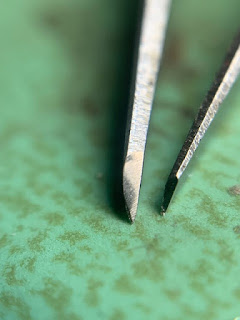
My remaining method is using my Onglette graver #1. But modified to create a very, very thin sliver of metal just inside the bearing just above the girdle of the stone.
I think that this is a good idea, but somewhat of a delicate technique to those folks who are not skilled in using gravers.
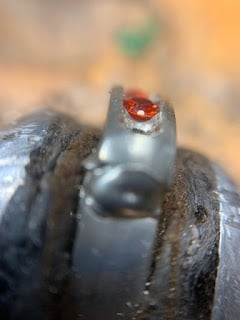
In this ultra-close photograph, you can see just where the little wire-bead is located . I make sure that the over-hanging sliver of metal is above the Girdle of the “Crown-Facets” and nowhere else!
Here is the fine-tuned Onglette #1 graver creating that little bead, interesting idea?
Would you believe that the width of the modified graver is only .35mms? This is only at the very point of the blade, the graver on the left is a normal 1.40mm’s. I need this thin graver to get inside the bearings made for the Girdle.
Now you can see just where the point is starting to do its work in securing the stones.
Be so very GENTLE when doing this against an Emerald, accidents might happen!
These Wire-Beads will be literally covered over by the metal being pushed over while in the
hammering process!
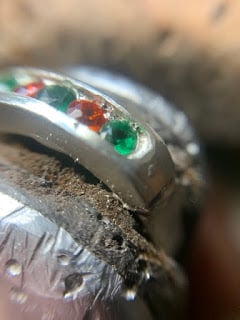
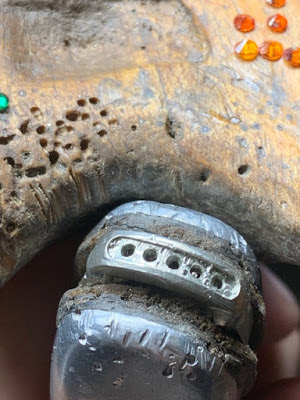
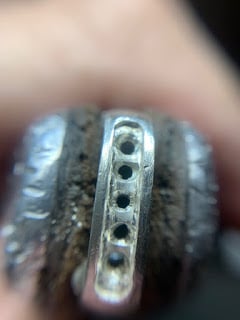
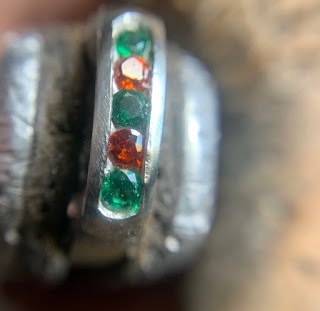
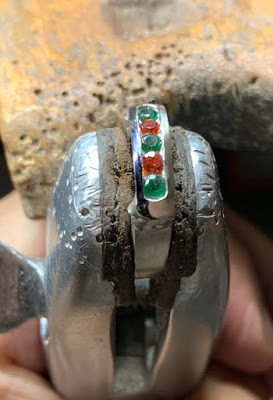
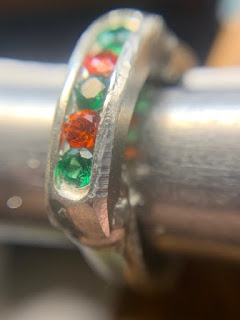
All is now ready to do the hammering and final cleanup afterwards. So much work to get this ring-top completed.
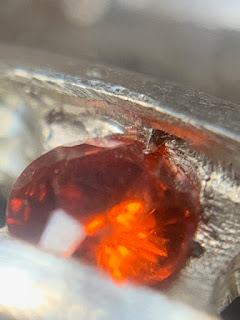
With all five stones tightly secured by either of the two techniques, we can go to the next stage. Let’s suppose that the five stones were not into the channel deep enough, there would be much ‘breakage’ starting NOW!
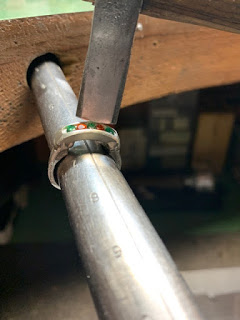
I like to use a riveting hammer on ‘most setting jobs’ but my reciprocating hammer works best for me here!
I’m now holding the anvil at a 45degree angle “away” from the stones. The hammering action might touch the ‘Table-facet’ and “Good-Bye, stone”…:>(
The downside is that you are not getting to see exactly where the hammer face is actually touching!
Why is the ring-top situated on a mandrel? If I was, or even you were hammering on a leather insert wooden ring clamp the "hitting power’ will get absorbed into the leather lining.
All reciprocating hammer hitting is done on metal, why is this? The steel frame allows the “hitting power” to be put into the ring-top where it belongs & not to get absorbed from another medium.
I AVOID HOLDING THE HAMMER ANVIL AT A 90 DEGREE ANGLE. I don’t want to reduce the thickness of the Channel metal. I need it for the “Bright-Cutting” that’s next on my adgenda.
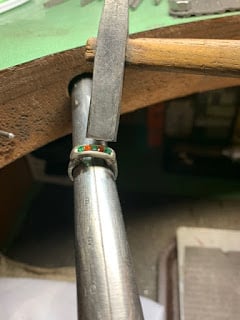
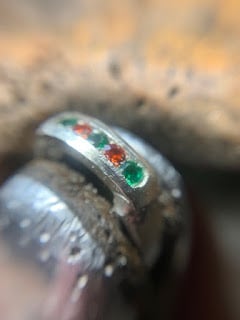
I am so very careful not to touch any stone in the hammering process. I will hammer until each stone will not move anymore!
Those little pieces of metal will be removed in the filing and Bright-Cutting process. There has to be a little space in between each stone. Don’t have any stone grind against each other, or breakage will occur. This is including that no two stones must overlap each other, the results are not nice!
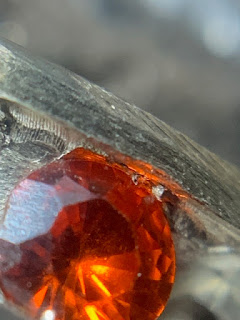
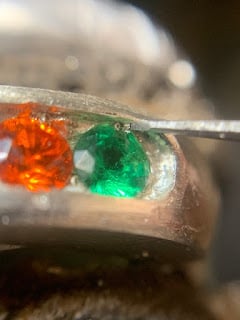
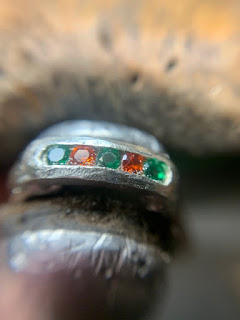
This Emerald is tilted and the Golden Topaz is underneath at the Emerald Pavillion. (I only hope that nothing happens in the hammering process).
If I see that a stone is tilted, I will cut away those little wire-beads and re-position that tilted stone.
Can you now see why I ask you not to have any stone grind, or touch each stone? The Emerald stone has now been damaged, ouch!
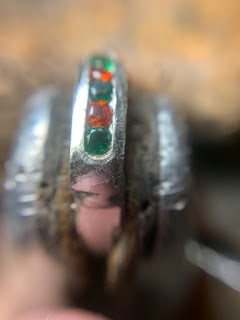
The Flat Graver #40 used for Bright-Cutting is now starting to cut the inside of the Channel wall. The corner of this graver will remove all of those little wire-beads while it is Bright-Cutting the metal.
Here is the Bright-Cutting being done . If the metal was reduced in thickness, there wouldn’t be any chance to do this interesting technique.
If you can cut a semi-circle around the two ends, this will make a nice appearance to the overall pattern.
All of the ‘hammering marks’ should be removed with your Pumice wheel of #180 grit. Try and avoid using a file as this just by itself will leave more stirations in the metal.
Just another view, this shows how the remaining few of the ‘hammering marks’ look.
How would you remove these offending indentations? I would use my Flat-Faced pumice #180 grit wheel so very gently but not aggressively at one spot . I would just further smooth the surrounding areas and keeping the curvature of the metal on my mind.
Why was I using my felt-marker on the metal? A very easy answer, I want to know at all times where my pumice wheel is touching!
Once all of the marks have been removed, don’t stop there! Remember that there is a continuation of the curve of this ring-top.
Keeping in mind that appearance is 75% of the setting, if there is a curve on the ring, keep it there!
Don’t allow any flat spots to appear anywhere!
Just a few notes to remember:
File with your Pillar file #2 grit at an angle of 45 degrees away from the stones.
Try and remove ALL OF THOSE remaining marks. Keeping in mind as to not let any file get too close to the inner-edge where those delicate stones are located.
Hammer even at the curve of the setting area at the end of the Channel. Maintaining the ‘curve’ of the pattern everywhere at all times. This alone is so important!
Continue with the hammering anvil beyond the end stones, again at a 45degree angle.
You can easily see that the anvil is nowhere near, or even close to the inner Channel wall .
You can see that there is a little thin ‘untouched’ space between the anvil hitting and the bezel angle.
This now gives you enough metal for the Bright-Cutting processes.
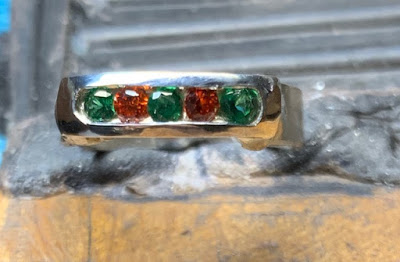
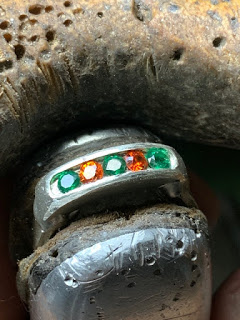
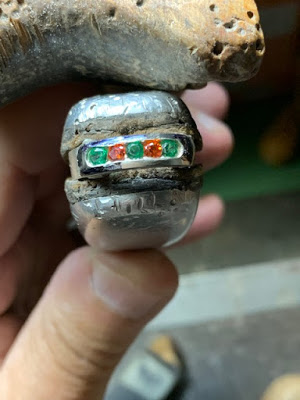
F I N I S H E D!!!..:>)