Categorizing/organizing in the workshop

Oh my. I hardly know where to begin, which is why I’m including you all in my dilemma. I am by nature a piler-upper of things. My workshop is small and crammed full/piled high with stuff.

I can’t get to some larger tools easily without moving a bunch of stuff first. I’ve decided to clear out a lot of stuff (starting to feel like George Carlin with all my “stuff”) & try to get to a point of having only tools that are necessary around me.

My main problem is how to classify things so I can start chucking everything in separate boxes and then sort through for the good stuff I want to use every day.

Does anyone have a good organization LIST for a workshop? For instance, I could have a box for hand tools, but it should probably be narrowed down by types of hand tools - files/scissors/hammers/pliers, etc? I can’t even think of proper categories…

If I can get a good method of organization, I’ll take before and after pictures and post them in the workshop section. You’ll be appalled and gratified to see the change.

Thanks tremendously to any organized or disorganized person who has some good hints!

3 Likes

I like pegboard if you have a place to mount one (see pic). A proper bench is great too because you can drop tools you use a lot in the sweeps drawer for easy access. I keep hammers, files and saws on the pegboard and pliers and other smaller tools in the drawers. I totally agree it is a pain to have to look for a tool … but I’d like to meet the person who can keep theirs bench neat and tidy all the time.

Mary Jo,
How much room do you have, do you have any shelving and do you have any wall space to hang things on like Brent has shown? What size of Tools do you have that you’re having trouble finding a place for? Larger and heavier Tools will obviously need to be on shelving or a flat work bench, but smaller Tools can be hung up in various ways or stored away in organizing drawers or plastic see-through bins, it all depends on how much space you have to work with… Can you share a photo of the space that you’re working with?
Jonathan

I can’t leave my shop at the end of the day without putting everything back where it belongs. My shop has evolved over time as I have added space and tools. There are tools that you will use regardless of what you are doing. For me that would be my soldering, annealing, sawing and filing bench and my grinding sanding and polishing bench. All of the tools and supplies in these areas have a place and are nearby. Designing, layout, drawing record keeping and some storage are in another area. Forming, cutting, rolling and drawing have another place. Engraving is a bench and storage area by itself as is all of my lapidary equipment. I may have duplicate tools in different areas so that I don’t borrow from one to use in another. So I guess that my shop is organized by functional areas. You can see it on the Shop Shots page of my website at www.robmeixner.com. I need organization, but accept that others thrive in clutter…Rob

2 Likes

https://www.inc.com/geoffrey-james/a-messy-desk-is-a-sign-of-genius-according-to-scie.html

1 Like

Hi,

I have a very small space…and use a few main strategies…and uncontrolled clutter is my nemesis!

  1. i find that good/ maximum use of vertical space has helped me…ie: shelves on everything possible

  2. everything is labeled, and contained…, mainly in (stacked) plastic Plano tackle boxes, or cardboard boxes with removable shipping label windows

  3. things are on rolling units, that can by pushed in/ put away…(increases the working space…) or pulled out for easy access to what is on the rolling cart…or what is on the side of the bench that is next to the rolling unit…ie: my rolling mill is on the side of a bench with handle detached…to use it, i pull out the rolling cart next to it, attach the handle and move into that space.

  4. i put everything away at the end if the day

my space (weirdly) has floor to ceiling library shelving…i use one size of cardboard box, for uniformity, like drawers, on the shelves…for my backstock of comsumables as well as less often used tools…each one has a clear packing list window stuck on it, with a piece of paper slid in, listing the contents

i have also built small shelving units for my benchtops, where i have dedicated bur boxes for each of the main types of burs, drills, polishing wheels, etc…with backstock in another bur storage box)…i pull it down, use the bur, put it back

ie: twist drills
burs by style, with sizes marked in box (round, hart, setting, cylinder, flame, inverted cone, etc)
grinding stone burs
pre-polish (dedicated buffs, wheels, etc)
final polish (dedicated buffs, wheels, etc
rubber wheels
sanding
scratch brushes
etc

and plastic pencil boxes to hold the compounds on top

everything is labeled…my brother sent me a p- touch labeled for Christmas a few years ago and i went nuts with it!

  1. my other main storage vehicle is plastic compartmented fishing tackle boxes (brand is plano)….all the same size…that are labeled and stacked near my bench, in a rolling cube unit from Ikea…(i love it…wish i had room for more!…i pull it out and use it like a return for my bench for hand tools, …i started using these plano boxes back in the day when i took alot of classes…as a way to stay organized and not leave anything behind…they are by category…

i also have some on the wall shelving…with backstock of flexshaft buffs, wheels, brushes, mandrels, etc…again by category….and labeled…ie:

grinding
sanding
muslin/ felt
rubber/ silicone
etc

ie: misc hand tools
mandrels
files

as for other hand tools:

pliers are on a strip of aluminum i bent and screwed into the side of my bench (from home depot)

i have 3 ceramic utensil cylinder canisters on the top of my rolling cube unit…for:

  1. sanding sticks
  2. often used hammers (i also have an underbench sliding hammer pullout i made, and 3 more utencil cylinder cannisters for less often used hammers…they wear socks to protect their faces)
  3. scissors, ruler, rawhide mallets, etc

my needle, escapement, riffler, files are in fabric roll- ups that i made, or paintbrush rolls from hobby store…in a cigar box…i use cigar boxes like open top drawers too…

i find that using uniform containers/ boxes, when possible, helps to reduce the appearance of “clutter”…even though my space us packed to “within an inch of its life”…haha!

also, i use trays to contain little boxes when i need that

i like to be able to pick up a tray, and brush off my space…

i have found that if i have a dedicated “place” for things, and i know where they go, then it is easier for me to put things away, as well as access them quickly…

julie

3 Likes

Oh my gosh, Julie, this is all amazing advice. The rolling units (I have ONE, but I don’t use it as well as you do), and the lists, and the p-touch labeller! Can you send me pictures of your workspace? As you can see from the attached picture, my vertical space is severely limited, but I DO have some. Thank you soooo much for this info.!

Mary Jo,
Wow! I can see what you mean, you definitely do need some more storage space, though I do Love the natural light, but I bet you have a some difficulty annealing! :wink:

The first thing that I would do is, build/install some Open Shelving across the front of the (3) windows behind your bench to the left (wall to wall if possible), then purchase Clear Plastic Storage Containers to use on them, that way you would still have some of the light coming through the Containers. I like and use some similar to this that I buy through Walmart.com (the Link to Walmart wouldn’t show up on here - but this is what they are called: Sterilite 7 Qt. Latch Box Plastic, Stadium Blue, Set of 14), but these on Amazon are very similar:

The latch on them works great (much better than the snap-on lids) and the containers hold quite a bit for their smaller size - they also have larger sizes available if you need or want them and they work really well too… These Open Shelves and Plastic Containers alone, would free up and help you to organize a very large portion of your overflow Tools & Supplies right away, plus you would be able to see what was in each box, just by looking at them.

I would also measure out the width of your wood tools rack at the back of your Bench and then take some 1" x 1/8" or so Steel Bar Stock and add 6" to the length (3" to each end) and using a Vice & Hammer, bend the 3" into a “L” shape (see photo) and drill a hole larger then the head of your screw to make it easier to attach to the frame - then attach it to the wood frame at a height that is comfortable to reach while sitting at your bench. I have found that this relatively quick and easy Steel Pliers Rack works much better and holds a lot more pliers than the wood racks that are most often sold and that you have now. Using 1" x 1/8" Steel Bar Stock will also enable to you have the Pliers Rack as long as you want it to be and it will not bend or warp! This will allow you to still have your Pliers right in front of you, but also a lot more of them will fit and hang better too, thus freeing up the space behind them where they once were. You can see one of my short Spare Pliers racks here, as well as how I bend the “L” shaped attaching bracket:


After I bend my racks into shape, I always file and smooth round the top & bottom edges of the rack to help keep it from rubbing on the bottoms of my Pliers and to keep from scraping my skin off too…

I also use and really like the Plastic Multi Drawer Storage Organizers that they sell at Ace Hardware store:

They also have the Organizers with smaller drawers and a combination of small & large drawers - I have quite a few of them and use them for any small tools, supplies, parts, findings, stock, usable scrap, etc., anything that will fit in them and they hold a lot in a relatively small frame…

Beyond those three suggestions, I really like Julie’s ideas and am thinking about using a few of them myself! I hope my suggestions help or at the very least give you some other ideas to think about. Good luck with your organizing!
Jonathan

1 Like

Hi Maryjob,

my “cockpit area” is similar in size to yours, but my benches are deeper…2 jewelers benches and 2 48”x30” deep workbenches…

you have lovely wrap around windows…i would be hard pressed to cover them with shelving units…i think i would start with one floor to ceiling shelving unit on the left side “wall” as a compromise

adjust the shelf height for maximum tote/ box capacity…small uniform sized cardboard boxes are a cheap and easy option to start with. get the shipping windows and cut paper to fit for content labels…i use a sharpie marker and just write what is inside the box…

i just cut a small strip at the top and just use that small strip of the adhesive backing…i leave the majority of the adhesive covered…

set that up, and then just start by “filing” things in the boxes, by category: (you can go back and fine tune, once the clutter is under control

consumables, such as:
adhesives
soldering supplies
sand paper (use a partitioned plastic file folder, or a 3 ring binder with pocket pages

lathe polishing buffs
jool tool stuff

flexshaft stuff: (sep boxes for each if you have alot)
sanding
grinding
buffing, brushes, felts, etc
scratch wheels
burs
engraving

etc

you will figure out the categories as you go…you may even change up stuff after you start getting on a roll…

just get totes or boxes and start “filing

you can stack totes first, if you want to wait and see how many you end up with, before you buy or build shelving…you can calculate tote height to the shelf height to choose the best height and # of shelves

keep the bottom shelf up off the floor so you can get a broom under it…

julie

metals:
use 3 ring binders and clear page protectors
one for wire, one for sheet, silver, gold

jooltool

here is a photo of my metals bench, with the shelving unit for my bur boxes, files, and much used small hand tools.

on the front left and right, and right side, you can see my aluminum strip that hold my pliers.

and here is a photo of my 12x8x8” cardboard box “drawers, and plastic tackle boxes…all labeled

lastly, i would consider changing out your non- jeweler side bench for a deeper 30” benchtop somehow, and then built shelving at the back of that one

1 Like

Here’s how I organize all my stuff:

The flat white plastic boxes are in the cardboard slots. I think they are called ‘bankers… something’. It came flat and I had to put it together myself. I love it because I don’t have to dig out my container from under a pile. They just live inside their own little slots.

The white shelf had a decorative brace, so i used it to hold a dowel to hang stuff on. The sign always makes me smile (from local artist, sorry but he’s no longer selling them).

The suspended file box is how i store precious metals (wire, sheets, tubes etc.). They live inside hanging files. I purchased this at Walmart.

The ‘tower of drawers’ is from an office supply store. It has wheels, so I can move it out of my way if needed. I love this thing. The first 2 drawers hold my hammers…

Happy organizing!


2 Likes

I have four of these carts in my shop. They are relatively inexpensive and help me to organize tools and supplies in my various work areas. The last one I bought came from Walmart for about $110. They need to be assembled, but go together fairly easily…Rob

3 Likes

To quote you, Rob, “Great (old) minds think alike.” I have three. Two are built into my workbench, one at each end, and one is at the end of another bench / cabinet close by. They are very handy, especially at that price. Mine came with a drop-down table-top extension on the right side, which I did not attach.

Neil A

1 Like

Hi Maryjob,

to answer your question more globally, consider the following separate stations in your cockpit, based on workflow:

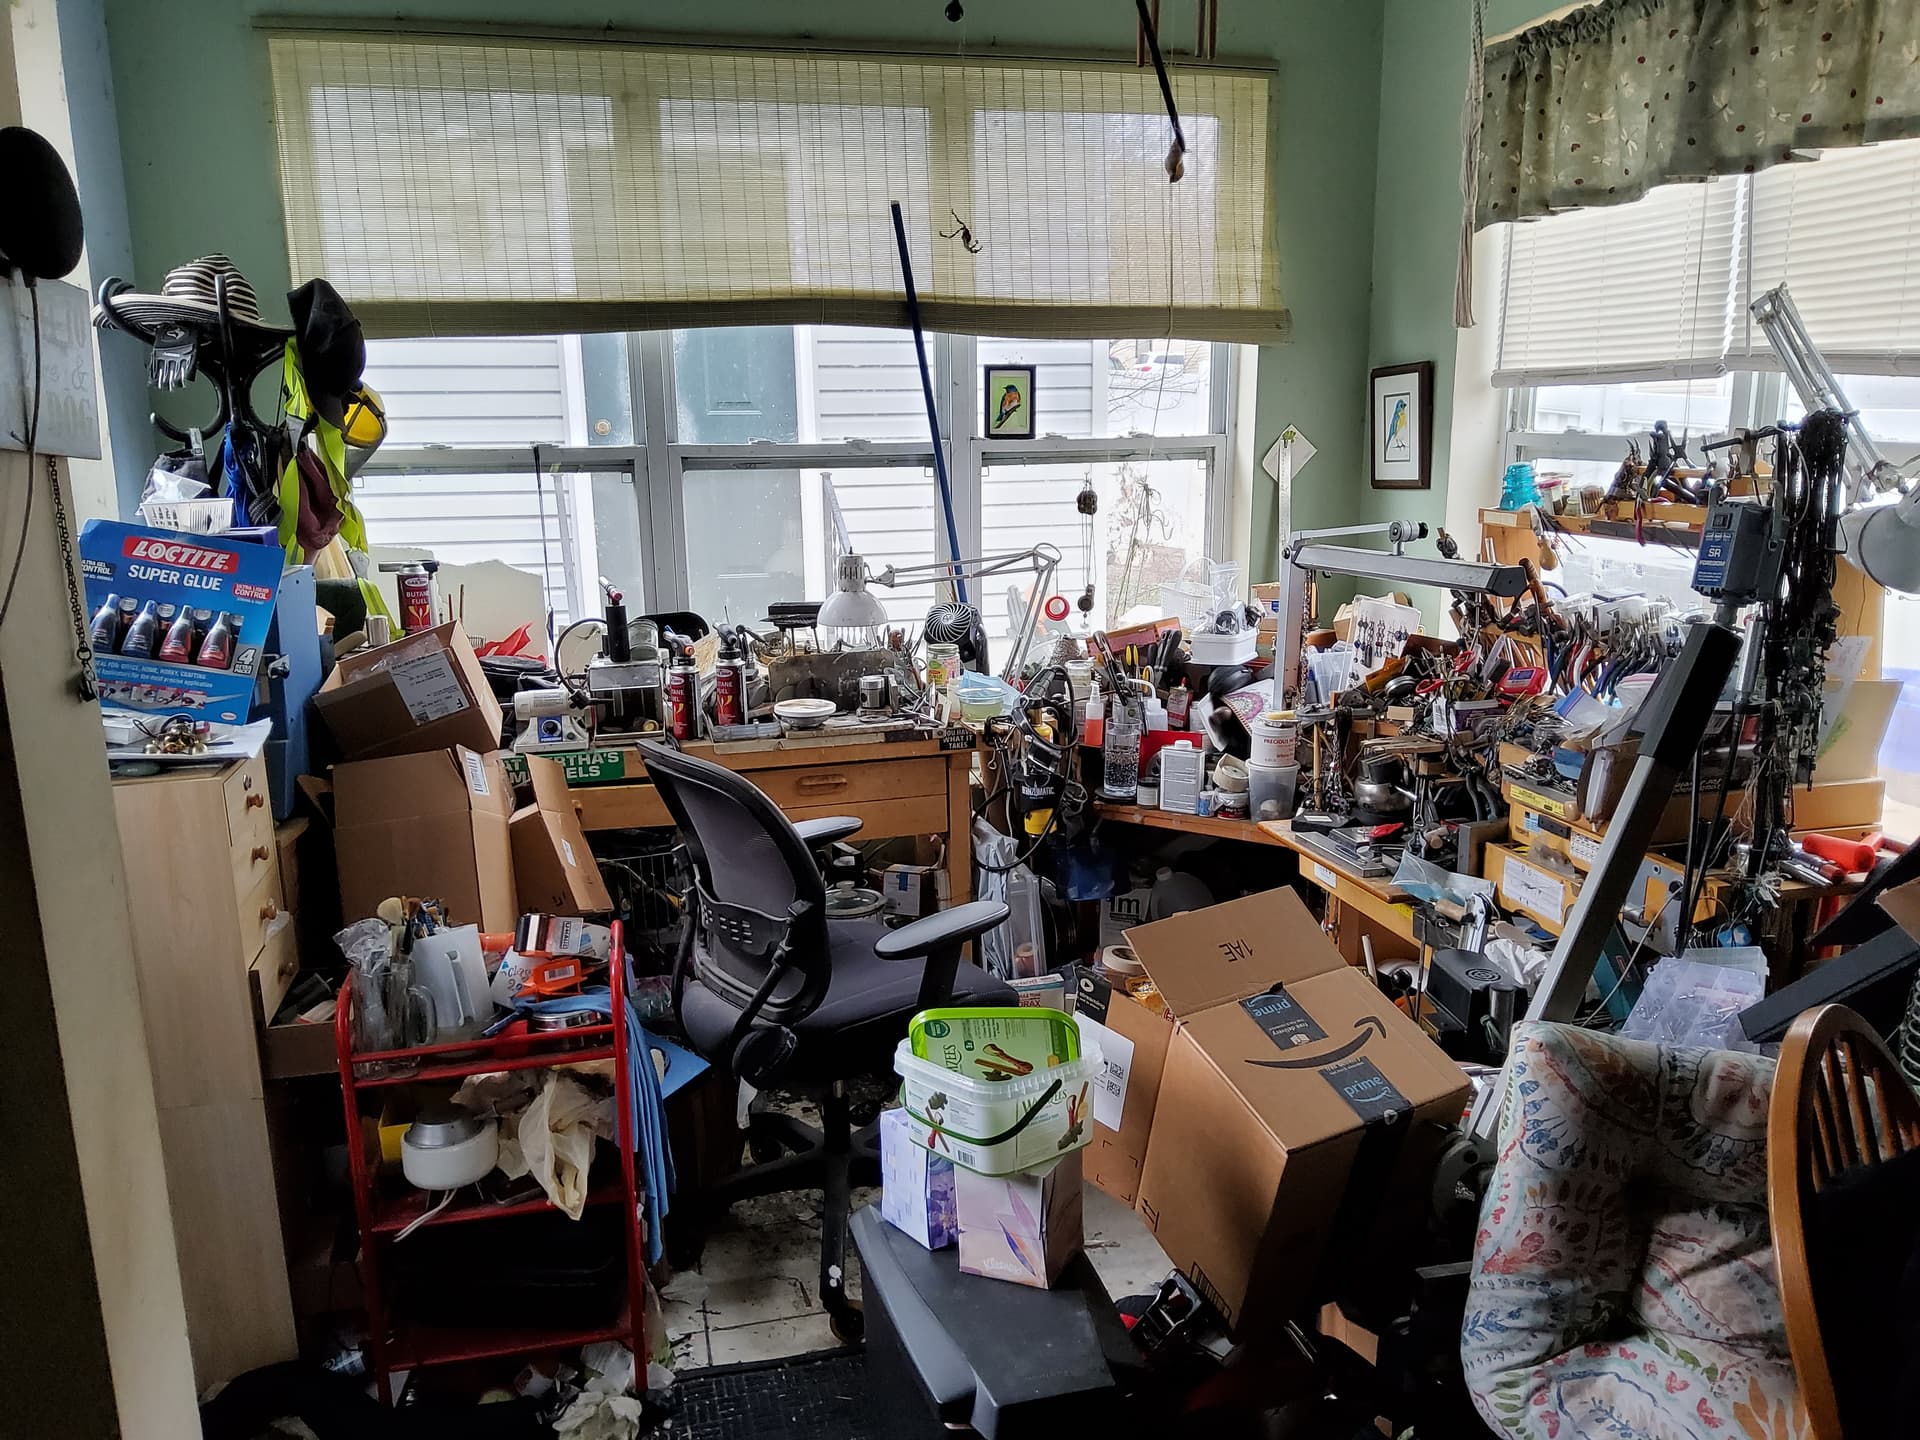
start your boxes like this, then once the space is cleared out, set up your stations

then store what remains in the cartons on a floor to ceiling storage shelf

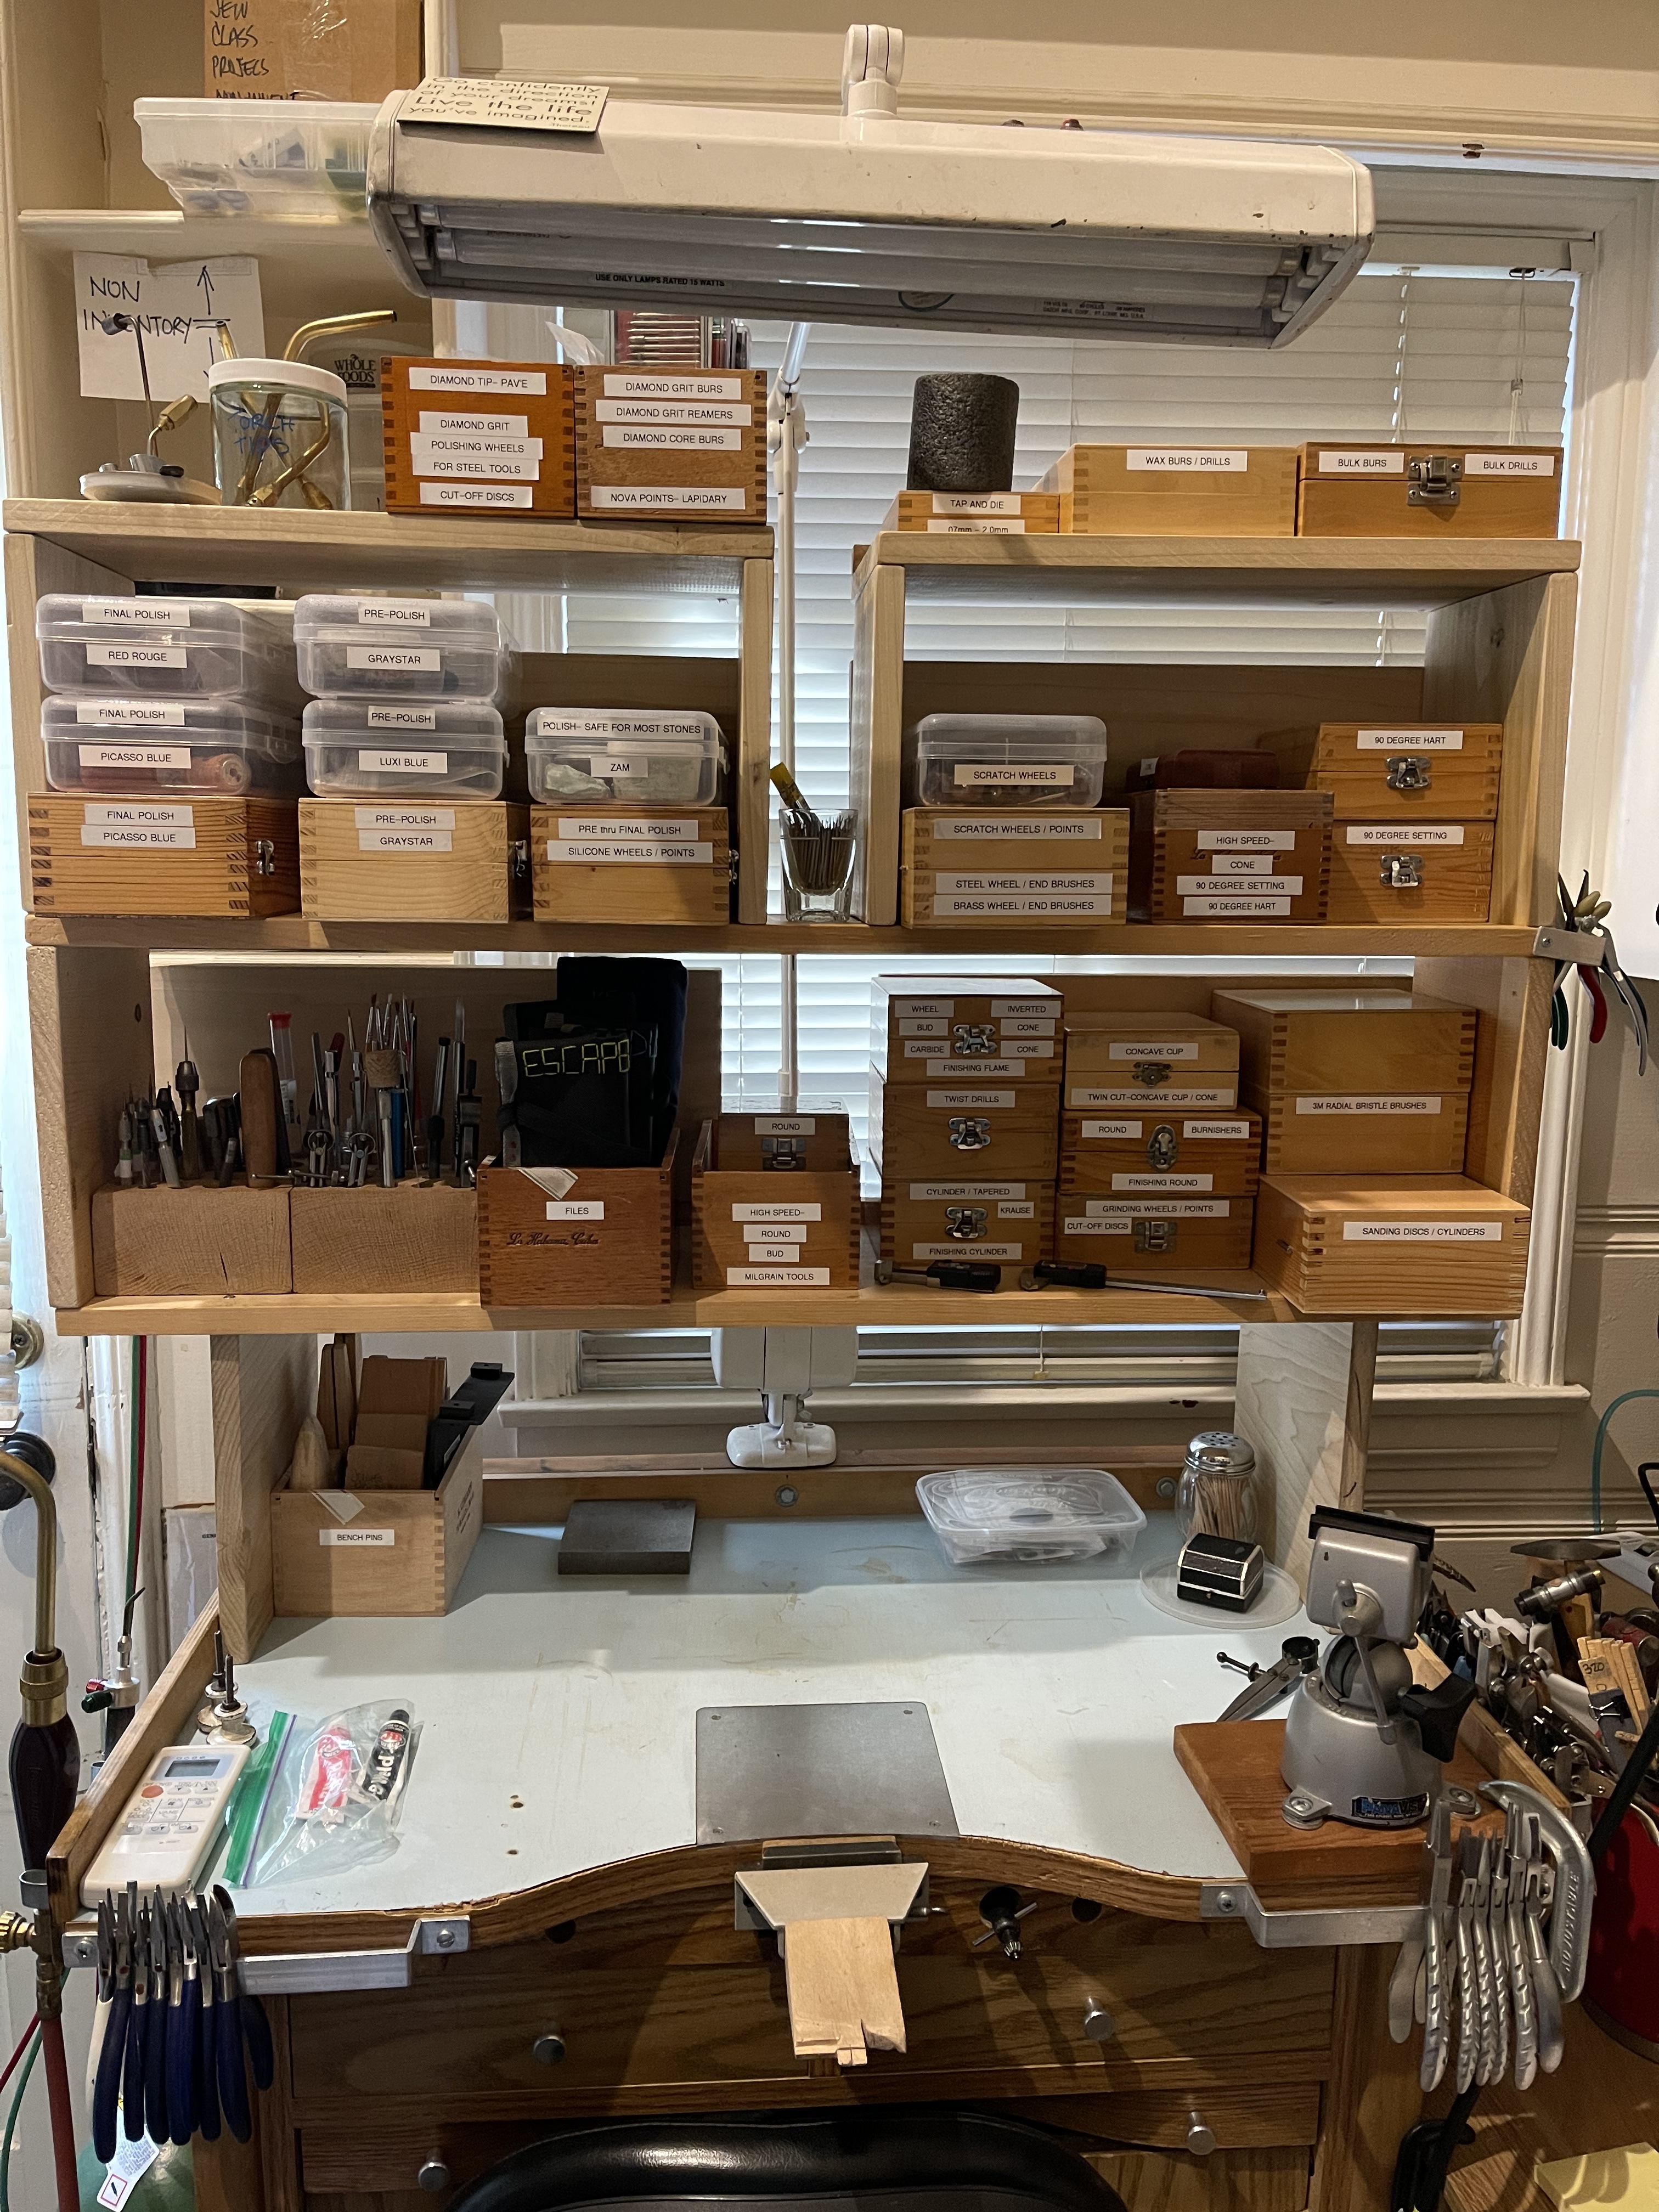
you can just pull down the labeled box to get what you want

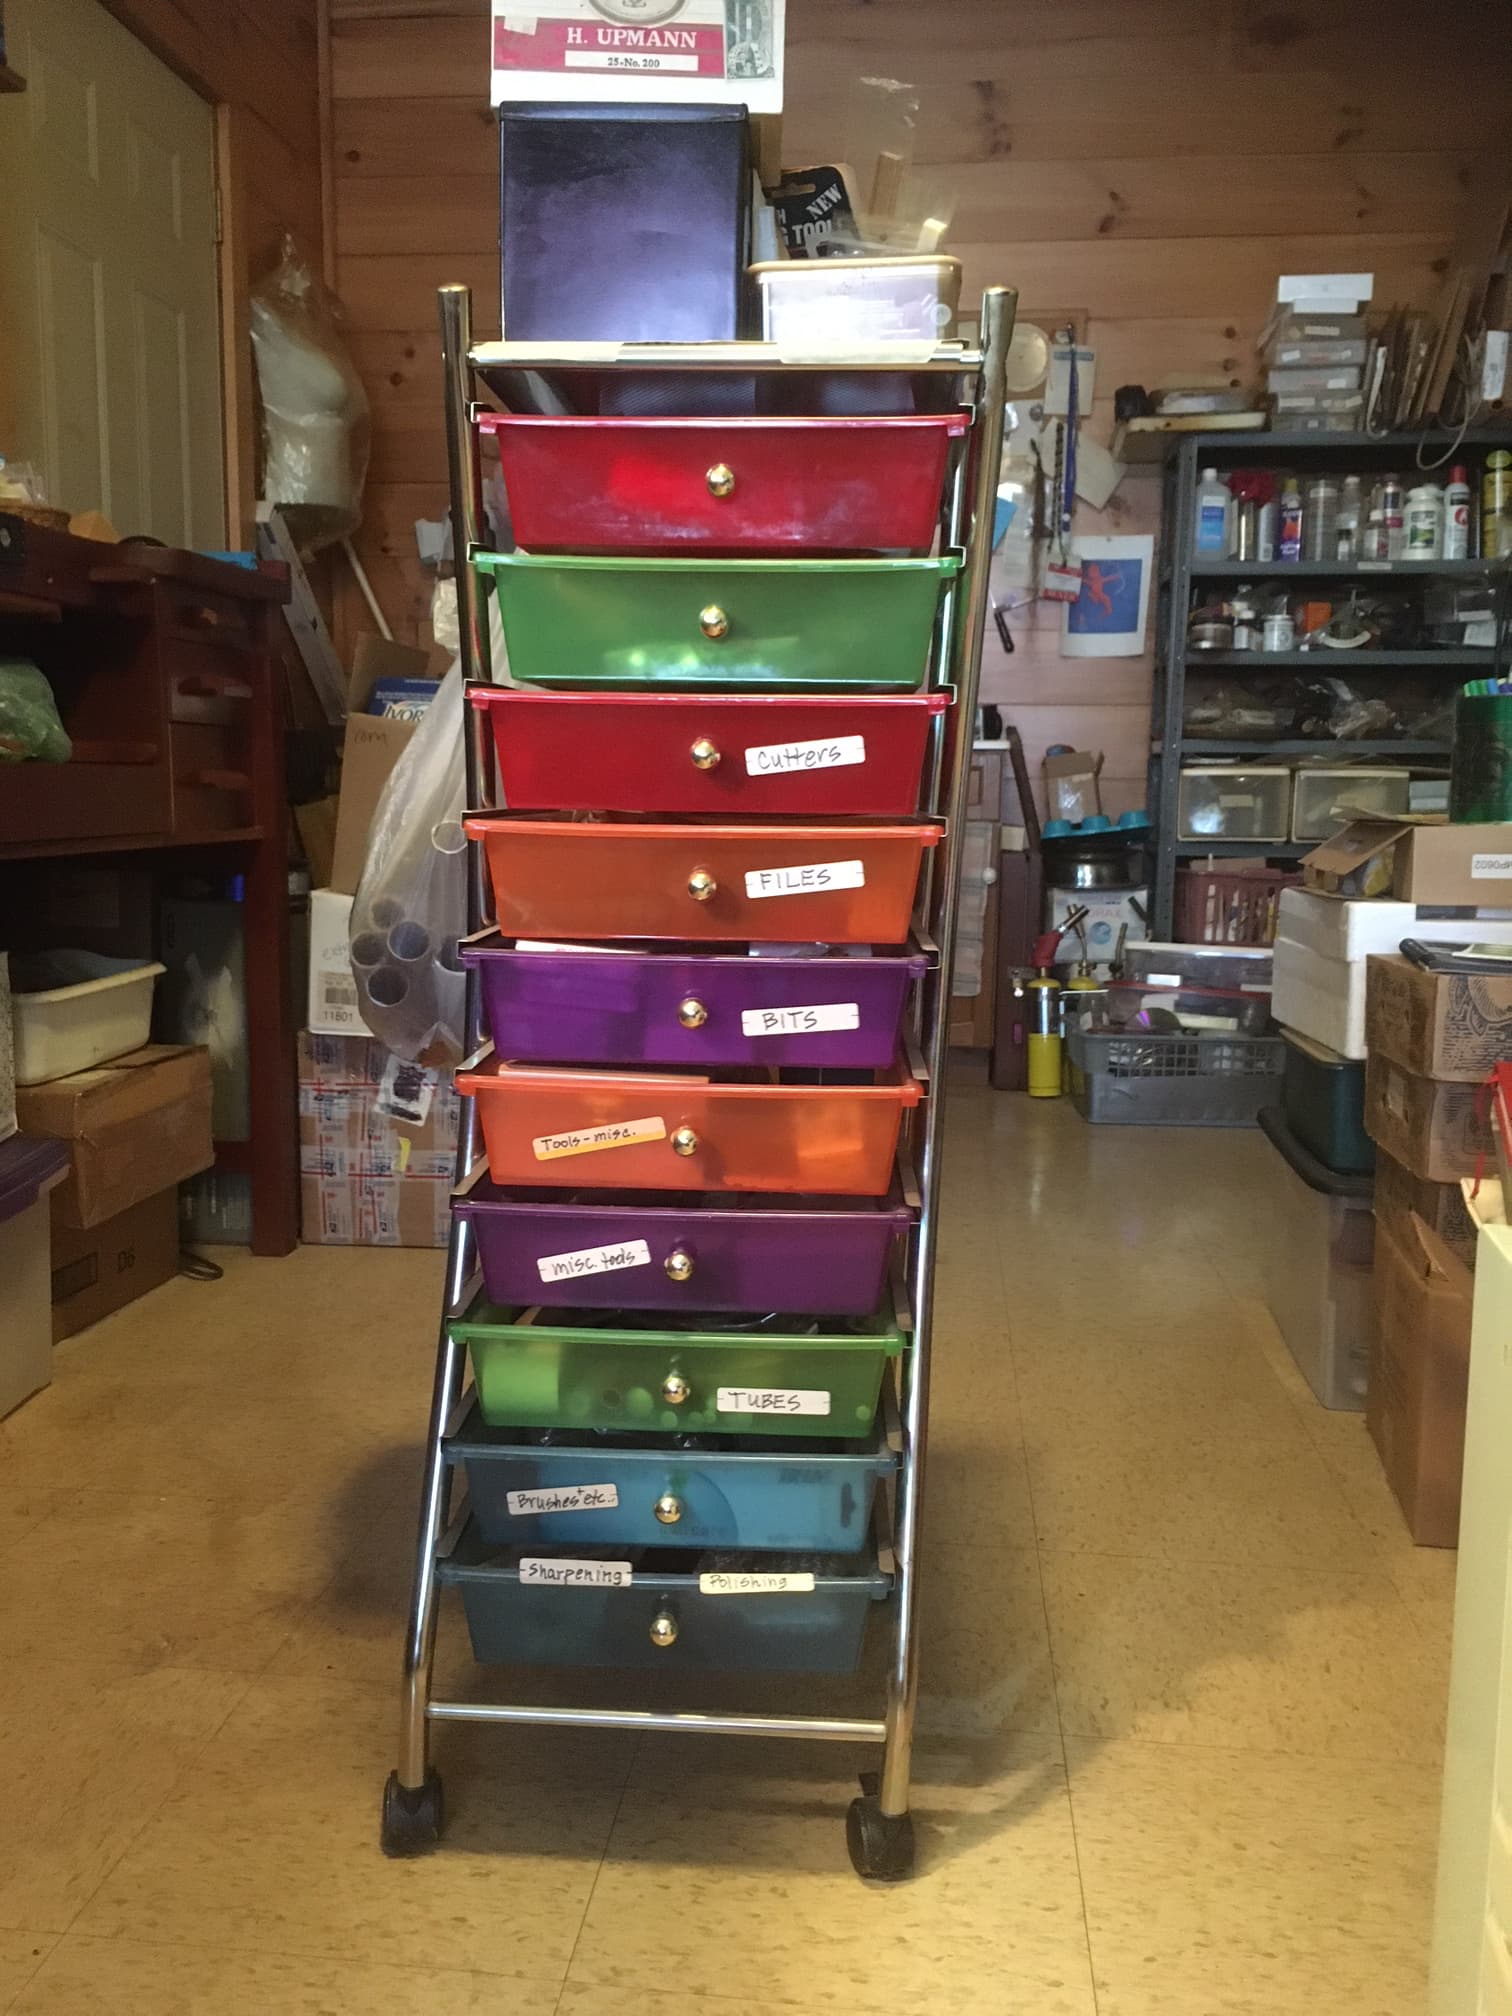
once you have sorted the stations out, then you can figure out what nicer, more permanent storage/ drawers/ rolly carts you might need, and can also plan uniformity of these units

if you start buying more permanent, costly storage solutions before you have a global overview, you might end up with storage that does not make maximum use of your space, that hides things in plain sight (whereby you will start piling stuff up because you dont have an easy “filing” system, is non uniform and adds to the appearance of clutter…the 12x8x8 boxes are like $1.50 each

pick something up…think about “who it is friends with” and put tge friends together…

ie:
a can of oil…it is friends with the drawplates
drawplates…it is friends with the vise
baking soda…it is friends with the pickle station
metal ruler…it is friends with me/ my jewelers bench
beeswax…it is friends with my burs and sawblades
burs…it is friends with my flexshaft
flexshaft…it friends with me/ jewelry bench
compounds…it is friends with my polishing lathe
heat gun…it is friends with my chasing and repousse stuff

once you get the friends all divided up, then you sit down and think about who is important, and who can stay in the box…and then after you do that for each friend group…

your space should be a blank space…all cleared out…contemplate…stare at your blank new studio space and decide where each station/ friend group should go…then set each one up, one at a time…take your time…consider how you move …your workflow

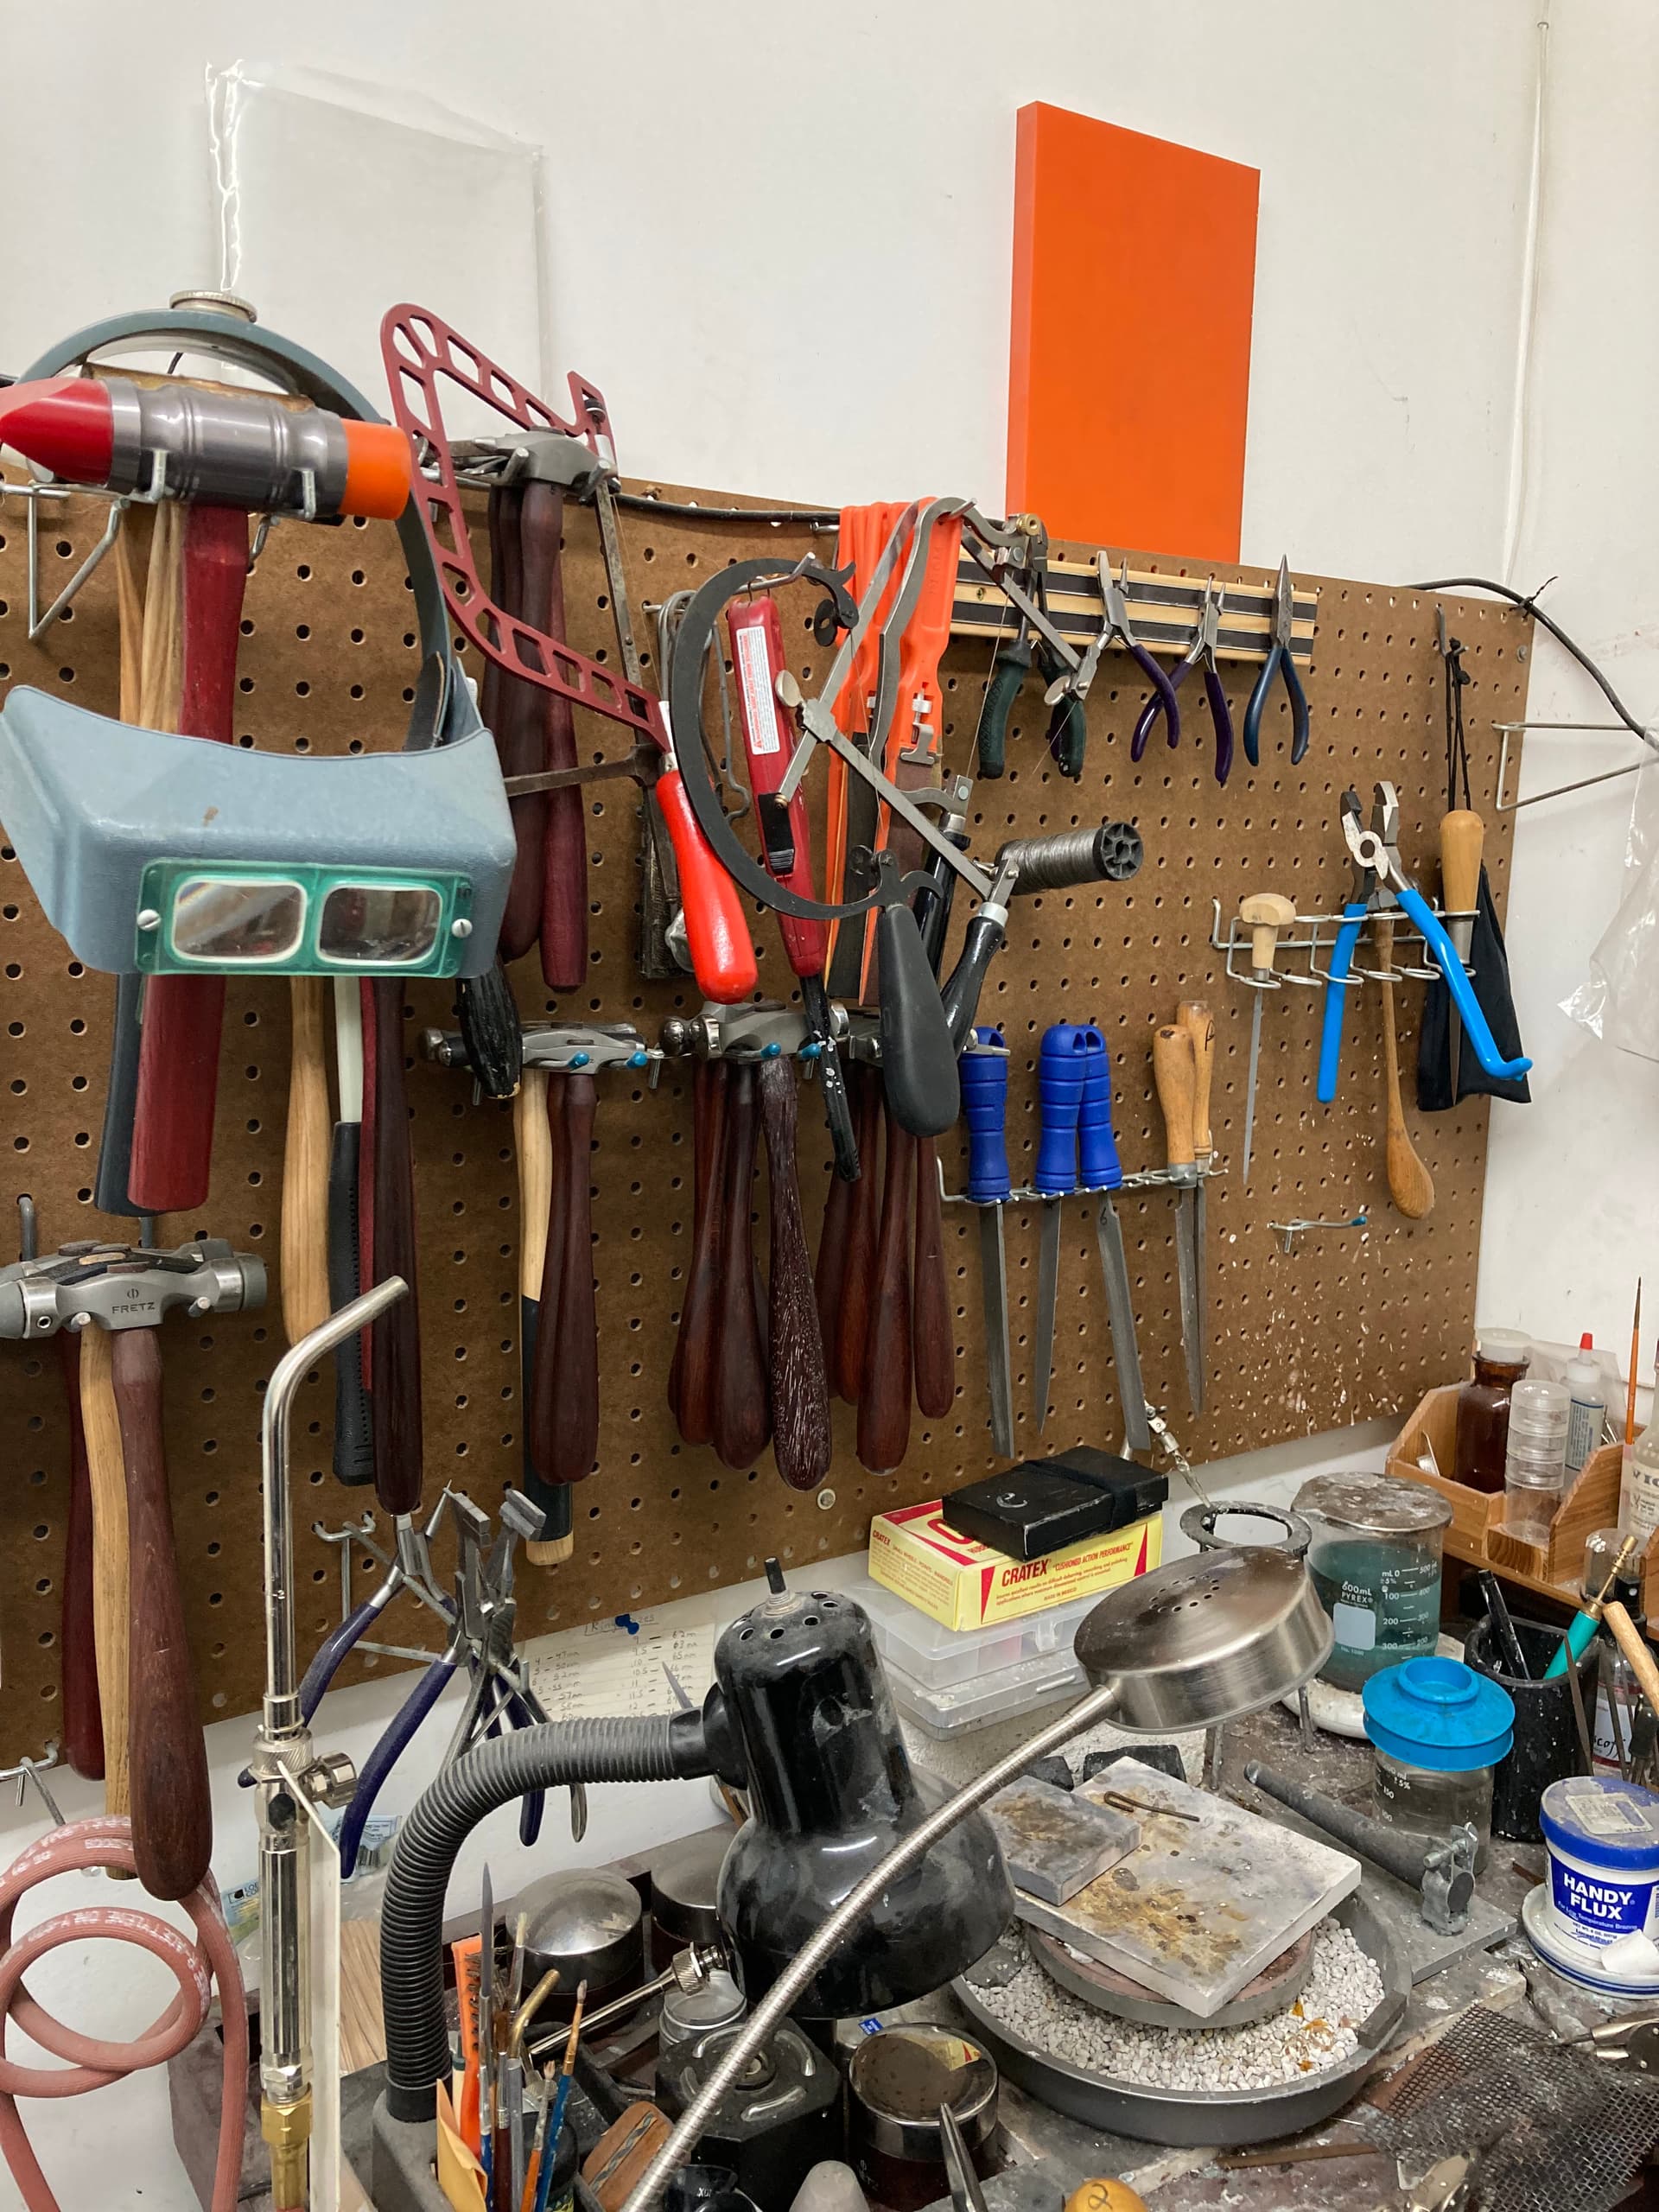
jewelry bench- where you do your:
sawing (saws, sawblades)
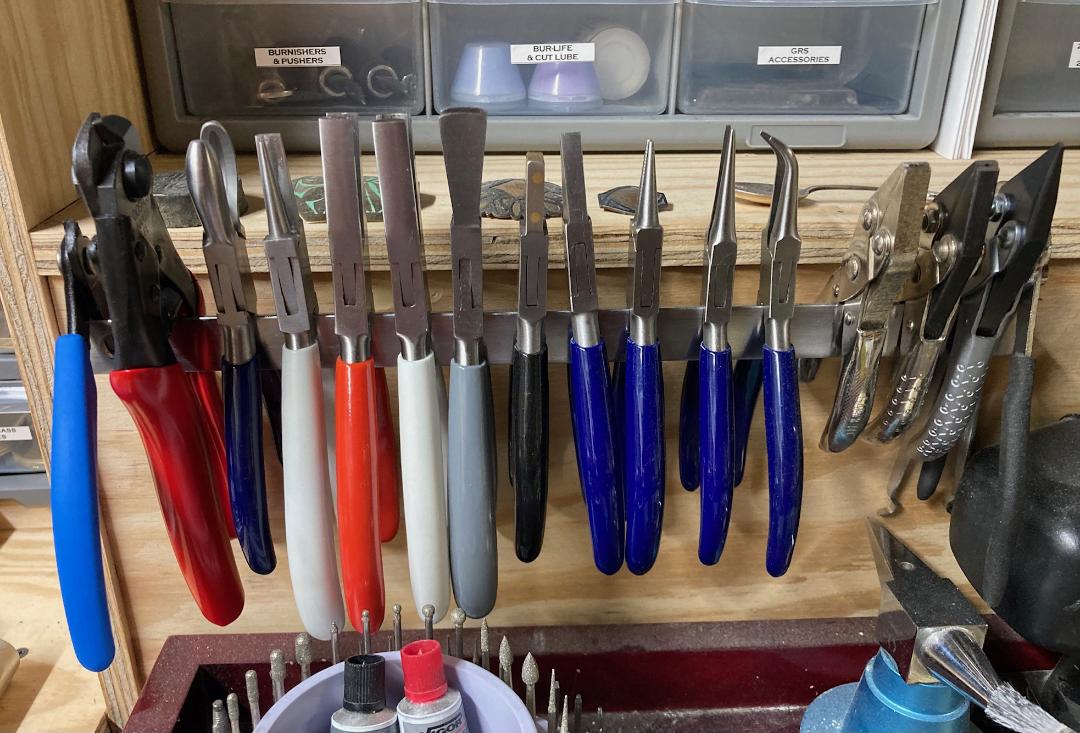
bending (pliers)
filing (files)
sanding (sand paper sheets on clipboards, sand paper cut into quarters in a small recipe box or similar filing system, sanding sticks, wood dowels, little sanding sticks in a box, etc)
flex shafting (drills, burs, buffs, wheels, brushes, discs, cylinders, stones, etc…and hand held pin vises)
micromotor
burnishing (large, slim burnishers)
hammering (hammers, bench blocks)
measuring (dividers, metal ruler, scribe)
holding (ring clamp, small bench vise, etc)
forming (ring mandrels, jumpring mandrels, etc)
screwdriver, wrench, tape measure
beeswax/ bur life lube
maskung tape, tape, double stick tape

consider ease of access while sitting at bench
consider a roll out unit to create a return, and additional surfave to the right or left if your bench
or a slide out surface

stable storage near bench:
possibly stone setting/ engraving ball, chasing and repousee etc unless you have space for a dedicated station for this stuff

then:

soldering station/ pickle station:
soldering tools and consumables
pickle pot, tools, vessels for water/ baking soda, consumables
fume extractor
torches, torch supplies
comsumables (denatured alcohol, baking soda, borax, flux, pickle, etc)

polishing station:
polishing lathe
jooltool
dedicated storage for buffs, by compound
lathe buffs, wheels, brushes, felts, etc
compounds
dust collector

cleaning station (or tote to take to sink)
hand cleaner
nail brush
toothbrush
brass brush
3m green scrubbies
pieces of wood
ultrasonic
steam cleaner
towels

forming station:
dapping blocks/ punches
bezel blocks
larger mandrels
anvil
forming hammers
stakes
large vise
drawplates
draw bench
oil

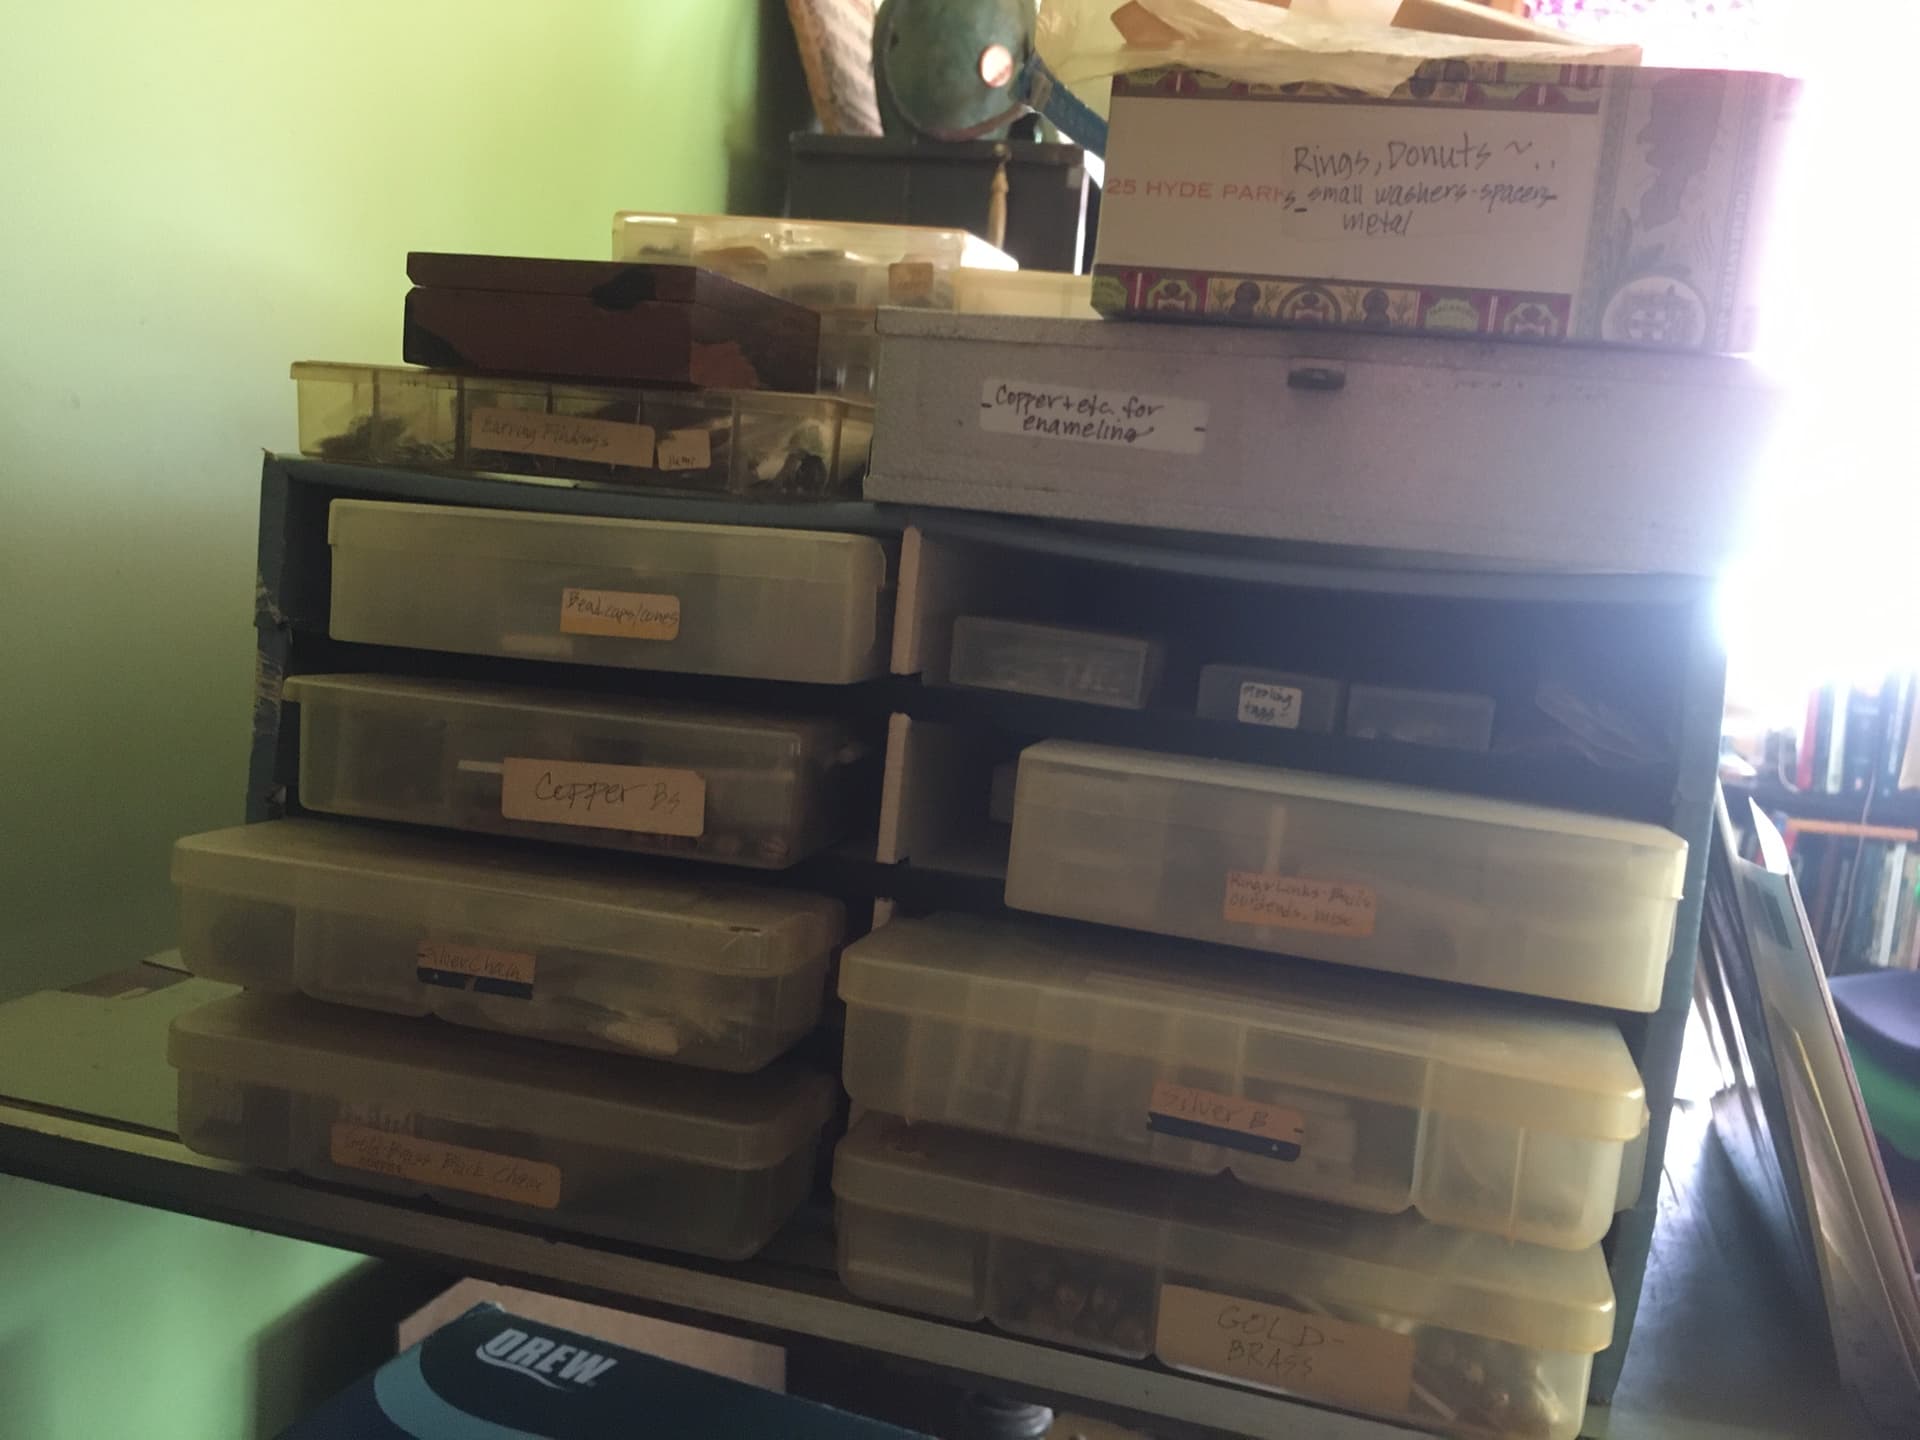
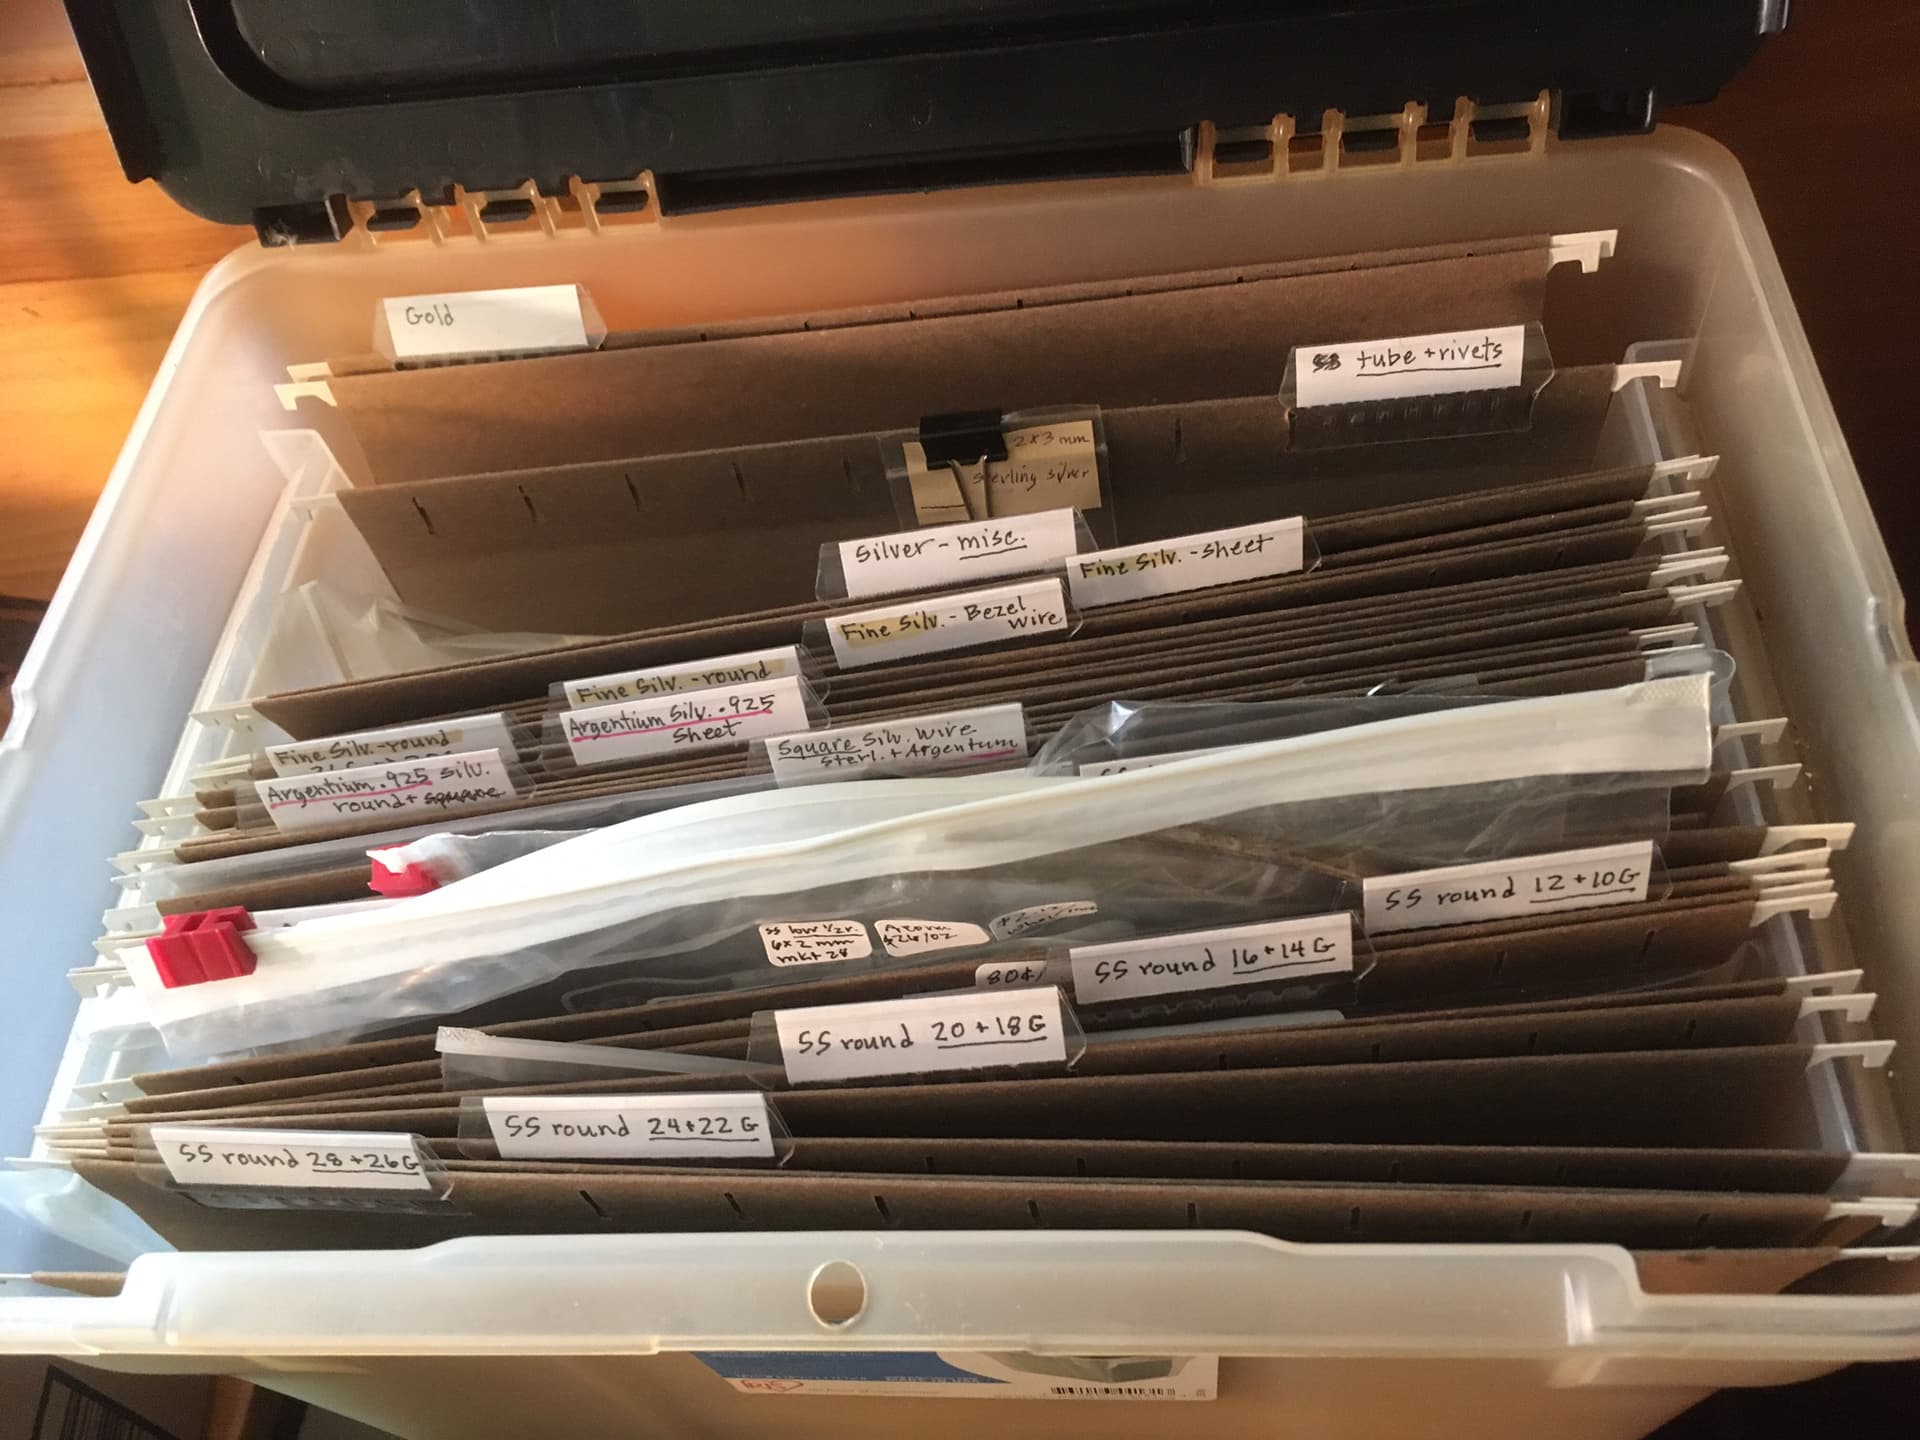
metals/ findings/ chain storage solution

just to name the basics

julie

4 Likes

How about corner shelving between those AMAZING windows. Attach to the walls as high as you can and keep a stepstool handy.

(I’m in the basement so the thought of that much natural light has me quivering with jealousy.)

1 Like

I have a VERY tiny space in a shared studio. I use this kitchen organizer as my above-bench storage. Very affordable!

3 Likes

I use an inexpensive steel towel rack to hold my pliers. Works great…Rob

Google Photos

4 Likes

This is so smart!!! I have looked at these for my kitchen before- can’t believe it never occurred to me to use on my bench.

Cool. Thing is, I DO use it in my kitchen (love it!) and stared at it one day thinking… “why can’t this work in my studio?” My spouse thought I was nuts, but after installation, it was obviously perfect for my space. Let me know if you do install it!

Here’s the video of the space I took to share with Corkie Bolton of Metalsmith Society. https://drive.google.com/file/d/10wu-PlOha5osDvRVKfiPGXAfdY6XwOk_/view?usp=share_link