Hi,
To cast AS, you need to use a casting method that allows it to cool
at least 15 minutes. I don’t know anything about casting with Delft
clay…
Before casting AS, sign in to the technical support page on the AS
site http://www.argentiumsilver.com/technical-support And find the
page about casting AS. There are specifics for temperature of the
crucible, and material of the crucible.
But, why cast these rings? They sound easier to make by soldering
or fusing.
Cynthia Eid
Thanks for your reply, Cynthia. I’ve signed up to the Argentium
website as you sugggested.
But, why cast these rings? They sound easier to make by soldering
or fusing.
I had considered soldering, but I didn’t want a seam within the rim.
Mouthpieces come in for a lot of wear and tear and I worried that the
solder and the silver might wear at different rates. Any ridges in
the rim would be noticeable when playing. Secondly, my main reason
for using silver rather than brass is so that I know what metals are
in the alloy and that they are safe. I haven’t seen tables for
Argentium solders anywhere. There is also a soldered join between the
rim and the cup, but this is slightly recessed and can be avoided by
press-fitting the parts together.
I hadn’t considered fusing, and I can see that it would sidestep
these issues.
The other reason for casting is that I wanted to avoid doing too
much machining on the rims before fitting them. Currently I machine
rims from brass sheet and I find it quite time consuming to get all
the dimensions correct. If I could start from reasonably accurate
castings, the process would be considerably simpler and less
wasteful. It would also give me an use for my offcuts that I would
otherwise have to send for recycling.
I have some pictures of my early efforts here, if it helps to
picture what I’m trying to do:
I’m afraid I haven’t got round to taking any recent pictures, or
pictures of the making process. The mouthpieces aren’t as bad as they
look - I treated them with peroxide to remove lead from the surface,
and it’s left the surfaces looking very mottled.
Kit
Kit,
I would investment cast in sterling. It can be a pain to get the
initial measurements right but all the pieces come out the same. If
you want to fabricate the cone put a recess 1/2 way through the rim
on the inside and silver solder. Hard solder and silver go together
well. I would avoid brass/copper parts if only because they taste
bad. And NO lead solder on something that close to your mouth. I
might often play loose with some rules (hell, I was trained in the
last century  but lead is nasty stuff which will sneak up on ya.
jeffD
Demand Designs
Analog/Digital Modelling & Goldsmithing
http://www.gmavt.net/~jdemand
Hi Kit,
After looking at your Pictures, I wonder why you are not using a
casting service such as ours or another one to produce your mouth
pieces? We have produced mouth pieces and component parts for flutes,
saxophones and guitars (I’m a guitarist, Bass & 6 String) in Bronze,
Lead free Brass and in Deox sterling as well as gold. We also produce
in Argentium. The most important part of the process is to make sure
the model is designed correctly using the right thickness for mold
making, casting and finishing.
Tolerances can be kept very close by using insert molding technology
in areas where it might be necessary.
Please contact me at my business email [sales at racecarjewelry dot
com] or by Telephone if you would like to talk about doing this
through casting.
Daniel Grandi
Racecar Jewelry Co. Inc.
Tel: 401-461-7803
I just wanted to say ‘thank-you’ to everybody who gave me
suggestions, both on and off list, regarding my mouthpiece project.
And also to post back regarding my own experiences for anybody who
is interested.
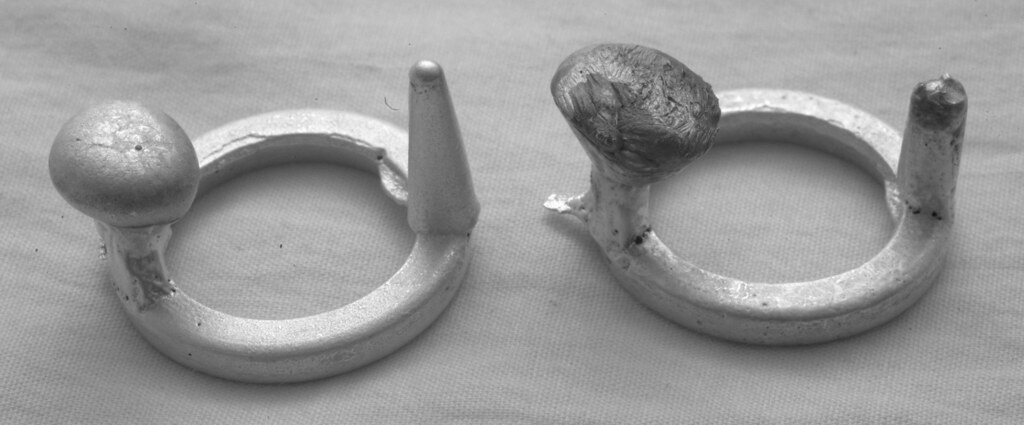
I’ve now finished my first two silver mouthpieces, and I made the
rims by casting Sterling and Argentium silver using the Delft
process. Now, two castings isn’t enough to draw any firm
conclusions. But the Argentium casting was considerably sharper and
(as predicted) had much less firescale on the sprue:


Both pieces show some small indents on the surface. My main concern
with casting was the risk of porosity within the castings and I
initially feared the indents on the surface meant there would be
oxygen bubbles within the castings too. However, after filing and
sanding the rims to shape I can say that this doesn’t appear to be a
problem.
This is not to say that I’m ignoring the advice to try fabricating
and fusing as an alternative to casting. I just haven’t gotten round
to it yet. However, overall I was very pleased with the results I
got from casting.
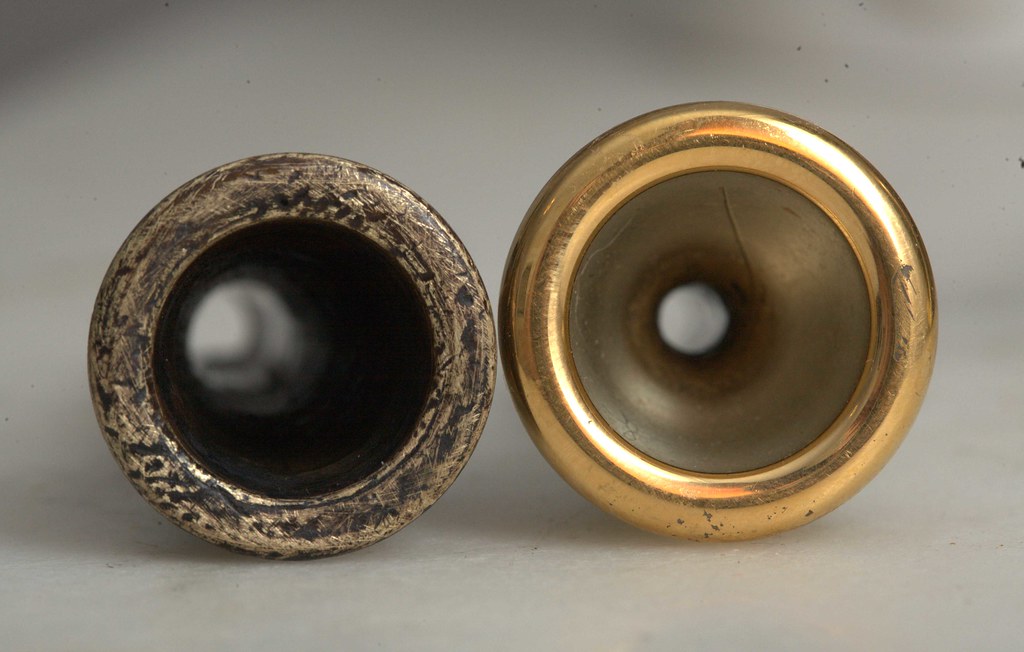
And of course, the finished objects:

The first was very much a ‘learning process’ and I had to patch over
a hole in the seam. But the second was considerably better.
Kit
I am wondering why the mouthpieces are not cast using centrifugal
casting? I have done several million pieces of sterling over the
last 20 years, and I think your pieces would be simple to cast. I
know you could use vacuum casting, but I just have no experience.
Richard Hart G.G.
Denver, Co.
Hi Richard,
I am wondering why the mouthpieces are not cast using centrifugal
casting? I have done several million pieces of sterling over the
last 20 years, and I think your pieces would be simple to cast. I
know you could use vacuum casting, but I just have no experience.
That’s a good question.
I may be wrong (I have no experience in this matter) but one reason
I would be cautious about casting the cups (the hollow tube part) is
that they are quite thin and tolerances would have to be extremely
good. The walls are about 0.4 mm thick and I wouldn’t want them to
risk them getting much thinner than this at any point.
I agree that centrifugal casting would be better (at least
theoretically) from a quality-control perspective when it comes to
making the rims. As I’m a hobbyist this would either involve getting
them made commercially, or investing in a lot of equipment. If I end
up making more than a few of them then this may prove worthwhile, but
for one-offs I think the Delft clay method is simpler and cheaper,
and the results seem very good.
The final, and most important reason, is simply that I’m interested
in making the mouthpieces in the ‘traditional’ way - which means
seamed tubing and a separate rim. Also, they’re good ‘practice’ for
making larger instruments - a lot of the skills are the same and a
mistake on a tiny mouthpiece is less expensive than a mistake with a
large instrument.
There’s an interesting story about copies of baroque instruments.
Until recently, they tended to be made from modern seamless tubing.
However, people complained that they never quite sounded the same as
the surviving antique instruments. Now it seems that they were simply
‘too perfect’. Seamed tubes aren’t quite as regular as seamless
tubes. There are slight ripples in them. They have a slightly wider
bore towards the middle of the tubes because you have to burnish them
in order to release them from the mandrels used to form them. The
result is that the older instruments don’t hold a note as well,
which paradoxical as it may sound is a good thing as it means that
you can ‘lip’ each note sharper or flatter to match the tuning of
other instruments.
Of course, if I were that much of a purist I would use a historical
brass containing oodles of lead, rather than Argentium silver!
Kit


