Hello everyone and everywhere!
I’ve just posted my 72nd essay to my blog on Diamond Setting. The topic is somewhat vague but so interesting to read and as well as learn. Instead of placing large amounts of gemstones everywhere on a ring or bracelet you can now cut a ‘facsimile’ of them! The name of the topic/essay is “***Can you find the Diamonds?***”
All it takes is some practice in how to use your select group of Onglette & Flat gravers. This is not a difficult task, but once you get to understand this great and so useful cutting process, it’ll be like “eating a piece of cake” after a while…Enjoy!
"It’s not what you see, but how you perceive it should be! " And with this statement, let’s explore what is sculptured in the metal & how it now appears!
"Scale of Difficulty" 8.5 out of 10!
What very important tools that are needed?
Burs:
Round #005 & #006.
Bud #006.
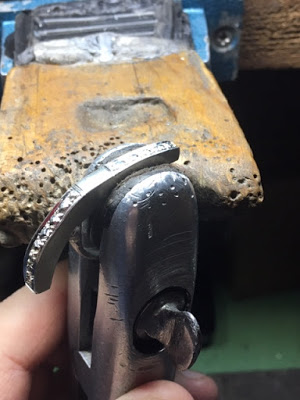
Metal clamp: This kind of screw-type of a clamp is my best, as there must be no movement at all during the many delicate cuttings.
Gravers:
Onglette #0, #1, (extremely reshaped to be only 0.33millimeters in width)
Flat #40 (extremely modified to have thinner, but not a narrower face).
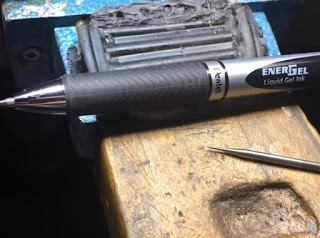
Marking pen: This must have a f ine-pointed tip.
This little marker needs to be able to draw ‘little squares’ with the finest detail! A large, felt-marker do not allow fine lines to be drawn on (.925) silver.
To initiate the first cutting, I suggest and truly suggest cutting or drawing with your #006 bud-shaped bur for these two outside lines in the metal.
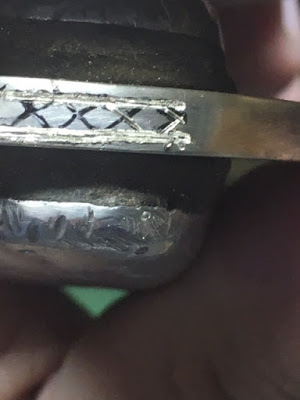
Once the two lines are outlined , it is prudent to use your ‘Onglette #0’ graver. Try not to rub off these little guidelines, as we need them all in a few moments.
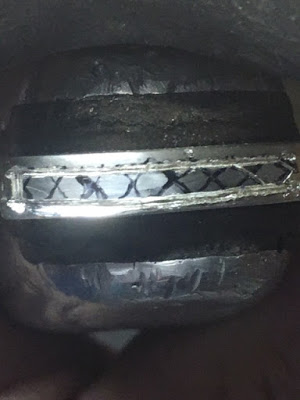
I would now start to use the bud-shaped bur #006 and ‘mark & cut’ the surface of the metal. Please realize that ‘we’ are dealing with ultra-small areas to cut!
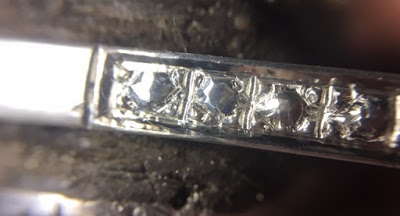
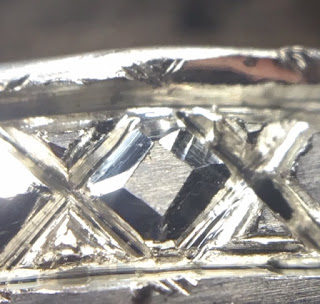
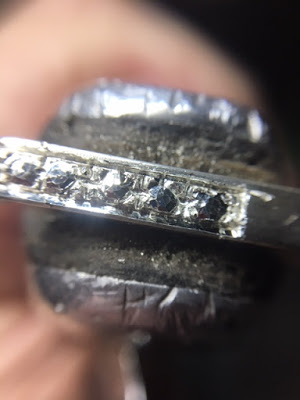
These up-close photographs can be quite misleading , as some sections being shown in the metal are about only .005 of a millimetre.
These photographs are showing different angles of the new & basic cutting!
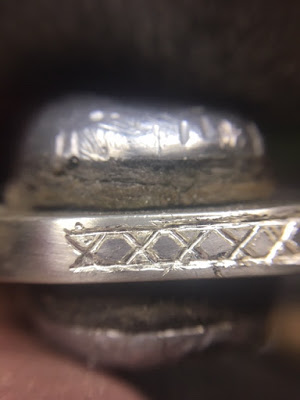
With my Flat-Graver of #40, (or Glardon #12) , cut a square in the metal and see just how brilliant the cutting is starting to take shape.
You should be noticing a (little square) or pyramid now taking shape. The bur- cutting pattern should be much deeper as this will allow you Bright-Cut easily.
To allow a square-effect to take place , the Bright-cutting must have the 4-cuts equally cut on all four sides. This might need some practice!
The Flat graver should be at a 45degree angle and while being used cutting into the soft-silver metal.
Once you are quite satisfied with your initial results , I suggest you continue cutting all of the remaining ‘little squares’.
Once that all of the little mini-cuts are finished, only then you can Bright-Cut the two side-walls!
With the ‘little triangles’ in between the little squares, I would now draw a line in the center of each. With this, there will be now four beads ‘appearing’ to hold each gemstone.
All of these mini-beads are shaped with a Bud & Round bur to make these cuts. The Onglette graver cannot do justice with what is now needed!
I found that any form of graver cutting keeps on cutting or digging into the metal long after you need it to stop.
For these delicate cuts, I’d stay with the two bur shapes and your Flat Graver.
I know that this looks so very ‘rough’ in these preliminary cutting photo’s, but it will take shape in a few minutes!
With each square that you have the next step is to ‘cut downwards’ to the base of the metal. These cuts are to be done with your Flat graver only and all around each square until this pattern has a ‘rounded’ shape!
As there are many facets on a diamond , then as well you should have multiple ‘cuts’ all around each ‘square or pyramid’.
During these many Bright-Cutting stages, you might be feeling or getting tired. I usually stop at these points & refresh the brain and rest my fingers & eyes!!!
Please remember to make sure that your Flat graver is cutting clean and with no situations to contend with in the Bright-Cutting!
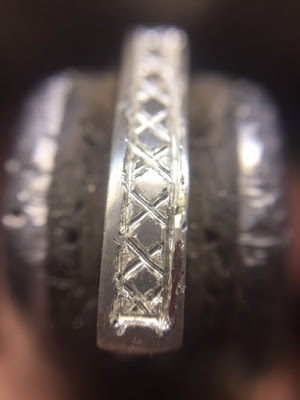
After all of the ‘pseudo-beads’ are burnished & cleaned , then you can continue with the two outside lines for Bright-Cutting.
On each side being Bright-Cut is the reflection from other areas of the setting. This alone signifies to you that your Bright-Cutting is progressing just nicely…:>)
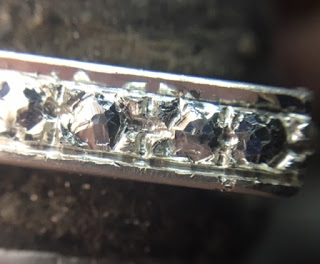
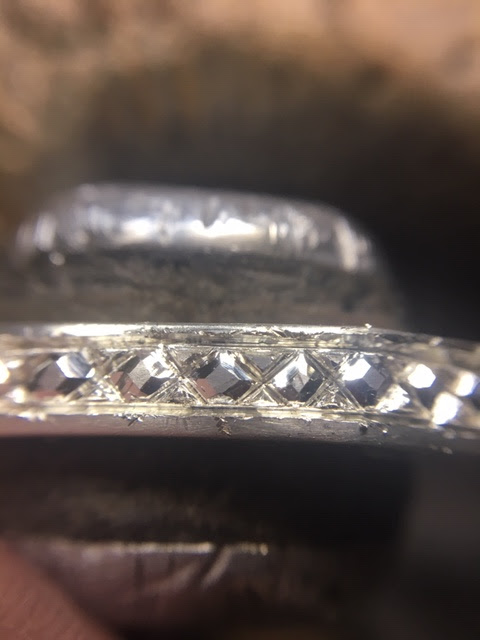
In this better photograph, you can start seeing a pattern, or a form taking shape. If, and I repeat, if I have the opportunity I’d bead-burnish the little pseudo-beads!
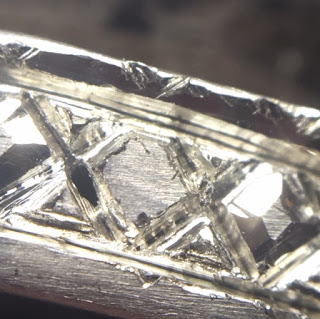
YES, there will be times you might have to continue with your ‘down cutting’ until each square looks like a ‘round pattern or having a diamond shape’.
I separated the little triangles (with my round & bud shaped burs) in between the square, as these will be re-cut & trimmed until you have little ‘pseudo-beads’.
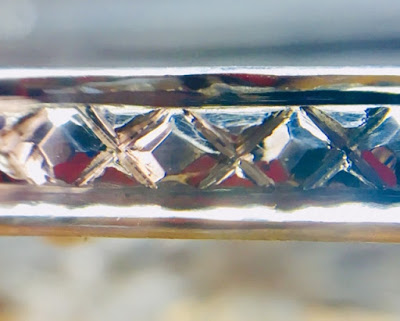
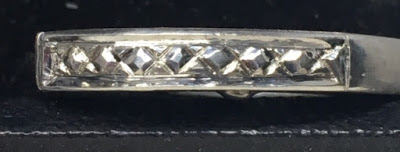
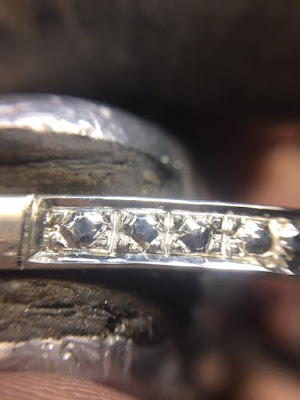
From a distance, you can just not tell if there are gemstones , cubic zirconia or diamonds in the metal.
This specialized “Bright-Cutting pattern” can be very convincing from a distance!