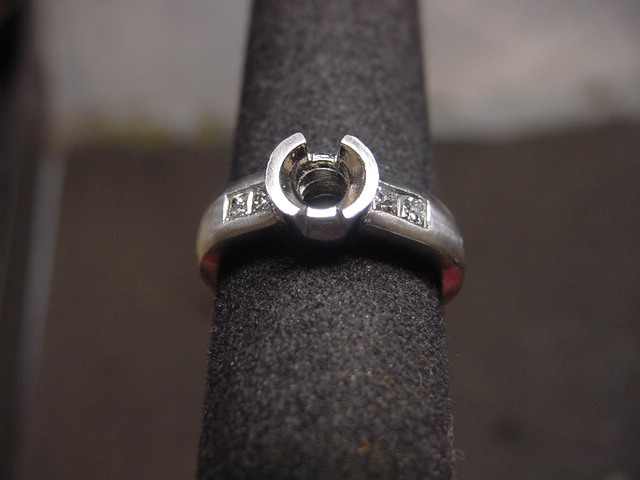
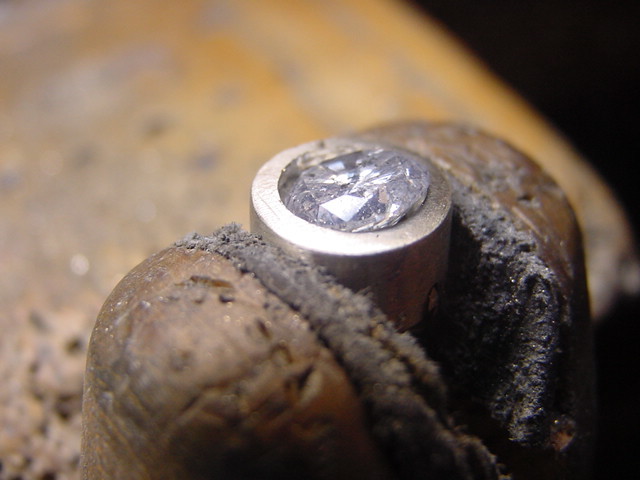
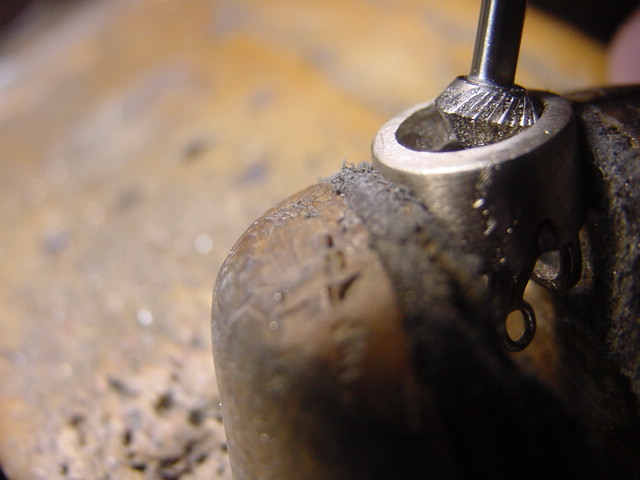
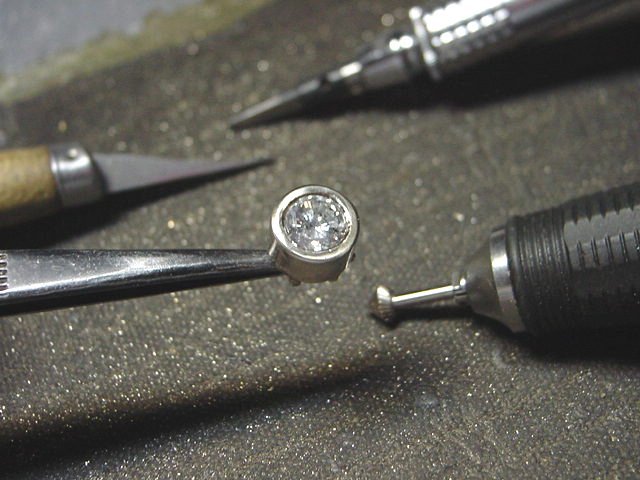
The sequence of photo’s fully shows how I set a Diamond into a fairly large Bezel frame, I believe this was a 1/4 carat Diamond. The very first thing you should do is grind out the top rim of the Bezel to at least 80% of the circumference of the stone. The balance of 20%, will be remaining INSIDE of the Bezel frame, nicely covered & being made secure! By using your HSS of 45degree (as shown) you should have the teeth start carving out a bearing. The question is how far down into the bezel should the bur be? Exactly to the depth of where the teeth of the bur are not seen anymore in their cutting process, now isn’t this simple? Attempt to slide the stone in on a 45-degree angle into bearing seat, this is to avoid any chipping as its being placed straight down!
Now you’ve gotten the stone sitting in it’s seat I would gently remove by filing with a Pillar File of #2 cut and just remove the outer edge. As this is where the reciprocating hammer will be hitting, again on a 45-degree angle. Interesting numbers (45 here and 45 there), you will notice that this is a common number when drilling and filing!
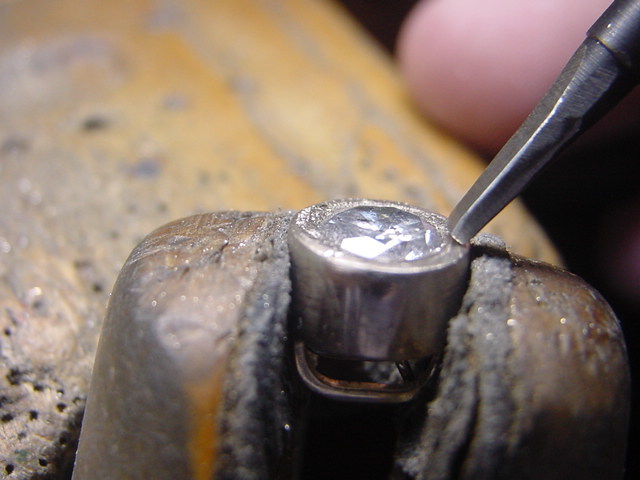
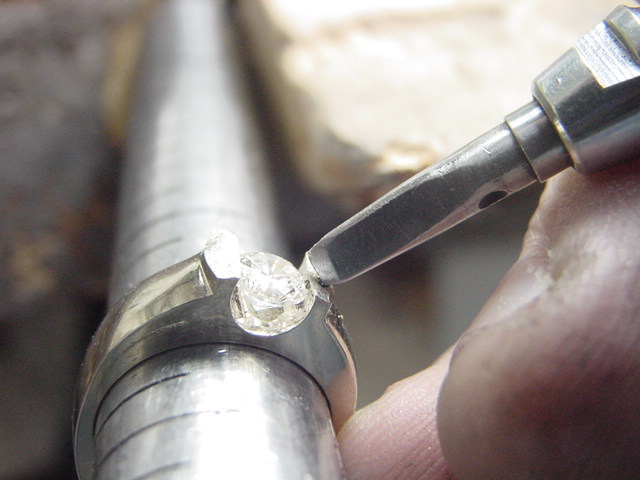
Start your hammering not anywhere near the diamond but just further back, I don’t want you to hammer and hit the stone. I could do this if I had an Emerald! If the hammer-anvil is vibrating & not hitting where you need to, it still won’t hit the stone, get my drift? Safety at all times, in filing and hammering!!!
When hammering start at the 12:00 clock, then to the 6:00, swing over to the 9:00, then 3:00 oclock. Then just finish all around & fill in the remaining gaps, this sequence is common on all round bezels!
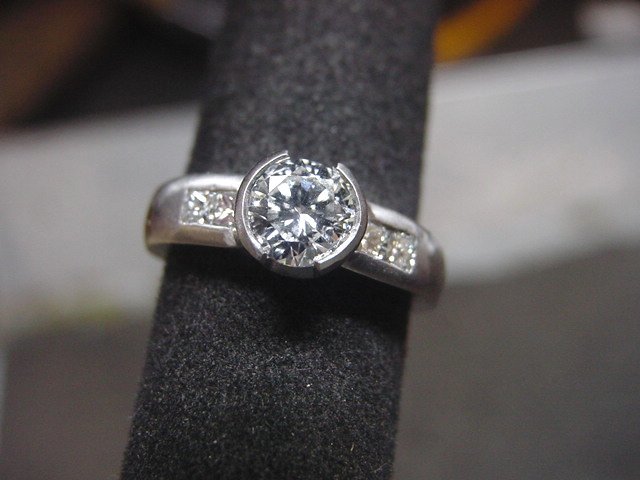
Now you can, once finished, use an Onglette graver #2 & Bright-Cut around the inside of the bezel. How difficult is this setting on my “Difficulty Scale of Setting”? I’d put this on about a 6.5…Just have fun!!!
o

 .
.
When you are totally finished, use your Pumice Wheel @ #180 grit followed by #1,000 Pink Wheels!
4 Likes
Great pictures of bezel setting, however I have a question. I notice in pictures 5 and 7 that you are hammering in the middle of the bezel metal and not on the outside. Is this correct? If so, what is the shape of the hammer anvil you are using?
Thanks sharing your knowledge on this site Gerry.
Mieke
Mieke
I am hammering to ‘move’ the bezel wall 'towards the stone". Not to hammer
to ‘make it thin’. That hammer-anvil is devoid of any sharp corners, what
you see is a slightly rounded edge. I need to know exactly where the anvil
is ‘touching’ at all times!! No surprises afterward the fact!
I might even use either a fully-rounded anvil & my other will be slightly-
round at the edges, depending on the setting job at hand!
I always START at the center & this keeps the stone level, then proceed
towards the ends/side…if I started at the ends, I might have a crooked or
a tilted stone, and this is not wanted…Any help?
Gerry Lewy
Toronto, Ontario.
Canada!
1 Like
I think I get it Gerry, You are sort of spreading the metal over the stone
without thinning any part of the bezel wall. How thick is the bezel wall?
Mieke
Mieke
Your bezel wall should be as thick as you want it to be .75 mm or even
1.25 mm’s. Its your design! But it should be thick enough to Bright-Cut
afterwards!
Gerry Lewy
Toronto, Ontario.
Canada!
Thanks Gerry. So much to learn!!
Mieke
Hi Mieke
There is so-o much really to learn! All the subtle nuances of just one
little aspect of setting or attempting to set one little stone, can be so
truly mind-numbing…Not lets not forget frustrating, much of the time. Even
the aspect of the karat of the gold can play into this, hardness, too much
alloy, pin-holes while polishing, should I go on?..:>)
That’s just why I spent 9 glorious years learning my craft…now it’s your
turn, have fun!!!
Gerry Lewy
Toronto, Ontario.
Canada!
I so love a nice thick walled bezel. I actually enjoy making and setting them. I go to my local hardware store and buy Key Stock to make setting punches. My favorite one is like a very small plannishing hammer with softened or rounded edges. I also love how Gerry does a nice bright cut on the inside edge of the bezel. That one little touch rally makes it look crisp and professional. Plus that little bit of bright cut next to a diamond makes it look a little bit bigger and brighter.
-Jo