Could anyone share with me how to achieve a bezel that looks like the ones in the this photo? The metal that is framing the stones has such a rounded edge and it appears to be a thick-walled bezel. Is it cast? Is it fabricated? How do you make a bezel setting look that way?
I’m hoping someone can shed some light and point me toward the right methods to hopefully be able to make something that looks this fancy.
The image is a screenshot of @numiolive jewelry.
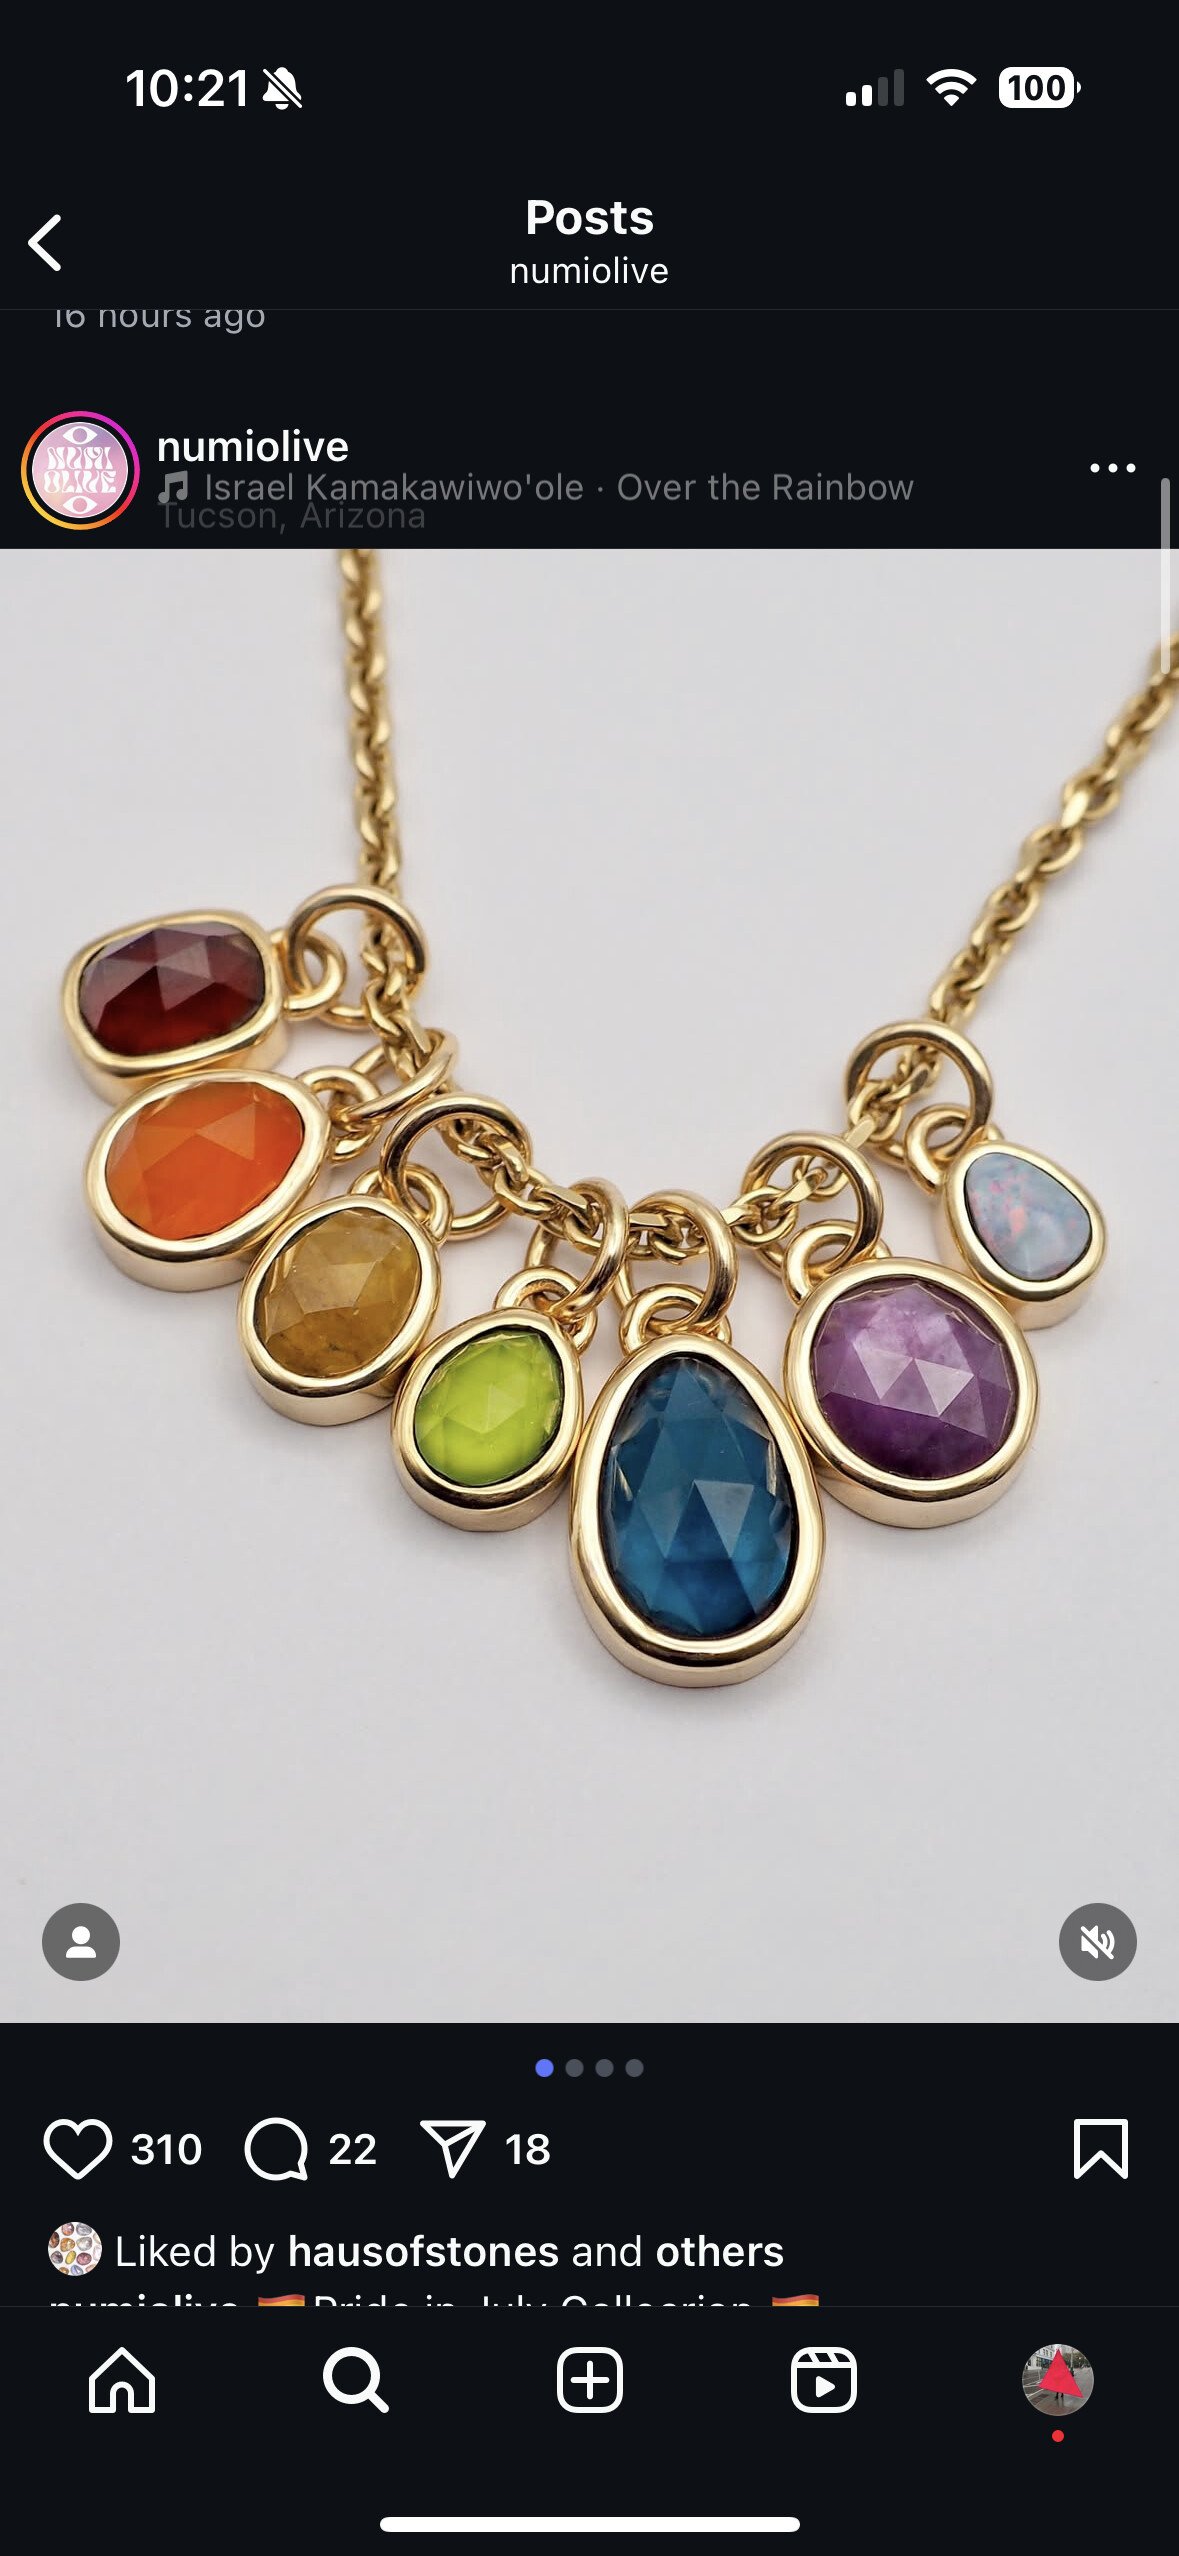
Enlarge the image and look at the green and purple stones in particular, which are faceted. You can see that the bezel is not pressed down onto the stones’ facets. Any bezel setting of faceted stones that I’ve done do not come out with gaps like that - the metal gets pressed down onto the stone, all the way around. So I’m going to assume these were back set.
However they were set, I don’t like the look of the gaps above the facets and would not consider them well made. If that makes me OCD so be it.
7 Likes
Like Neil says, they are likely set from behind. Does the description talk about an open back to let light through?..Rob
1 Like
I agree with Neil A and Rob that these stones are probably back set. But your main question is how to set stones like this. It’s a complicated question because there’s lots of variables and multiple steps.
Blaine Lewis has a DVD on bezel setting fragile gem stones that answers how to set stones like this and is excellent. It’s part of his “classroom in a box” series where you get the materials necessary to learn the technique. Rio Grande sells the DVD for $179. It might be available elsewhere too.
Bezel and Flush Setting with Diamonds and Fragile Colored Stones, DVD, I
tem No. 560685
Blaine owns the New Approach Jewelry School in Tennessee, which is an excellent school for learning stonesetting if you ever want to take a class.
I’m sure there’s other places out there to learn bezel setting with thick wall bezels.
I hope that helps at least a little bit! Bezel setting with thick walls is one of my favorite ways to set stones.
Jeff
2 Likes
I recently took a course with Kent Raible that covered thick walled bezels but these settings look very different from those.
I think you’re right Neil, these are backset bezels- oddly enough I’m not familiar with these. I’ve seen them before but I didn’t know what I was looking at. Now that I know, I’m noticing that they look a bit sloppy but I do really love the way a nice thick-walled bezel looks around a stone. Thanks for everyone’s feedback, very helpful!
1 Like
That’s great that you took a class from Kent! He’s amazing!!
Lindsay ,
The question on the so called Fat Bezel- try this technique: Once you have rolled the bezel against the cab, take a flat file that has an edge with no teeth on the side so that it doesn’t dig into your stone and make marks. Work your way ariund the setting and will give a fatter look to the top edge of the bezel. Faceted gems present a little different problem. Maybe just sections of bezel utilized, or cast in place.
Good luck…~~~*STV
1 Like
I really like wide bezels and use 20 or 18 gauge metal for my bezels. I made a tapping tool out of an old chasing tool. Grind the tip into a rectangle about the size of the 45 degree angle, sand the tip to 600 grit and don’t polish it. To set the stone, I hold the piece in thermo plastic in an engravers ball and tap the bezel into place. File the edge of the bezel to a 45 degree angle and tap it at that same 45 degree angle. Slowly work the bezel against the stone till it’s flush with the stone. Finally, file the bezel using a barrett file and polish it with a silicone, pumice wheel. If the stone is fragile, I make the thick bezel out of fine silver.
3 Likes
I looked at the actual post, and the artist says they used a “chunky 14k bezel cup”, so it’s not back set
https://www.instagram.com/p/DLsZSEPPgqx/?igsh=ZDlidmtkMjZxbTF5
2 Likes
They may also be cast in place or set from behind. Stuller sells a lot of settings that look like this…Rob
I make bezels like this frequently. They are not back set. Push the walls over the stone with a square pusher opposing sides, and work your way around. Once everything is pushed over you can glide the pusher horizontally around the bezel to smooth it, or if they are thick enough you can skip that step and do it via a silicone disc instead.
The inside is then evened out with a graver, then go over it with a very thin tip burnisher to round it out.
As far as the thick, round look, the walls are either taller or thicker than usual. My guess is a combination of both, which is why you see gaps in some areas between the stone and bezel wall.
2 Likes
how do you flush the bezel against facets?
Greetings All,
I love making all kinds of bezels. Since most of my work involves teaching others, we can indulge in time-consuming projects.
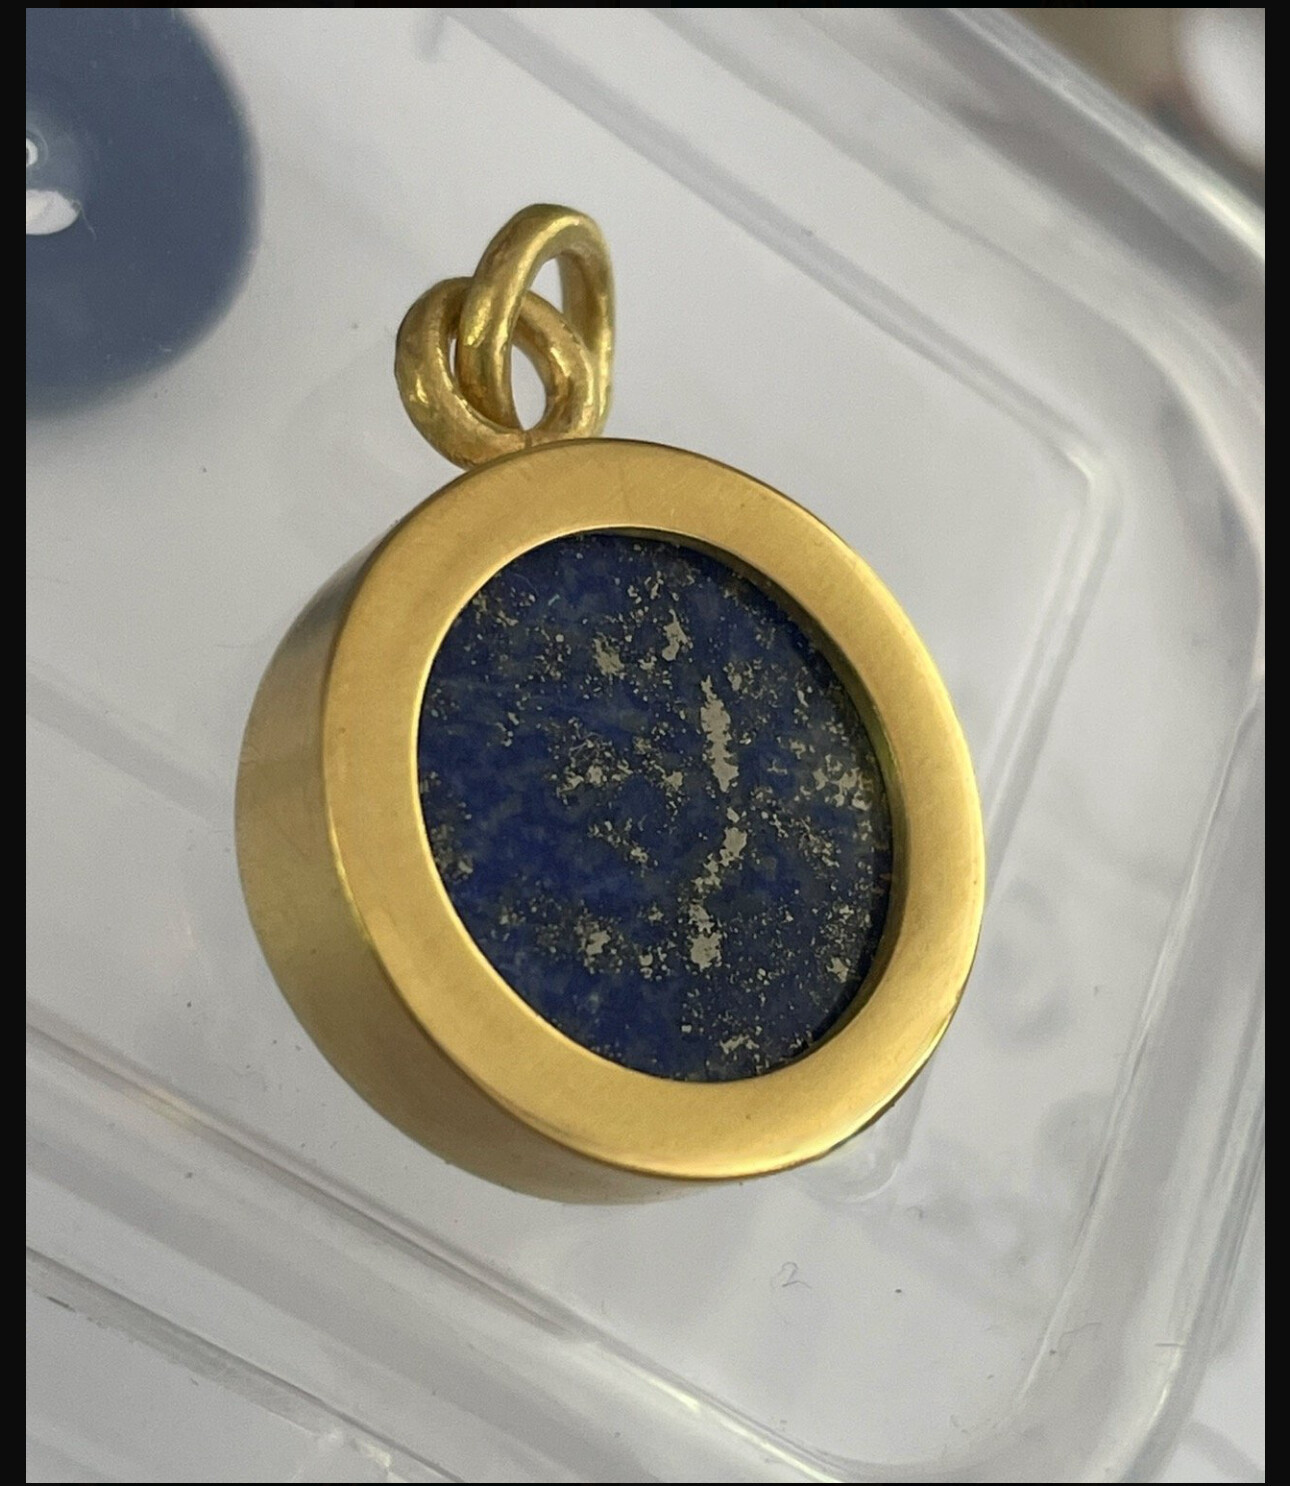
My mentor, the late Louise Parish, showed me this technique. Although it is not like the bezels in the photo, it can be adapted with a round wire inside the bezel wall instead of a square wire.
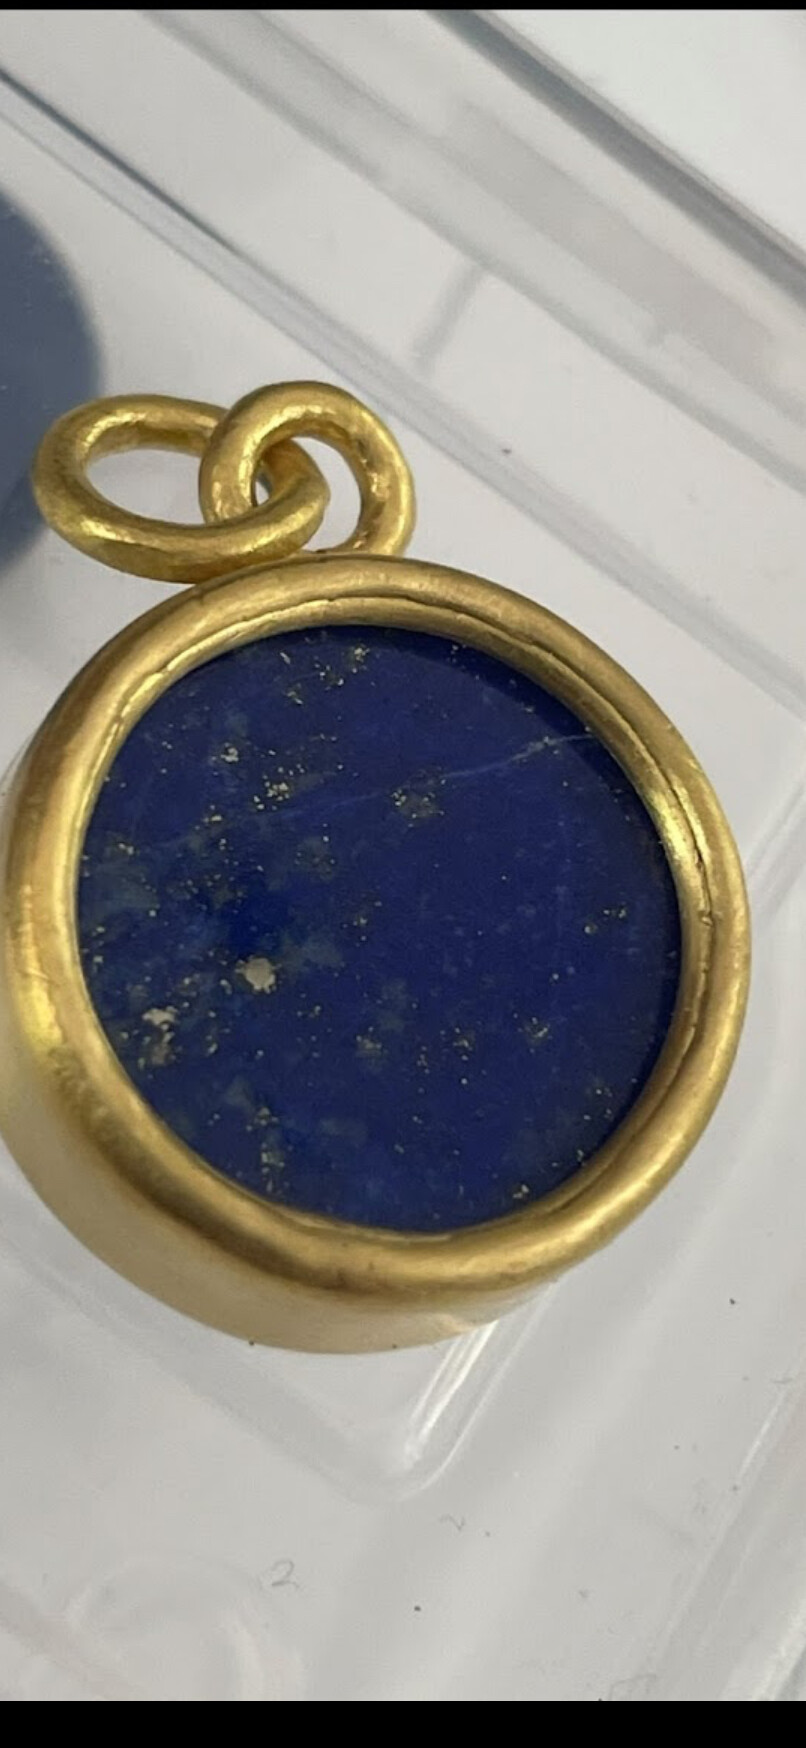
Here are photos of the front and back. This technique is useful when setting an ancient coin with an irregular shape.
I will be happy to share details if interested.
Kind regards,
Lois
Front:
Back:
3 Likes
Hi Lois, I would be very interested to learn more about this type of setting. Anything you can share would be very welcome. Thank you, Debbie.
1 Like
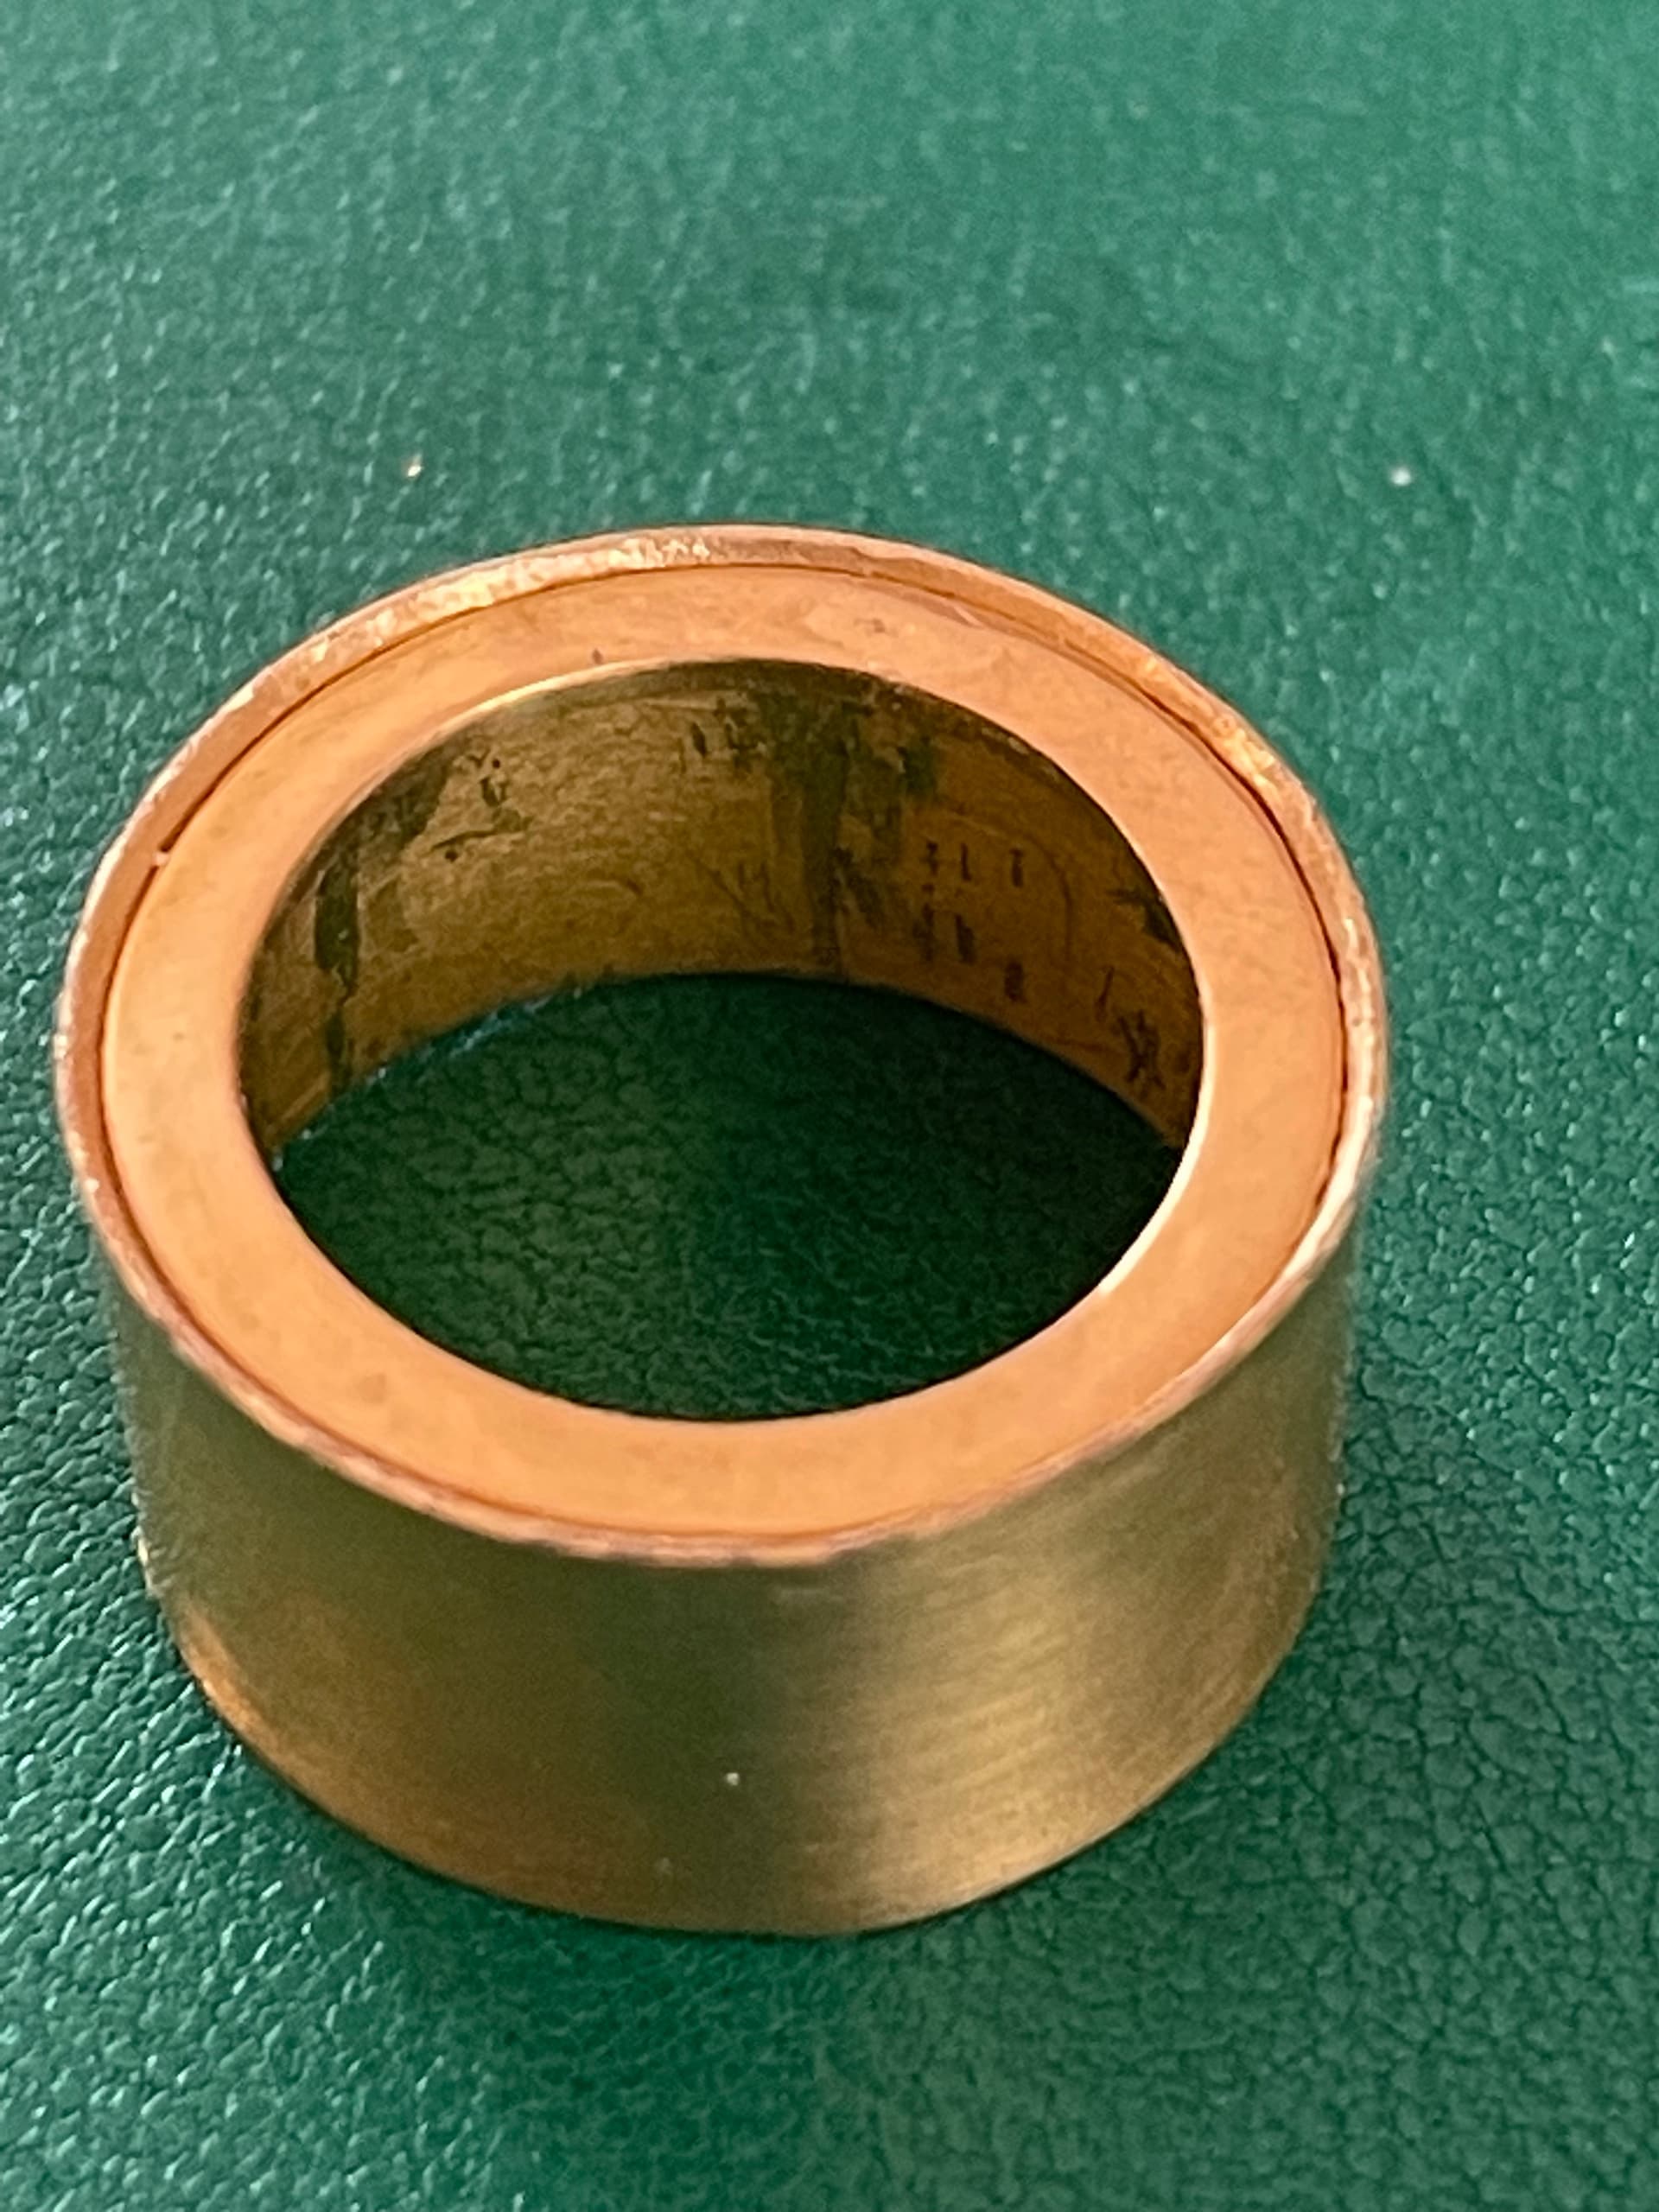
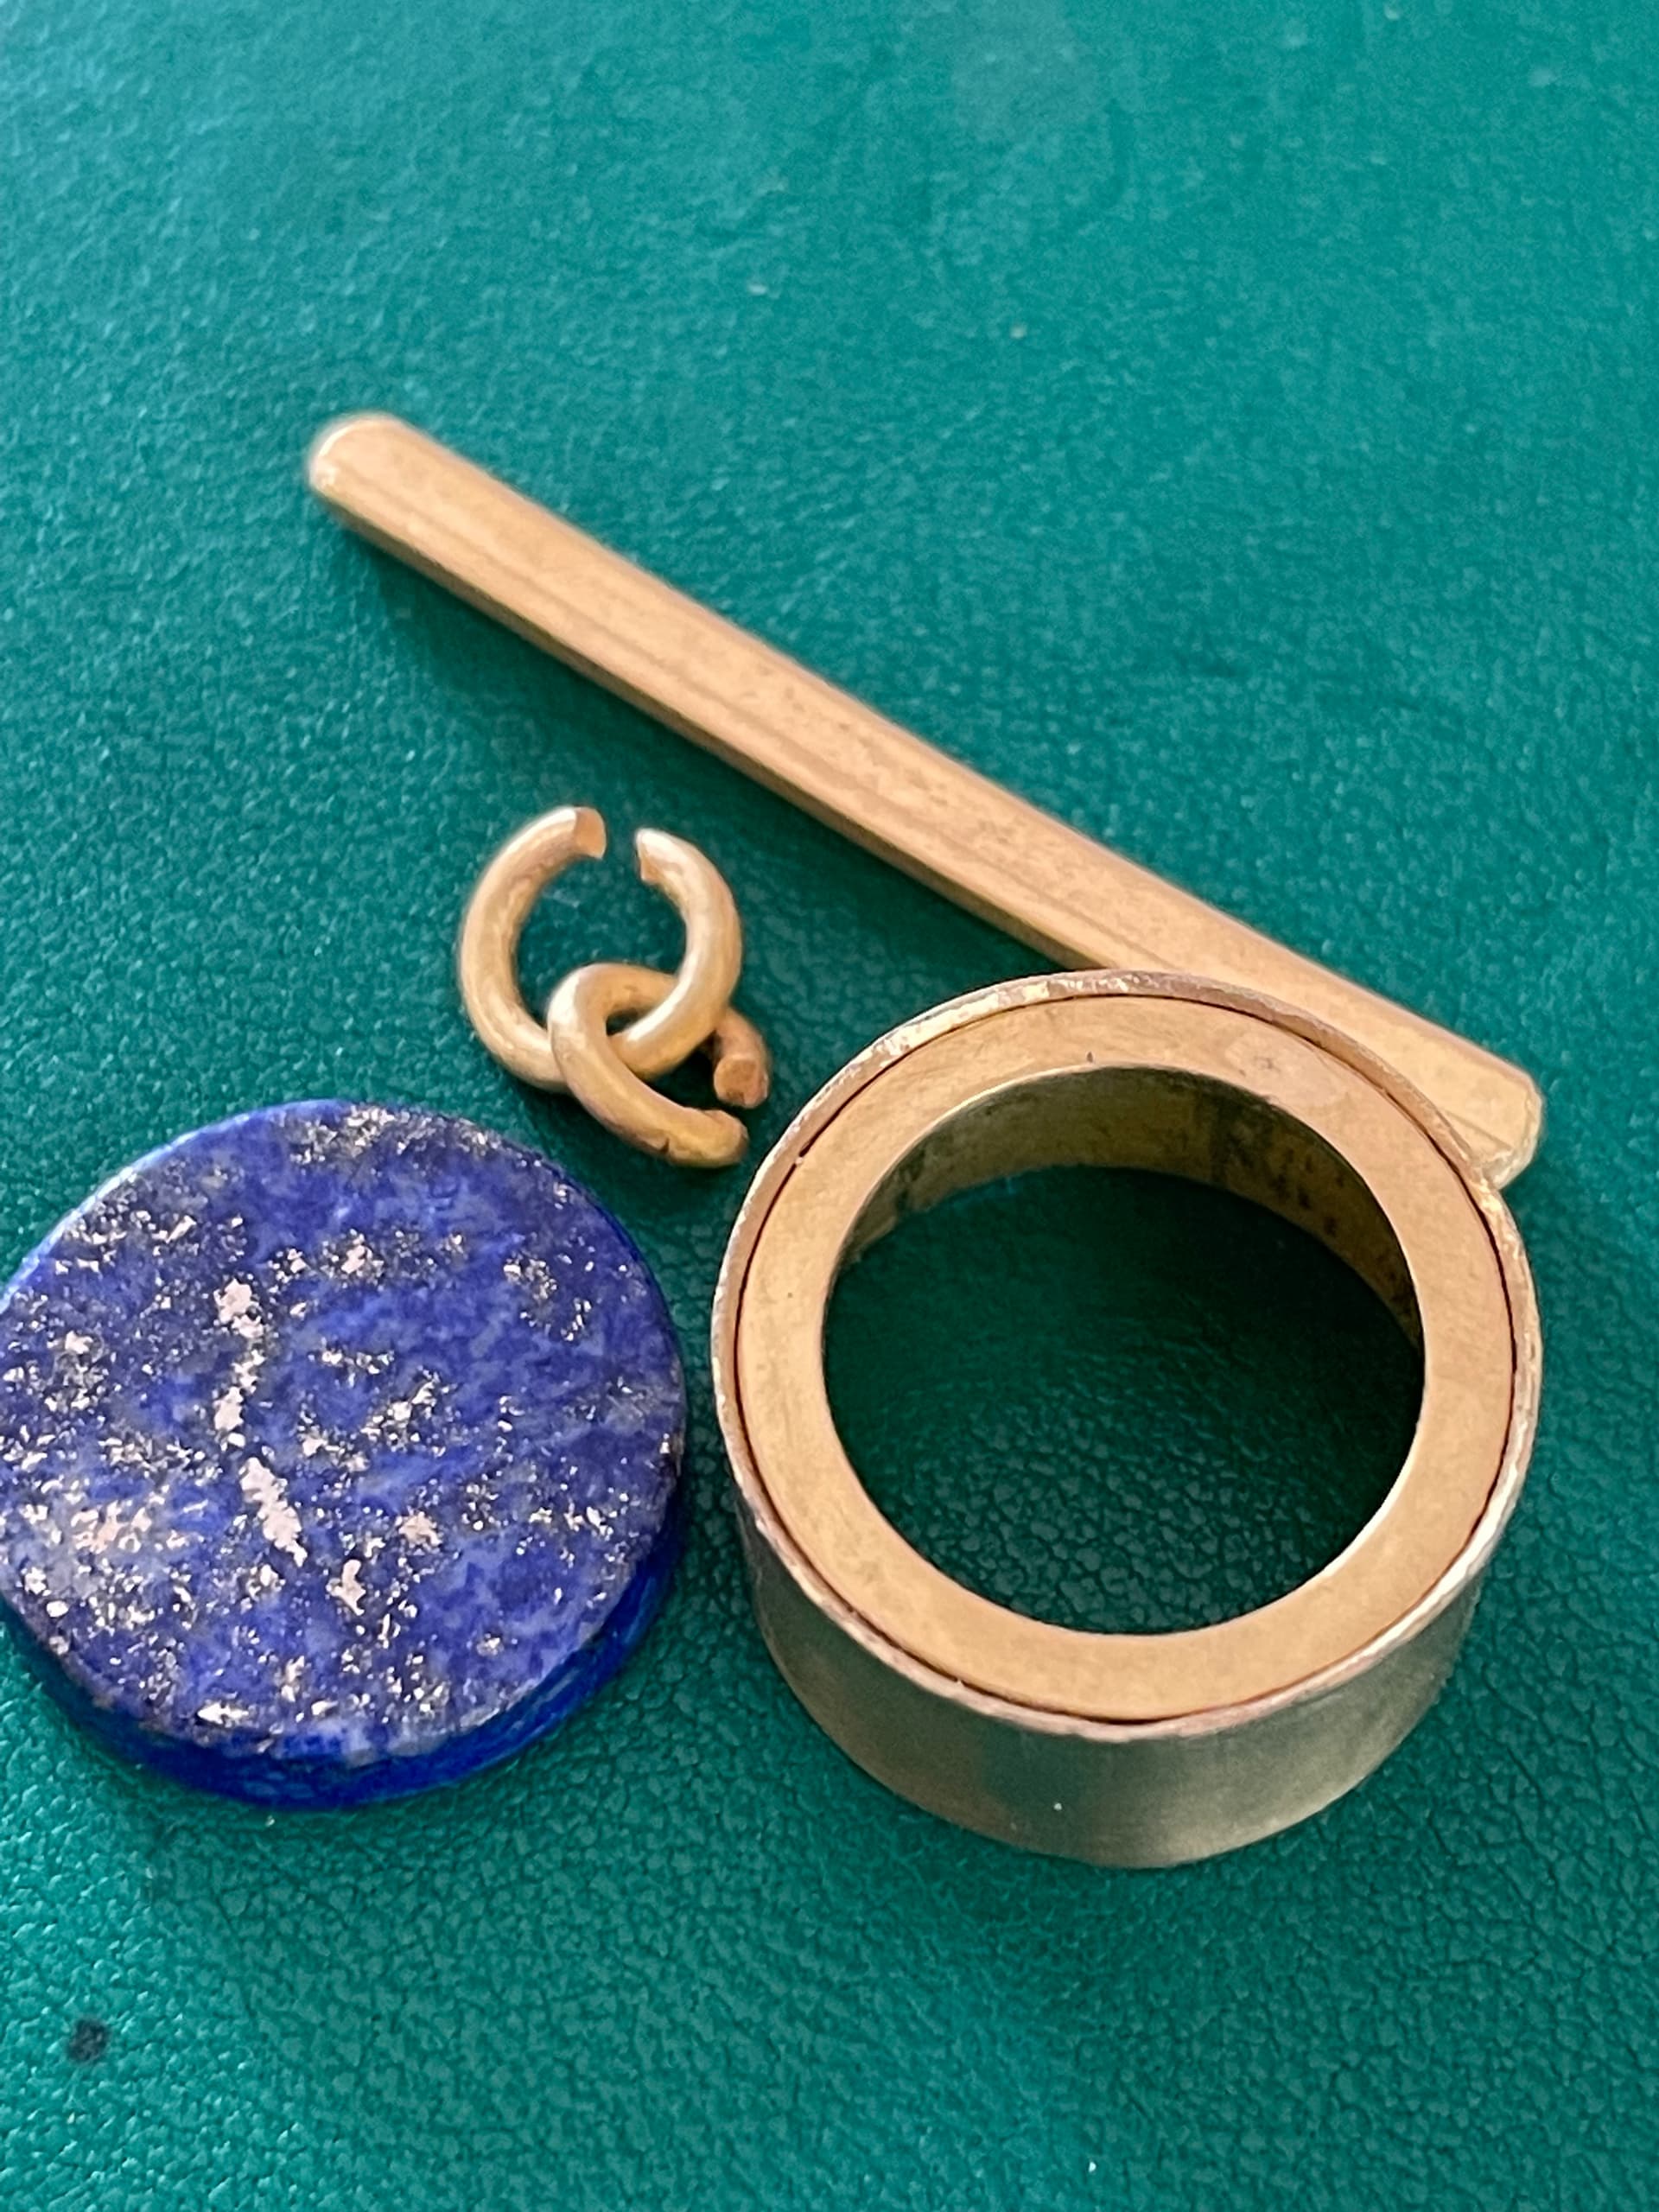
Hi Debbie, I would be happy to share. After starting to describe the process I decided that I better check some notes, so I will get back to you. Here are photos of parts. Notice that the thickness of the inside top frame is about 2 mm. The rod is to make a wire ring that sits on top of the underside of the coin (or disk) and then metal is pushed over it to set.
To be continued.
Practice, practice,practice.
So it appears to me from your description and the parts in the pictures that the stone (Lapis maybe), is back set in that the wide front bezel (washer shaped piece of metal) is soldered in place, the stone pushed into the setting, the round wire bushing placed against the back of the stone and the edge rolled over the round wire bushing to secure everything in place. The bezel in the front has had very little done to it other than to solder it in place and finish it. The same could be done with a low domed cab or even a faceted stone with a flat back surface. Again, this is what it looks like to me. Please correct me if I am wrong so that others know that this is not the case. Thanks for sharing…Rob
tapping a fat bezel against a tough cab such as agate wouldn’t risk cracking the stone. How do you safely tap a fat bezel edge against a brittle faceted stone so that the bezel is flush to the facet… without risk of cracking it? Is there another technique that can be employed that is safer?.. I would not risk a valuable stone… practice pratice is something I agree with… starting with tough cabs… however, brittle faceted stones present another dimension in stone setting.
Yes, Rob, you are correct. I am about to post my lengthy process, and your description simplifies it perfectly. Thank you.
Kind regards,
Lois
Hi Debbie,
Follow-up. My method is designed for working with 22-karat gold, and I’ll walk you through how I set an ancient coin, especially when the coin is irregularly shaped but you want a more symmetrical bezel.
-
First, measure the coin, both the widest width and tallest height.
-
Use the flat blank length formula to calculate the bezel wall dimensions. Add approximately 4mm to the length and 6mm to the height for a proper fit.
-
Shape and solder the bezel wall. I typically use sheet that’s 0.018–0.020 inches thick.
-
Next is the rectangle wire that fits just inside the top of the bezel. This will secure the coin by extending slightly over its edges.
-
Also make 15-gauge wire for the bail and jump ring, and make 18-gauge wire that fits snugly against the inside of the bezel wall, on the underside of the coin. Shape and solder the 18-gauge wire.
-
To make the rectangle wire: start with square wire, then flatten it in a rolling mill to create a rectangular profile. Exact dimensions are up to the maker. In my example, it’s 0.89mm thick and 1.95mm wide.
-
Shape the rectangle wire to fit inside the bezel wall. The wider side should face upward. This is a tricky bend. Go slowly and anneal often. Use a wooden dowel or a mandrel that matches the inner curve of the bezel. Shape slightly larger, then reduce it until it fits snugly.
→ A tip I’ve found helpful: file the inside top edge of the bezel wall about 1mm deep. This slight bevel allows the rectangular wire to seat well. Place it in and gently tap it down before soldering.
-
Once the fit is right, ochre the bezel seam to prevent solder flow, and solder the rectangle wire to the bezel wall. Check for gaps and add solder as needed. The goal is for the seam to vanish after cleanup.
-
Clean up and refine the bezel.
-
Now, place the coin inside and mark where the back of the coin meets the bezel wall. Add about 3mm to the highest point, then use dividers to transfer that to the bezel. File down the bezel wall accordingly.
-
Bevel the bottom of the outer bezel wall slightly. This thins the metal, making it easier to push over the 18-gauge wire later.
-
With the coin and wire in place, check how much bezel wall you’ll have to push over the wire. You want just enough to cover the wire—not so much that it touches the coin. Remove any excess as needed.
-
Once everything fits well, remove the coin and wire, and polish the entire piece. Then solder on the bail and jump ring.
-
My method for attaching the bail is to drill two tiny holes slightly forward of center, insert the ends of the bail into the bezel wall, and solder from the inside. I also clean up any part of the bail that shows inside the bezel.
-
Finally, set the coin: push it into the frame, nest the 18-gauge wire underneath, and gently fold the beveled bezel edge over the coin.
That’s pretty much it. Feel free to ask any questions!
Warmly,
Lois
3 Likes