Artistic-Metal Engraving from 1900 A.D.!
“A step back into time, long before any of us were born!”
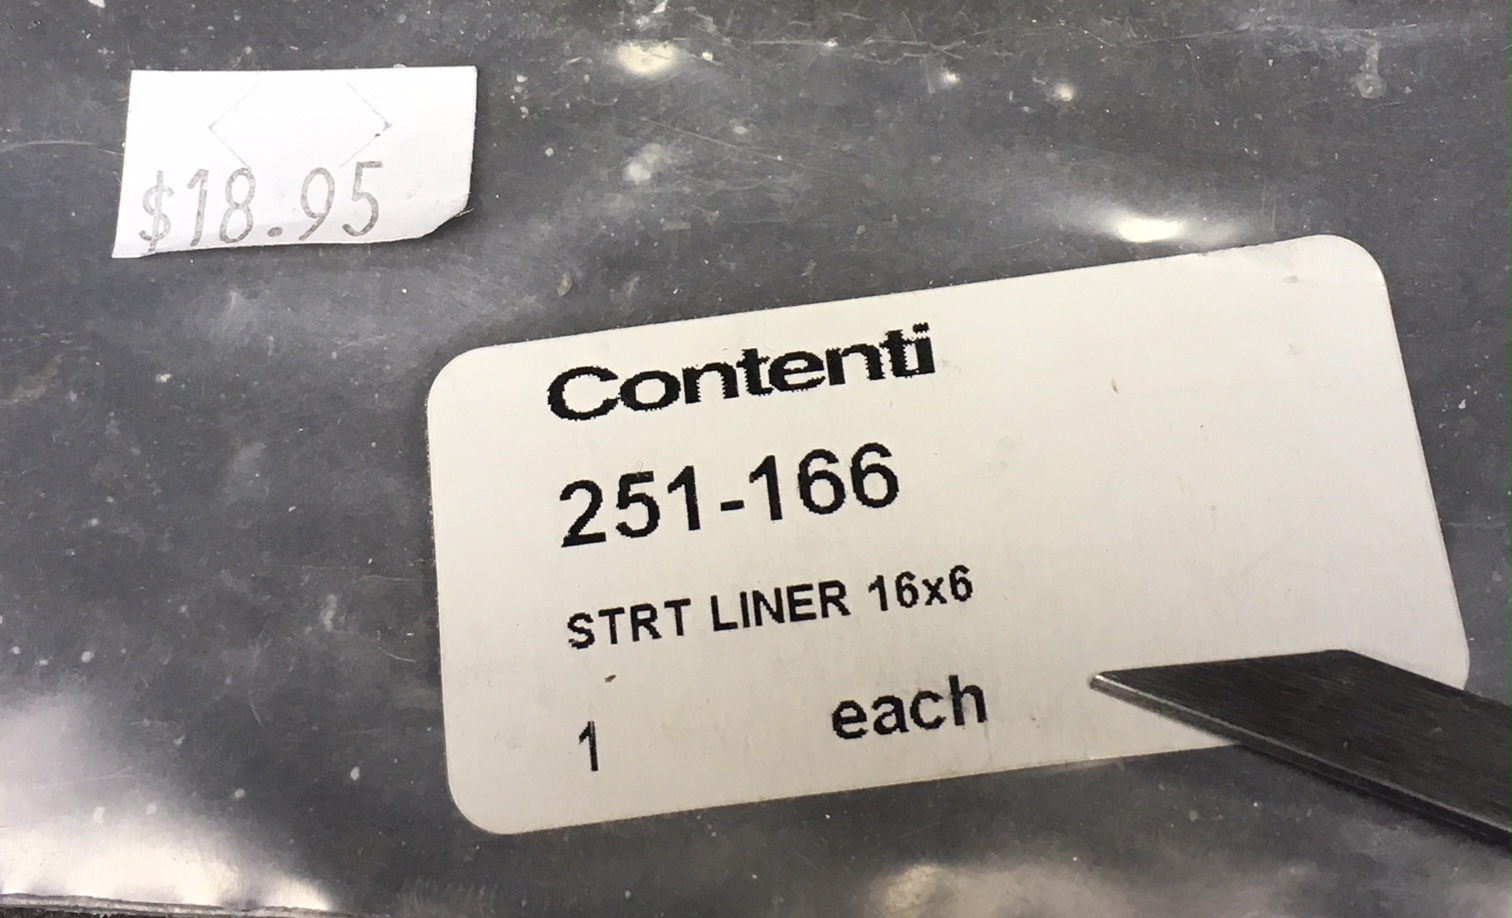
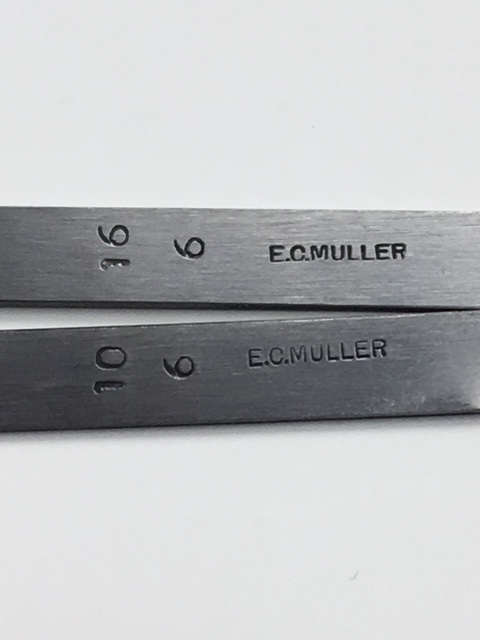
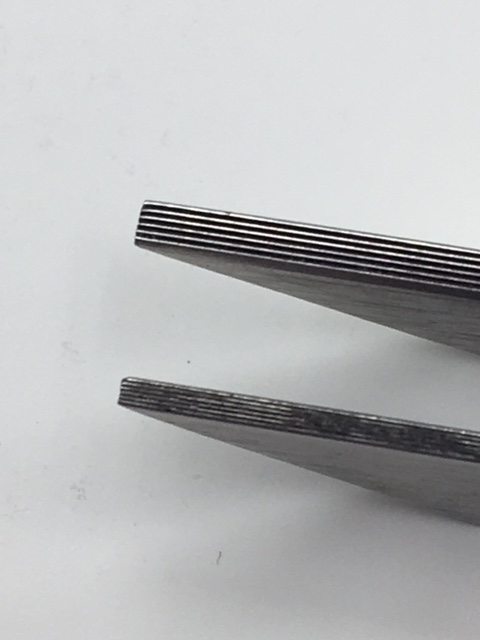
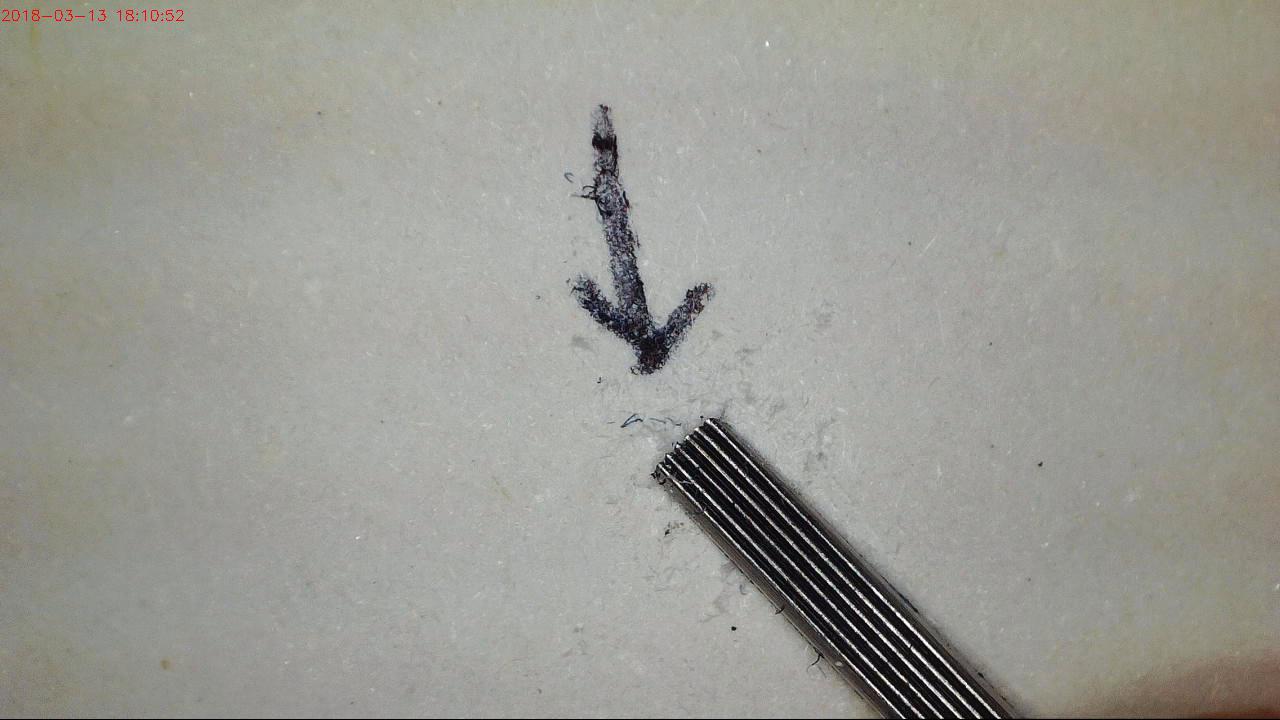
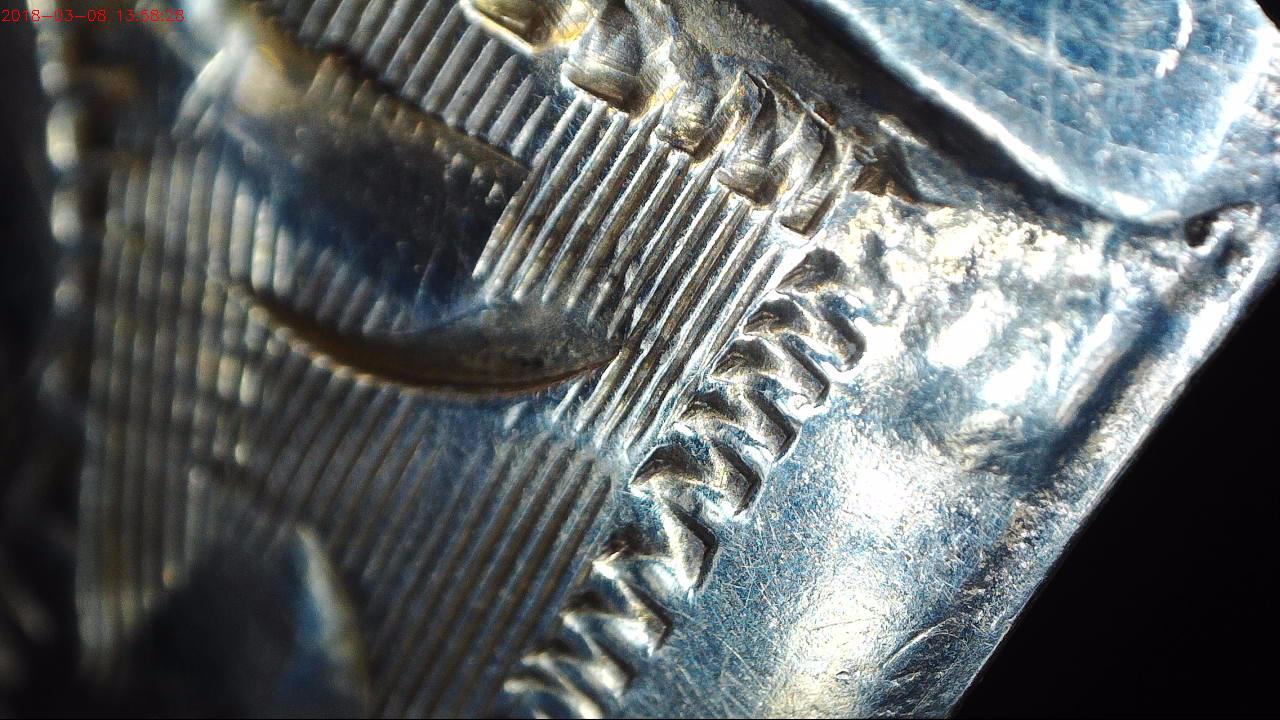
Enclosed is an exposure to a “Straight-Line graver of 16-6”. The “16” means the unit of measurement & spacing in between the rows of teeth, “6” means the number of teeth, or lines being made available for line-cutting!
The first step in any “artistic engraving”, is to have the item held on an easy-to- grasp & comfortable wooden dowel. Some setters might use ‘Jet-Set’, or other newer holding gels that are now on the market, but with my ‘few decades’ of experience, I still prefer “Flake-Shellac”. Putting the whole apparatus into a locking & swivel-vise is a delicate set-up, much time is spent on securing the bracelet and holding it in place, very tight!!!
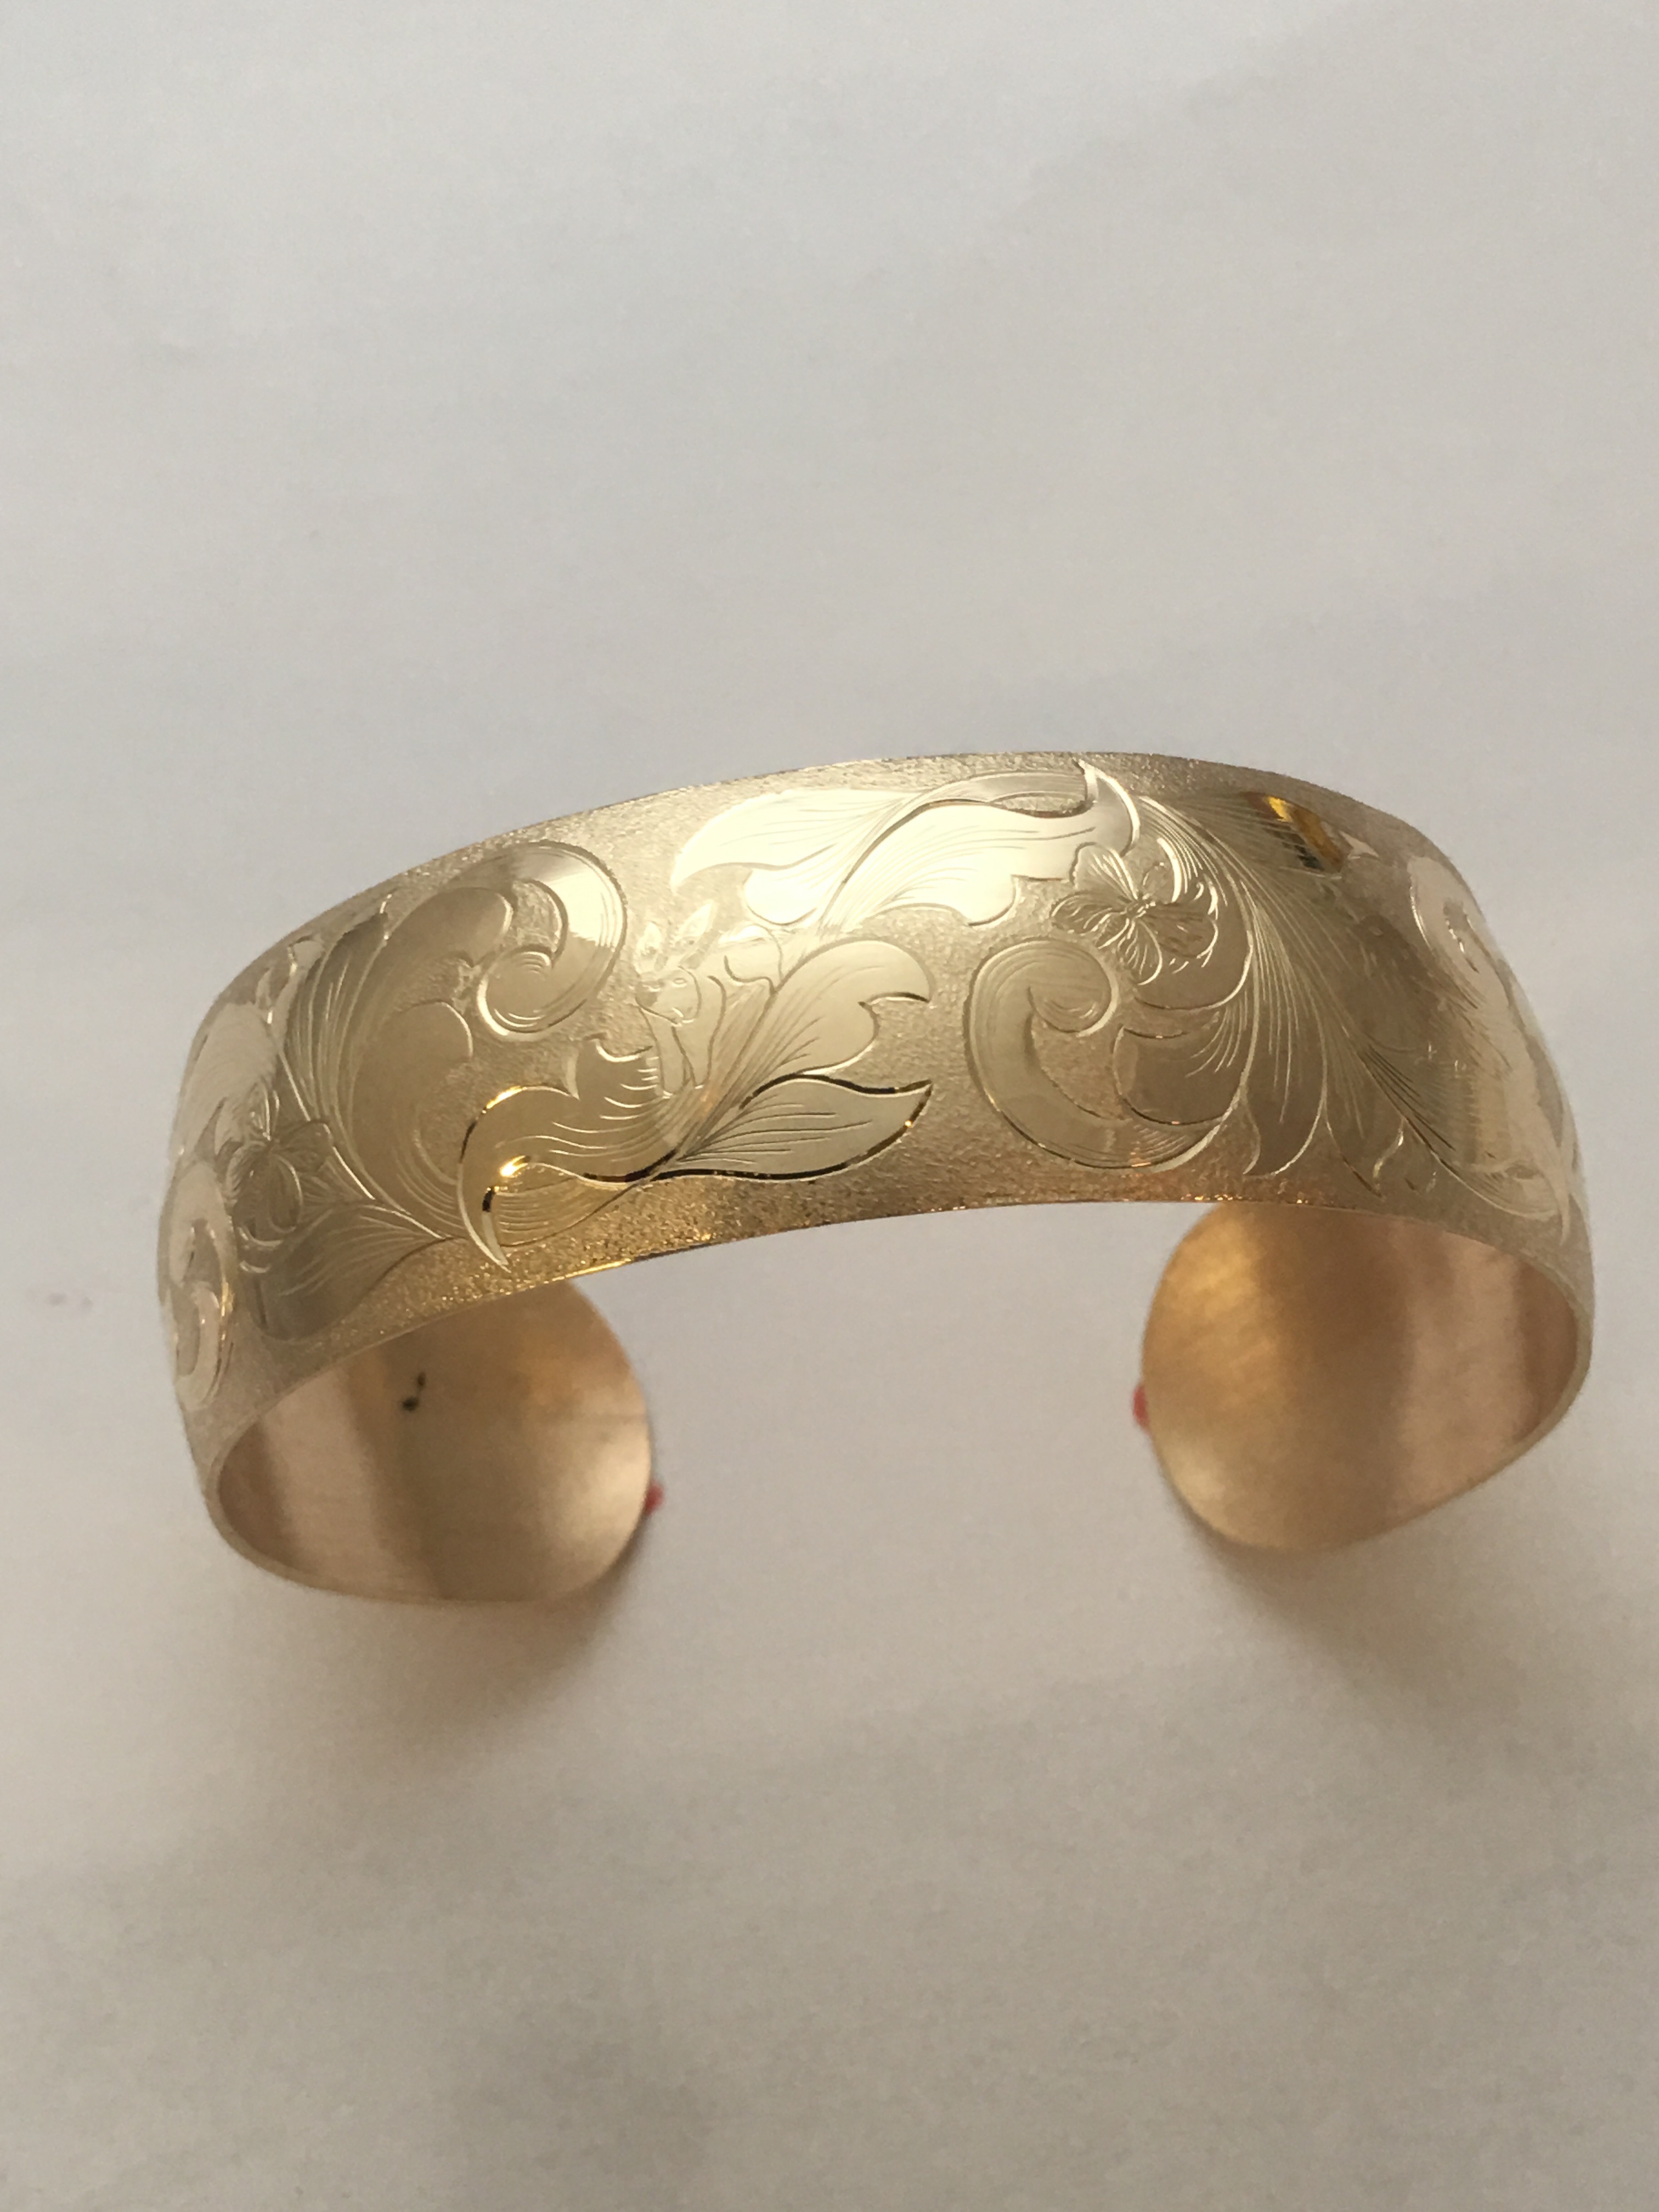
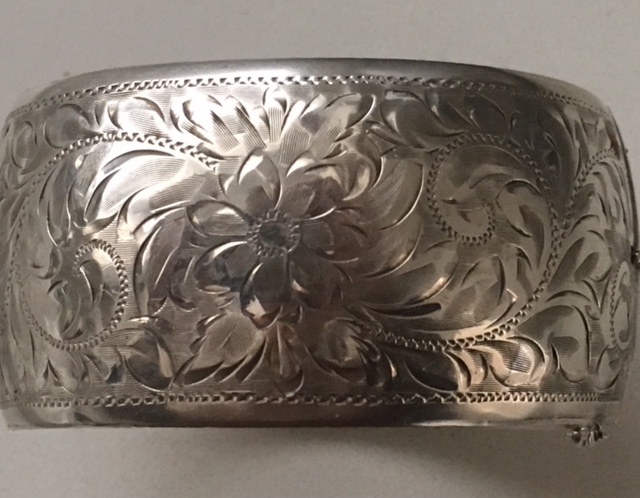
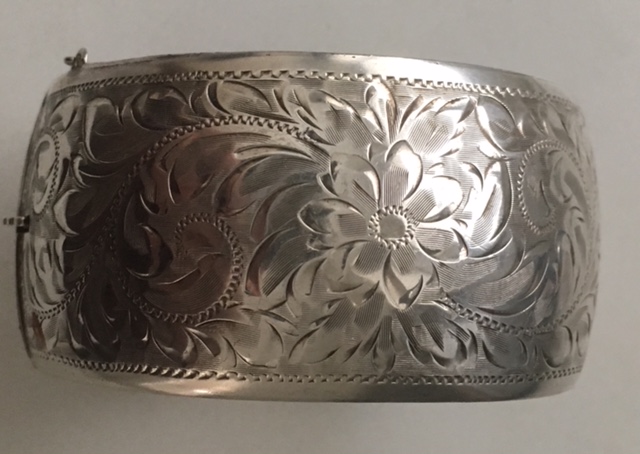
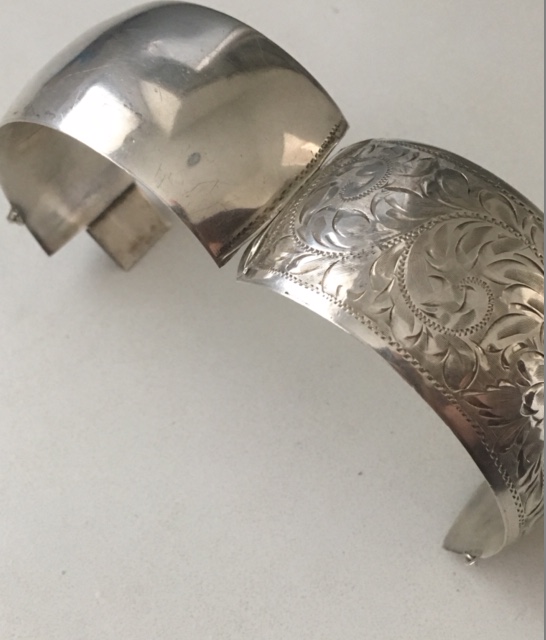
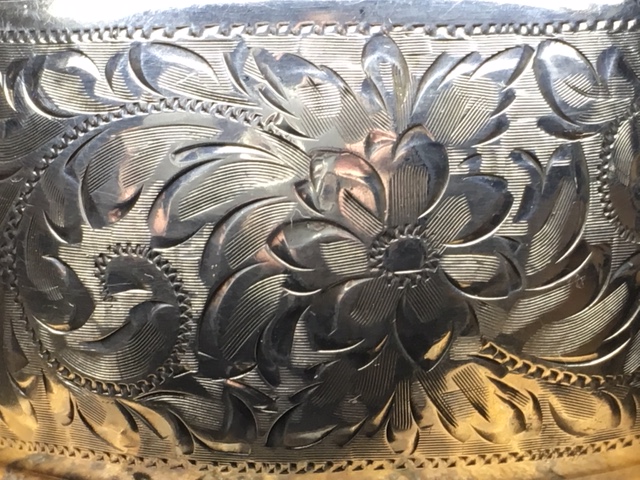
This bracelet was engraved, as far as I can understand, in the beginning or circa 1900’s, my client told me that her Great, GrandFather had it made for her Great, GrandMother.
This bracelet was almost ready to be melted down for recycling last year. Imagine, this could have been melted just for a few dollars of refuse just to buy a few cups of coffee & never to be seen again. When I saw it, I feared this would easily happen!
I asked my client if I could show this to the ‘newer generation’ of jewellers on describe how this bracelet was engraved and using what kinds of tools…she felt then so honoured!
But now everyone will be viewing the labour intensive results of the engraver what he or she created, this is a definite Art & Skill!
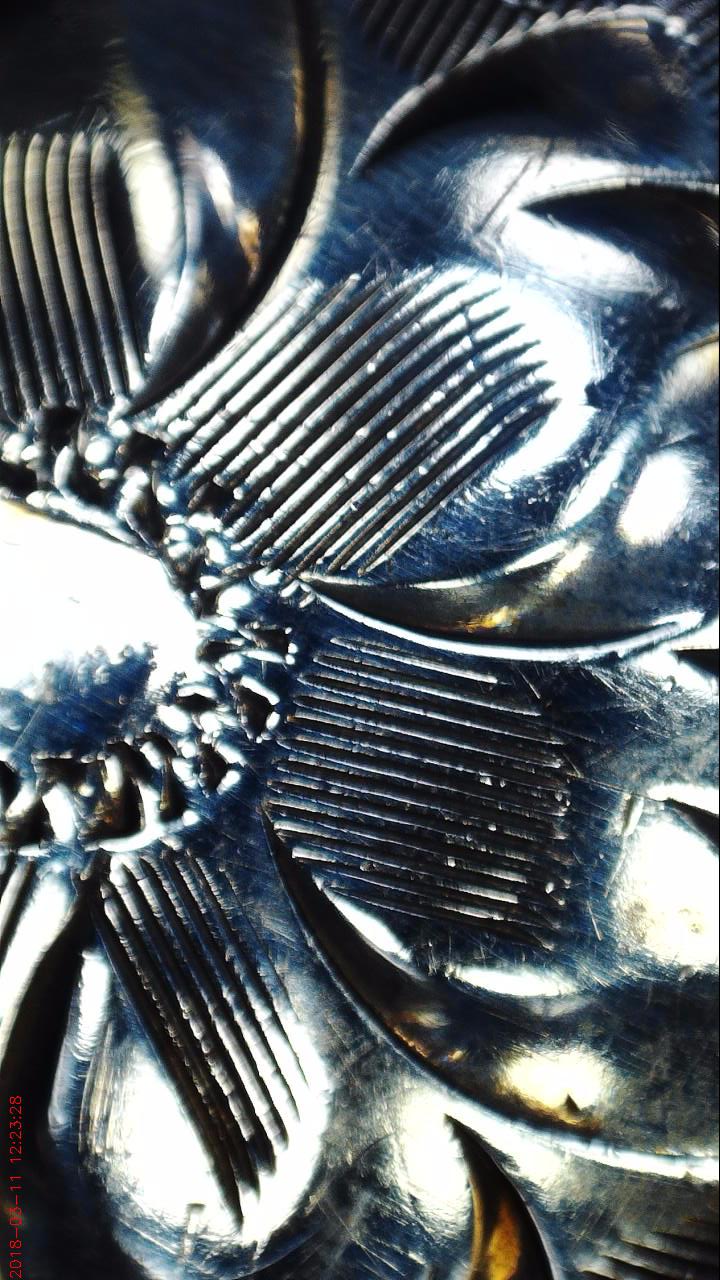
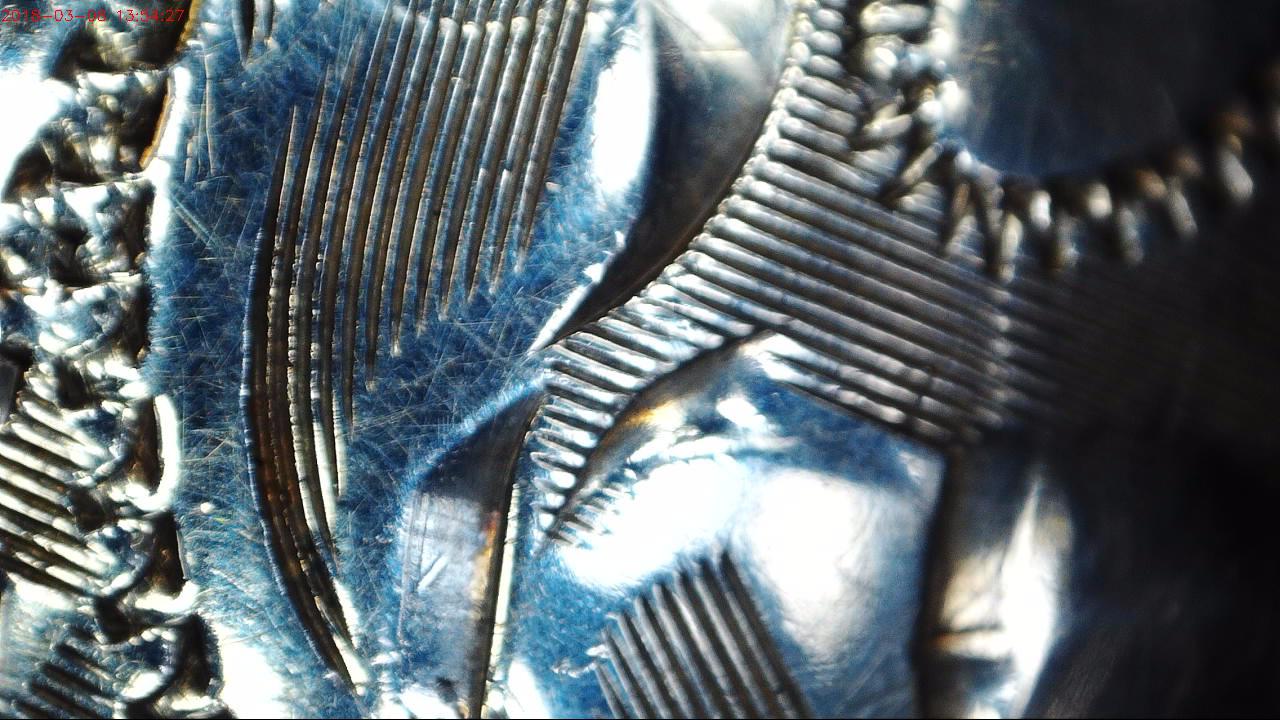
All of what you see here, in these multiple Ultra Close up 85-100x power digital photographs, showing how was all this engraving was done by hand & without any machinery. I estimate it just to engrave this bracelet, could be in time-frame of 2 days.
On very brighter note, what tools are needed?
As an experienced Diamond Setter, I have a fairly good idea on what tools that sat on this Engravers bench: …Circa 1900!
1) => Oil-Stone “Arkansas” soft grit @ 8 inches in length or 20 cm’s.
2) => Polishing Papers, #600 - #800 - #1,000 in today’s standards.
3) => Very soft ‘artist’ soft-core #1 pencil.
4) => Flat-shaped gravers of various widths #39 - #40 - #41.
5) => Onglette gravers of #10, #1 and #2.
6) => “Florentine” Graver at a width size of ‘10/6’
I am very sure the “Artist & Engraver” had multiple gravers in his collection to create all kinds of different patterns. All of them were also of different lengths and some being polished on one, or both sides of the cutting blade.
(BTW, I have 19 gravers for my own “Bright-Cutting” exercises.) Here are some of the measurements of the well-used gravers.
NAME - SHAPE - Graver Number - Width measured in Millimeters.

A) Flat #39 @ 0.71 mms.
B) Glardon-Vallorbe, Flat #12 @ 1.30 mms
C) Glardon-Vallorbe, Flat #10 @ 1.04 mms.
D) Glardon-Vallorbe, “Knife-Edge” N20 @ 0.65 mms.
E) Straight Liner ‘STRT 10-6’ @ 1.41 mms.
F) Onglette #5/0 @ 0.77 mms.
G) Onglette #0 @ 0.79 mms.
H) Onglette #1 @ 1.15 mms.
I) Onglette #2 @ 1.22 mms.
J) Onglette #3 @ 1.73 mms.
K) Onglette #5 @ 1.87 mms.
Names of ‘popular’ graver manufacturers:
“E.C. Muller” <=> “Glardon-Vallorbe”<=> “Lyons”
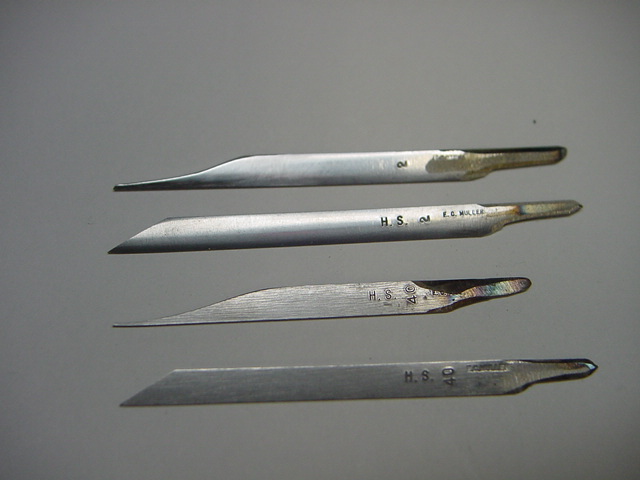
Mostly all of these gravers are “HS”, or “High Speed Steel” why so? These gravers are strong and meant not to have their cutting-points keep from breaking during the most important periods of “Bright-Cutting, Advanced Graver Designing & Carving”.
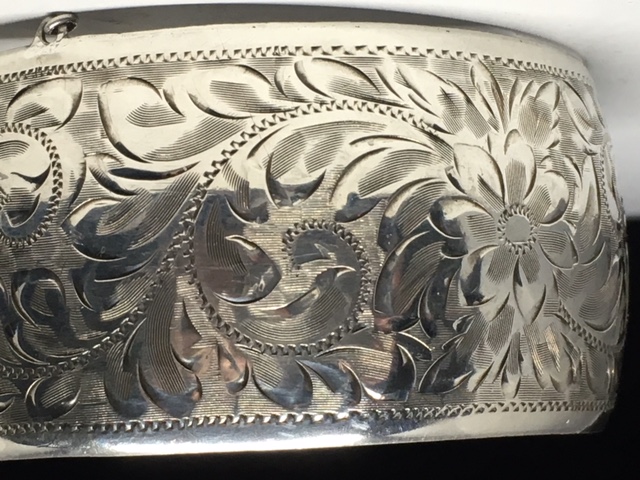
The bracelet measurements are: 33mm’s wide and 65mm’s in diameter. The inside of the bracelet is hollow & the thickness of the metal is only 0.75mm.
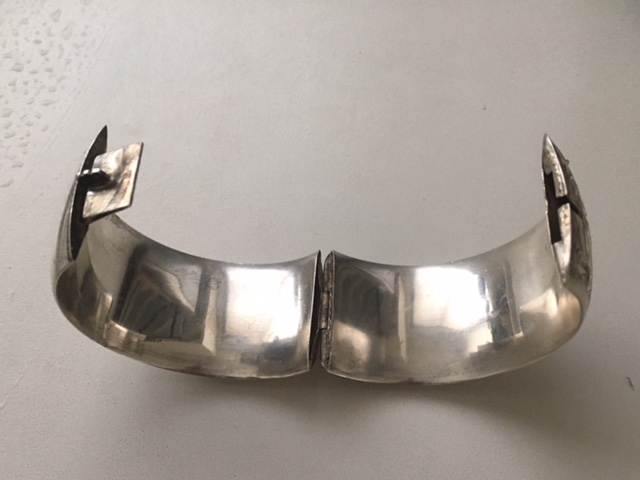
Why is this so important? I need to have you know how this was engraved on such a light-weight bracelet, this is truly an “Amazing, Piece of Art”!
The lighting was another factor, in seeing with the limited lighting conditions. We have no idea how difficult it must have been for the engraver to sit at long hours each day & draw out the design. The light in those earlier days were without any form of fluorescence lighting, so how did this person have sufficient light to see what he was doing?
This is so very strenuous on the engravers eyes, he would do all his engraving with the help of simple window lighting.
In the advent of having strong or (blinding) Southern lighting, that engraver would have their bench facing the North. Why so? No strong light and this could cause severe eye-strain. The “North Light” just had the correct colour of the spectrum shining on the bench-peg!
For evening work, there was a large candle in front of a parabolic reflecting lens or mirror, and that beam of light was then ‘pointed’ to the engravers bench-pin!
The first thing the engraver had to do is to rub a white paste on the silver. Letting it dry, then use a fine pencil & literally sketch the initial stages of the overall pattern.
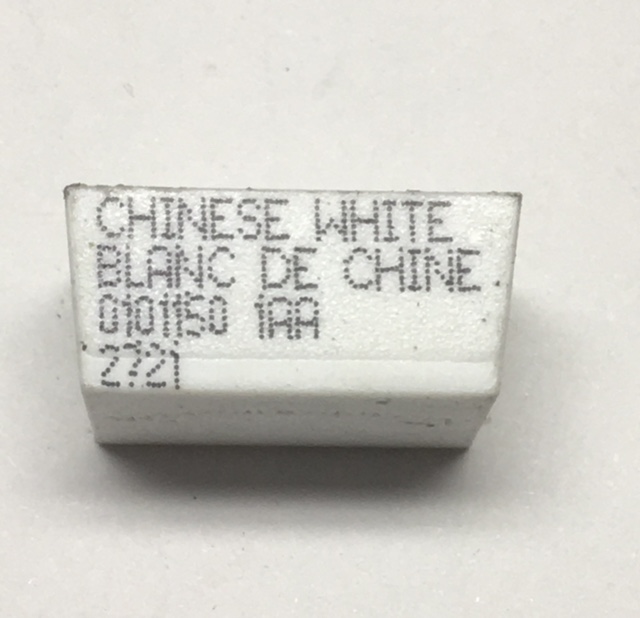
The white paint was called, and still is to this day named “Chinese White”. If he made a mistake he applied more white paint & again redraw the pattern.
The overall total time spent in these preparations, sometimes it took longer than the actual Onglette engraving!!
Let’s suppose that the engraver had to re-sharpen the blade after some lengthy cutting. The ‘best’ polishing paper was not available in those ‘earlier years’.
The only graver-rubbing done, was on a leather belt. On it, were compounds that would give more lustre to the steel blade. Once the ‘compounds’ were used, the next step would be to use a graphite pencil, the skilled engraver would then rub the graver on this area of the leather strap. Keep rubbing it till the graver was back to the desired pristine cutting condition.
In looking at the final results are just mind-boggling in how the engraver achieved the patterns that we see here today. What we have now are advances that are basic to us, but in those days they were in the advanced stages of fabrication & engraving.
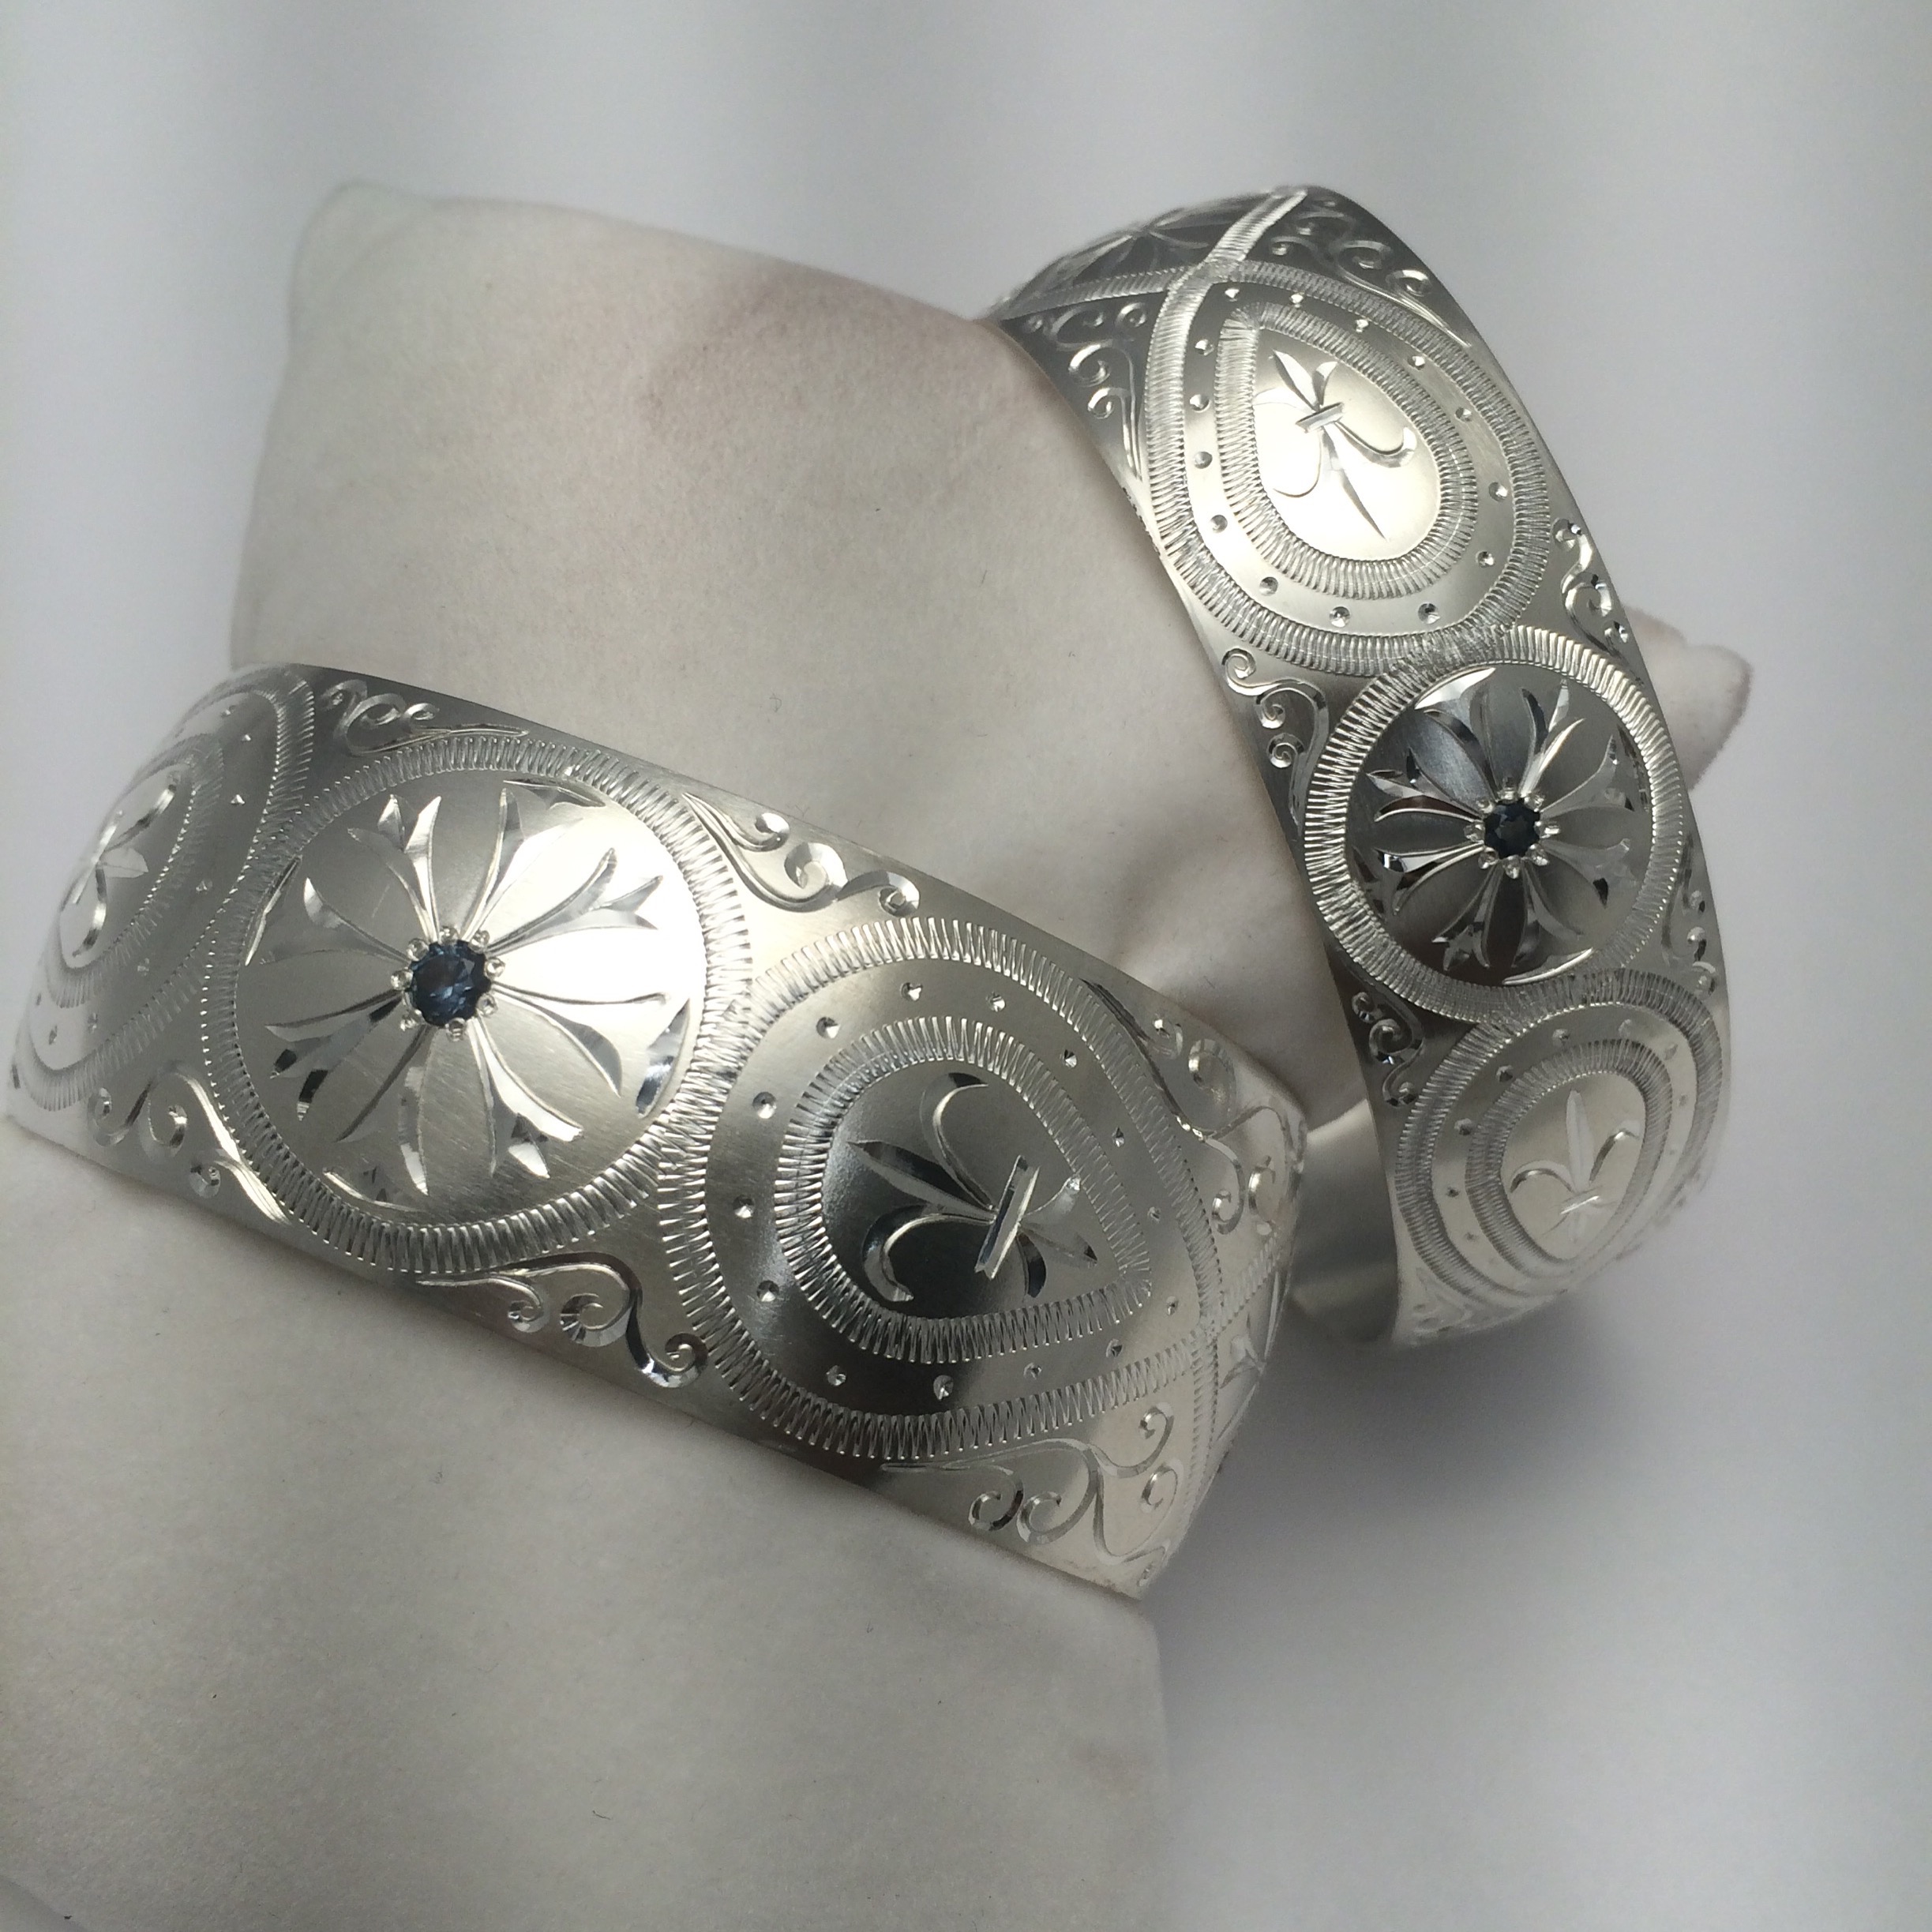
Once the “Rough Pattern” was ‘company & client approved’, the engraver would use a narrow Onglette graver #0 & #1 and cut a rough outline.
The Engraver would next use the Onglette shaped tools and cut any patterns that were required. The final step would be using a wide Flat graver #40 #41 and scallop the area for any wider cuts.
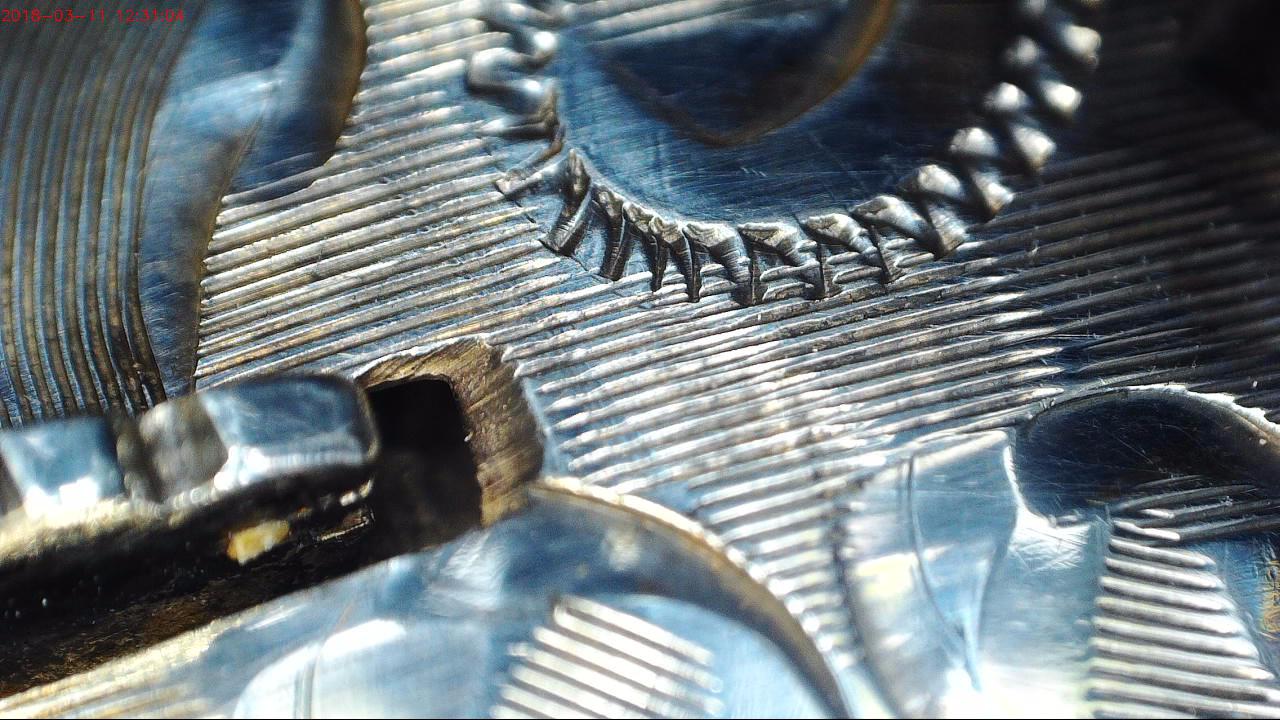
With these Flat gravers he would outline the “Zig Zag” all around the borders of the ‘working area’ of the bracelet.
Remembering, that the thickness of this bracelet metal is only 0.75mm’s.
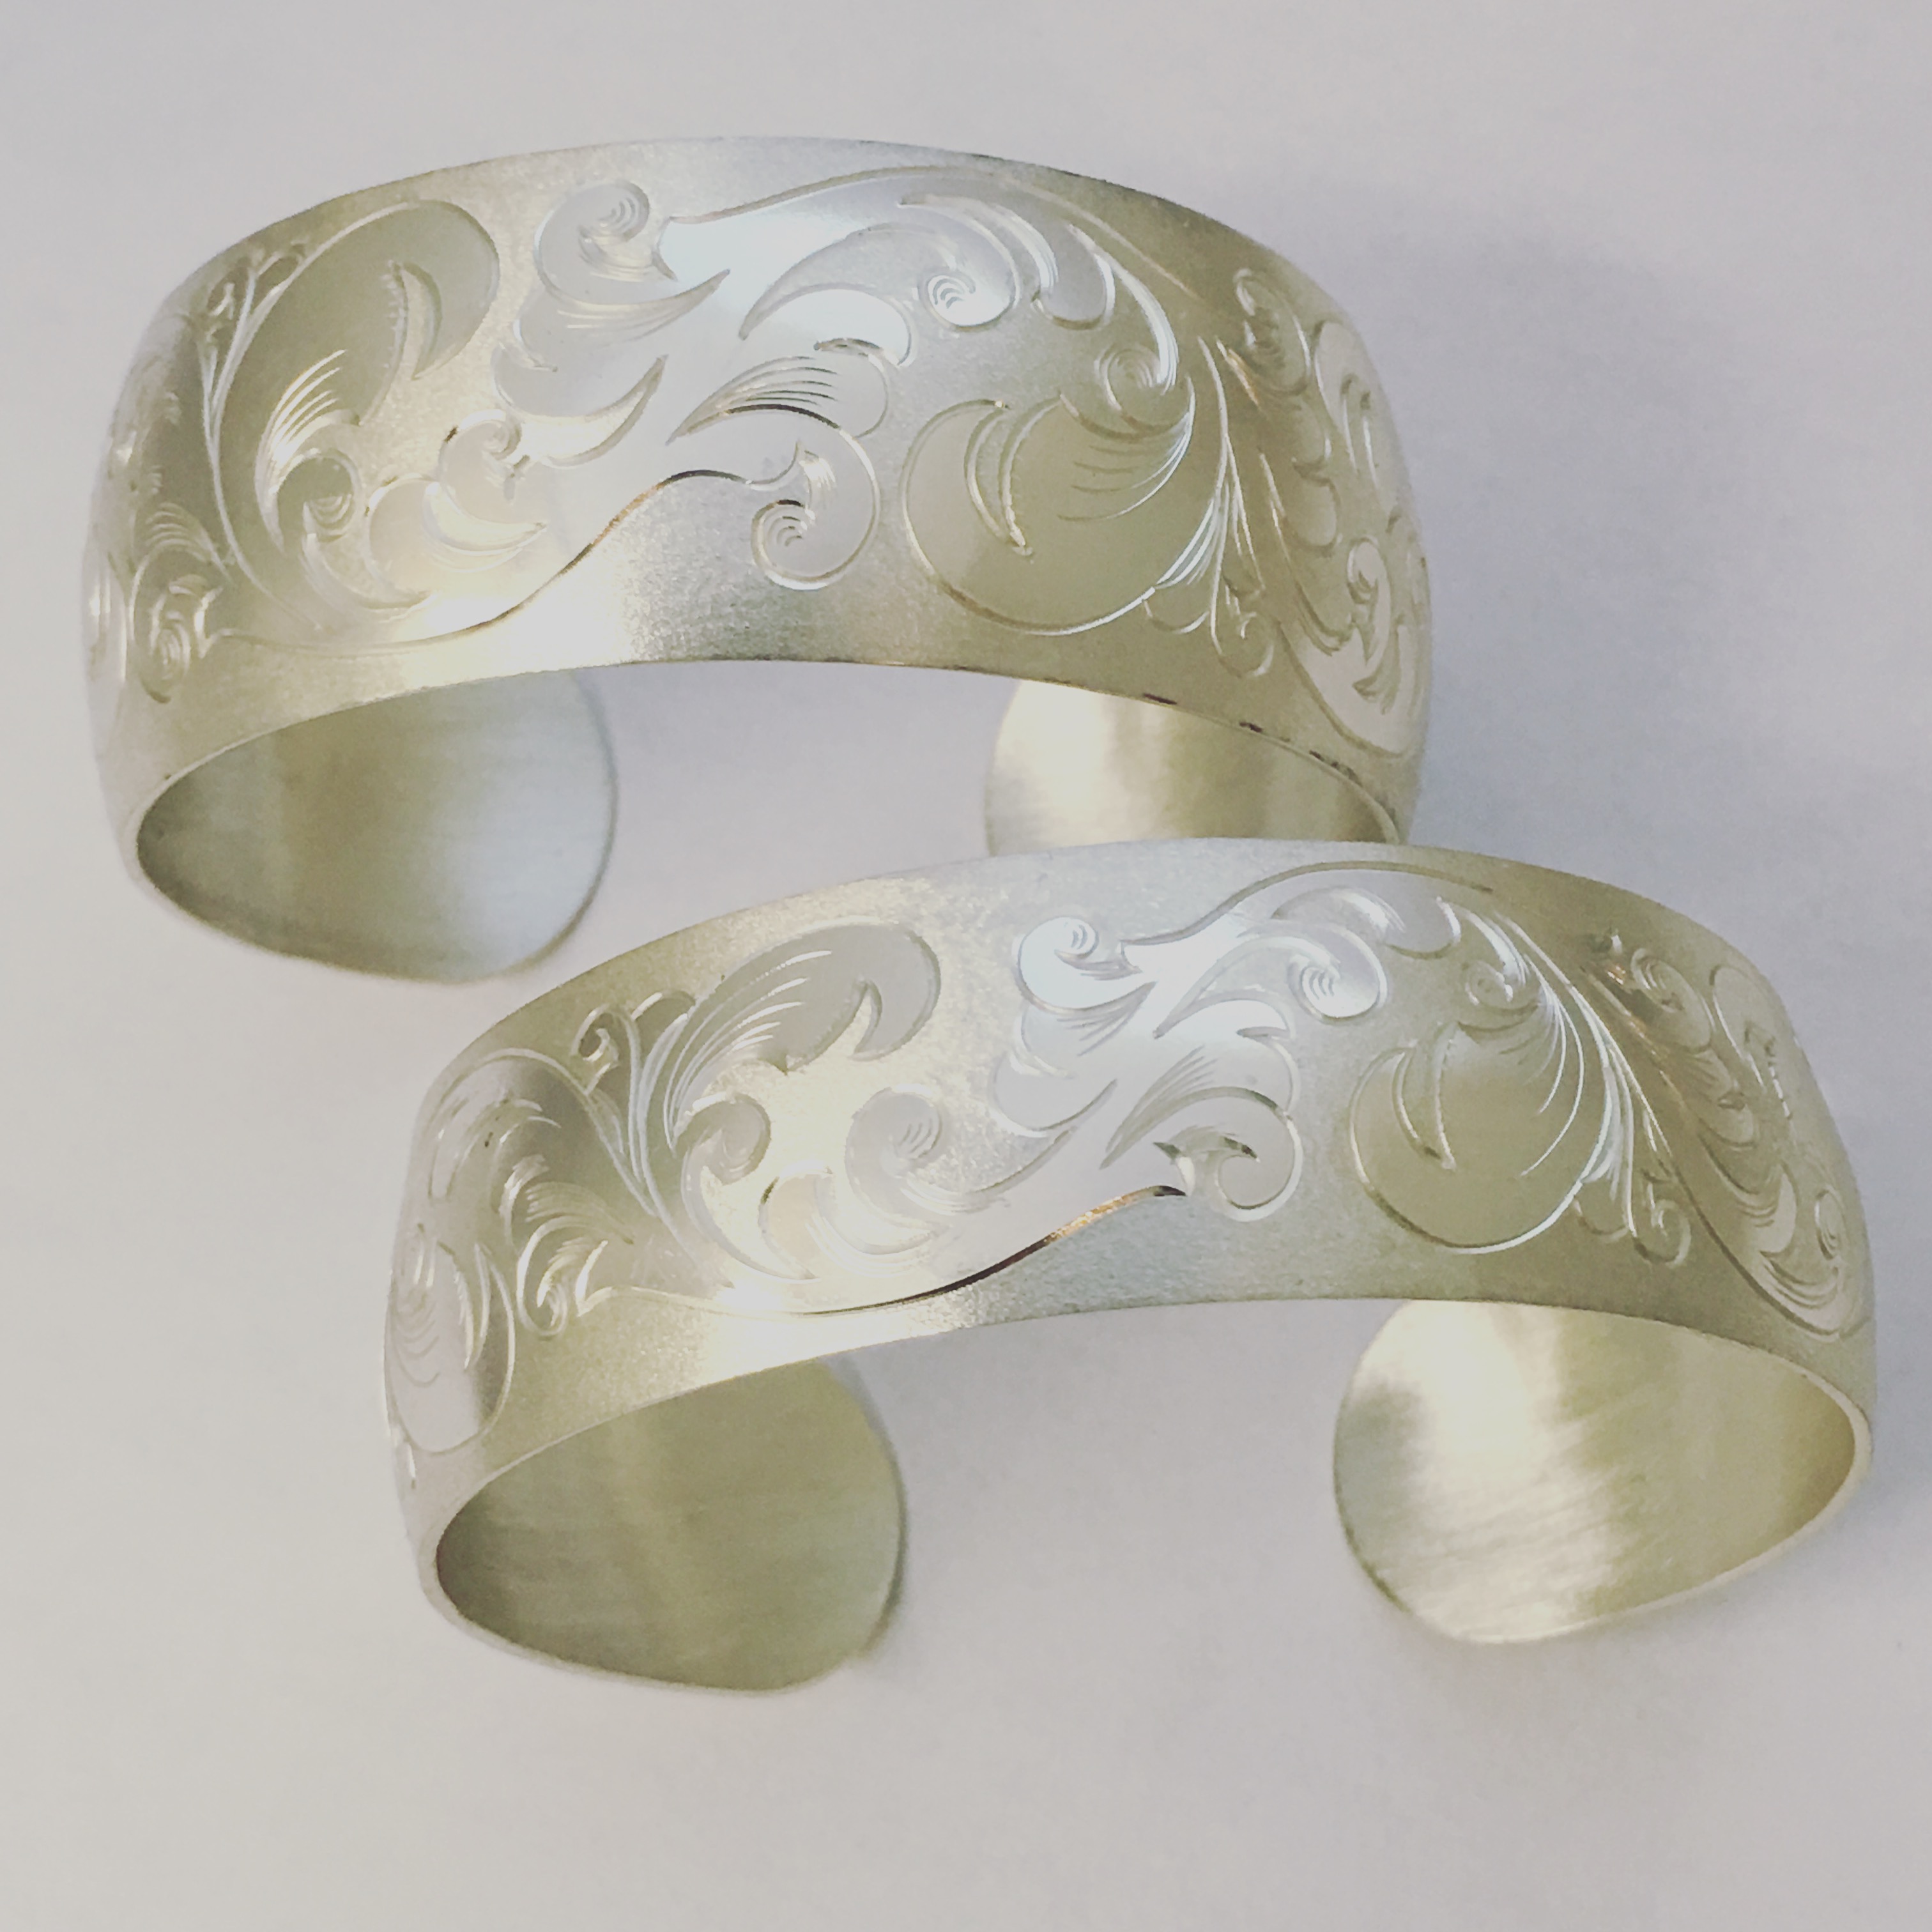
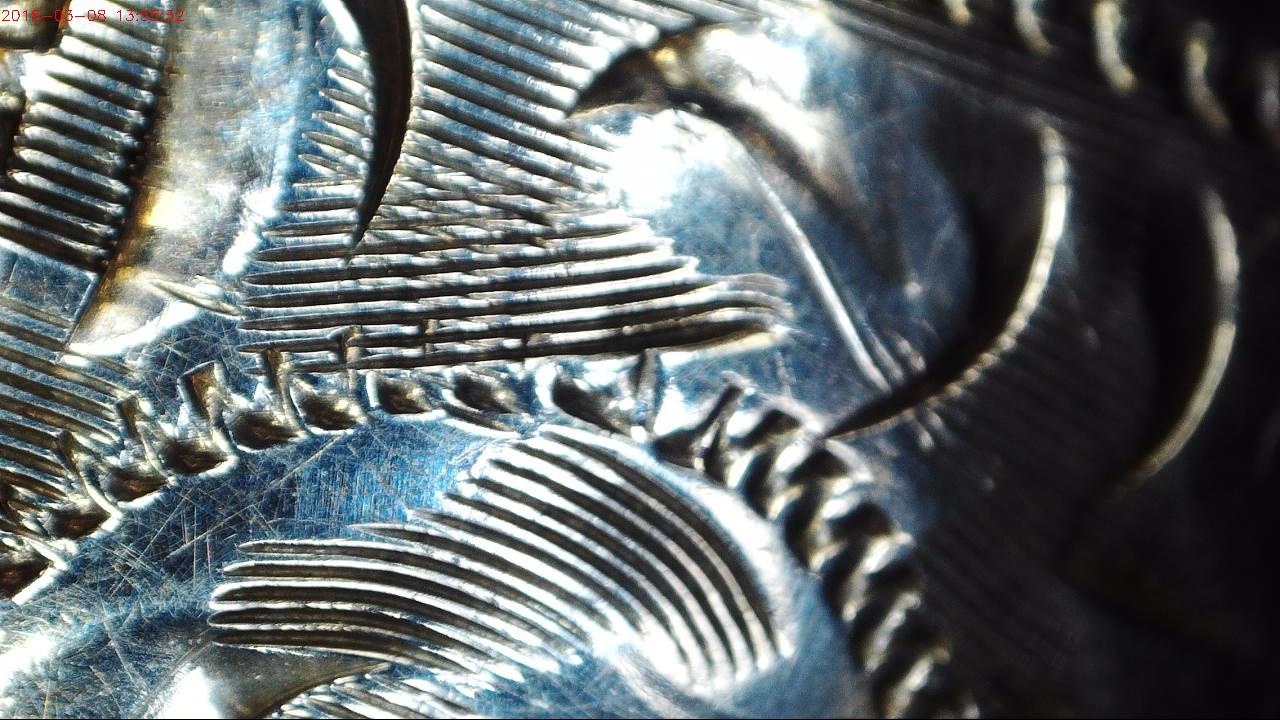
In between the very wide cuts, the engraver would use a “Florentine Graver” to fill in the empty spaces with a gentle “Fill-In” pattern!
These “Line-Gravers” are still readily available, now you know the correct (generic) name & number. They come in Straight & slightly-curved, let the tool-supplier know just where you’ll be using them
This grinding process is to shape the gravers accurately, as the front-face of any graver should & must always be coming to a fine point. In my eyes, this looks like a “little 4 sided shield” and all the graver-shaping cuts are to be designed to cut equally, on both sides of the blade.
My current saying is: “Why push a mountain of metal, if only a little garden spade or trowel will suffice?”
One fellow brought me down to Tennessee (from Toronto) just to see why his gravers weren’t working! To his amazement, the simple answer was that he never put his gravers to any bench-grinder to shape them for Bright-Cutting.
If the graver turns a dull blue or any other colour during the bench-grinding, the reason is the metal got literally burned and totally lost its strategic & important tensile cutting strength.
This process of grinding a graver is so darned important, in my earlier days this simple task of fully grinding a graver, took me about 6 months to learn. What will eventually happen is that the slight digging of the graver into the metal, the teeth will lose their cutting ability & needs to be re-sharpened many times!
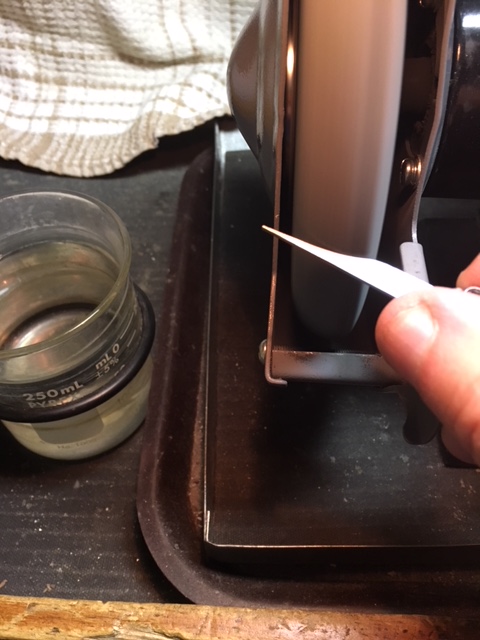
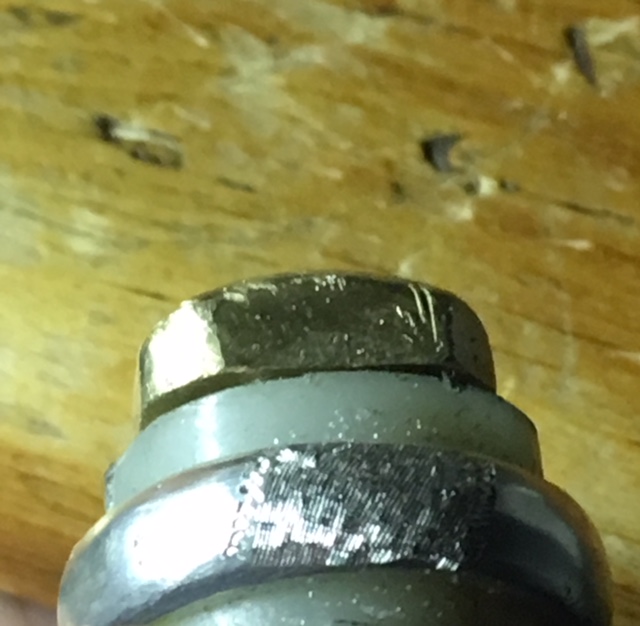
“Reshape, recut, regrind, reshape, recut, regrind”. Please be so careful in not letting any of your gravers get hot to your finger-touch. Keep dunking in your graver into a glass of water, on my photograph you can see how close my graver is to the jar of water!!!
Just keep your grinding your gravers as if that there wasn’t anymore to be bought, treasure them and each graver will give you many years of great use.
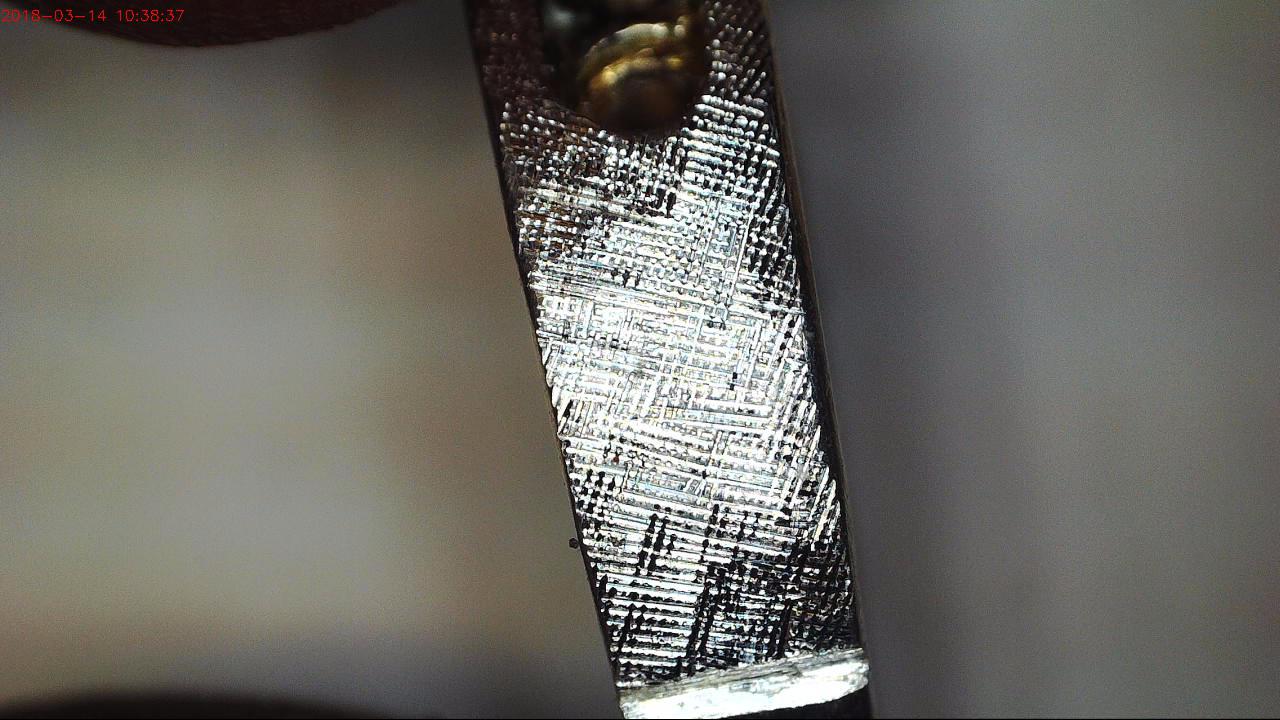
With the “Florentine Graver” there are no need for any Polishing Paper whatsoever. This spectacular graver only cuts little lines in the metal, nothing else!
The only section of this graver that is to be cleaned continually is the ‘forward face’ and keeping the ‘cutting-teeth’ clean if any of them get broken. If you find this graver not digging but just sliding instead of cutting, what does this mean?
The answer is easy to observe with your 10x power loupe the line of cutting teeth were damaged in cutting into alloys in the metal, not the soft silver, as it cuts through the metal.
I always say that “Damaged gravers do not make a happy Engraver!”
I suggest practicing on plates with a gentle curved piece of metal. I would use Copper or Silver, Brass is too much of a challenge at your delicate learning curve! To engrave patterns on Brass is really too difficult in your Beginning Levels or Stages of Engraving … don’t rush yourself!
Give yourself time to practice! How about a few weeks, or months? Not days as you might think, this is not an overnight session of learning to engrave metal. It has taken me only 5 YEARS to learn and perfect this “Bright-Cutting” skill!
This is ‘very serious learning’ as you will eventually find so many uses of your new sets of graver tools, anywhere!
I loathe any empty spaces on any engraved area, this is just where your new “Florentine Tool” will come in handy! There are many ‘widths & numbers of teeth’ for each tool
I showed the results of using a “Florentine” graver to a studio-owner who had stored many of them in her desk drawer and not knowing what to do with them.
After about ½ day of reshaping all of her ‘decades of old gravers’ on her bench-grinder. I gave the gravers back to her and now literally found a multitude of uses for these great and new gravers. She a happy new jeweller and she was grinning all day!
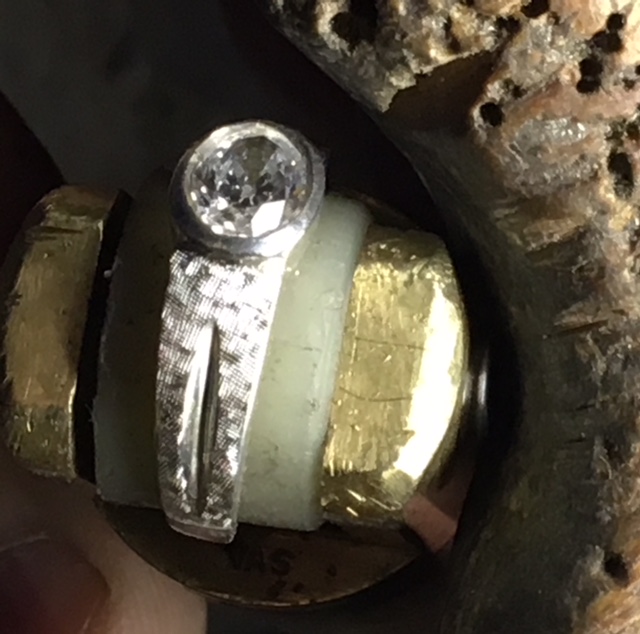
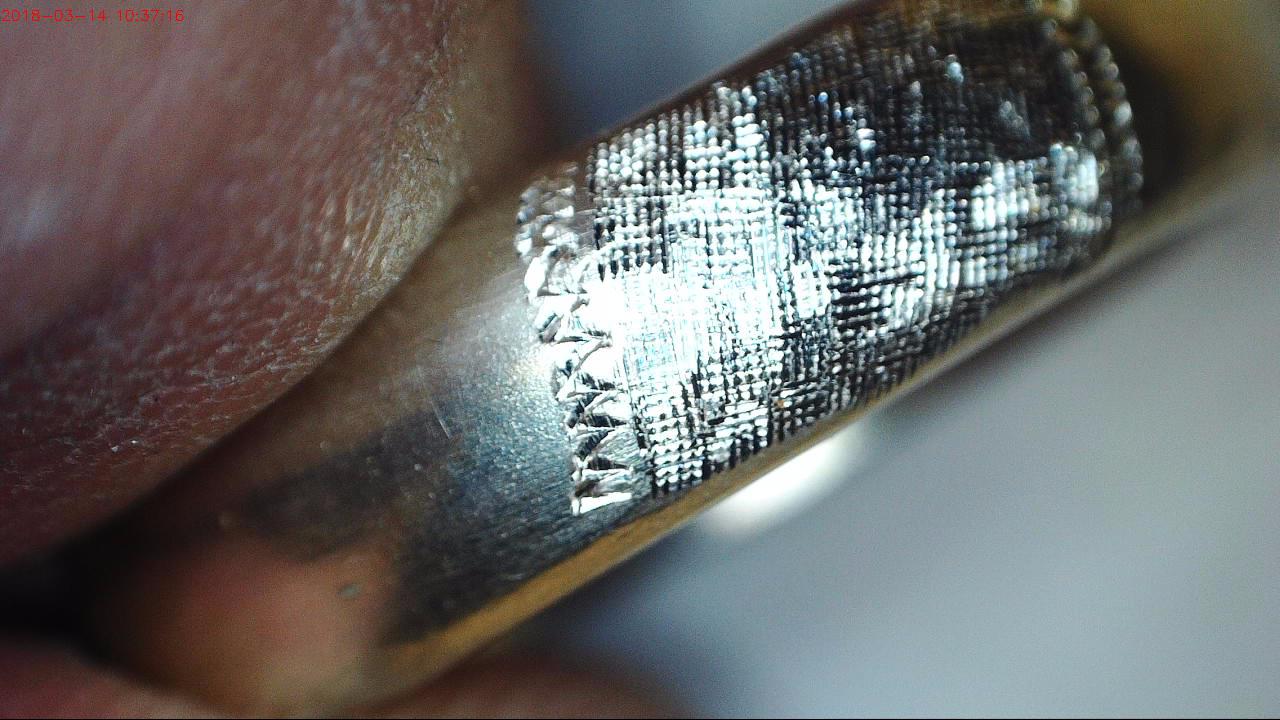
I suggest practicing simple lines or curves on any flat surface you can find, even along an unused section of a ring (as shown).

What are the following steps in completing this bracelet engraving?
Once the pattern is “Roughed-in” and also the “Preliminary Cutting”. The engraver then used his #40 #41 Flat graver and drew up the border with these Flat gravers, just to outline where the overall pattern will be. This is important!

With this very wide #41 #42 Flat Graver, he would start to again draw the main ‘flower’ in the center of the bracelet. From this point all connecting lines were then draw out to the 4 sides of the whole bracelet. This process had to almost 100% exact, as again, all secondary lines were drawn from there.
The results are now seen;
1=> All 4 borders around the main bracelet frame were drawn!
2) => All borders around the ‘not to be used’ Engraved bracelet are laid out!
3) => The ‘main flower’ was stenciled and very lightly engraved!
4) => Further “Chinese White” marking paint was applied to the other sections and further more exacting pattern are now penciled in!
5 => The engraver then was to use the very thin Flat graver #39 #40 and extend the pattern outwards. “This is where the Engravers imagination ruled all based upon his past experiences”.
6 => Having access to the very wide #41 #42 Flat graver the Engraver switched to creating the ‘Petals of the Flower’ and other little added swirls. This was to start the “Fill-In” and with more ‘outlines & swirls’ to be added later.
f7) => In between all of those “Petals” and remaining “Flat Areas” will be the culmination of this whole exercise. The Engraver uses the “Florentine Tool” to give a breath of originality to his/her craft.
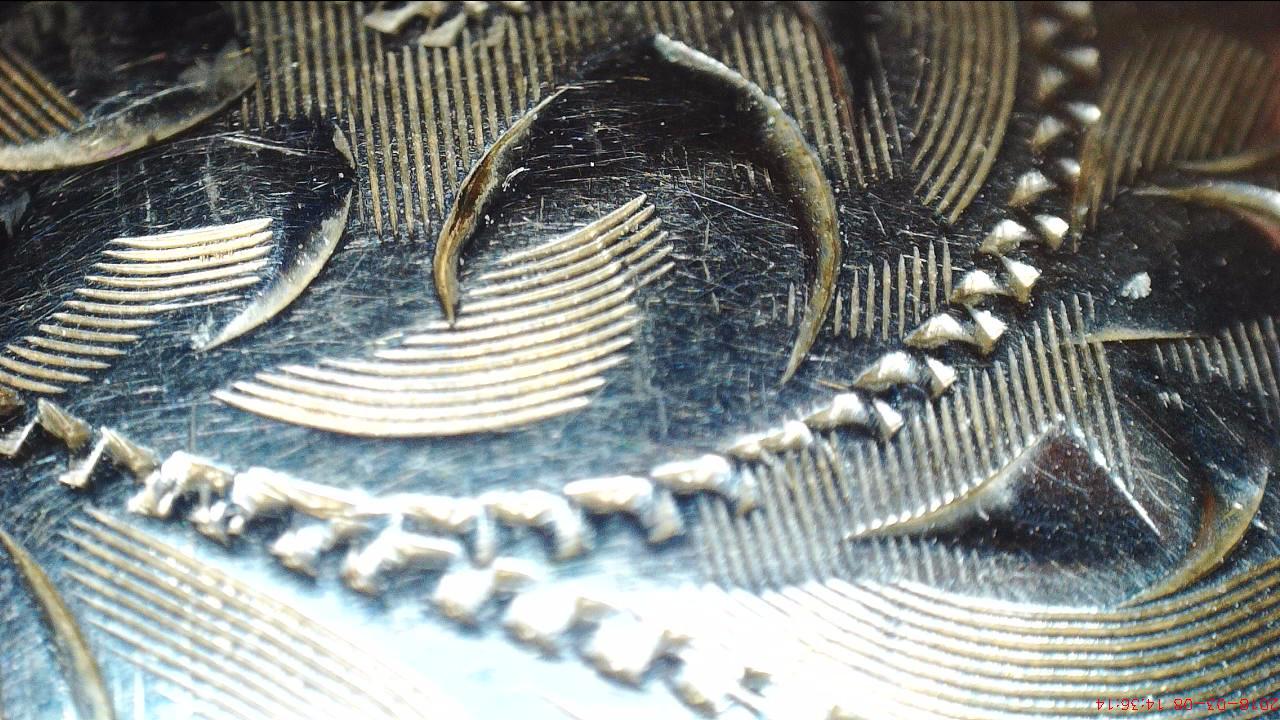
This tool gave the image of depth to the Petals and many additional swirls.
The end result is that there would be ‘no empty flat surfaces’ anywhere on the bracelet.
All of the gravers were kept in pristine condition, that upon wanting to use any graver at a moment’s notice, none of the gravers were without blemish!!!
Any chance for any graver to be not working on his bracelet, would be totally catastrophic. Slipping of the graver instead of cutting, scoring on the surface instead of actual cutting.
The Flat or Onglette graver would leave dull cuts. “There are no second chances for any original cut”.
8) => The “Florentine Tool” appears to create ‘flowers & veins’ out of a thin & flat surface.
9) => NO MISTAKES are allowed in Engraving and of course, no short-cuts!
10 => The Engraver will then sit back and examine the overall appearance of the pattern as its nearing completion.
11) => By means of using the ‘Flat graver’ blade of #40 #41, the engraver would use a “Zig-zag” pattern on the border cuts. This is done by rocking the Flat graver from ‘one side of the blade to the next’ aka ‘back & forth, side-ways rocking’ as the cutting is progressing along the surface.
12) => The Engraver will spend much time using his loupe and examine every detail on the pattern just being cut. “Tiring & exhausting” is an understatement!
13) => This bracelet needs just a very light Rouge polish with polishing cloth-wheels and this is only where absolutely necessary!
Is this a work of art worthy just for being displayed, a definite 100%. “This is 30+ out of 10 on the Difficulty Scale”.
(2,436 words)