I do silver and gold fabrication, and simple stone setting. My bench
pin is a disgrace. I see some intriguing high tech options in the Rio
Grande catalog. There is one that goes up and down. Since my chair
does that as well, I’m not sure I see the value in that. But there
are others that tilt side-to-side. That strike me as potentially
useful. Anyone have any thoughts on this topic they would like to
share?
I look at a bench pin as a disposable/modifiable to at my bench. I
replace them as I need to. I file shapes into them as I need to. I
have never found the need for a hi tech solution to the bench point
but that is more a function of my work needs and the space I have to
work in. Being a typical Tooly kinda guy I’d probably have one if I
had the bench space.
Don Meixner
Marie- Bench pins are such a personal thing. All wooden bench pins
end up reflecting the ways in which you drill file, burr and saw. I
find a well used bench pin a thing of beauty.
I have two bench pins. One is wood the other is brass. My wooden pin
is all shaped by how I hold things when I file etc. My brass pin is a
thick sheet maybe 5 mm thick that is screwed down to the top of my
bench just to the side of my wooden pin. It swivels out of the way
when I’m not using it.
It has a few slots cut into it. I use it for very fine saw piecing
because when I am saw piercing I want my metal to lie flat for better
accuracy.
As for a pin that raises and lowers? Nah. As you said My chair does
that.
Angled? Hmmm not so much. That is already built into my wooden pin.
Given how much money we all spend on tools I’d save my money for the
best basic hand tools I can afford.
Have fun and make lots of jewelry.
Jo Haemer
timothywgreen.com
Love, love, love, love the Jayne Redman bench pin!!! Did I say I
really like it?? A lot?
It is BIG so lots of room to support things.
It rotates - love that, especially when I’m cutting blanking dies
(she does a superb workshop on that!)
Mine has a metal and a wooden version, which easily swap out,
depending on what I need.
BIG pre-cut space in the middle, which I finds holds a multitude of
things very well. I do lots of piercing, and this gives me so many
options of ways to support the metal. love it. In case I hadn’t said
that… ![]()
I also like how it mounts on my bench. very sturdy.
I actually love it so much I bought two, one that I keep permanently
mounted, and one that I can move around, or take with me to
workshops, etc.
Beth Wicker
Do you use a grs ring clamp on your bench?
Hi Marie,
Funny you should mention this.
We’re just now finishing up final machining on our version of a
’tilting’ bench pin. Except ours is a rig that’lllet anything that
mounts onto a standard GRS dovetail rotate up to 45 either way.
So you can use whatever bench pin you like. You’re not stuck with an
aluminum one that’ll contaminate your sweeps and files. It also has
a little setting dial to help you automatically set it for 9.5,
10.5, 11, 12.5, 13 and 14 degree tilts in either direction, for hand
cutting blanking dies. (Hand cutting them isn’t as precise as using
our saw guide, but we thought it would be useful for people who
aren’t making all that many dies.)
Don’t know for sure about pricing yet, but I’d guess in the 75-ish
range. (We have to get some done before we know for sure what they
cost us to make. All else proceeds from there.)
Should be available from us in about 3 weeks, and the big suppliers
not too much longer after that.
Where our version came from was that we’ve gotten a bunch of
requests to make our steel bench pin tilt a bit, mostly for people
who were trying to pierce under a microscope, and wanted to tilt a
little off to the side so they could see past their frame to where
the blade was actually cutting. (Microscopes being stuck looking
straight down at the pin, they couldn’t see past the frame of their
saw.) (Of course our swivel blade clamps will let you get around
this too.)
Now that I’m almost done tooting our horn, I can explain about some
of the other toys on the market.
Rio’s “up and down” bench pin holder is intended for people using
microscopes. It lets you put a pair of GRS brackets on it, on on the
top, and one on the bottom, and switch around between them. It also
lets you put an engraving ball shelf on one of the brackets, and
then adjust the height of the ball to get it comfortably under your
scope. The problem with using your normal bench pin attachment point
with a scope is that the scope requires "X"distance between it and
whatever you’re focusing on. Which is usually a lot higher than
where you’d put your head normally. So either you drop your pin down
into your lap, or you become a giraffe. Which is where the
adjustable widget comes in.
The only reason I haven’t bought one personally is that I have a
hunk of aluminum I machined up with a bunch of different places to
put GRS dovetails, and that (A) does the same job, more-or-less, and
(B) I already have it dialed in for my scope and engraver’s balls.
But if I hadn’t already done that, I’d pony up in a heartbeat.
Our stainless pin is designed for people who’re doing a lot of
piercing. It’s stainless for a couple of reasons:
(A) it’s much stronger than all the aluminum ones out there, which
means it bounces and vibrates less.
(B) The thin metal pins let you use the full stroke of your blade,
without losing half your stroke to the thickness of the wood
underneath the pin, which is more efficient if you’re doing a lot of
piercing.
© Aluminum causes the same sorts of eutectic alloying problems
with silver and gold that lead does. Get a spot of aluminum on your
silver when you go to try and anneal, and watch it eat an ugly
little hole in your piece. Which is why we go through all the
trouble to machine ours out of stainless steel: it won’t contaminate
your files or sweeps.
The flat metal bench pins aren’t the best thing on earth for filing,
which is why you’re starting to see more of them now that the GRS
dovetails have become so standard. They make it easy to swap out
bench pins in a hurry, so now it’s possible to have several
different pins, depending on what you’re doing, rather than trying
to make one pin do everything.
Hope this helps,
Brian Meek
Knew Concepts.
(AKA the guy who normally posts as Alberic.)
There is always a better mouse trap. For 47 years I have been using
the old fashioned ones with lots of special cuts and holes for
special jobs. Cheap to get a new one and cut and file it for that
special job. I do use the bench mate system now. was the best mouse
trap in my time 
Vernon Wilson
Panama Bay Jewelers
Hello Marie,
I have never seen a ‘disgraceful’ bench pin- au contraire ~it
becomes an idiosyncratic work of art or more accurately,
craftsmanship! every hole, filed edge, burnt spot and saw mark.
reveals some important ‘feedback’ on how you work : you can read
degrees at which you hold various tools, see evidence of comfortable
angles that help you maximize your filing tasks, ad grooves to steady
’x’ task, etc but more importantly when you get your next wooden
bench pin you can use the you glean from the last to
customize it more perfectly than the previous pin from the
beginning! I must add that there are many styles of wood pins and to
a small degree it depends on the holder you already have installed
(but that can always be changed!)- but I like the hardwoods (and a
dark colour when they are available) and those with a decided angle
for everyday use. admittedly I also have one that is designed for
piercing and clamps metal sheet to a wider flat brass plate. it was
only slightly pricey but has lasted for going on 11 years now since I
tried it and realized the benefits over a standard angled pin. I also
have a flat wooden “v” pin that I use occasionally because a stone
setting/ring holder fits into the manufactured hole quite tightly.
Even though I have a grs bench mate system I find I use standard wood
pins or the piercing vise/ ‘clamp’ more often than the GRS ring
holder(it slips in my experience) or the pin designed for the grs
system.- in fact a benchmate system really isn’t that necessary! I
have tried Knew Concepts’ bench pin and at 65 bucks(and as high as to
215.00 from some vendors!!!) it’s just not as versatile as the
standard, customizable wooden ones (their saws on the other hand-
once you get used to using it -is nicely balanced and you can see
your workpiece a bit better but again, far too high a price and too
much extra space in front of my bench taken up with what I deem
unnecessarily bulky for me- I’m perfectly happy with my swiss style
saw frames with different neck sizes for various sized work!!.
Get a couple of good hardwood pins and if you do a lot of piercing
consider a brass plate (29 bucks or less) or vise/clamping type pin
(40 bucks or less)- you’ll be fine and your work will be consistent
as opposed to trying this and that fad-ish device.
As for the Jayne Redman system- simply and entirely too high priced
and not terribly environmentally responsible!(I would never have
dreamed ‘political correctness’ could creep into a discussion of
jeweler’s tools!!) I don’t want to contribute at all to rainforest
deforestation, and buying purple heart wood one does just that (some
of the species of purple heart are endangered too!) and there is a
decided health risk if you file or drill into it and breathe in the
dust repeatedly. Nor do I ever want aluminum in contact with any
metals I work in (unless alloying a purple gold and even then I don’t
introduce aluminum particles into the main studio!!) So in a word,
it’s so very not for me. Beside, you can get an entire grs benchmate
system (without the engraving block) for the cost of her purple pin.
that’s designed to fit the grs system!..hmm…
One can get carried away with tools and you must decide when you
have so many that you are losing the easy functionality of your shop
! I had to have the tools for each process that I did and I found
GRS tools for tough angles and jobs were the best.
Too many tools can cut into your profits without the proper return
on your investment.
I was a one man shop and I had a rule that was keep it simple !
Charles
My well worn and shaped wooden bench pin is attached via a GRS
system. I do use the swivel ring clamp attachment when setting or
using a graver to clean up.
Have fun and make lots of jewelry.
Jo Haemer
timothywgreen.com
Want to thank Brian Meeks for the comprehensive explanation of bench
pins!
Beth Wicker
Hi again folks,
Just because it happened to wander through my brain while I was
writing my last reply on this subject:
How many of you use (or have used) those old “rubber block” bench
pins? The ones that had the cast iron shoe that bolted to the bench,
and then they had an angled front cut into a block of 3/4" rubber
that you’d use to file against.
Any opinions about them? I just realized I had one in a drawer that
I haven’t used in years.
Regards,
Brian

Shannon, thank you for the bench pin photos. What kind of glue do
you use to attach wood to the T plate?
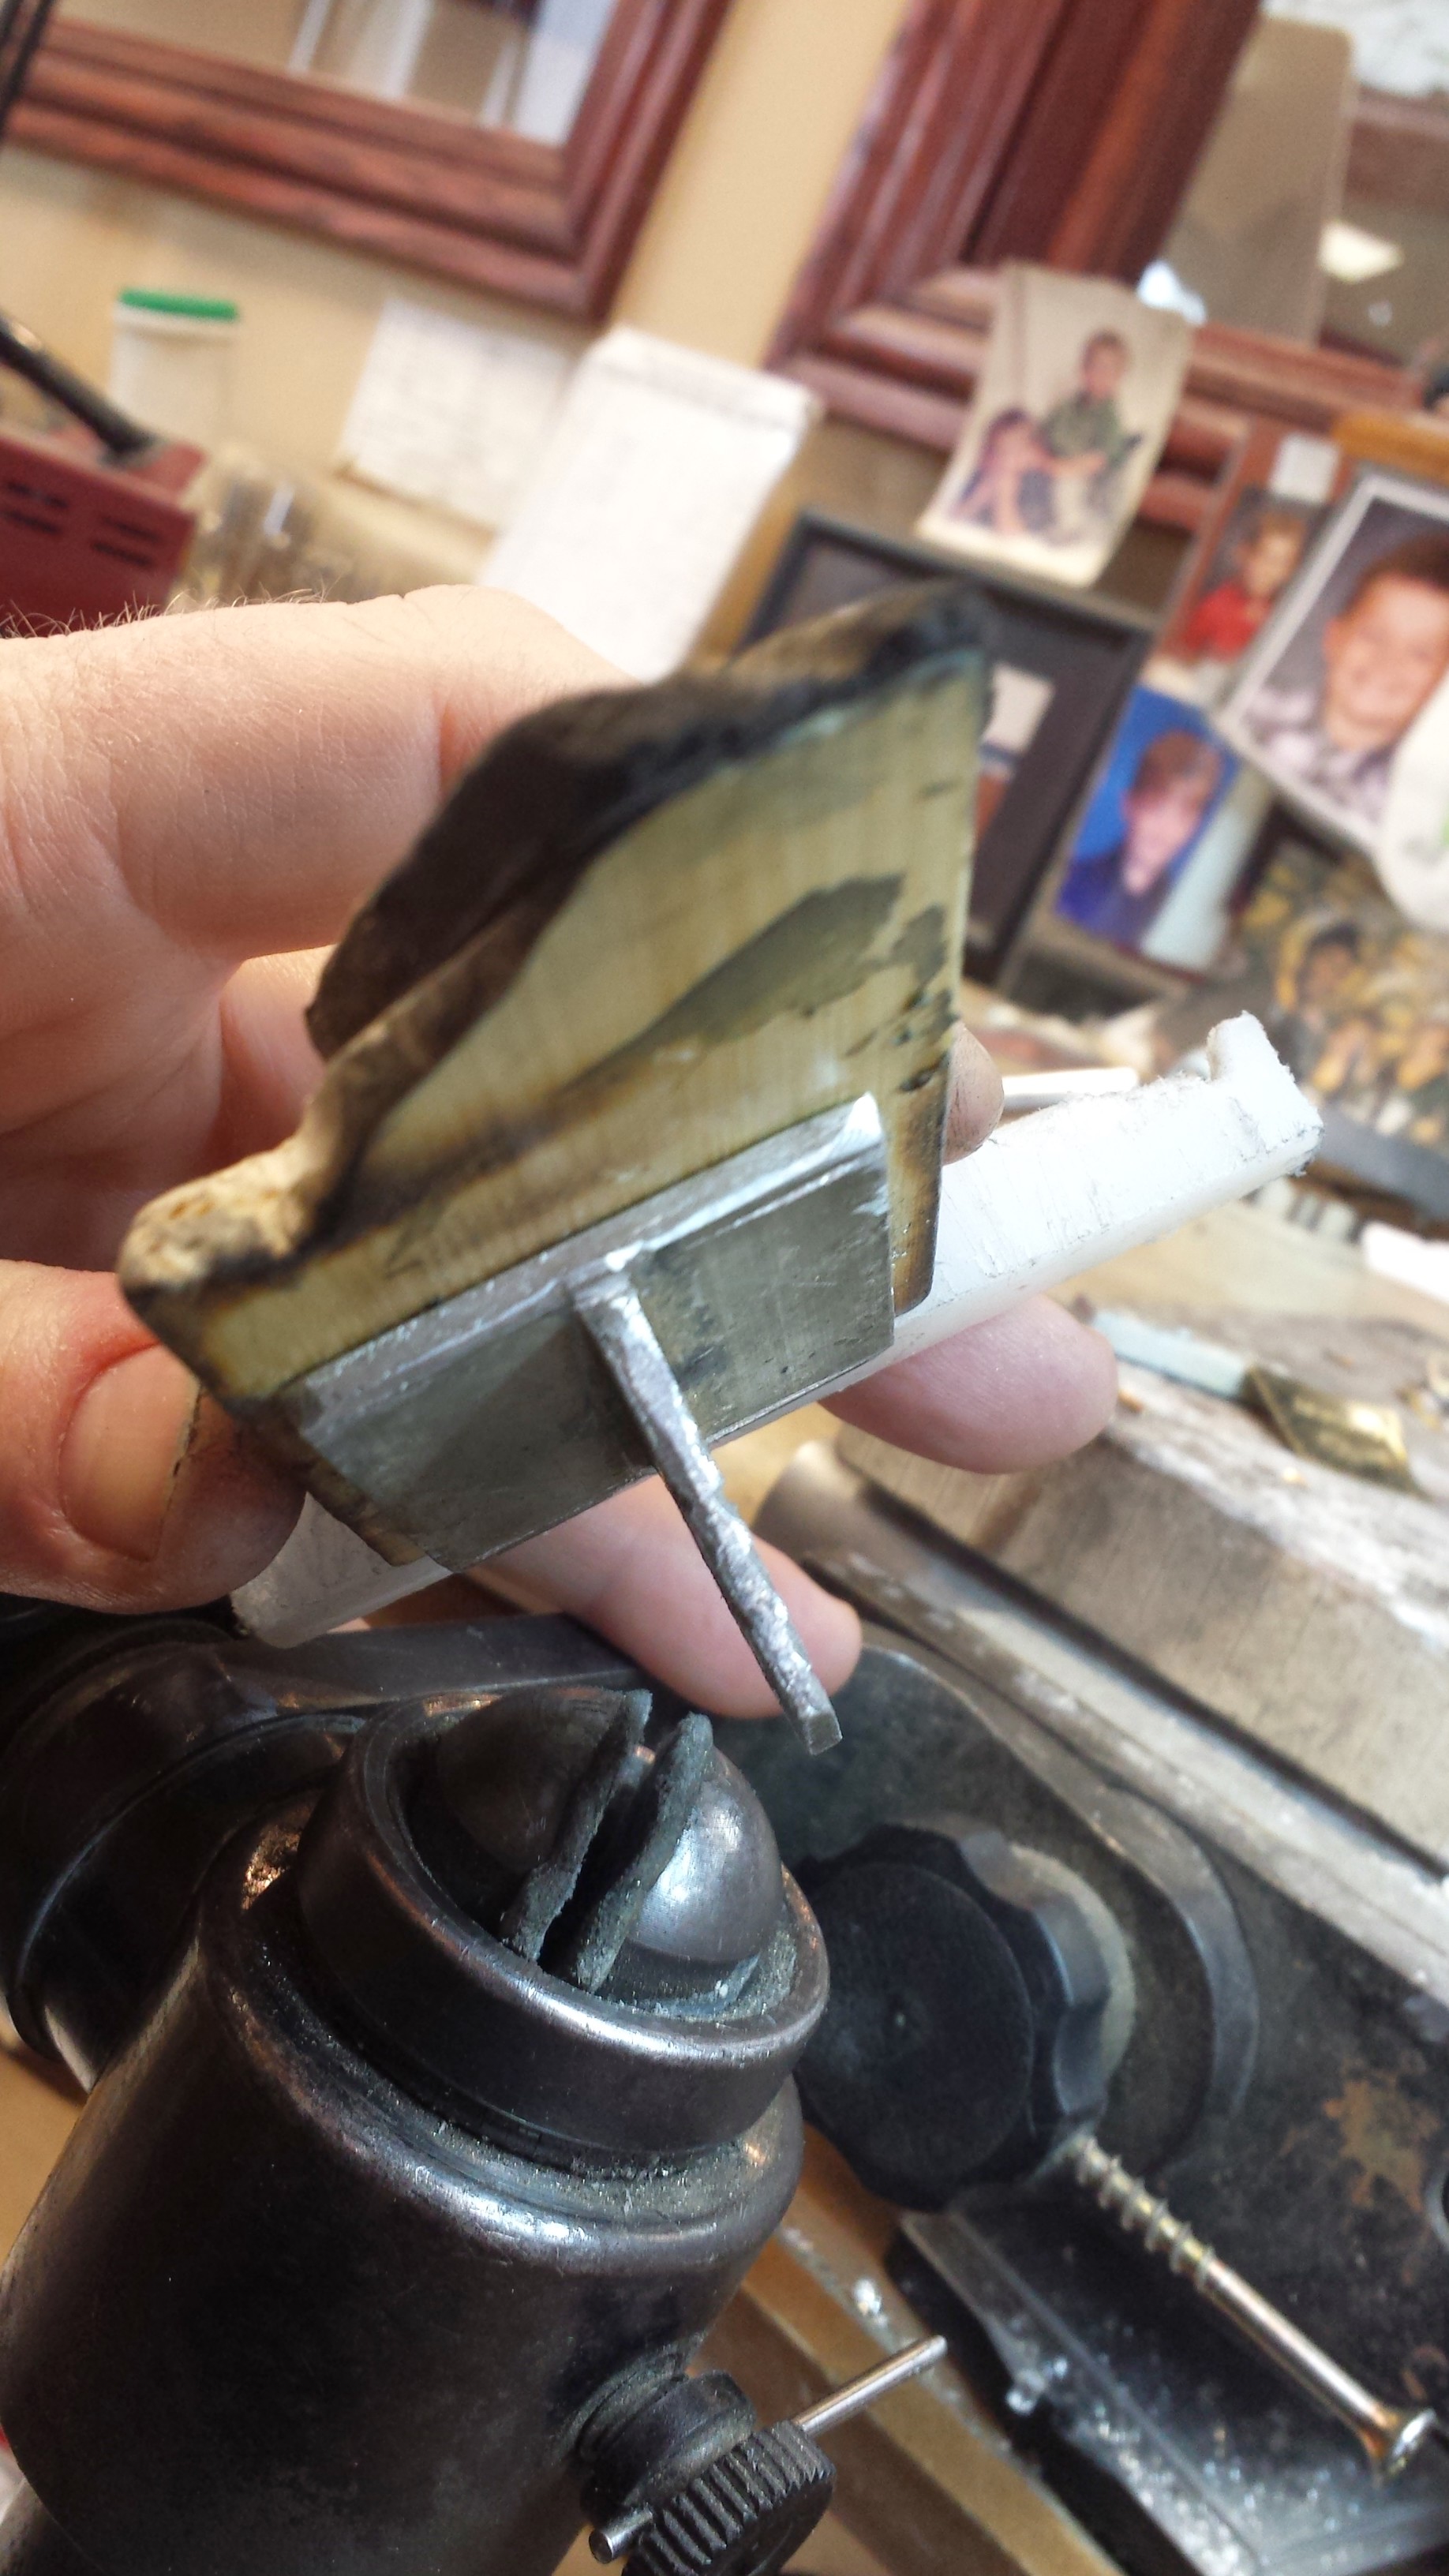
Victory!
Or, at least I’m feeling good tonight: I convinced our fancy new CNC
lathe to mill a totally asymmetric “star” onto the end of a bar of
aluminum, thus making the final part needed for our tilting bench
pin rig.
Doesn’t sound nearly as impressive put that way. Ah well, I’m
pleased. (totally hand coded, no “pray the CAD computer gets it
right” for this particular machine.)
(At Knew Concepts, we use only Artisanal, hand crafted G-code to run
our machines…)
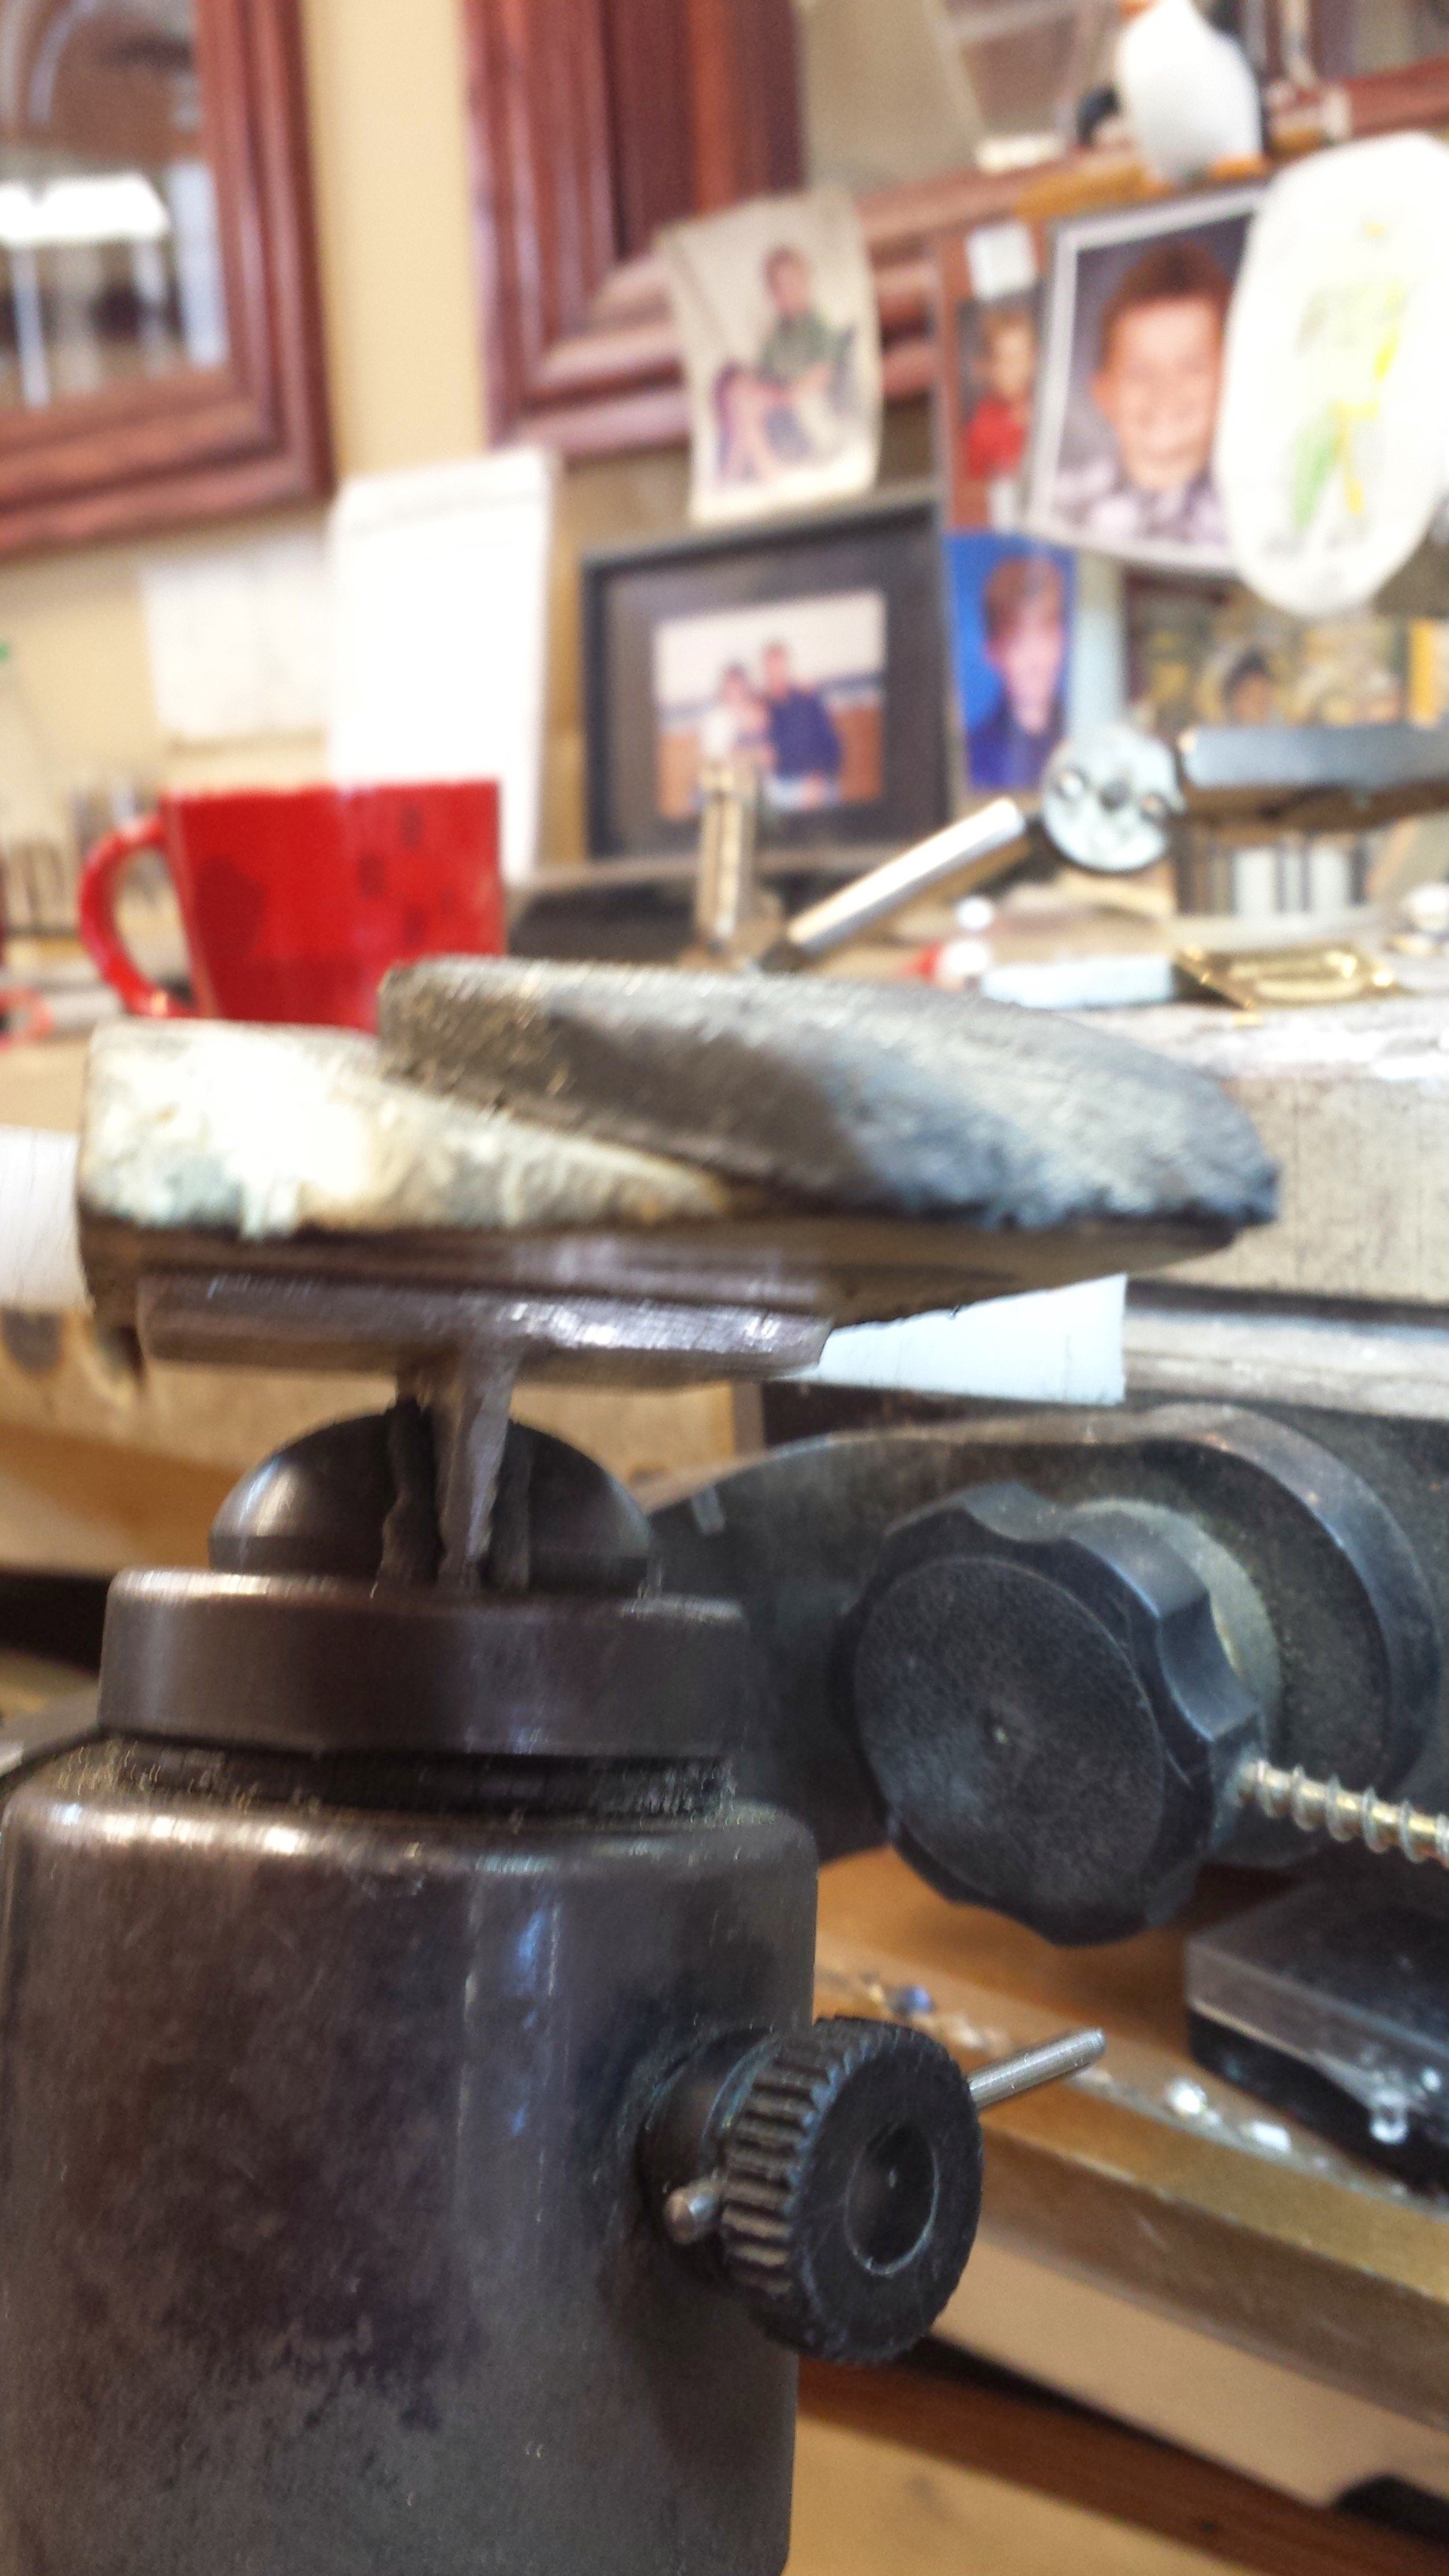
So, here’s a couple of picture of it, so that you can see what the
thing looks like. (Please excuse the cellphone camera.)
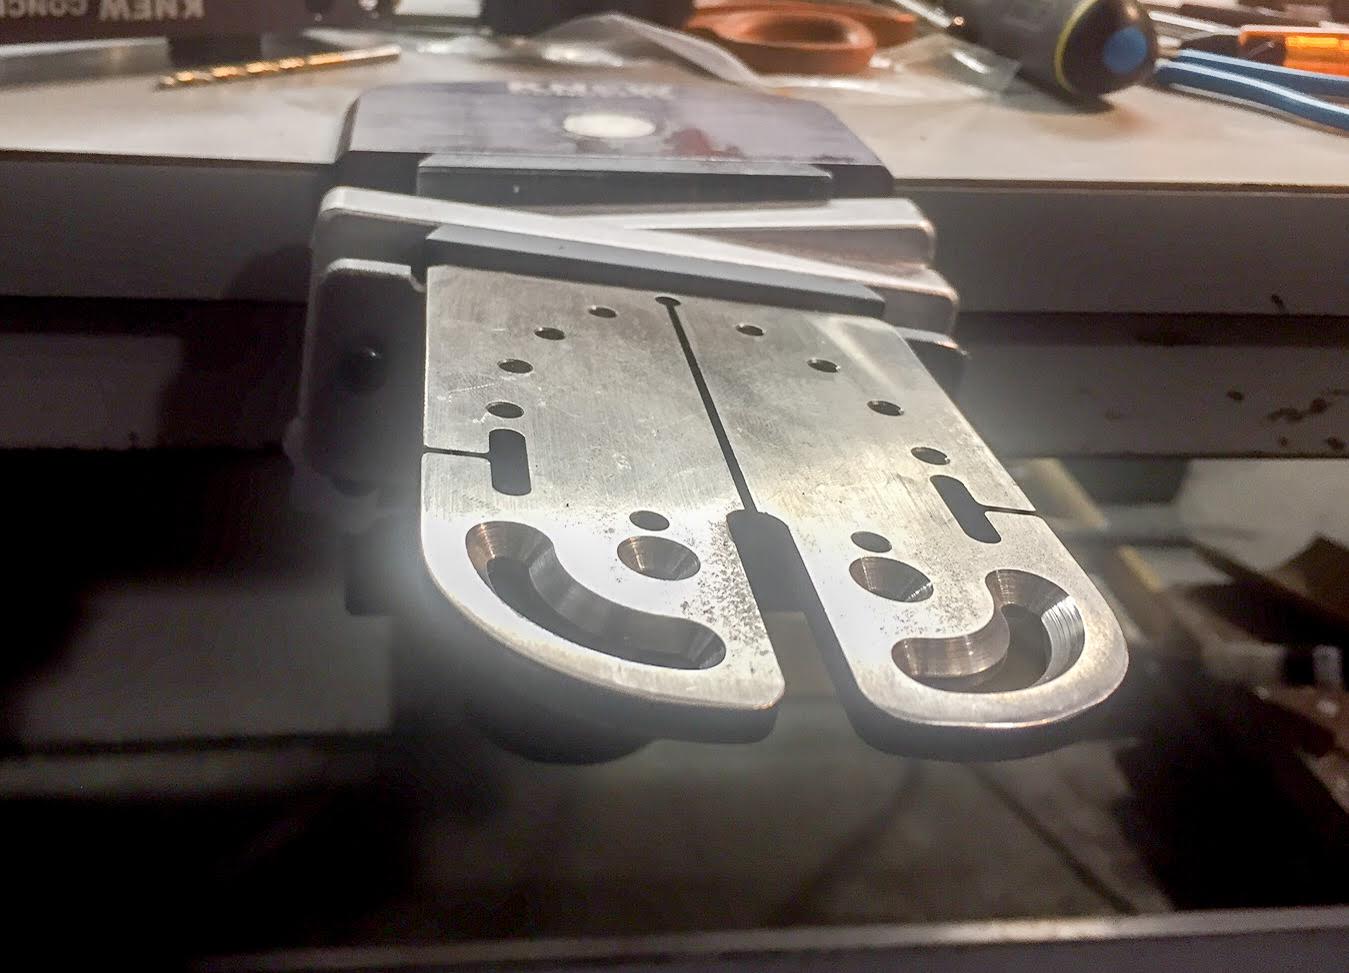
The short form is it’s a pair of plates that rotate against each
other, one of which has a grabber for a GRS wedge, and the other has
a wedge. So you can tilt anything that uses a GRS wedge. Any
particular bench pin you like, at any random angle you like. So if
you prefer to have one of your wooden ones angled side up, and
tilted over to the side to favor your filing hand, you can do that.
Or if you want to tilt one of the steel pins a smidge to the left so
you can see past your saw when piercing under a microscope, you can
do that too. Still don’t know what it’ll cost until I add up the
numbers, and they won’t be back from anodizing and laser engraving
for another week or two, but the hard part is done, now it’s all
just finishing.
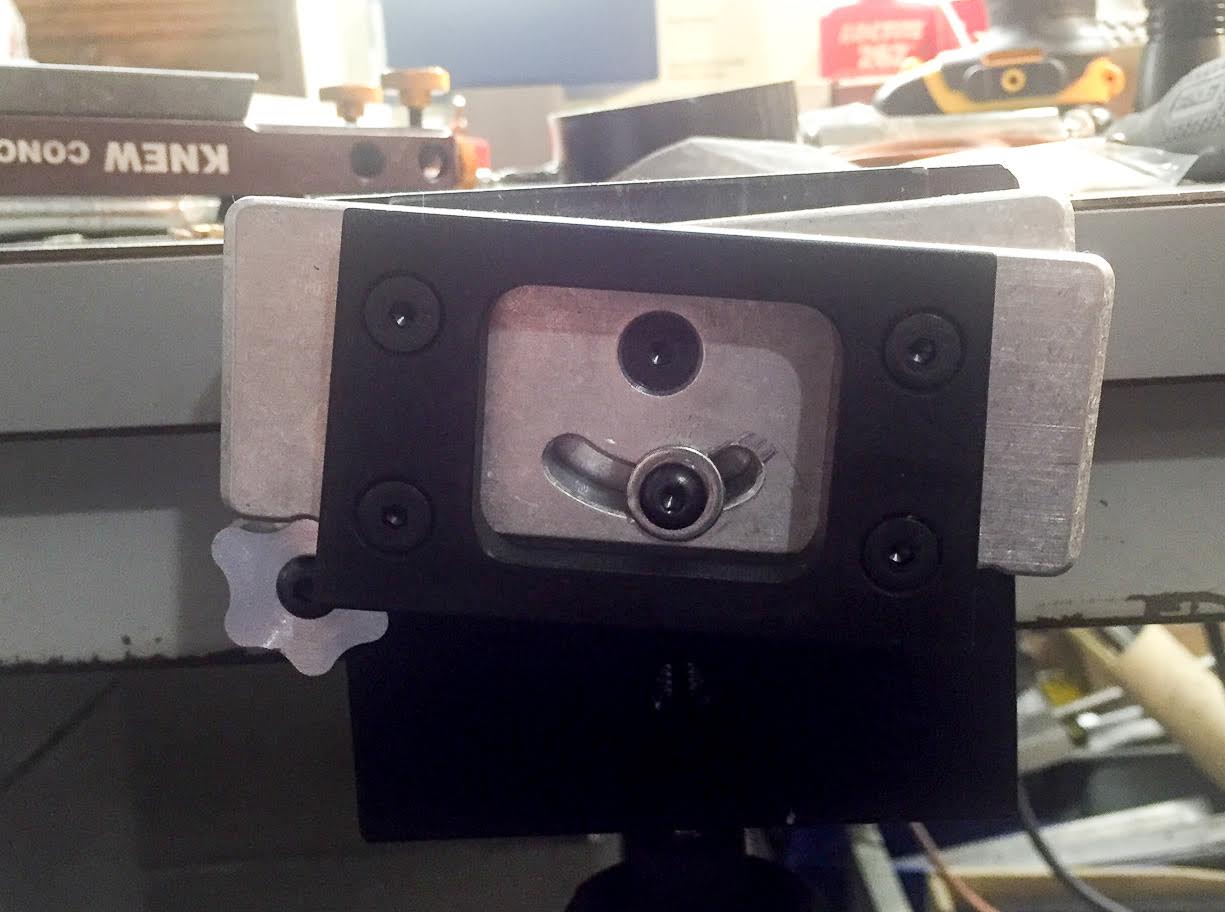
This is the very first one off the line. It’s the “put them all
together to make sure they actually fit” test. The finished ones
will be anodized that dark burgundy we use for the bench pin clamps.
(It’s what class 3 hard ano does to our normal red.) The funky star
I was machining tonight is over on the left side. It’s got 6 very
precisely placed tips to that star, which lets you rotate it around,
and use it to set the bench pin to a series of precise angles for
freehand cutting of blanking dies. It wasn’t so much getting the
lathe to cut a star that was the hard part, it was getting it to cut
that star, exactly, that was the issue. (or, figuring out what the
shape of that star was in the first place.)
Regards,
Brian
Hey Brian,
Yup. Pretty cool. One question - is using aluminum the best metal
for your’star’? I wonder about wear over time, unless there is no
play on the part. You guys make such cool things. I really enjoy
using the bench pin you make. It’s stable and has made piercing much
kinder to my saw blades!!
Judy in Kansas, who is moving lots of lush grass from the lawn and
turning that space into terraces for growing things. I’m thinking
rhubarb would be striking and eat-worthy too.
Hi Judy,
No, there’s no wear on the star. It’s basically just a collection of
offset rods. Loosen the clamp screws on the main plates, loosen the
star screw, rotate the star until the point for the angle you want
lines up with the notch in the bottom of the forward plate, then
snug it all up and away you go. The point’s a 1/4" radius, 1/4"
thick, so if you manage to wear that, you really need to buy the
sawguide anyway. (cutting a LOT of dies.)
The plates are hard anodized, and the star is normal anodized, so
there’s even less reason for wear. (the one you saw wasn’t done yet,
it was just the "let’s test them to make sure they really fit"
sample.)
You know you’ve been doing this sort of thing too long when…
I got my hair cut today. I was watching the woman doing it getting
tangled in the power cord for the clippers, and came up with an idea
for a power-strip that sticks to the bottom of the chair, so you can
plug it in there, instead of the wall, and tripping all over it.
Yes, even a trip to the barber turns into another minor invention.
Unfortunately, someone else beat me to it about 10 years ago. Ah
well. I’ve definitely been hanging around with Lee.
Regards,
Brian
Thanks for the explanation, Brian. BTW, I don’t think you can do
much better than hanging around with Lee!
Judy in Kansas
Regarding your brilliant invention and getting beaten to the punch -
the same thing happened to me. I invented a really cool thing to
eliminate friction between moving objects. Works wonderfully and can
be scaled up or down to suit objects of almost any conceivable size
and weight.
I searched patent records diligently and could find nobody held a
patent for this concept. I was really excited. Must have missed
something, however, because apparently somebody beat me to it.
It’s called “the wheel”. Dang!
Marty
I’ve tried a couple. Hot glue with a torch works best. Surfaces need
to be cross hatched with a saw. Nothin pretty just go at it worth a
sawsall.
Contact cement is a close second. SD