Advice for scaling up production in rural Malawi, Africa

Hey there Ganoksin community, been coming here to peruse all the solid advice for a while now so decided to go ahead and join the conversation myself.

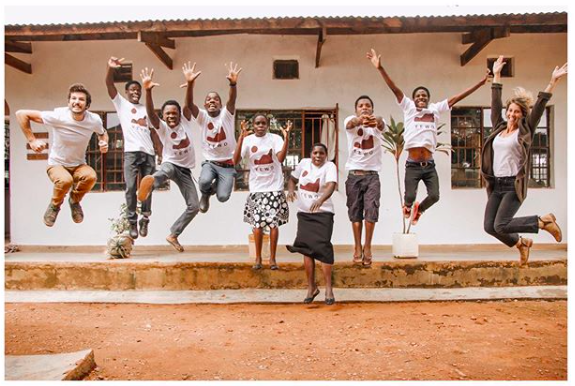
Quick introduction, my name is Kyle Snell, originally from the U.S. but currently reside in Malawi, Africa where my partner and I have started a small business training and employing people from the surrounding village (we’re about 3 hours from the closest city, by dirt roads) to create jewelry that we export for sale. Our main goal being employment and a sustainable income for our staff in an area that doesn’t have access to many jobs or resources.

We started about 3 years ago, and not being formally trained myself, have been bootstrapping it with our team of now 7 jewelers to get up and running. We’re currently making what I know is basic brass jewelry, but we are all striving to become true craftsmen/women. If anyone is interested in what we do feel free to check out our website or our instagram.

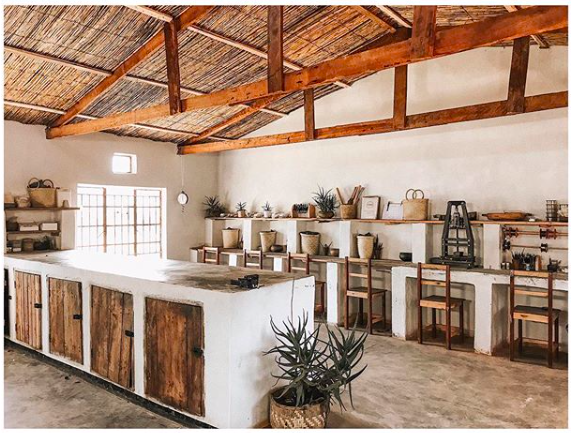
We have a small (recently solar powered, which is a REAL game changer!) workshop with a small collection of tools but looking to scale up a bit, which is why I’m here to seek advice. I’ll give a quick rundown of our current workflow and tools used. Any input or advice is welcome! Don’t be shy, we all have thick skin :slight_smile:

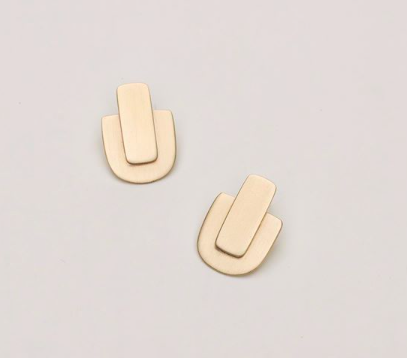
  1. Most designs begin with 20 gauge sheet brass which we punch out shapes using pancake dies that we make in house. Pancake dies are made with mild steel (tool steel not available in country).

  2. From there we grind of file the blanked shape to match a master template shape. (time consuming)

  3. Then off to sanding going through 150 grit, 400 grit, 600 grit, 800 grit, and finished with steel wool to obtain the matte/satin finish we are going for. (time consuming)

  4. Next, if the piece needs soldering it heads to that station. We have 2 ORCA torches that run on LPG and atmospheric oxygen. We solder on top of either locally made burnt clay bricks, or a block of wood. We do have handy flux, but import that so open to other options.

  5. We use a vinegar/salt pickle solution in a crockpot (thank you newly installed solar power, no more making a fire to pickle!) Then also use a vinegar/hydrogen peroxide super pickle to remove the copper visible from burning off the zinc during soldering. (we use quite a lot of hydrogen peroxide, so any alternatives are cool)

  6. Brush and clean piece after pickling, then clean up with steel wool to get a nice matte finish.

  7. To prepare for packaging we wipe the piece with medical grade 96% alcohol to remove any oils/grease from handling and then dry. Followed by a light coating of coconut oil, which we have found helps to put a layer of protection for tarnishing, especially for retail shops where people are handling the pieces. This all goes on our packaging into a sealed bag with a 3M anti-tarnish strip.(This is also all quite time consuming)

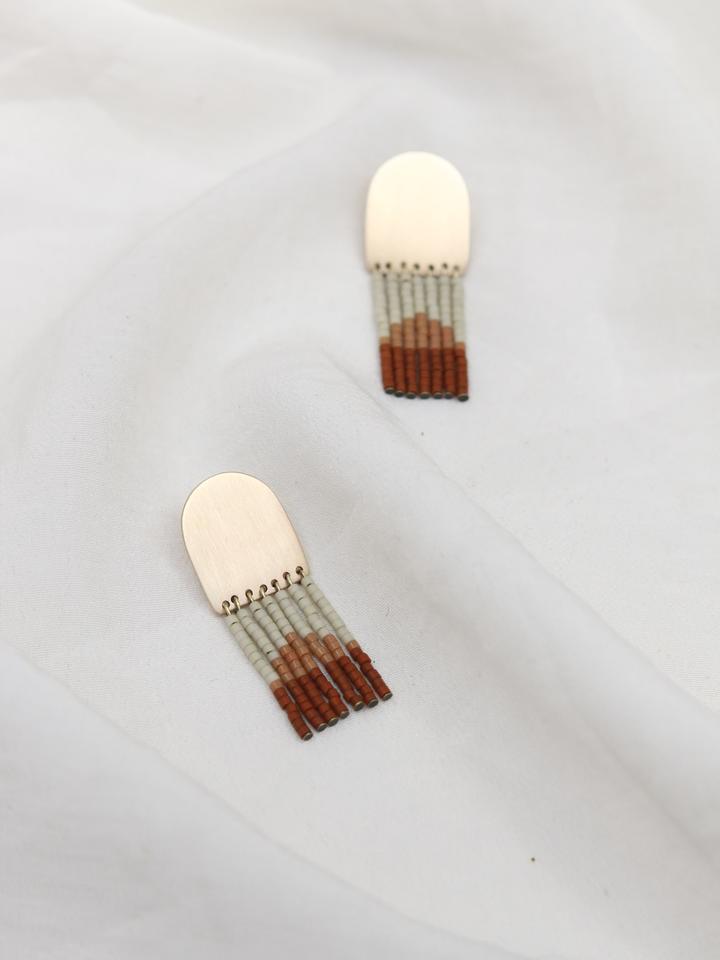
Phew, I know that was a long one, but hopefully someone can point out any areas to improve. To me it seems to be biggest bottlenecks are filing, sanding, and cleaning for packaging. But, open to any and all ideas for production methods and techniques to improve workflow! Few pictures below for your viewing pleasure, because that was a lot of words.

Screen Shot 2020-09-05 at 1.44.31 PM Screen Shot 2020-09-05 at 1.46.54 PM Screen Shot 2020-09-05 at 1.46.04 PM

Cheers!

Kyle Snell

6 Likes

No advice just a big well done!!!

Hopefully the community will weigh in with advice but I just wanna say you are an inspiration. Wishing you all the best and continued growth and fruitfulness.

Cheers Abby, the kind words are much appreciated! Humbled to be called an inspiration, most people in the village think we’re a bit nutty nuts for making earrings when the next biggest business is growing maize haha

The filing seems to be one of your most time consuming problem. First thought was electric grinder or sander. Then I wanted to kick myself. Old school from farm days idea. Electricity may not be available, but a little leg effort would be. Find an old grinding wheel that was used to sharpen knives and tools. They were big, and you sat on what looked like a tractor seat. From that seat you used leg power to pump two slats that then turned the grinding wheel. Some had water containers above the wheel to help keep the metal you were grinding cooler.

Aggie

I too have no advice but wholeheartedly applaud your efforts and hold you up as role models.

1 Like

Your doing excellent work. Kudos.
I do have some thoughts, however.

First thing: your benchtops are too low. Working at what is normal table height forces a jeweler to bend over the work in order to see detail. This is hard on the back, and eventually leads to all sorts of back ailments. The surface of a jeweler’s bench should be at about the middle of the sternum when seated, generally about 38-40" high. In the days before chairs with pneumatic height adjustment a jewelry shop would have wooden chairs in a number of heights so a jeweler could sit on one that brought the worktop to the right height for him.
At the least the benches should be fitted with bench pins. Local carpenters can make them up to your specifications.

Also, the European style, multi-seat factory bench is very cost effective as tools that are used less frequently can be easily shared by all the jeweler seated at that bench.
Here’s a photo of a modern variation on that style.


Saws, files, emery paper, pliers, etc. are kept at each seat, but less often used things, such as anvils, bench plates, dapping blocks and punches, can be put in the middle, so are easily shared. As you work in brass a tray or leather is not needed for catching filings, but a tray above the lap will keep people’s pants a bit cleaner.

Regarding your dies. You might consider case hardening them. It’s not a difficult process, though hardening and tempering the dies will take a bit of practice as it will be a home made alloy, but it should significantly improve the quality of your cuts, and probable the life of the dies. Case hardened dies should make clean up quicker, as the punch outs should be closer to the shape of the template.
For a quick look at the ancient practice of case hardening watch this clip from ClickSpring, a machinist in Australia.

For flux, borax and water has worked famously for millenia. Plain borax is sold as a laundry additive. In the US the most common brand is Twenty Mule Team Borax.
You should probably be soldering on charcoal blocks. If there are charcoal burners in the vicinity you will be able to get bulk charcoal from them and shape it into blocks. Soldering on charcoal creates a reducing atmosphere around the piece, which helps keep it cleaner and helps the solder flow.

Don’t emery your pieces beyond 400 grit before soldering since you’ll have to clean them up again afterwards anyway.

A polishing lathe will speed up your finishing immensely. If your solar array does not produce enough power for a polishing motor you could have a local machine shop make a pedal driven, flywheel lathe. Something similar to an old-fashioned pedal sewing machine, but with an arbor that will take polishing mops. Here’s a video from a fellow in Germany who made a mini-metal lathe powered by an old pedal sewing machine base.

You might try acetone instead of alcohol for degreasing. It is a very capable degreaser, has a higher autoignition point than isopropyl alcohol, and has the added advantage that if anyone breaks into the shop they won’t be tempted to drink it.

My last thought is that, since you are working in brass, you can think larger in terms of your designs. Especially pendants and necklaces can be designed more as statement pieces, since the cost of materials is very low.

Anyway, keep up the good work.

4 Likes

Hi Kyle

As already stated you are an inspiration, role models and I also applaud your efforts. Your website is a pleasure to to peruse. The the jewelry is beautiful and I wish my shop looked like yours.

I have some info that may help.

  1. Toolbox Initiative collects donations of used tools and silver and delivers them to working jewelers.
    toolboxinitiative.org

  2. An old high school pal was working in Ghana for MEST. Great guy. Let me know if you would like contact info?

  3. I am a classically trained trade jeweler with 40 years at the bench with 10 years CAD/CAM and would like to lend a hand any way I can.

  4. If you are looking for retail outlets I have some customers here in central California who would have interest.

  5. I would suggest that you contact Shawna Kulpa editor at MJSA. I think she would be very interested to do an article on your work.
    info@mjsa.org

Cheers
Franz

3 Likes

Hello Kyle,
I have little to suggest beyond the master suggestions you have already received here…I do wait for Judy Hoch to weigh in, since she literally “wrote the book” on mass finishing…but I do wonder if some vibratory tumblers would be more efficient than that monster rotary tumbler you have on order. If blanks can be sawn out rather than filed or ground, that will save time. If you are blanking from sheet, it could be that whatever scratches are there could be easily dealt with by filing or hand sanding and then start with 400 or 600 grit. Consider omitting a step or two in your rotary or vibratory system before buffing…

Your story is a wonderful one, and since stories are what sells jewelry, be sure that you include the story of how your pieces were made in the sales arena! There are many in the developed world who would like to own a piece of your jewelry and be connected to your narrative!!! -royjohn

3 Likes

Great Job and keep up the good work.

I would like to help your project in anyway I can , I am starting a Jewelry community called CLOXEY (website) , This I think would be an ideal opportunity for you to showcase your jewelry to retail jewelers all over the world.

I dont charge any commissions on sales or start up fees , Its a free service right now.

wishing you all the best

2 Likes

Since you have a modicum of access to electricity, I might suggest a rotary tumbler and assorted stainless steel shot. This will go a long way to decreasing or removing additional finishing time for scratches that are not deeper than 320 grit. It will also work harden and planish the surface adding to durability and tarnish resistance. Since you are using mild steel dies I am sure you have come to notice the burring that occurs with wear. I saw mention of case hardening and that would probably help a bit. If you could get a steel with a higher carbon content to use for the dies it would help a lot. Mild steel will usually be 1015 to 1030 which is .15 to .3% carbon content. A flat spring steel would be ideal but may not be available close enough to you (I know, relative term considering your distance from the city). If you could find something in the .5 to 1.0% carbon content it will last far longer and give cleaner cuts over its life. Also, die cuts work better when the metal being cut has a good amount of hardness, so avoid annealing to get better cuts.

Keep up the good work. I am sure many more will chime in after me.

1 Like

You know Aggie, funny enough I did start going down this route by working with a welder in the city to construct a bicycle pedal powered grinding/polishing machine. We had some designs sketched up and were starting to source parts when our business received a grant for solar power. Had a hard time justifying spending a few weeks on said project when I could pick up a bench grinder, albeit a large one, for $50 and get on with life haha

That being said, we do have a bench grinder, but have thought about investing in a couple flex shafts. We are having a hard time justifying the costs though if they are just for using a smaller grinding wheel. Do you find you use a flexshaft a lot for sanding as well or is it too difficult seeing as how most of our pieces are flat sheet? We have a few belt sanders for sale locally but the only belts available are in the 60 and 80 grit range.

But my dream of a treadle powered flex shaft type machine that can connect to multiple different tools is not dead! Just on pause until time allows me to tinker around with it. You guys ever seen the R2B2 treadle powered kitchen gadget? Think this but for a flexshaft.

1 Like

Elliot, thanks so much for taking the time to reply with so much useful information and tips, really appreciate it! A few questions/comments for you:

Fantastic point you make, rookie mistake on my end when getting the benches built. I have noticed since I sit at the bench most days as well that it puts a bit of a strain on the ol neck/back.
Do you think just cutting down the legs on our chairs/ each person has a custom cut chair for their height will be ok or will that complicate the matter of correct posture more by having a short chair?

Love this design! Our staff are a bunch of chatty Cathys all day long so I think the communal bench would really benefit their social butterfly tendencies. I’ll keep this one in mind for when we (hopefully) expand the workshop.

This is so helpful, seriously. I messed around with case hardening the mild steel by heating it and quenching in used motor oil, read that somewhere on the internet, but it seemed to just barely penetrate the surface and not make a noticeable difference. I’ll save this one and give it a go in the near future. I’ll let you know how it goes when I get a chance in the coming weeks to try it.

I read about using borax cones, but just plain ol powdered borax will do? You just have to make a past similar to handy flux out of it?

We do in fact have a local charcoal guy, I’ll place a custom order with him for large pieces. You think they will need some sort of compression to stay together, or just shape them roughly and they will be good to go?

We’re hoping with the arrival of a rotary tumbler soon to eliminate a bit of sanding. I’m thinking to punch, grind, file, rough sand up to 400 then, solder, pickle, then chuck it in the tumbler with plastic abrasive media. Sound kosher to you?

Very cool pedal powered lathe idea! Been looking at the old Singer sewing machines that are around here just dreaming up ideas of how they can me modified to use for our purposed. That guy really went all out, re-inspired me to not give up on using that resource.

:rofl: :joy: Have you been here before?! Haha, there are a few guys around that I would be worried about being tempted to come try to snag the alcohol if they caught wind we had 96% in the shop! I’ll keep my eye out for acetone next time I’m at the hardware market.

We initially started with bigger pieces, but we weren’t happy with the amount of tarnishing/fingerprints that showed up on larger pieces. The tarnish wasn’t an all over even one, it would show up more spotty, so we have strayed away from large flat surfaces more these days.

Thanks again Elliot for all the advice and time, can’t thank you enough!

1 Like

@fbroz, cheers for the info!

Funny enough, I reached out to Tim McCreight about that project and he showed interest in coming out to Malawi to visit our workshop, but then Covid happened and the world went on pause :unamused:

Never heard of MEST before but looks cool indeed. Would love to get your pals contact info, never know where these things can lead!

40 years?! I bow down to your knowledge. Honestly, any advice/tips on improving workflow and production speed is what I’m after so whatever you got on that front, bring it.

Always looking for retail outlets, we have about 20 or 25 stores now but always looking for more!

I’ll reach out to MJSA for sure, would love to get our team featured in there!

@royjohn, thanks for the info!

Do you mean hand sand up to 400 grit and then move on to the tumbler for the rest? And yes I agree about the vibratory tumbler, but can only find rotary ones on the continent, so hopefully we can make it work!

So if we are trying to achieve a matte finish, we would in this case probably use steel shot, then a quick wipe with steel wool. Would this negate the tarnish resistance the steel shot planishing action imparted? Also, you’re saying we could just hand sand up to 320 or so and throw it in with steel shot straight after that to remove smaller scratches?

The brass sheet we use comes dead soft. Any advice on how to harden brass sheet? I’ve never heat-hardened before if you know this process?

1 Like

Hi Kyle,
– Bench height, cutting down the chairs’ legs would work depending on how tall each jeweler is. You don’t want to sit for long periods of time with your knees bent more than 90°. Taller jewelers would experience quite a lot of discomfort in sitting on very short chairs.
Better would be to add another bench top at the appropriate height. Something that sits on the existing top, rather than rebuilding the entire bench. If you do that think about adding bench pins and arm rests to the top.

– Borax, yes just plain powdered borax ground with water to a thin paste.

– Charcoal, the density of the charcoal will depend on what sort of wood it is made from. Even relatively soft woods will give usable blocks without needing compression, though they will not last as long. To keep the blocks from breaking apart after repeated use bind them around their perimeters with binding wire.

– Tumbling for clean up. You can get quite a nice surface by going through several grits of abrasive media in a tumbler, but that’s not my area of expertise. Others can give you better advice on those processes.

– Larger pieces tarnishing. You should think about lacquering on larger pieces. There are several companies in the US and Europe that make lacquers specifically formulated for protecting brass and other copper alloys. While these don’t hold up on rings or anything that gets extensive wear, on a large pendant or necklace, which would likely not be worn every day, they should protect the brass for a long time.
There are also high-tech clear platings which will last years. Now that you’ve got electricity that could be something to investigate, though importing the supplies might be economically prohibitive. And the chemicals themselves may raise your prices too much.

– Heat hardening brass. The technical term for this is precipitation hardening. Most of the brasses jewelers work with will not harden via heat treatment. There was a nice discussion about this some years ago on Ganoksin. Read all the way to the bottom.

For simple brass like you’re probably using, best to work harden it by rolling it. Get your sheet a bit thicker than you need and then roll it down to the thickness you want. This will work harden it significantly. How much you’ll have to thin it to get the desired hardness without it cracking in the mill may require some experimentation.

– Cleanliness of the tools. When working with non-ferrous metals any dents, dings, or surface irregularities in the tools will show up on the work. It is important to keep the working surfaces of hammers, anvils, and bench blocks smooth and polished so that the work is not marred by the tools themselves.

Hey Kyle

You are getting some great advise from some very knowledgeable jewelers.

I do not do much mass production work but I do a lot of pre-finish work with flex shafts going all the way to final finish. I find this much safer that my polishing unit and with a optvisor while working I can see what I am working on. Note I always wear a 3M respirator as the work is in right in your face and if I was not wearing a optivisor I would be wearing safety glasses. I like to use a slotted mandrel with 800 grit emery to clean up all kinds of projects before polish. Don’t know what your solar power output is but my flex shafts are rated 1.7-2.0 amps at 110v.

I do use a Magnetic tumbler to brighten up castings. I don’t know if that would work for you as it will not remove any tooling marks.

FYI Rio Grande is a sponsor for Tool Box and Ganosin and Suller is also a Gansosin sponsor.

I will PM you contact info for my pal.

Cheers
Franz

2 Likes

Seriously great info guys, really appreciate it. I’ll look into making some of these improvements and keep ya’ll updated.

Just inquired about a flex shaft from South Africa to see about getting one up here as well.

Cheers for taking the time to give me so much advice!

A couple of things that would help you -

  1. If you could apply some kind of texture to your material, you wouldn’t have the finger printing problems. Texture can come from patterns in steel or hammers or rocks or even etching.
  2. when you punch your dies, if you cut the dies with an angled die, you won’t have the extra stuff hanging down that takes so much time to remove. Information on cutting dies is easily found in the book by Susan Kingsley - Hydraulic die forming for artists. It is back in print. Or if you aren’t cutting your own dies, Dar Shelton at www.sheltech.net does a fantastic job. The dies from him are hardened and last pretty much forever. If you cut your own, you do not have to harden them, they just don’t last as long. You can also make simple 3-d shapes with the information from the book.
  3. when I run production, I clean and smooth the pieces with an abrasive media in a vibratory tumbler. The abrasive can be in shaped media or even pumice mixed in with some plastic media. This leaves a slightly satin finish that takes patinas very well because it leaves a bit of “tooth” on the surface. The same media can also remove patina from the raised surfaces while leaving patina in recessed areas.
  4. You can get a very nice shiny surface after using the abrasive media in the vibratory tumbler, by running your pieces in steel in a rotary tumbler.
  5. If you would like more detailed information, I’m available to help. My email is judy at marstal dot com.
  6. Specifically I can help with times, kind of media and abrasive, surface texturing, etc.
2 Likes

I have a blog that would be so very useful for you. Although it is mostly geared for gemstone setting, there are many aspects of my blog where jewellery would be quite useful. Go to “gerrysdiamondsettingessays.blogspot.com”.
There are here 127 essays, where no matter where you live, these will be so very helpful. These topics range from how to sprue wax rings to the main ‘tree’ to how to set stones in wax. The reading time could be in excess of 2-3 months, to read all of these topics, word for word!.
Very soon, I will be starting to give an 8-week setting course of 1.5 hours setting session. But this is not official until the class is given the ‘green light’ sometime this week.
This is all on “Zoom”, I suggest this for everyone, including you! I wish well in your learning!

2 Likes

@judyh Cheers for the tips. We are making our own dies on an angle, we actually have a copy of Susan Kingsley’s book in the workshop that we brought over a couple years back with us, it is so helpful! We might revisit our angles as we are still getting some burs, but then again that might be from only having dead soft sheet brass, we’ll play around with hardening it in the rolling mill to see if that helps.

I’ll send you a message to pick your brain about our specific tumbling setup to see what we can improve/try out, thanks for the offer!

@gerrylewy18 I will check this out in the next day or two. We have a long term goal of getting into stone setting with gems from a local mine, so will be very useful. Cheers!

1 Like

Yewomalawi, like so many of the others here, I am impressed with what you are doing! I have been making and enjoying brass jewelry for over 40 years, so maybe I can offer a few ideas.

To cut down on your grinding time, I highly recommend the Cratex rubber abrasive wheels (available from Rio Grande and probably elsewhere). I use the 4" X 1/2" wheels, set up in a drill which is fixed upside down in a drill holder ( you could probably make your own holder – just make sure it holds the drill tightly). I use Coarse, Fine, and Extra-Fine grit wheels. File off any burs on your brass piece, then smooth the edges (or anywhere else) with the Cratex wheel(s). I go directly from there to my tumble-polisher, for a shiny finish. Or, if I want a matte finish I use my vibratory tumbler.

I never lacquer anything, but prefer to “oxidize” my pieces, using Jax Black (this stuff can be used for a long time). I dip the piece into the Jax Black until it has just turned black, then remove and rinse twice in water (if you leave it in the Jax too long, the “color” will flake off). Then I hand-rub the piece with damp pumice, removing the black where I want, and leaving it in the recesses of the design (or wherever I want it). This works well for me, and the whole process seems to help the brass not tarnish too rapidly – if it does, I rub it with a silver-polishing cloth, or with 4/0 steel wool. When a customer buys a ring, I suggest that they wear it through everything (dish-washing, showering, etc.) and they will likely never have to polish it, and it may not leave any marks on the skin beneath the ring. If there is no black in the recesses, some brass jewelry can be quickly cleaned in a commercial jewelry cleaner called Tarn-X – dip, rinse, dry (and do not EVER soak anything in Tarn-X). If you wish, I can e-mail you the list I give my customers of suggestions for cleaning base metal jewelry.

This brings up another suggestion – can you branch out into using additional base metals like copper and nickel-silver? They allow for nice contrasts in color, and copper can be fire-oxidized to a permanent red/gold/etc. color. Nickel-silver, if polished, looks almost like sterling, and can be soldered with silver solder.

With regard to cleaning off the oxidation from heating brass, the vinegar/H202 is good, but if you have access to nitric acid, I recommend that (assuming you don’t have children around your workshop). I dilute it by half, with water, and put the brass pieces in-- in seconds, the oxidation is gone, and the brass has a wonderful gold, matte finish. Rinse very well in a baking soda solution and in water, and dry. I have used this system for years, and have never had any problems with it. Of course, I do not allow anyone near that part of my work area unless I am with them.

If you branch out into different styles of jewelry, 20-gauge brass is certainly thicker than needed. When I make pins, I usually use 26-gauge metal sheet.

Well, I could go on and on. Please contact me if you have any questions or comments. One other thing-- do you ever have anyone that comes to the USA? I would like to get rid of most of my jewelry-making books (this would be about 60 of them, very miscellaneous) and would be happy to give them to you, if you can arrange to take them to Malawi. I would not be willing to box and mail them to you.

All the best, and congratulations on what you are doing!

Judy Bjorkman, Owego, NY (LenandJudy@stny.rr.com)

3 Likes