4-Claw, “Diamond Setting Techniques” (First of 8)
"Diagrams to assist in your Diamond & Gemstone Setting" (1-8)
(I am only explaining one topic at a time, the next topic will be only on “Burs”)
As there are a multitude of other Diamond Setting techniques , I am only preparing diagrams on the practices that are being used at your benches, continually!
The techniques being shown here are well into the rating of ‘6’ on my Difficulty Scale! Just sit back relax and let me do this ‘setting & explaining’ for you now!
These collected 26 pages of diagrams shown are really very easy to follow! If you need to reprint them for yourself, please do so at ‘no charge’, even give a few ‘sets of diagrams’ to your own friends.
The setting topics being explained are as follows:
Name of topic: Pages of diagrams:
A) Princess Setting. 4 pages of instructions
B) 4-claw/prong setting. 8 pages…(just now done!)
C) Burs. 3 pages.
D) Bezel Setting. 4 pages
E) Channel Setting. 1 page
F) Gypsy-Flush Setting. 2 pages
G) Bead/Pave’ Setting. 3 pages
H) Solitaire Setting. 1 page
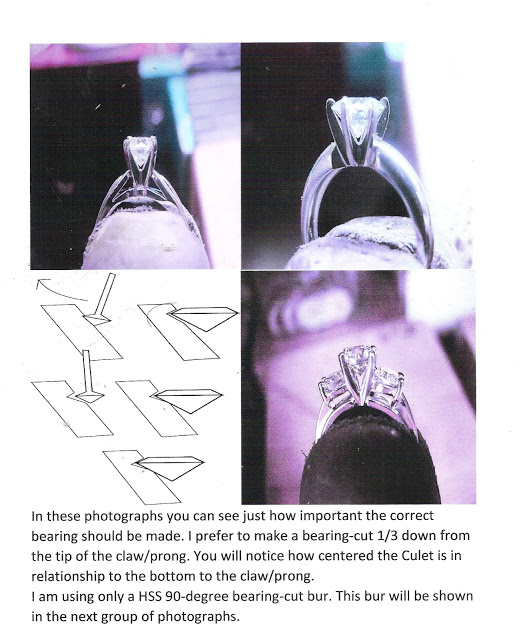
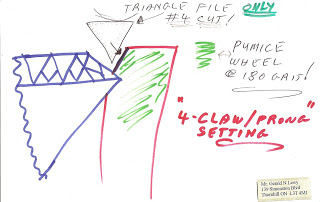
Explanation of “4-Claw/Prong setting” diagrams!
(My hand-drawn diagrams may not be perfect, the setting techniques are what you need to learn!)
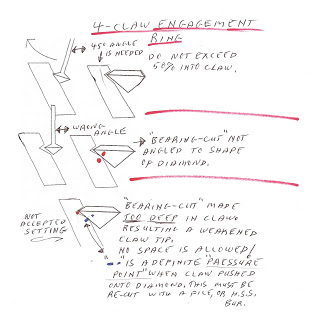
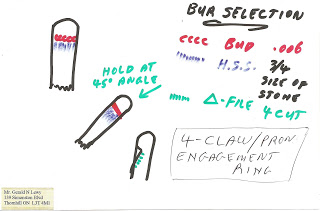
I use a High Speed Steel bur at a 90 angle while cutting a groove into the claw! Your large diamond must be sitting secure in and against ALL OF THE CLAWS!
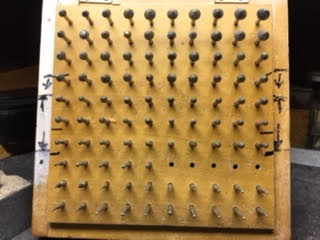
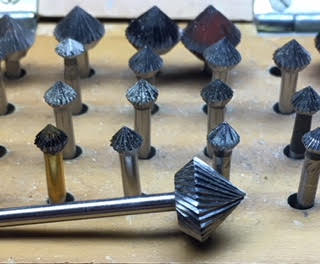
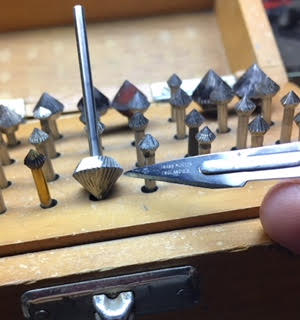
You can see just how the 90 degree angle is measured! What you see here is only 50% of my collection of burs
I never use a HSS bur of 70 degree angle, the angle of the bur teeth must be at 90 degrees, ONLY!
I’ve never seen a stone with 70 degree angle…only buy the burs with the ‘90 degree angle’.
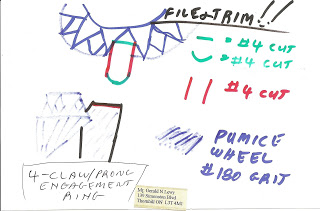
I use only a Triangle file with a number #4 cut! I use also loads of Pumice wheels of #180 Grit and also #1,000 grit (Pink wheel) these come in both Tapered & Flat Faced configuration
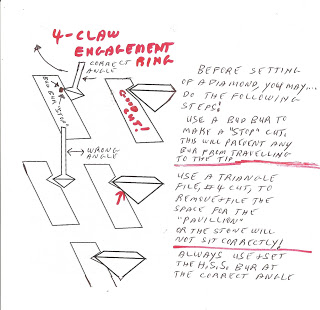
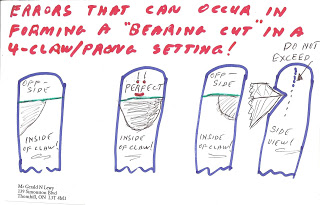
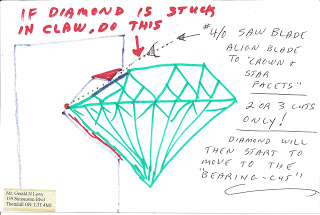
There will be (trust me) many times your diamond, or even a gemstone may be not sitting into the crevices or grooves you made for your stone.
Get your saw-frame with a saw-blade of #4/0 grit and slide the blade against the stone starting at the “Table” and cut (carefully) till your blade cuts and also against the ‘girdle’. If you use this saw as a mini-file, happily this is the whole purpose!
There is no need to remove the stone in this great little (repair) learning exercise!
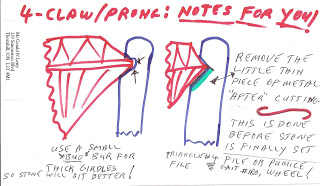
On the last diagram. you will find a little sliver of metal sitting on just one side of EACH claw!
I have only four words for you, “GET RID OF THIS METAL” not after polishing, but…NOW!
When your stone is already in the 4-claw head, and you forgot to use your Flat Graver! I’d use a very narrow Onglette #0, or #1 & keep this graver for future cleanings alongside of the claws.
(I remember a story about a jewellery store owner on the West Coast of USA sent a setter in NYC 50 rings to have set! Oh No! This setter forgot, or didn’t know about this cleaning before the stone went in. He set all 50 large center stones in the 4-claws. He returned these mounts to the store-owner, who went totally ballistic, why? He had to send back to that setter(?) every ring just to remove every piece of metal, on all 50 rings and with now to clean all of the 200 claws!) "OY & OUCH!"
This piece of metal will occur only 100% on all claws,all of the time, how do you clean this long extrusion of metal? DON’T USE A MINI-FILE, as this will leave striations on the claws. I use a Flat Graver of #40, or a Glardon #12 and from the tip of your bearing-cut, just follow down to the base of EACH claw.
I like to use my Pumice wheels everywhere I can, even in front of the claw as it’s laying on the Crown Facets. Moral of this: Where ever your file went, your Pumice wheels will surely follow!