I’ve just this moment finished my 80th essay, so what’s the big deal you ask? It consists of 45 pages of setting techniques and including 59 photographs. This is the most intensive writing I’ve had during the history of my blog which started in April 19th/2018 wh***ich now has reached 13,733 readers.***
I’ve delved into the realm of Bright-Cutting and using extensively the Onglette and Flat Gravers. Every photograph was taken with my iPhone at ‘extra closeup’ pixel range and with another close-up lens attached!
This essay was a culmination of over one month of working at my setting bench and taking photos at every step along the way. Then sending them to my computer and again putting them on my blog. THEN I wrote a text to each photograph, this is now like a ‘mini-book’.
When I was an apprentice (circa 1970), I and many of us never had this technology of the internet to reach out to so many jewellers around the world.
For 14 ‘fantastic’ years, I worked as a Diamond Setter in a large Toronto jewellery company . My duty was to Bright-Cut multiple patterns in gold and these patterns are now being shown to you in the greatest details as possible.
I chose to further display different versions, this was done for more technical clarity.
Just how important are these techniques? These designs can now be permanently added to your collection of usable Bright-Cutting patterns.
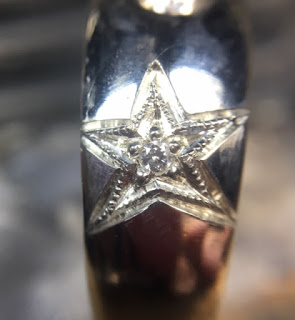
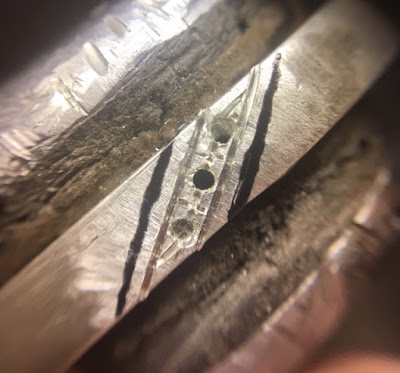
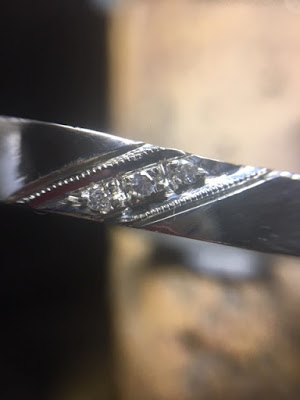
I name these three patterns #308 (5-bead, Star-pattern) , #404 (2-Bead Rectangular-design) #387 (3 stone, angled pattern) and finally a four-bead Square .
Why these strange numbers? These are the same I.D. numbers that the company named & used in their ordering department. So in honour of my earlier training, I will continue on with naming them for posterity.:>)*
The last series of 60 photographs is a basic & simple ‘square’ pattern. You notice I was not using any dividers to measure any of these patterns and in those earlier days. There was no such thing as a ‘bench-top microscope’ for us to use back then.*
These 4 rings were constantly ‘given’ to me as I had the fortune in doing every one of these rings that came into our ‘locked door, diamond setting-office’. I remember them even today (48 years later) that I used to get 6-7 rings of each design almost every day!*
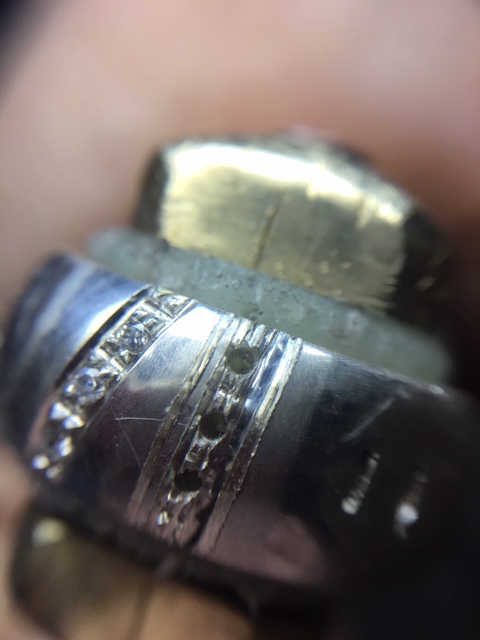
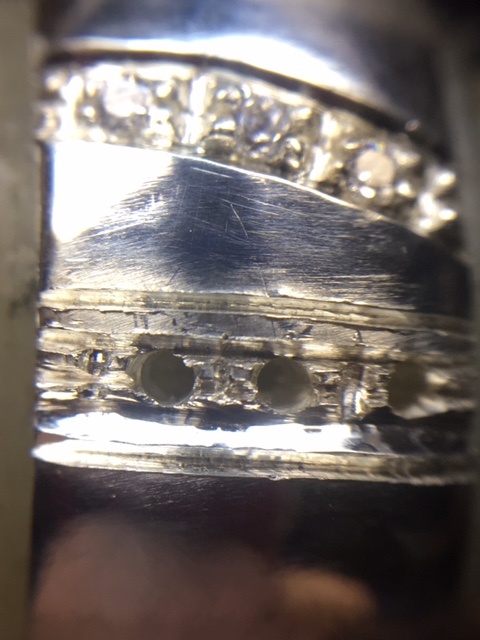
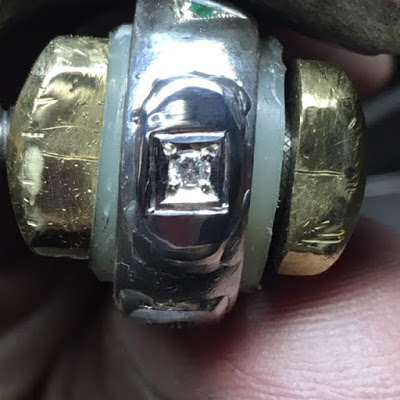
Let’s start with the ‘easiest’ pattern, the #404 (2-bead) wedding band . These rings were in 14karat yellow gold, and all diamonds were on a white plate. After the setting, all that had to be done was to do the careful " Rouge polishing ", then it was packed & shipped to the store owner.
Everything we did was done by hand, as we had no ( CAD ) " C omputer A ided D esigning" in those ‘prehistoric and ancient years’ 1970 B.C. aka " B efore C omputers".
BTW, Laser soldering used for repairs was still in the far distant future in those much early years.*
The Difficulty Scale for the collection of rings is an 8+ of 10!
As the #387 ring (3 diamond ) we all had to be so very careful in our ‘hand-cutting/engraving’. Even one ‘slip of the graver’ had to be immediately repaired…to complete perfection via a torch-repair person. We, as setters, never had to learn to solder as we had enough to do…:>)
The cutting designs are slightly different, as the 3 stone setting was displayed and cut, at an angle of 45 degrees. The 5-cornered, Star-Setting was somewhat of a detailed and challenging process!*
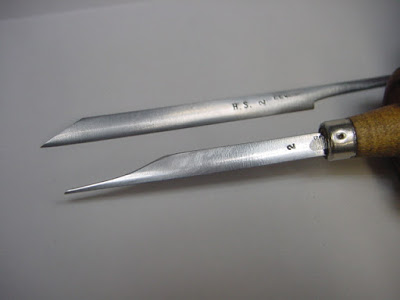
The first Diamond Setting exercise being shown here is my favourite pattern, perfection was totally demanding! The pattern is a “#404”, it consisted of two beads holding the stone. Precise Onglette #1 & #2 graver cutting was foremost in our vocabulary and still is.*
What many tools do I use on these four interesting patterns?
Onglette graver #0. YES, there is a graver with those numbers. ( I even have a #5/0) still at my bench and often used.
Onglette graver #1. This blade is used for only one purpose, and that is to cut the metal prior to the Bright-Cutting process. I use this graver (even today) as a ‘guide’.
Onglette graver #2. This greatly modified graver idea has been with me since…???*
Flat Graver #40, or a “Glardon” #12. This simple graver has only one job to do, and that is to cut a fine bright wide-faced line along where the
Onglette #1 was preparing for it
Polishing papers . I use, even today the following numbers, #240 grit Emery paper, #400 grit Emery (bit finer) #800grit Polishing paper and of course the finest and the best paper for me is the #1,000 grit Polishing paper.
"If your graver is not sharp, neither will be your cutting results…(simple as that!)"
Milgrain tool with a #6 wheel, that is your decision ‘when and if’ you need to use it!*
Just how does this little wheel do its great job? You are only applying a little downward pressure onto the inner-wall of this rectangular pattern. The wheel actually rotates along the desired edge that you now have.
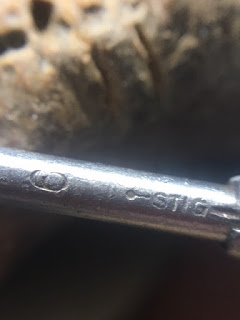
This is the name of the manufacturer of this Milgrain tool. I’ve had this tool for decades, you can see a little wearing of the wheel, but it still works great!
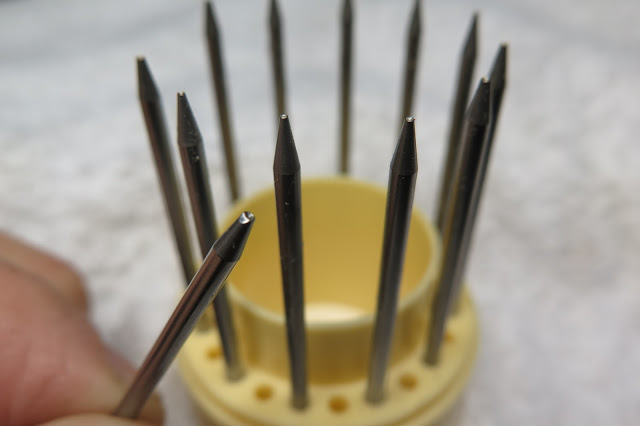
Bead-Burnisher. I usually buy the whole set of ‘small’ bead burnishers. They come in a set of 12 or 18 various sizes that can be used to burnish your small beads and you can choose which to use. The ‘little’ flat side shown near the top, is to prevent any breaking of soft-stone facets as I hold the bead-raiser in a near vertical position!
Here are in detail all of the Diamond Setting patterns that I’ve been writing about!
In this photograph (and of many to follow), you can see the beginning of the basic 'rough-cutting" processesstarting. I used only a Fine graver on my Onglette #0, or the #1 graver point. Accuracy is not fully needed, but its a start of many cuts to follow.
The second time of ‘rough-cutting’ I recut a bit deeper. You can see where the two beads starting to be created and will be now carefully ‘preserved’.
I started to cut the outline for the second line bordering the initial cuts. This gives me an opportunity to visualize how & where the Bright-Cutting will soon start.
Upon closer inspection, I’m now preparing to finish the important 'rough-cutting’ . Those little slips in the metal will soon be cleaned as this cutting process continues.
Now with my Flat Graver (my choice) #40 I’m now starting the cutting to give more detail for this pattern. I cut so there are now no flat surfaces being seen. If this fails, I’ll cut from the outside of the inner wall.
I jumped ahead as the previous steps in cutting is getting repetitious . You can see where I Bright-Cut on both sides of the “inner wall”.
In the next three photos, I chose to use my Milgrain tool #6 to give more definition to the “inner bright-cutting line”. If not the eye cannot distinguish one line to the other than the Milgrain tool does that for you. I ’ personally’ like the Milgrain tool finish and what the final effects it offers!!!
These final photographs you will see how it looks , either way, this is your choice in the final finishing process. Don’t “Tripoly & Rouge” too aggressively, then the fine cutting and Milgrain edging may be compromised!
I’m showing you how either way the ‘finish’ looks, the final choice is yours!
When the setting is done, from a distance this looks so much nicer, agree? If you just left the Milgrain effect ‘not touched & undone’, you wouldn’t be able to distinguish any of the lines or mini-walls!
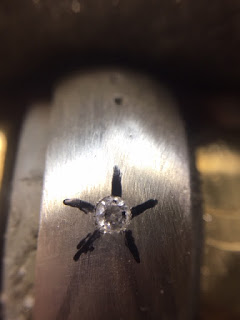
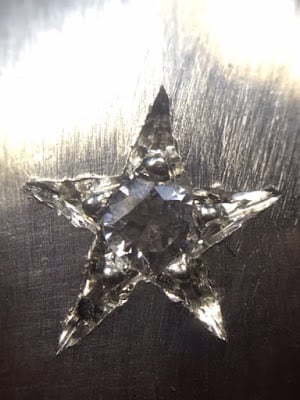
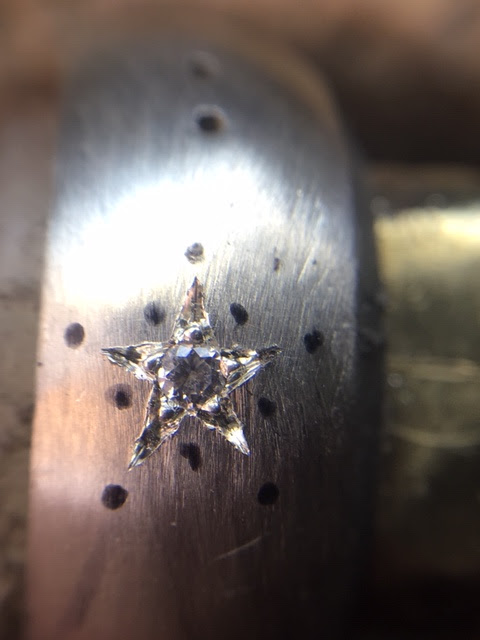
The second setting pattern is a “5-pointed” star; aka #308 pattern. The details on this project must be a minimum of 99% accurate. Much patience and graver experience is warranted and as well needed in executing the many, many cuts in the metal. Your 10x power loupe is constantly needed.
Remember that sharp graver-tips are required on all of your gravers & precision in your planning for the next series of cuts; “When? Where? & of course why?”*
The tools needed are few but so darned important; Onglette #1, #2 and of course the Flat Graver #40. I always use my felt-tipped pen to help me to plan the next series of cuts. The clock configuration is 12:00 - 2:00 - 5:00 - 7:00 & 10:00 All of these markings are drawn and try not to just ‘mark & cut’. This is YOUR guide for the many long series of graver cuttings.
This setting project is an 8-9 out of 10 in the Difficulty Scale: There is no such thing as shortcuts. BTW, this isn’t an easy setting project, trust me!!..:>) All this takes is practice, practice and still more practicing!*
After you mark out just where the beads should be created, I’d ask you again remove any unwanted markings. Decide again with accuracy just where each bead will be placed. If I make a mistake at the clock description, I can easily remove that mark and paint it again.
Now that you’ve decided where each bead is to be created , just do it now! Already I can see a little error at the bottom of the two beads…they are too close together.
How can I correct this, easily? I’ll make another bead just to the left of the 6:30 bead and at 7:00 it will give me much more room to make my many graver cuts.
Once you’ve got the beads secured, now is the best time to ‘round or burnish’ them.*
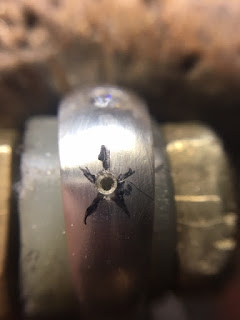
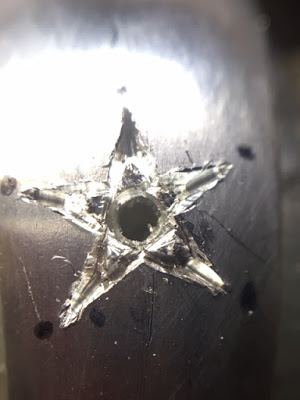
The very next step in this process is to start your cutting! The very first cut you make is to ‘clear’ the metal behind each of your 5 beads. I’d use a thicker/wider Onglette graver, I suggest a #1 blade. Just start your cut and proceed right up & behind that bead…(as shown here!) But please avoid breaking the bead, as you don’t have another opportunity in creating another.
In this up-close photograph, you can see how I used my Onglette #0 or #1 graver . I separated the metal from around each bead. Don’t worry or be too concerned about any little slips, your need is to 'clear the metal’ as we setters use this phrase often!
Now you can start making sure all of your little ‘slips’ are removed with your thin polished graver. I prefer to use a graver that is polished on ‘both sides’ for this first step in cutting.*
You will notice that all of the new lines are on the same axis and not just ‘cut and not bothering further’ in this very important step.
You will now see that marked with my 'felt pen marker’ the spots where the cuts will start and stop!!! Accuracy here is so-o important with your marking. Every mark shows where each step in cutting will take place.
The ‘marking’ in this photograph was poorly made, (I did this on purpose) it was just to show when the felt-marking pen cuts should not be continued…aka YUK!
(After my initial writing of this essay, I remembered that I missed this important step, my apologies!)
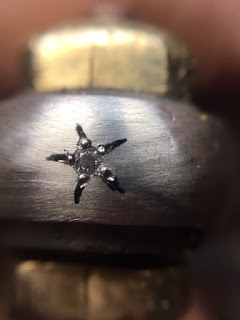
It is here I want to show where my new cuts are now being shown. Remember to keep the new beads ready for the setting of the stone. This stone setting is done further on AFTER all of the cutting is done!
It is almost impossible to cut any line when the stone is in the metal, just totally next to impossible, trust me!!!
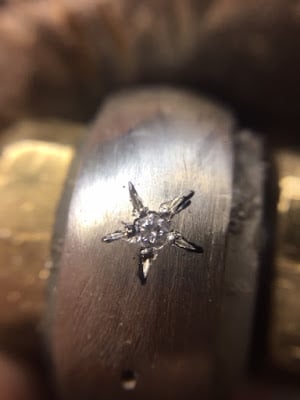
You can use your Flat Graver #40 to recut carefully and very gently all of the lines in this great pattern. Just observe that all of the lines continue across the stone and to the other side.
I’ve noticed that there is a normal tendency to curve any ‘lines inward’ at the end of the triangle. I’d use an Onglette #1 for this correction of cutting.
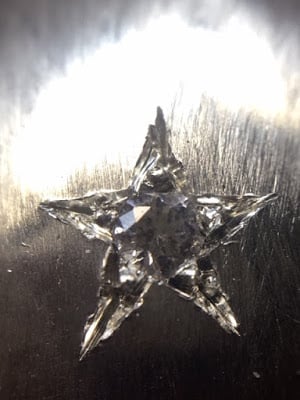
You now you can set your gemstones (of any softness), such as an Emerald, Cubic Zirconia, Amethyst, Blue Zircon or even a Diamond. You’ve done all of your cutting and there is now no risk of any sort of breakage!!!
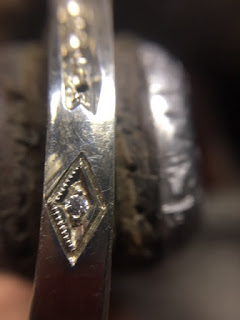
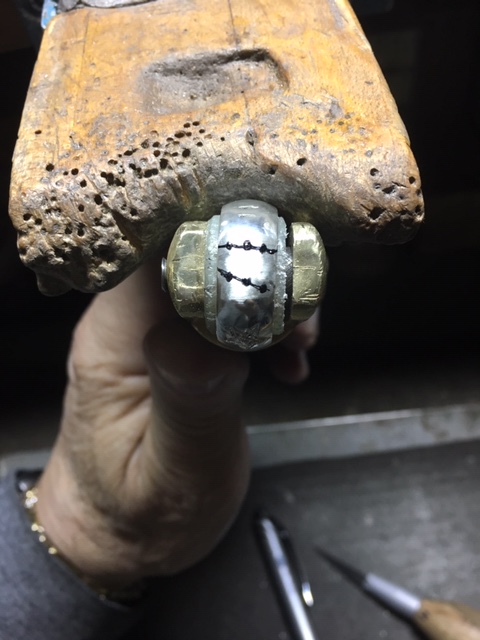
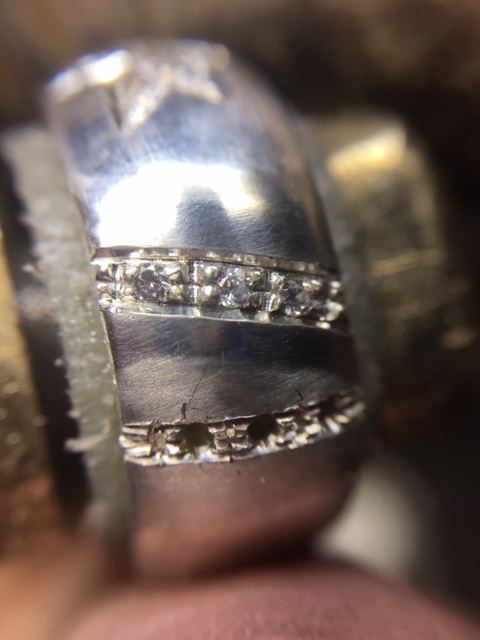
This next wedding band is a number #387:
The angle of this setting project that we used then was not important, but it appeared to be at 10-15 degrees. But this is not the issue for this essay!
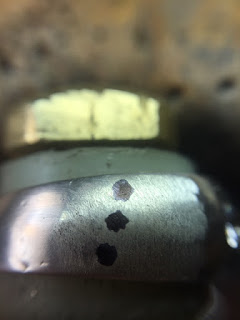
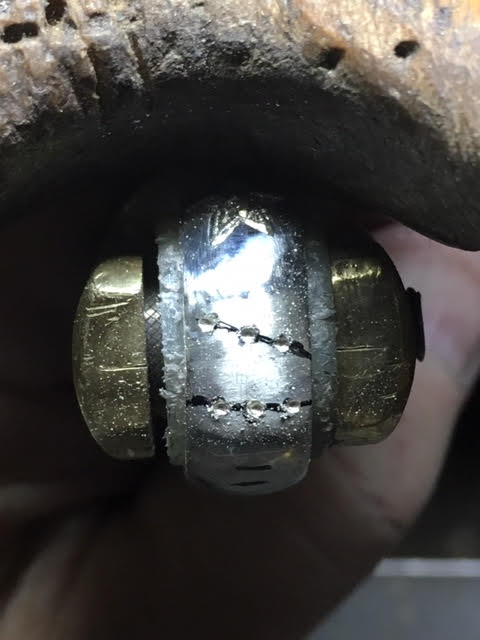
I plotted the drilling lines with my 'felt-marking pen’ as to where the drilling will soon commence.*
I’m going to be discussing ‘two versions’ of this style of ‘3-stone cutting’. Each style will be very interesting to learn about your future setting projects!*
The Difficulty Scale just for this topic is 7-8 out of 10!
This is the ‘version 1.1’ of this setting pattern:
Already you can see the basic pattern that has just taken place, the beginning steps will be shown in the next version 1.2. don’t get squeamish and think I might have missed many steps. The reason is I didn’t want to keep repeating the basic steps every moment!!*
As you can see here is that the two end stones only have three beads. I like this ‘optional pattern’ as there are many more ‘Bright-Cutting’ steps to take place!*
You can see now that I’m using my felt marking-pen at every opportunity!
With the aid of the marking-pen, I used this as a truly beneficial guide! Without it, I’d be in trouble and not knowing just where each line should be then cut.
This method of using a pen is a 'life-saver’ in this process of detailed line-cuttings.
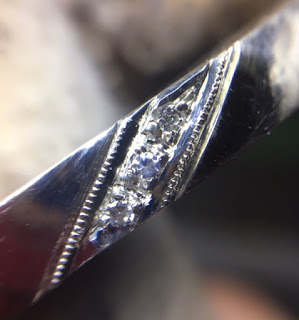
Once all of the Bright-Cutting has been completed, and then I used my Milgrain tool #6. This pattern is now finished!
No further comments on the versions “1.1 & 1.2”. Remember to keep you graver points sharp and continually being examined for any defects or broken edges. These two problems will definitely reflect in your cuttings.*
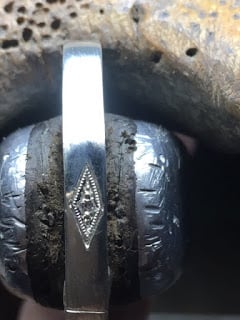
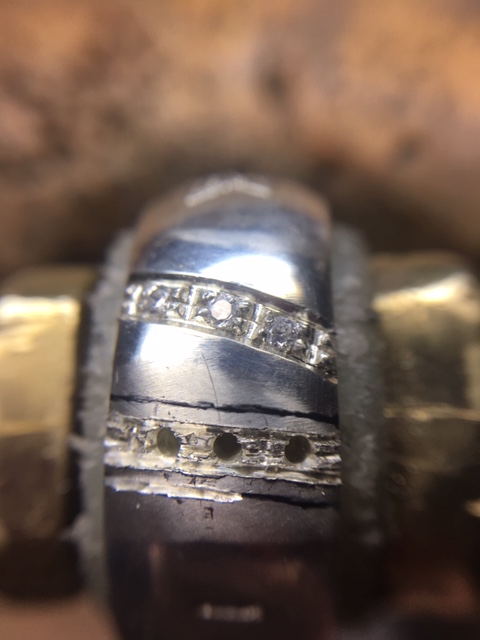
Here are second greatly detailed versions based upon what you’ve seen above: Just using my eyes I can easily visualize where the center of the 3 beads will be. From that point, I figure how much space I need for the following two stones.

This is the angled pattern, but not allowing too much of an angle. I believe an angle of only 10->15 degrees.
The angles shown here are not too be worried about. The cutting will be accentuated and of course, magnified further in the cutting processes.
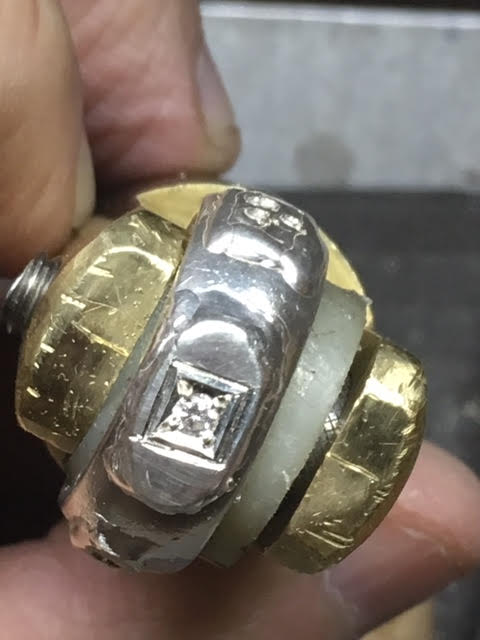
I’ve decided to incorporate two different styles of cutting into one single ring. I’ve evenly spaced where the 2 sets of ‘three stone patterns’ will be placed. As you can see, I’ve textured the surface as not to have my eyes long term bothered by the reflecting surfaces of the ring. (You should try this method yourselves).
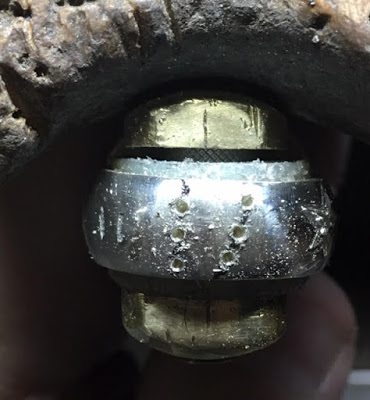
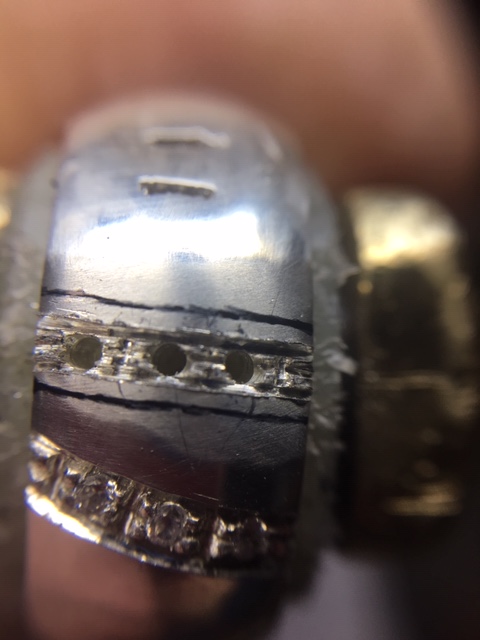
From a distance, you can see how the angles and spacing now looks. I’ve also used (again) my marking pen to use “as a guide” for the next step…the drilling of the holes!
If I hadn’t made some serious preliminary ‘light round bur’ touches on the metal, I might have been drilling in the wrong position. Even at this stage, I can still read just where any hole can be drilled.
Without the marking pen as a guide, I’d be continually be making errors in the spacing and laying out the holes for the stones.
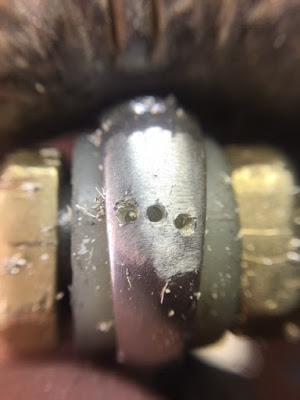
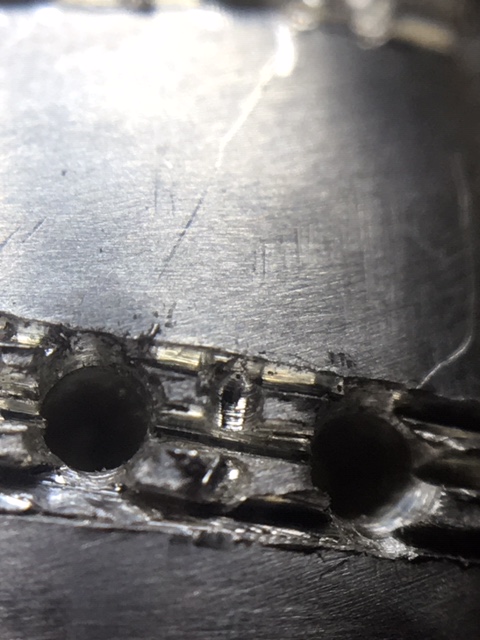
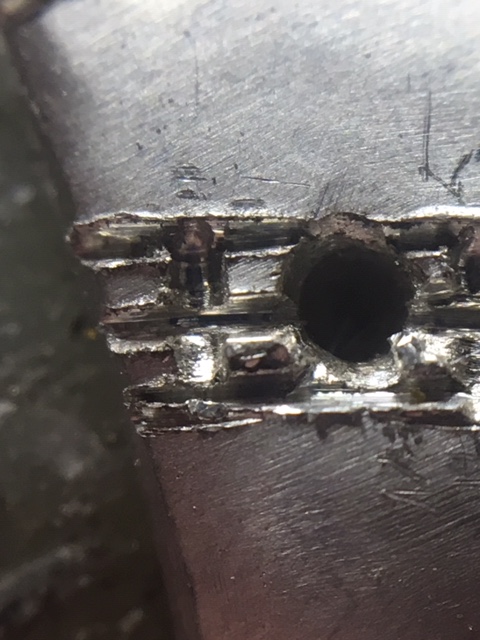
Now starts the most important stage of this pattern, and that is the ‘rough-cutting’ in using an Onglette #0 or a #1 graver. I’m taking little series of ‘cuts’ to get from one hole to the next. You will notice here, that ’the graver point actually gets right into the edge of the hole’. I’ll explain this extremely important manoeuvre in a moment so please bear with me. My teacher (48 years ago) made a comment, that this is too important not to be mentioned.
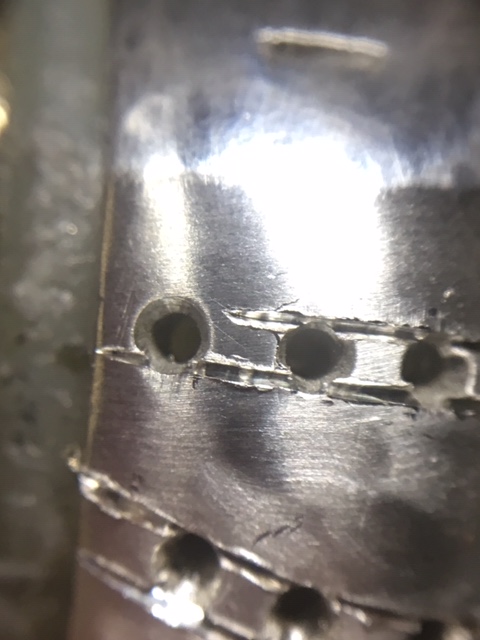
I want to make this known, that this “cutting into the hole”, can leave to some serious errors if not attended to NOW! In fact, I use a #006 Bud shaped bur to removed any metal on the edge of the hole. If not, ‘disaster looms’.
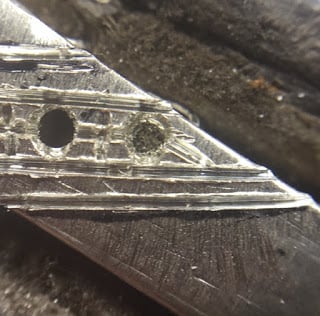
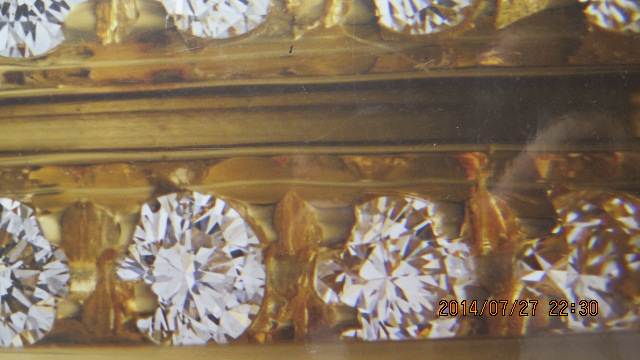
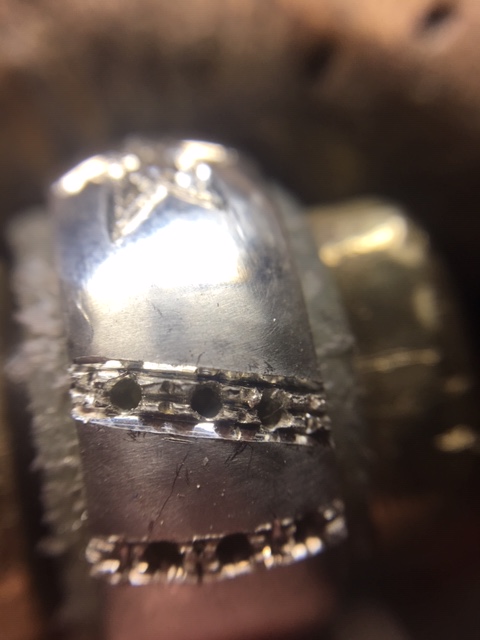
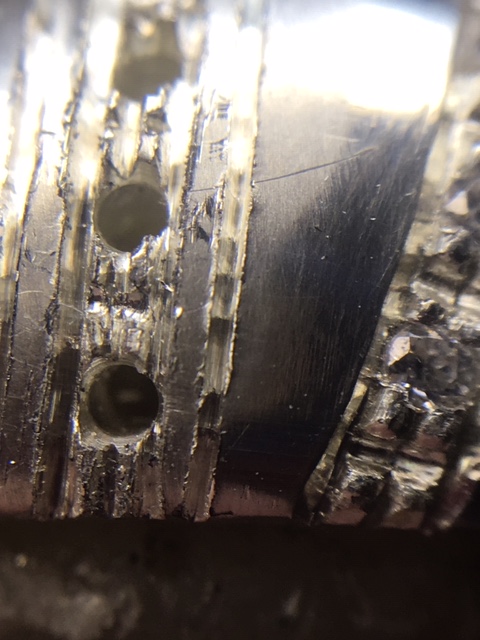
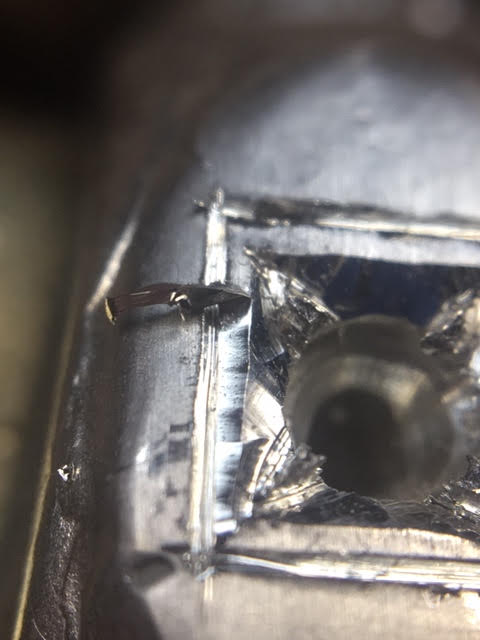
The next two photographs will clearly show how the previous setter made many errors in not knowing about what we’re reading here…:>( OUCH and totally ugly sight to see! This is featured in the (name withheld) magazine and this is the reprint.
Not only did this setter set the stones, not in line, but it looks like a disaster (in my opinion). His graver point went around each of the diamonds and you can see how it looks. In my estimation, this setter was rated as only a ‘mediocre’ tradesperson. I won’t tell you or anyone where these two photographs appeared, but the fashionable jewellery company had no idea what quality they were selling.
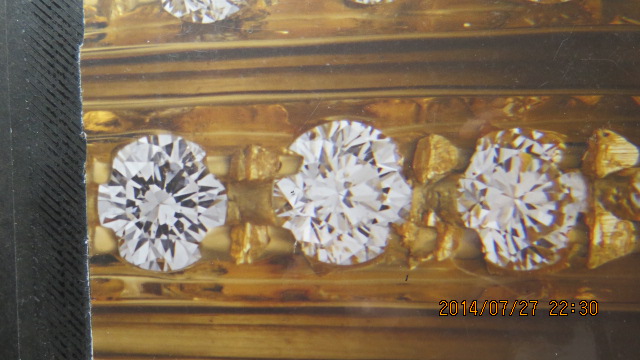
I tell my students, this setting is “good at 3 feet away, but not up close”!
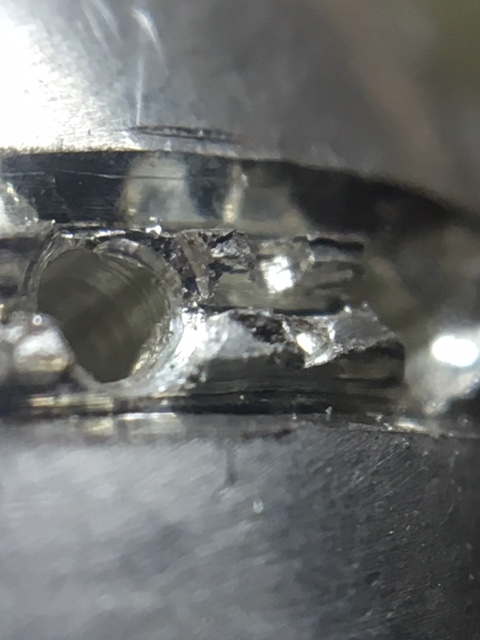
Before I start the Bright-Cutting process, I prepare to create the many bead/claws that will eventually hold the diamond. I am using only the smallest bur available, that is a #006 Round bur. With this bur, I’m separating and as well carving out the beads…NOW! This is done prior to any final Bright-Cutting, never after the fact!
If my bur hits the rough-cutting wall, that is not a problem as I’m going to clean this area thoroughly. Can you now see how the edges of the holes are in decent shape and no metal residue must remain?
Even if there is a glimmer of an ‘edge’ remaining, then the drilling of the hole to the diamond, more of the ‘edge’ will be cleaned more so.
While "attempting to set the stone" sometimes the stone might be of a thicker girdle, a problem arises. The answer is so simple; “how would the stone sit flat and not being crooked”.*
I use many times (even today while doing this demo) a 156C ‘Undercutting’ bur (this bur must be smaller than the stone) to actually make a little seat inside the hole…just where the girdle of the stone will eventually rest…How simple is that?
OMG, there is still some metal on the edge, and the graver didn’t get to where the hole is with the stone. I’d get my Onglette #1 and recut ‘gently’ as in “get rid of the metal”…again, NOW! Don’t leave any metal like what was previously shown in the magazine photograph.
Get a Bead-Burnisher that is slightly larger than the bead/mini-claw and press over the metal gently! The metal will bend over easy as the undercutting action will allow the metal to move easier.
Once you are gently rolling the burnisher over the stone, try not to have the tool sit vertical, why so?
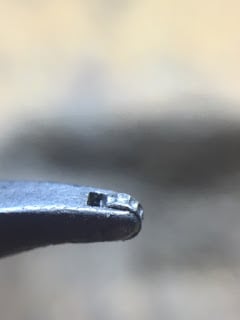
The bead-burnisher might damage the Facets just above the Girdle. That is why I remove a section of the burnisher tip (on the side), also being shown in the " Tools Needed " photograph.
Did you see the little facet near the tip? That will be right near, or on the stone now leading to never damaging the stone Facets
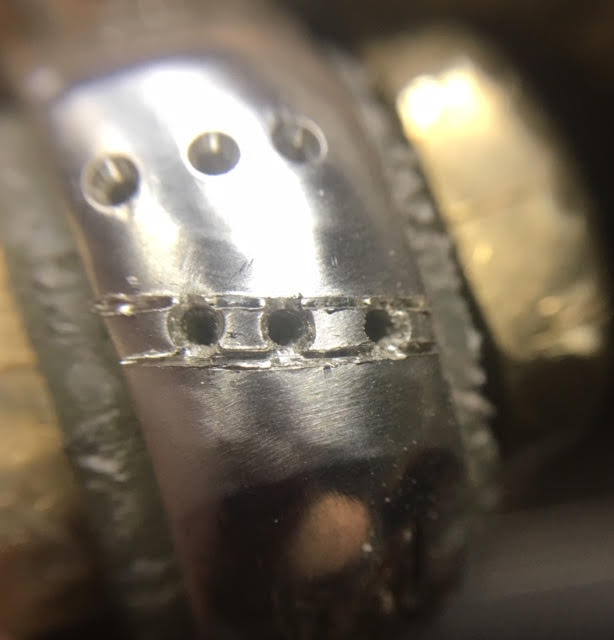
I turned the ring around, as I wanted to start cutting for the next pattern. You can see that my felt marker pen line (that I just drew) is showing me where to start the ‘rough-cutting’ process. I leave ample space between the two lines for the Bright-Cutting stage afterwards.
My Onglette graver #0 or #1 is starting to cut, never in one long line…but in a series of short and brief cuts. I have MORE CONTROL where the graver is to cut!!! This is not a habit…but a rule!
Just for the space of three stones, I’ve been cutting 12 little cuts. This way I won’t have any sliding around with the graver point. Basically, I have much more control of the “graver to metal ratio”!!!*
"KEEP YOUR GRAVER IN A NEAR VERTICAL POSITION WHILE YOU ARE DOING YOUR INITIAL ROUH-CUTTING"! (These are the words from my instructor & teacher 58 years ago and his teacher before him…both from Ireland !)
Don’t even think of thinking of leaning to one side. You will be literally removing the chances of a great Bright-Cutting process. Let your Onglette #2 do the leaning.
The leaning of your Onglette #0 or #1 will destroy your preparation for the Onglette #2 “Right-Sided cutting blade.”…Should I repeat myself again?..:>(
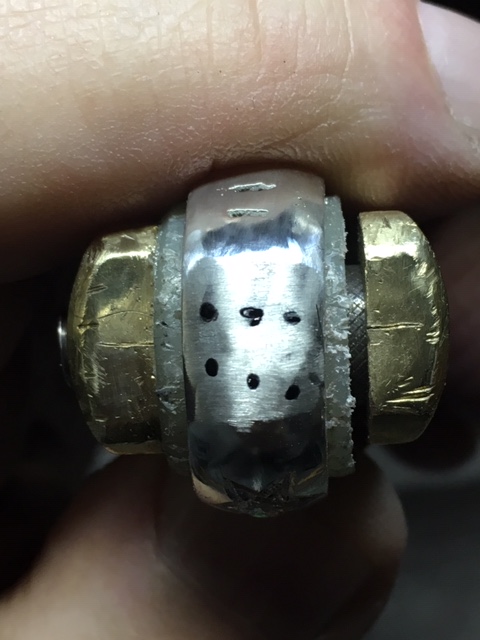
When I start to set the stones, the drilling will 100% remove any residual little amounts of metal near the hole for the stone that’s going to be soon set. Prior to the Bright-Cutting, I will make an earnest effort in cutting deeper in between the beads with my round #006 bur. Once the cutting starts, nothing must then be touched.
I’ve been cutting much deeper now and I’m ready to start the Bright-Cutting process. Don’t even think of using a tapered Bud shaped bur, why not? You might just inadvertently touch the walls, use the round bur, please! I use laterally the Onglette graver #0 to separate and then forming the beads/mini-claws! When you start the Bright-Cutting, ‘game over’ for any sort of Rough-Cutting.
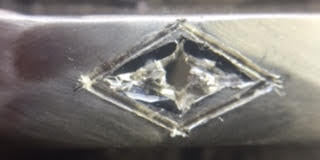
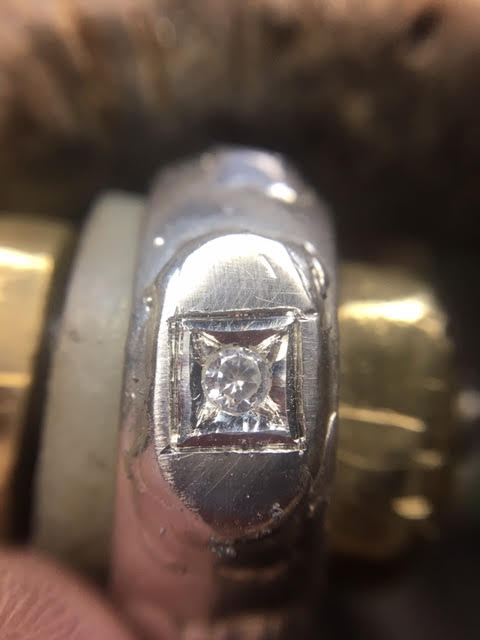
As this is the last of four examples in this long essay, I’m sure by now you can see just how important are gravers in Diamond Setting. I call then a ‘Symbiotic Relationship’! You can’t manage to set diamonds without some sort of knowledge of using a graver. As you can see for yourself, they are so terribly important. Now for the last feature, let’s get started, shall we?
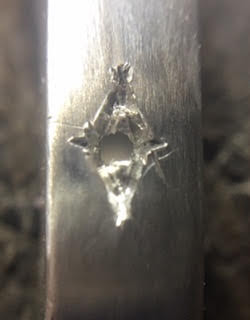
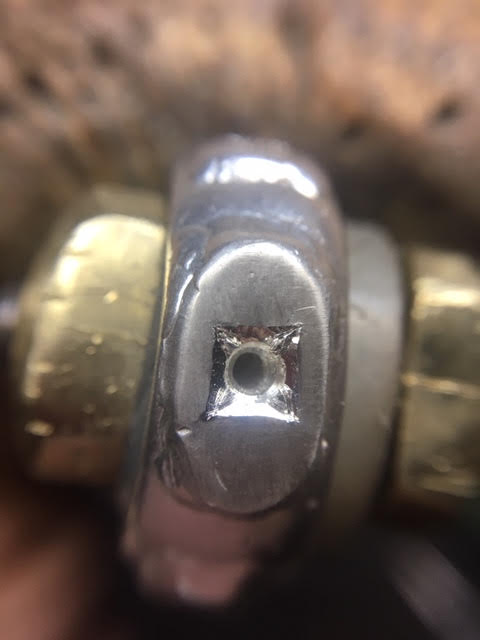
After preparing to open the metal to at least 90% of the size of the diamond or even a soft gemstone. You can use your ‘felt, marking pen’ and draw a square frame around the hole as shown below. Accuracy is not too important, but it helps.
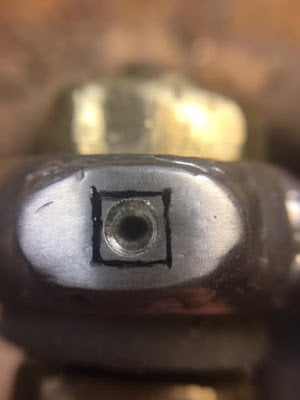
You should now draw four lines, as shown here! These four lines are where you will start to prepare the beads further on.
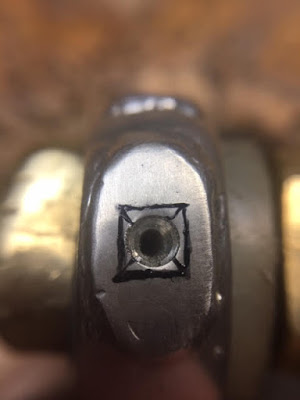
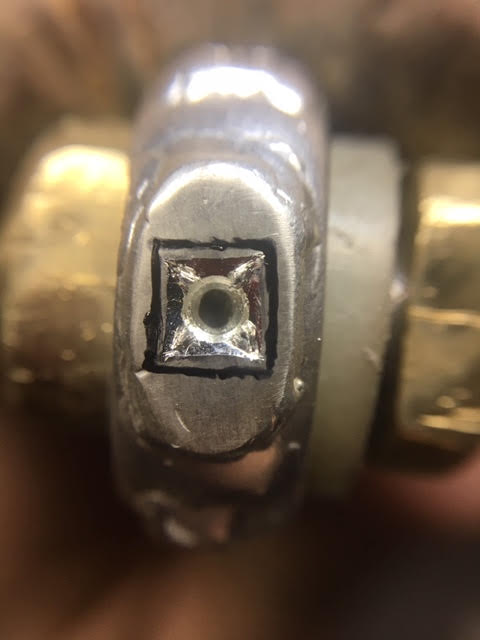
Have your Onglette graver #1 cut beside those four lines, what will be remaining are little triangles. Avoid any errors in the ‘initial cutting’ as these four triangles are now starting to be your ’beads-in-the-making’!
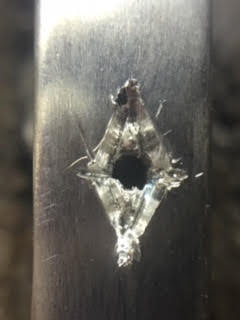
With your Flat graver of #40 cut away the metal and what you should have remaining is as shown in this photograph.
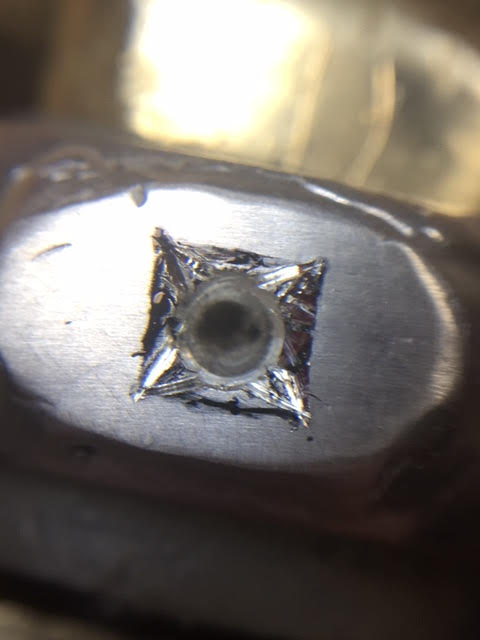
Keep cutting now with more accuracy and with great care remove all metal that you won’t be needing. This is where ‘graver experience’ is needed for this segment of cutting!
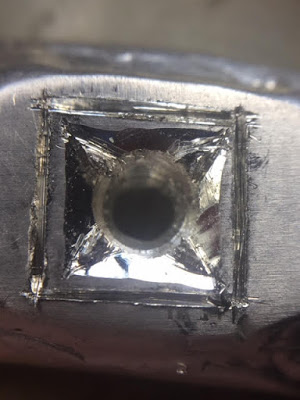
Once you have done your best in making a square shape, let do more drawing of lines and MORE cutting, agree?
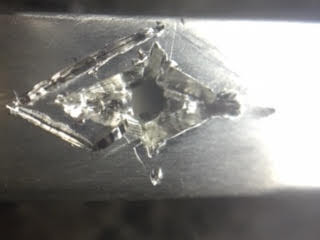
For your additional line drawing, you should now use your Onglette #1 and cut as shown. Don’t worry (yet) about any additional slips with your graver and any not needed cutting lines. These will be cleaned up in a few minutes.
Remember do not to lean your graver at any angle. We need to have the graver cut at a ‘near vertical position’ and always be kept in your control. Go very carefully at this point. I know this might appear to be a ‘darned mess’ to the untrained eye, but it does have some good features to it.
The separation of the flat metal wall of the two lines will be now carefully removed with your Flat Graver, What do I mean let’s proceed further, agree?
This next step is where Flat graver experience starts. I suggest a few practice cuts on metal to get the idea before starting this exercise!!! Every bit of experience helps in continuing this project! I have only 58 YEARS of practicing…:>)
The Flat graver should be cutting in a near 45degree angle, now you see that the space from the outside wall to the inner wall is now being very delicately removed. (Do I see a little smile on your face?) This exercise is not all that difficult. I’d use a "Difficulty Scale rating of only 6/10".
Let’s get rid of all of those outside slips and unnecessary cuts with your Onglette Graver #1. Try and recut a little deeper towards those corners where many of them are.
If you are having some difficulty in getting rid of them, I sometimes use my Pumice wheel of #180 grit and slowly clean them. It works for me as this might be a good idea! I’ve magnified these photographs on purpose, as these lines might appear and you should know how to remove them!
Don’t get disappointed if you can’t, if you have a torch handy you might use it to plug the lines if they are too hard for you. It worked for me many years ago prior to my many (9) years of training.
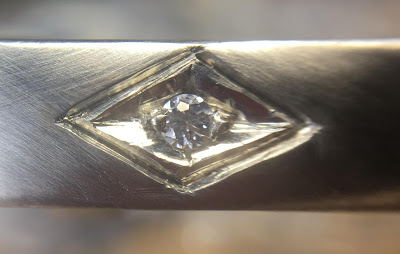
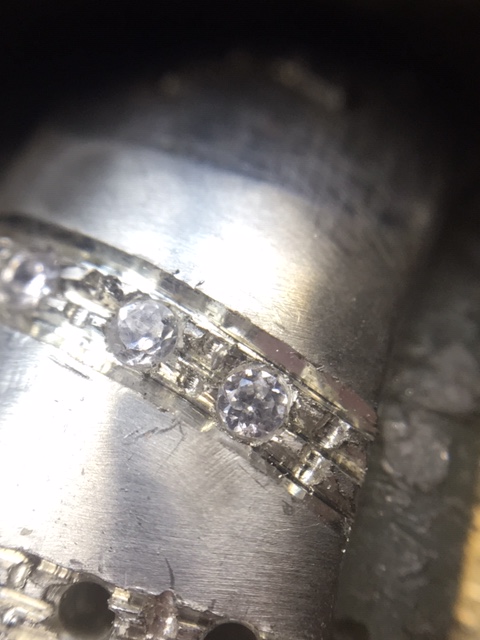
In this photograph, you can see just where my Bead-Raiser started to push over the bead. I might suggest to under-cut each of these beads with your 156C undercutting bur and lightly put a little groove into the bead wall. This will allow the ‘stone of any softness’ to sit well and not be crooked.
BTW, keep your stone further into the metal and have the “Table” of the stone sitting flush with the outside metal. Any wear and rough usage of the beads won’t get worn away, this could and might happen, I’ve seen this before. Even rough Tripoly polishing might even do this.:>(
At this point I ask you to use your Bead-Burnisher and round off every bead, don’t have any sharp bead-tips cutting into the person’s finger. YUK and OUCH!!
Behind every new bead, I might have you to use your Onglette#2 and start another little cut from the corner until your graver touches the new bead. This makes the square frame…totally square. If you aren’t sure how to do this, try using a little bud-shaped bur and remove any unneeded metal from the four corners. I do this myself, in these same delicate situations! "Appearance is 99% of the work, how you go about it, is the other 1%". My teacher told me a cute phrase during our 14 years together in a jewellery factory.
*"I don’t care if you use a knife and fork to set a diamond just as long the manager and ‘quality control office’ see that it is done correctly!"…(Stan Levine, R.I.P.)
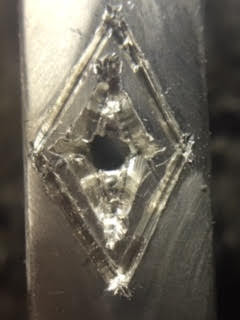
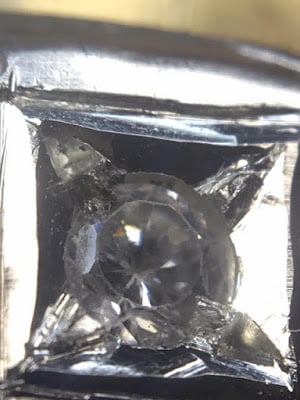
There are still some minor cuts still being seen in this top, as I said before use your Pumice wheels to clean them up. No one is 100% perfect!
I spend about 25% of my “finished setting time” during this cleaning process. BTW, I did these ‘minor errors’ on purpose.

This is still not too my 100% liking, but its an improvement.
In this final photograph, you can see how it finally looks. Controlling those ‘corner cuts’ is a “Learned Technique”. Don’t get frustrated, as nothing comes easy!*
We’ve finally finished this long exercise in setting these four demo-examples in Diamond Setting. I only hope that some of these new setting-techniques will be used at your own setting bench.
This one essay is full of setting techniques! You, the reader might have the need to use them in the future.
I’m happy that this blog with these essays will greatly assist you in years to come. Consider this blog and the contents as "a growing library" , I never had such easy access to this kind of exciting information.
Back then we had to ‘memorize the setting techniques’ as we went along. Thankfully we had a great “Head-Diamond Setter” and someone who was interested in teaching me and the other 5 additional tradespersons.*