but would really like to learn from someone who does this fora
living and knows all the little tricks, etc.
Sorry Mike - I meant to reply to this yesterday and just plain
forgot. I don’t teach classes and in fact I don’t even have lapidary
equipment anymore. Keeping in mind that nobody knows everything
about anything, really, I know just about everything about doing
inlay work. There was a time, long ago, when I ran an inlay shop. We
cut just about anything and everythingfrom straight inlay to
pictorial work of all kinds. I’m just starting this writing and I
need to get some work done, but over the course of today I’ll write
some things. I’ll say to Mike that he’s welcome to email be offline
with any questions.
There are three basic forms of inlay. I’m not including chip inlay
or Roman mosaic because those are different in every way. First is
cutting stones to fit into a metal space. We used to make a men’s
ring with a grid of rectangles in the top, essentially a signet
ring, that was very popular. Next is to saw a design into some
material and fill that with stone. That material could be metal but
the first type I mentioned has little boxes for the stones. This
second type hasa larger design space that is filled with stone.
Third is what many call intarsia - a certain shape like a circle or
rectangular that’s filled with design and background entirely in
stone. A table top covered in stone would be this.
Now, there’s an important distinction in methods and techniques.
What most people do for inlay is related to what ceramic tile people
call mosaic. Most of the junctions between the pieces are straight
lines, though there may be some curves. That sort of work can be
done with standard lapidary equipment, and it’s what I’m going to
talk about. What the Italians call “pietra dura” (which simply means
“hard stone”) is actual pictures made in stone. Pieces are cut with
wire saws charged with grit into elaborate curved shapes that fit
precisely together. Thatwork is incredibly labor intensive and
expensive and quite a bit more difficult to master.
If you can cut cabs, you can do inlay. All it means is cutting stone
to precise shapes and lots of fitting, but it’s still just cutting
and finishing stone.
Part one - you need rocks and lots of them. Inlay is about colors
and textures. You CAN make things using varying hardnesses of rocks
but you can run into trouble when you polish, attimes. Generally you
want to use rocks that are near to each other in hardness. You need
a nice trim saw and you’re going to get real well acquainted with
it. I used to cut on 220 grit carborundum and when I went todiamond
I worked on 600 grit. If using carborundum wheels they need to be
dressed to absolute trueness. Flat as flat can be. You are going to
be laying your pieces down into patterns and you need a separate
work surface for that. You can’t put them on the same table as your
machines because the vibration will make them walk apart, so get
some little table or even a level chair seat that’s nearby to you
for that. There are times when you dop and times when you don’t.
Some work is big enough for dowels of different sizes, but for the
small stuff you go to toothpicks snipped off down to the shaft or
wooden matches. This is a good place to put a small tip/trick. You
are going to be cutting wet, and you want to look at your fitting
dry. Wipe the stone onthe palm of your hand and it will dry it
immediately, much better than a towel or something.
Easiest job, we’ll make the grid ring or it could be a pendant.
Let’s say 3 x 3 rectangles, 3mm by 4mm each, made out of 3/4mm
sheet, which I guess is maybe 22 gauge for those into gauges.
Makingthe grid is another topic… Choose your stone or stones
and cut pieces for it on the trim saw. You want maybe 3mm thickness
and just aboutanything bigger than the finished dimensions around.
As always, better sawing means less work all around. These are
better dopped, so dop them all on toothpicks. Then, one at a time,
cut them to fit. Each space is different even if they seem the same,
so keep track. Somehow orient yourself - I use the trademark stamp,
either on the left or the right, and then lay your stones on your
separate little table as they are done, in order. Cut them down to a
rough squareness first, then cut either the length or the width
first, fairly closely, and then cut the other dimension so it just
lays into the space. In the end you will touch each dimension a bit
to get a final fit. Thissort of work needs a small angle so it fits
the space like a little wedge - not too much or your seams will
start showing when you grind it down. Maybe 5 or 10 degrees. Keep
them square all the time, only cut one side or one end, most of the
time - there’s no purpose or reason to cut all fouredges. Take your
time. Since it’s going to be ground flush in the end, the height
makes no difference as long as they are proud of the metal. When you
are finished cutting the pieces, wash the dust off of your pieces
and your metal, dry everything, un-dop and glue with 5 minute epoxy.
Then grind it down, sand and polish.
It’s not that hard, it just takes practice, a steady hand and a good
eye. Your first pieces may have gaping cracks in the seams, but
you’ll get better.
From there, it’s pretty much free form and harder to write about
with clarity. You can saw through just about anything in a design or
pattern and fill it with stone, andyou can just make a frame and
fill THAT with anything in stone. If you saw in metal, you can
solder it down in an overlay. If it’s not metal then you need to
back it with something. Thin sheet aluminum is commonly used for
that, glued down with epoxy. Anytime you glue anything that’s going
to get stone later, you need to clean ALL of the glue out, right
down to the corners. Use a bur to start, maybe, or exacto knifes,
gravers, whatever works. No glue, anywhere. And you may or may not
dop the more freeform work, that’s up to you. Mostly not, though.
I’ve ground my fingernails to the quick more times than I care to
remember.
If you have pierced something then you probably had a drawing and
your design is therein your piercing anyway. If it’s just a blank
space then you need a drawing. Two general rules that work together
is to start in the center andstart big and work down to small. If
your design is a butterfly then you’d cut the body first - if it’s
more than one piece then you’d start big and work towards small and
cut and assemble the body. Lay the parts on your drawing, on your
separate table. In this work you don’t want a taper or maybe just a
tiny bit, almost immeasurable, so the top edges meet up. You’ll also
find it easier to work with pieces that are nearly the sameheight.
Fill in the major part of your piercing or make the center of your
open mosaic, and when you reach a point, or anytime you feel like
it’s a good idea, glue it in place - always 5 minute epoxy. Make sure
you glue your pieces down and also together - glue the seams. Leave
it alone, let it set, and clean out all the excess glue, right down
to the corners. You might find it easier at this point to rough grind
the top so the pieces are level, but not too much. Just so you can
get a vision of what’s going on. Cut stone outwards from there,
filling in the spaces, make your central design. For our butterfly
that means the body and wings, and then glue it all down. You’ll find
that you need to keep your edges straight and clean, so you have a
clear shot at cutting the next piece. This is hard to explain, but
you don’t want pieces sticking out into space because you can’t cut
around that with your next piece.
Fill it in, into the background, keep it clean, glue whenever you
feel like it’s a good idea. Always wash the rock dust off before
gluing. When you are done, grind, sand and polish and that’s it.
Easy.
Finally, some things… For teeny tiny things like eyes, when you
are gluing they are almost impossible to handle by putting glue and
then putting a tiny part in place. Put your tiny parts where they
belong, warm it on a hotplate a bit, and then touch it with a drop
of epoxy. The glue will melt and flow down into the seams, all by
itself. If you want to cab your pieces so it has some dimension, you
need to cut them, dome the tops of each piece and finish them, and
then glue them. This whole thing on inlay is really about skill,
which is to say that there’s no great mystery, it’s just a lot of
fitting which is dependent on your ability. It’s also a lot of work
in general.
Really finally, I’ll write the one great secret, which is bestleft
for last so it stays in your mind. Cut the hard part first, and then
cut the easy part, which may seem obvious but it’s really very
important. If you have to cut a triangle, cut one of the points to
the right angle first. Then all you have to do it cut the third flat
side down until it lays in place. Same goes for inside (concave)
curves - cut the concavefirst, then cut the outer part so it lays in
place. Many times you’llfind there’s a tricky part, angle, or curve.
Cut that first, then cut the outside of it so it lays in place.
Thinking and working like this makes everything easy… That’s
enough I guess. Like making your first souffl=e, it seems scary
until you do it. Then it’s just a lot of cutting and fitting.
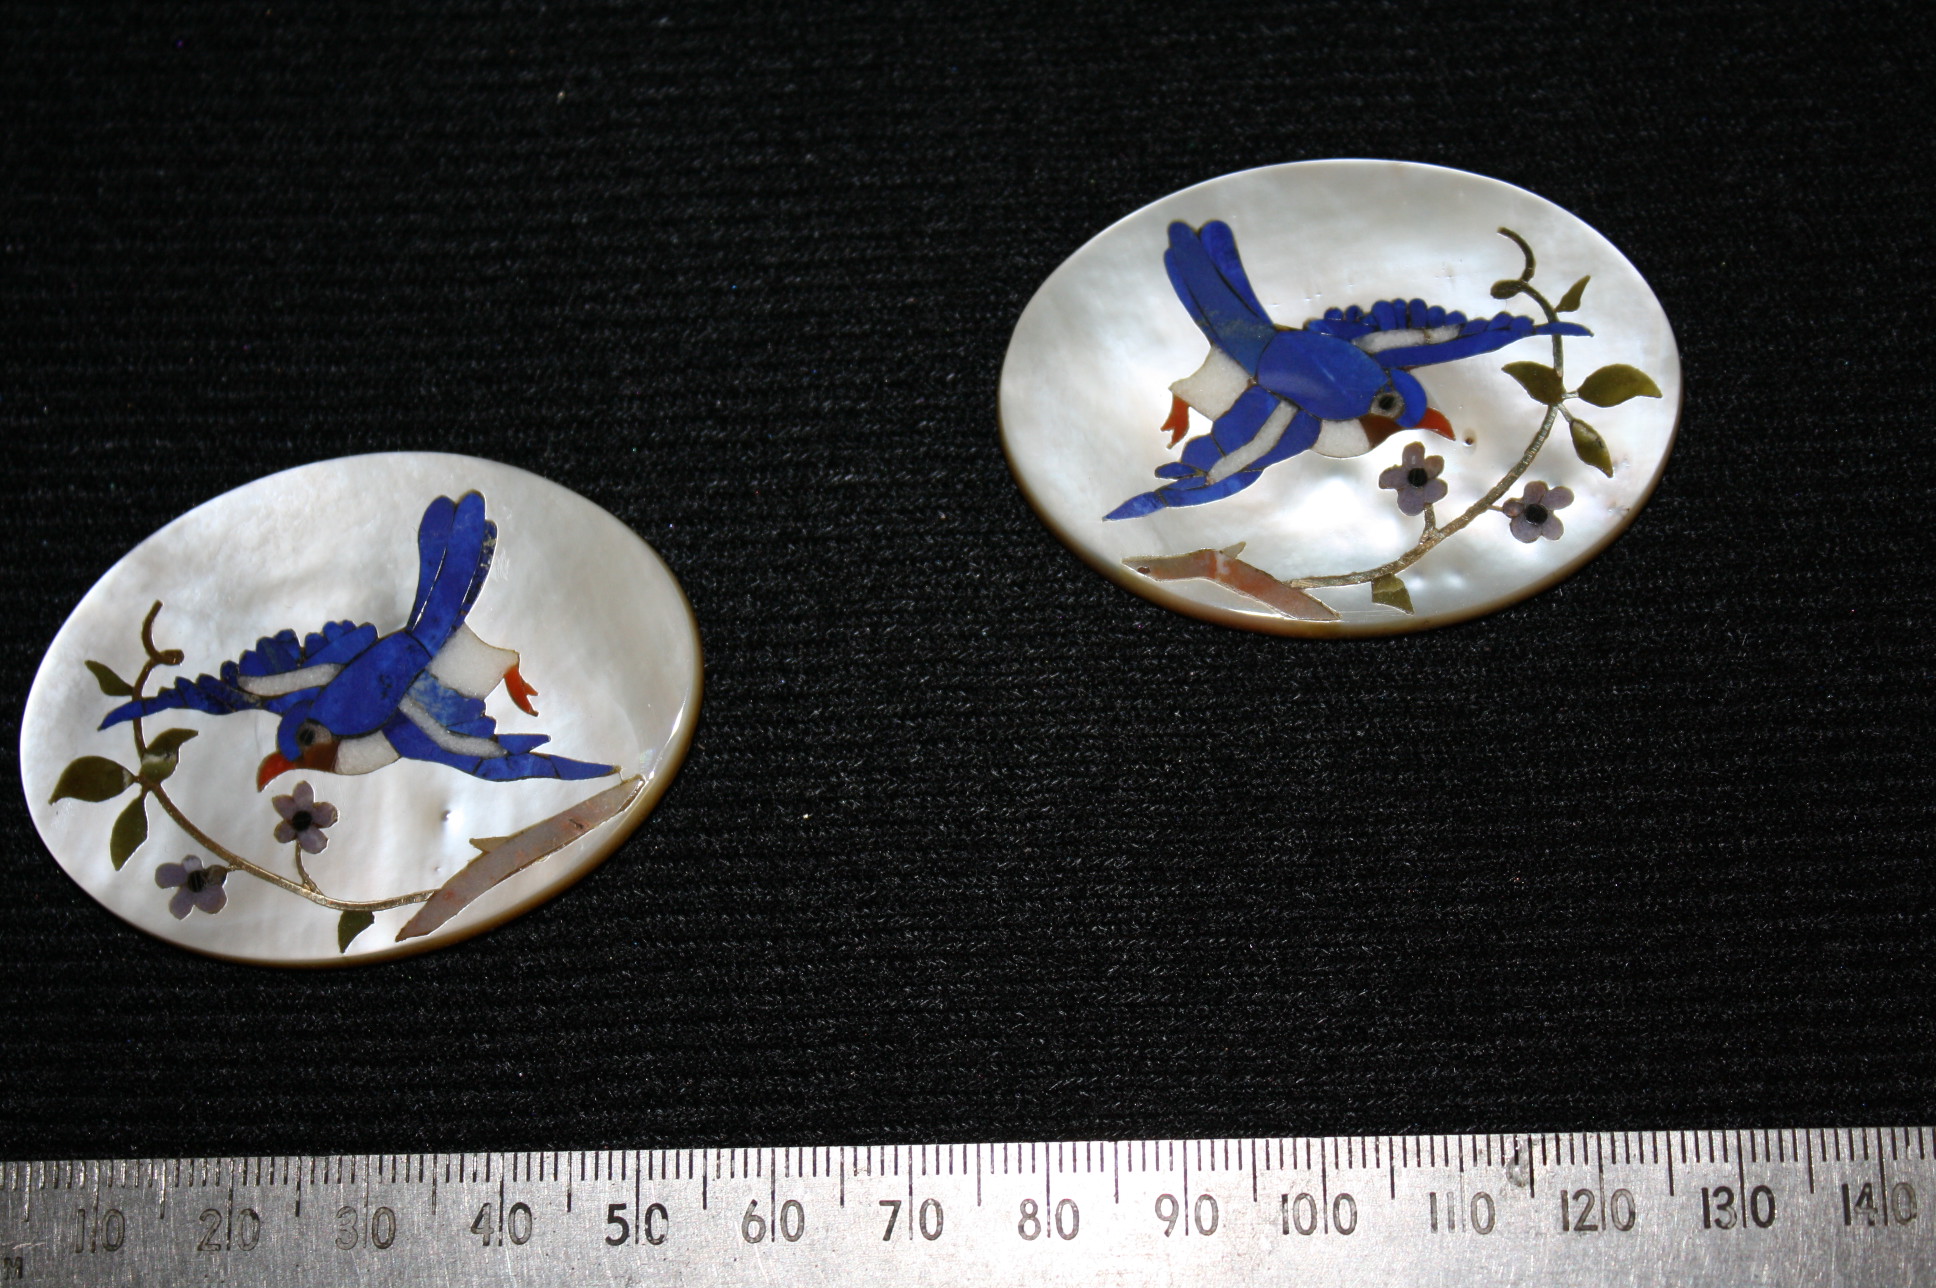
OK, one final thing. There’s another way to do certain items that
I’ll call buttons. That is to do the fitting of the pieces on the
inside design - this method is often used for designs you might say
resemble millefiore - without any real regard for the outer edge.
Glue it together, let it set up, and then grind the outside and top
andfinish it just like any other cabochon. Those sorts of pieces are
cut and set just like any other cab, in a bezel, usually.
Happy cutting! John D.