“Fish-Tail Pattern” in the Art of Diamond Setting! (Including extensive “Graver-Modification”)
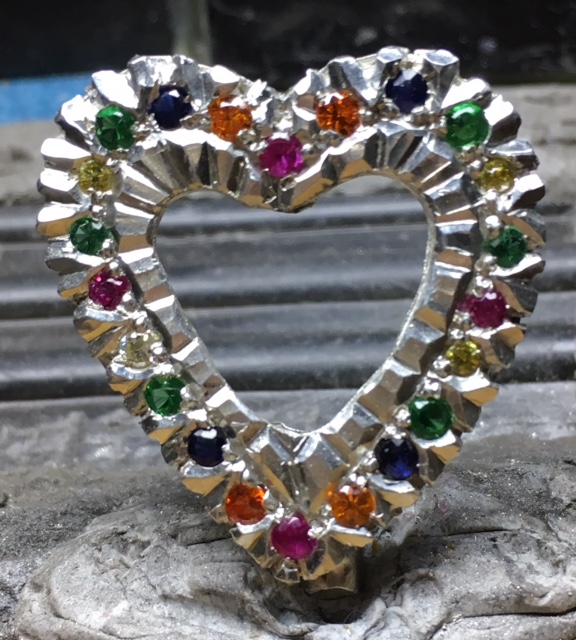
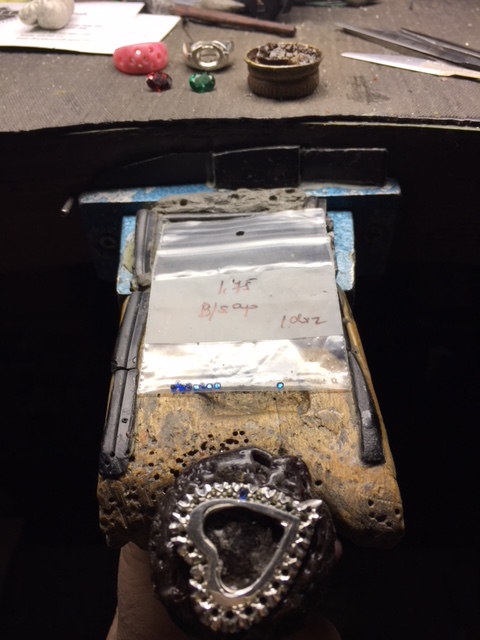
The most remarkable “Graver-Cutting” in Diamond Setting, is in “Fish-Tail Setting”. In this lengthy essay on gem-stone setting, I will attempt to use the written word & extensively use photographs to capture the techniques of this pattern. What you will find is a transformation from a simple rough casting of silver placed on a shellac-stick to a ‘wearable piece of art’.
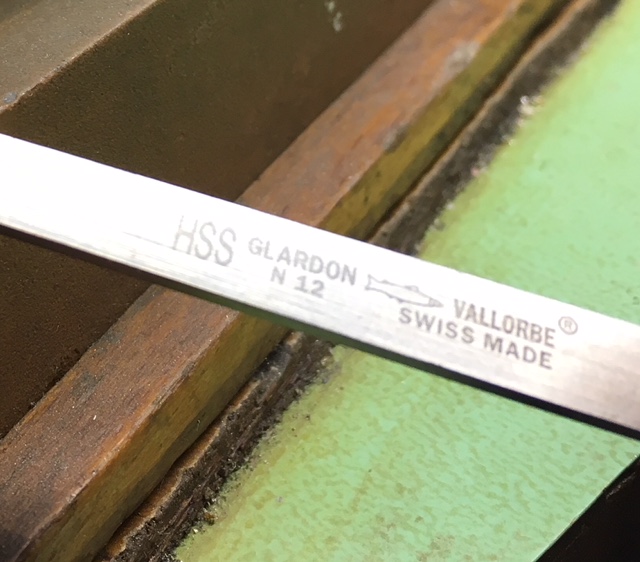
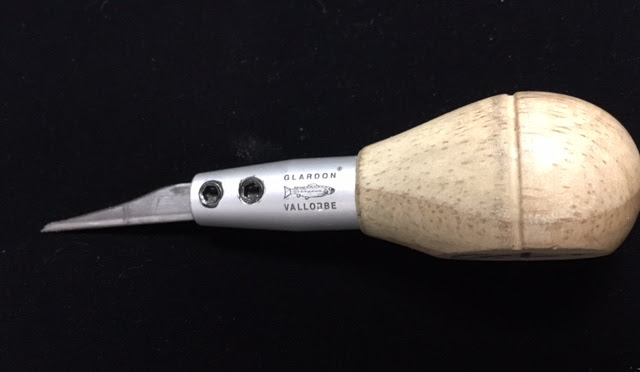
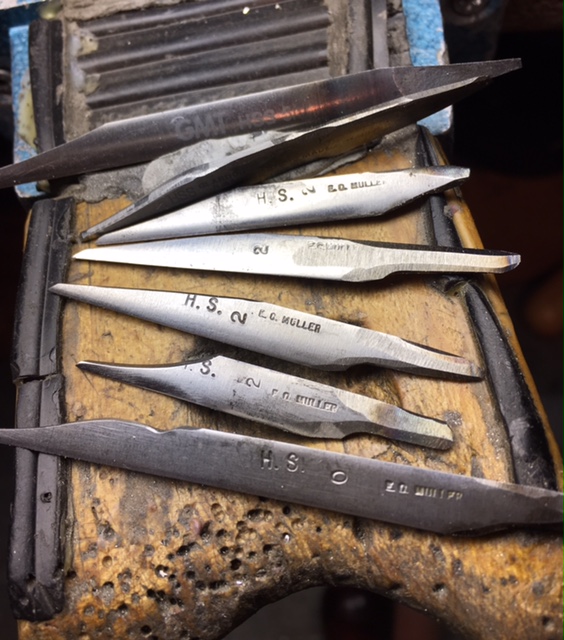
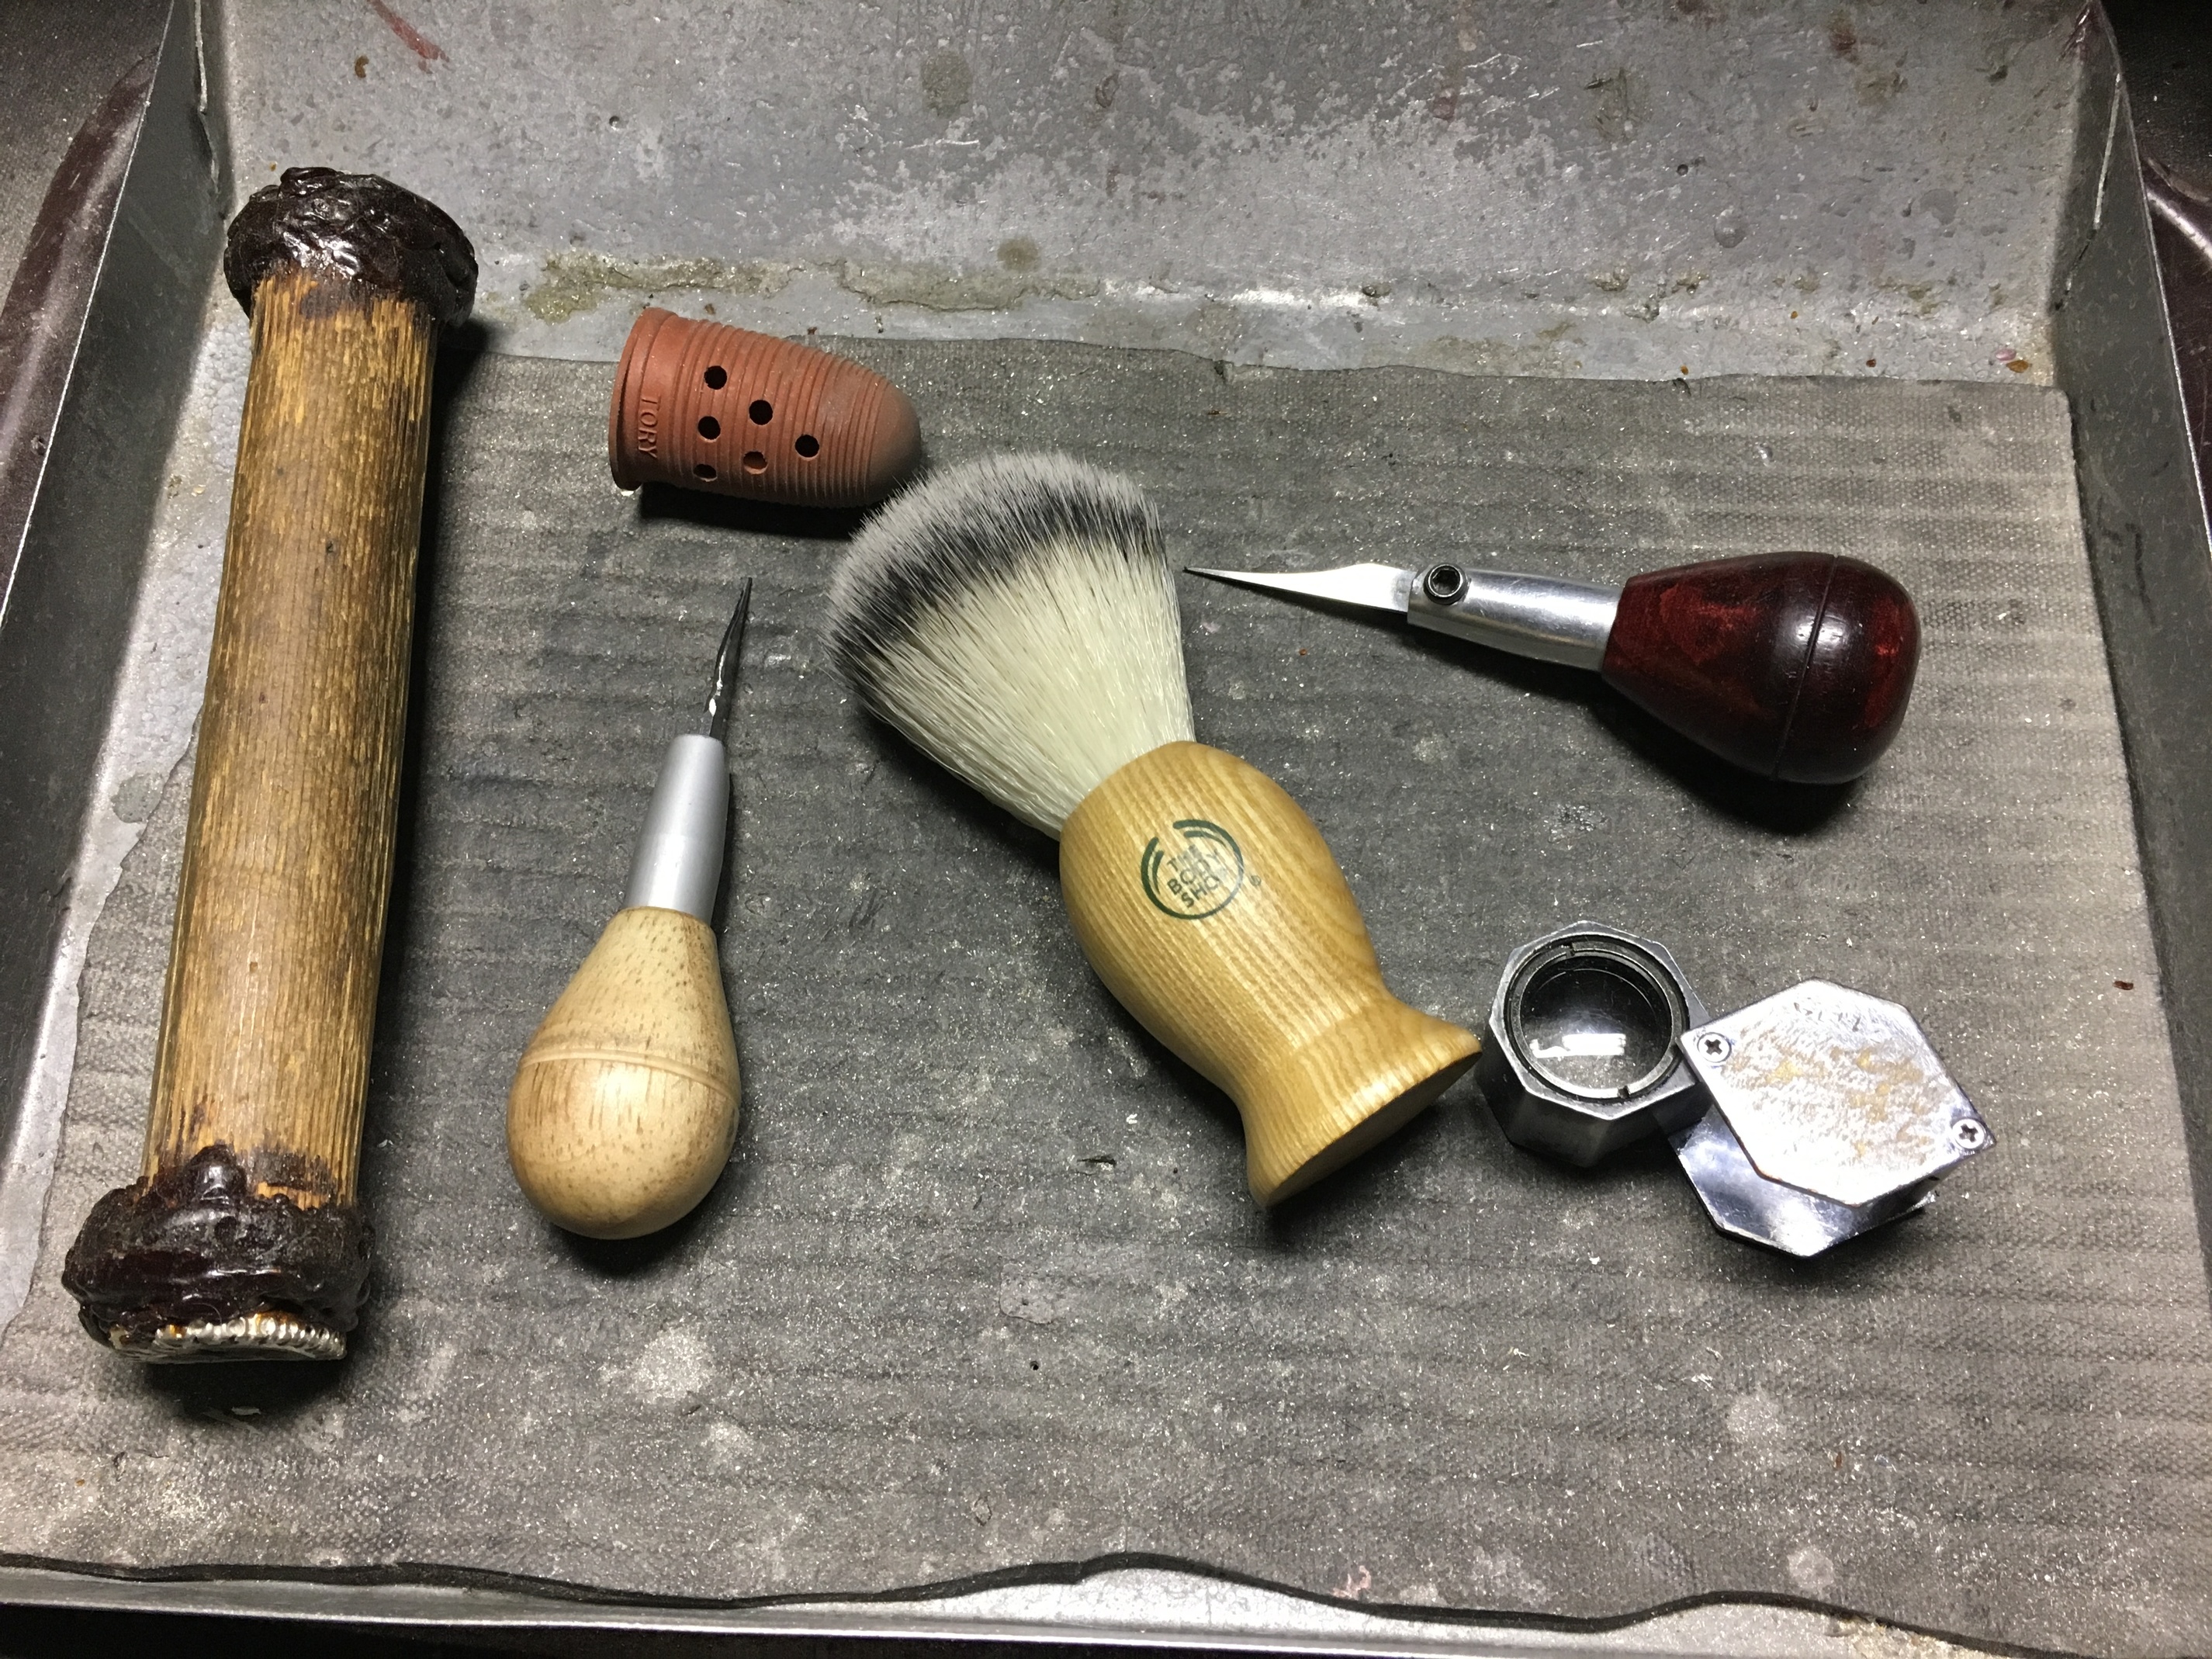
It is my firm belief that if this technique is not visually demonstrated in either text or photographs, then this pattern will slowly disappear and be forgotten. All I use in this creation are 3, well-shaped and greatly modified Gravers. They are an Onglette #1, #2 gravers and of course the Flat Graver named “Glardon” #12, “E.C. Lyons” or “Muller” number #2.
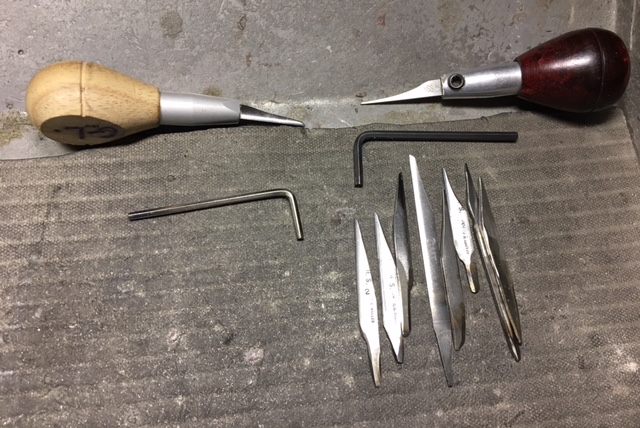
I presently use two graver-handles and using my many gravers that are many years old. But during these years, they do get reduced in length by the constant reshaping on a bench grinder. These two interchangeable handles allows me to keep using them for many more years to come!
It is not the actual graver itself, but also the setter, as I, with 55 years of constant engraving ability. It is also the combination of many, eye-hand, finger-tip techniques to the graver! Not to mention the thinking about at each next stages of the metal cutting. I, in this essay will extensively use photographs to illustrate what is going on. I plan in advance each step in cutting, then using my gravers to literally remove what is not needed!
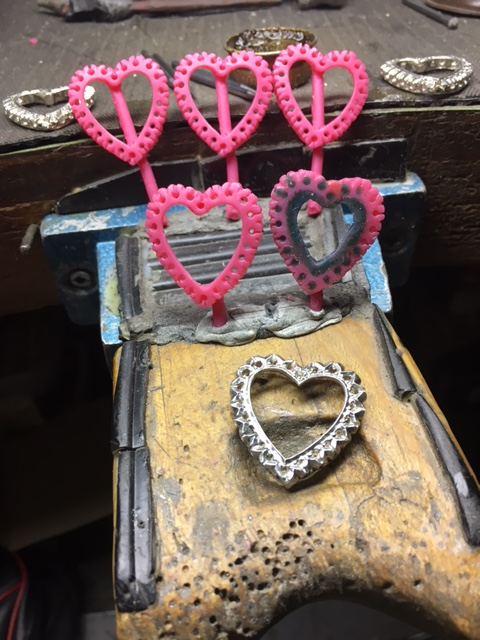
As the artist Michelangelo once said “In every block of marble is the statue of “David”. I just cut away what is not needed!” and so with my Bright-Cutting, I do the same. But some Diamond Setters can be just “fabulous artists!” I do not rely upon any Computer Aided Design in my cutting. I am using only my experience, my multiple gravers & many years of Diamond Setting … nothing else! In the very first (of many) photographs you will see how it started while in the wax-form until the end product. This is not a simple project!
I will use extensively the Onglette-Graver #1 with a .04mm wide ‘cutting face’.
)
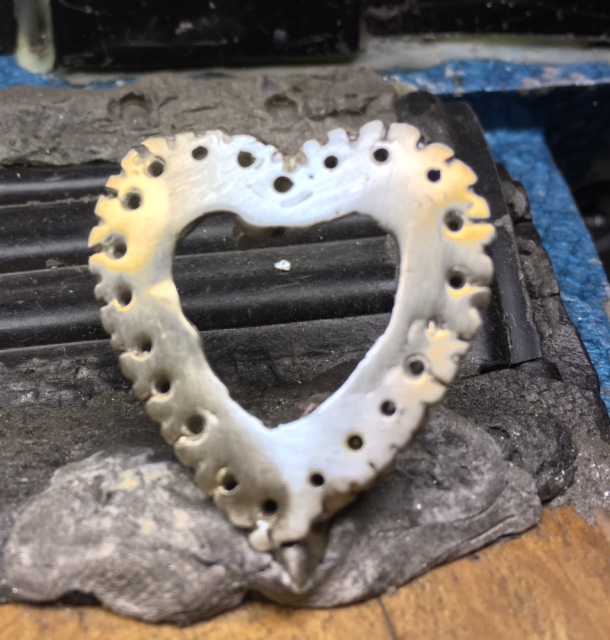
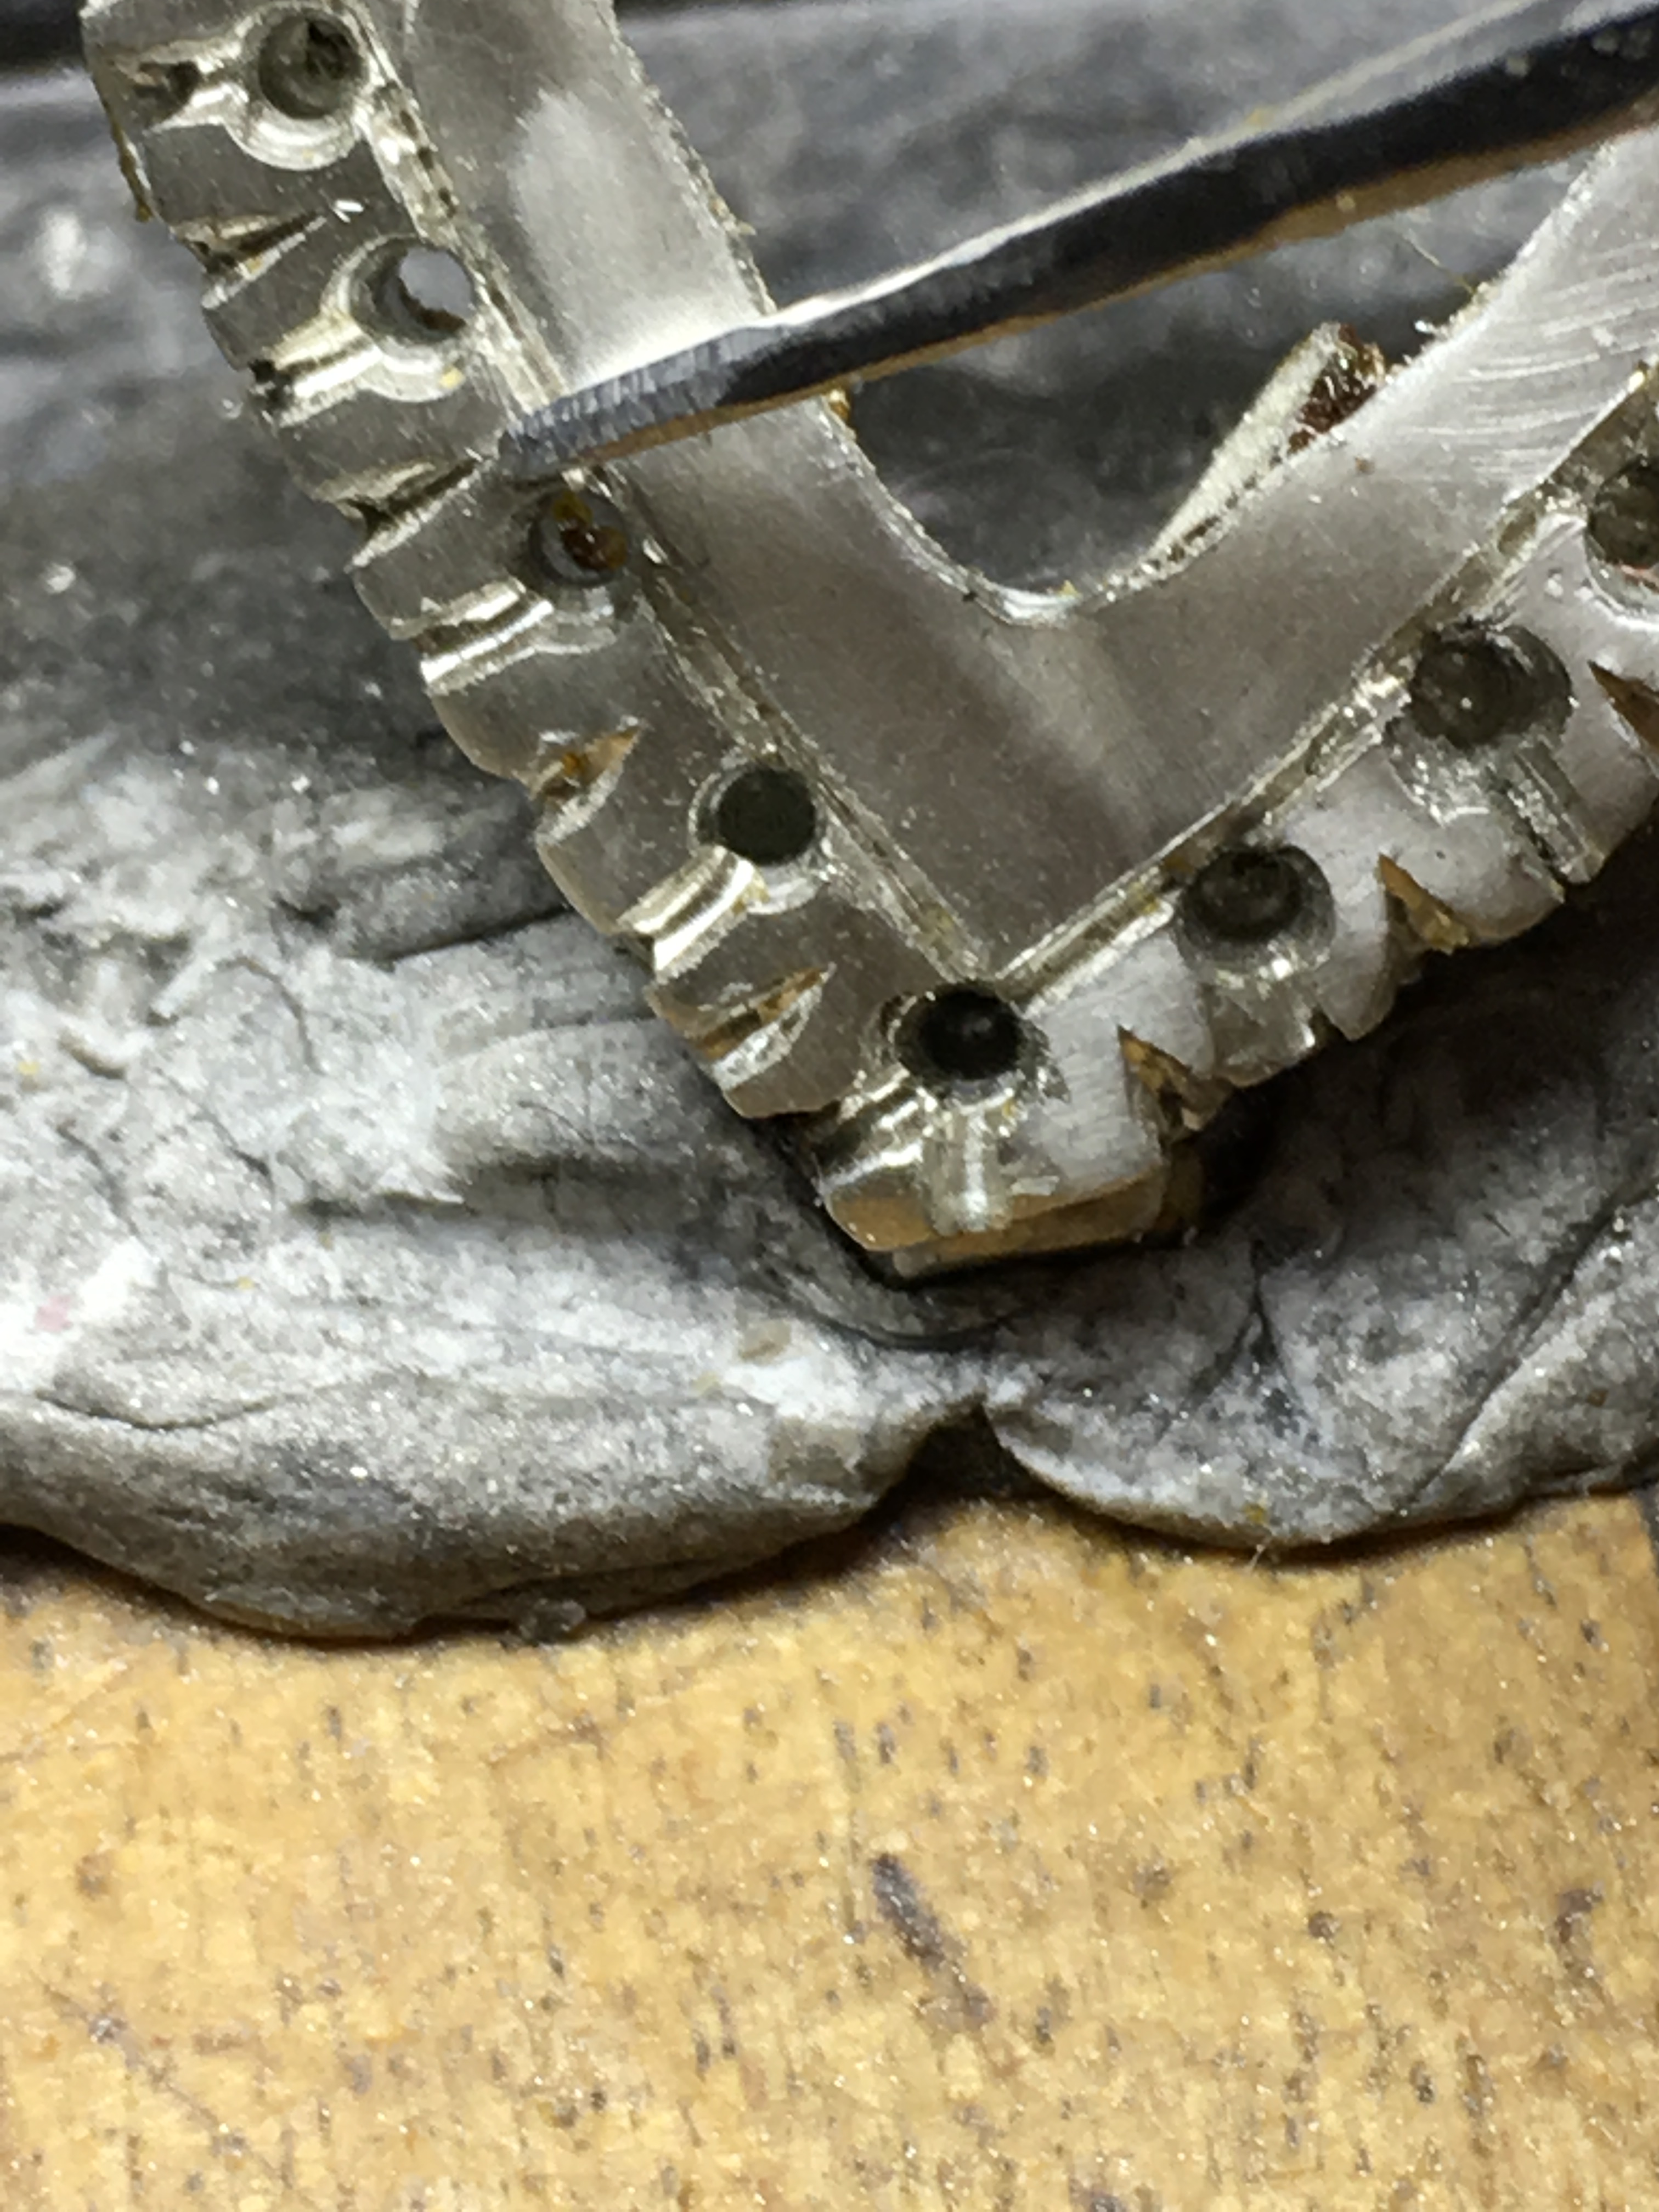
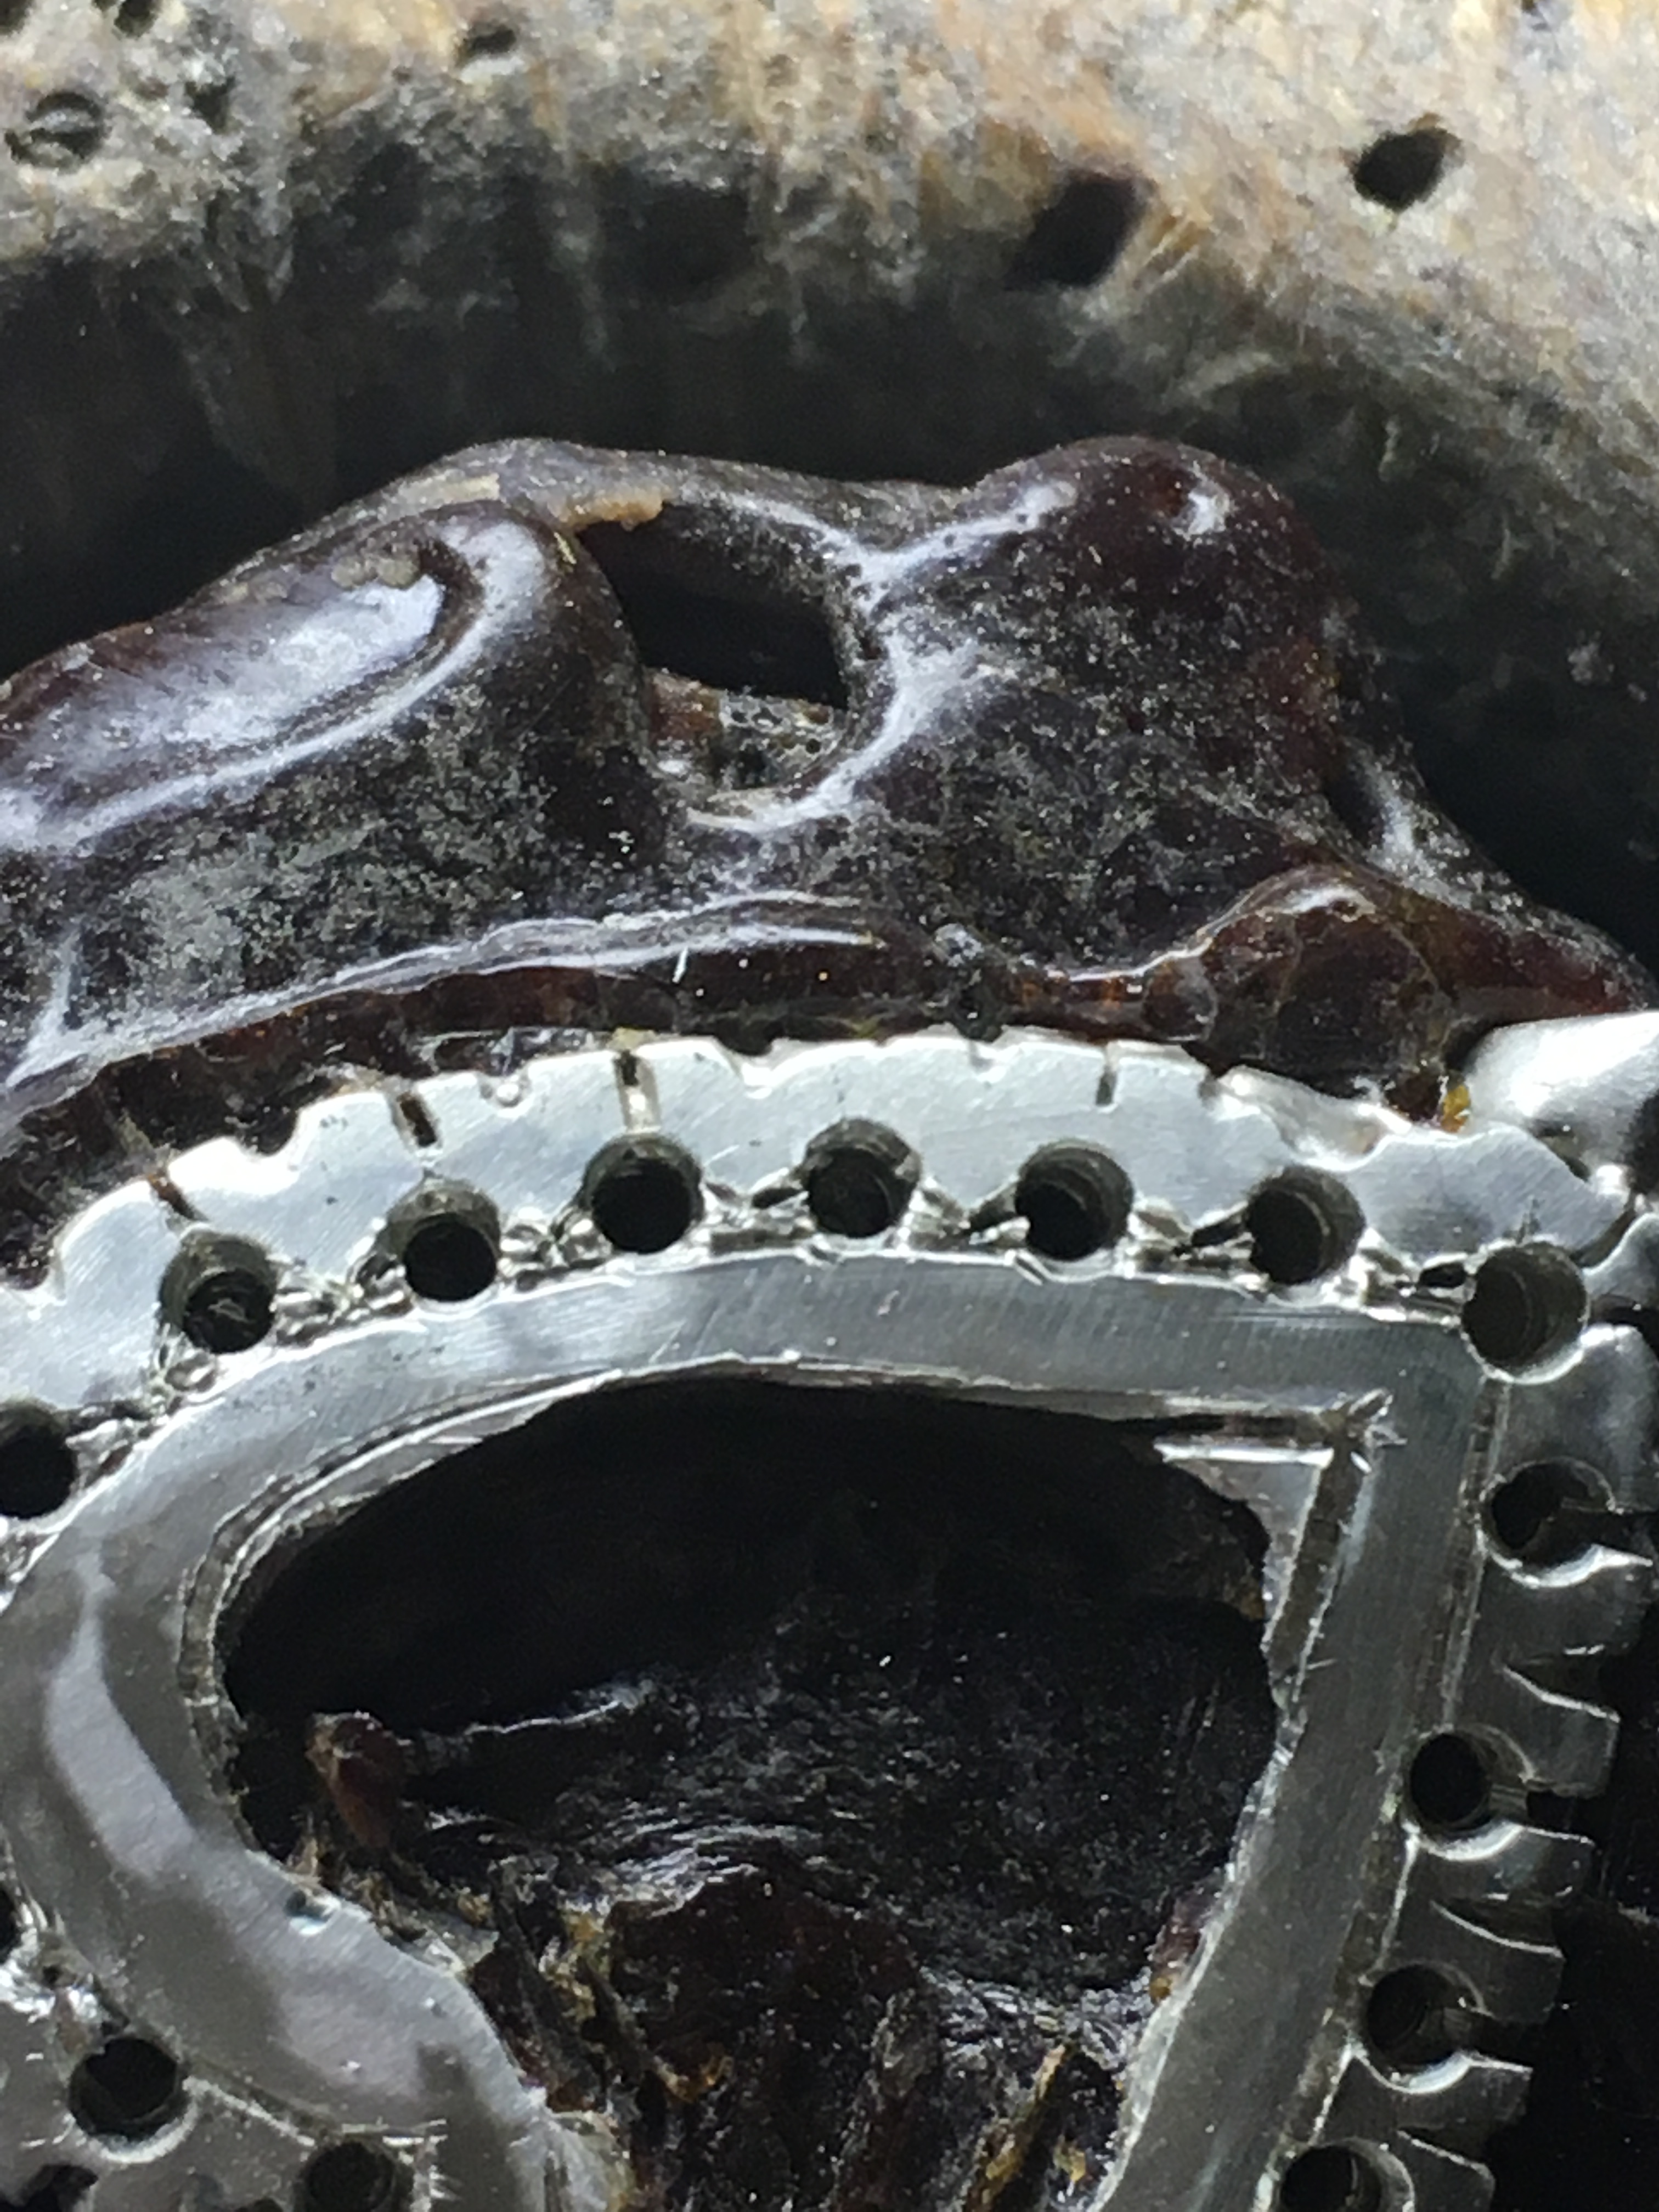
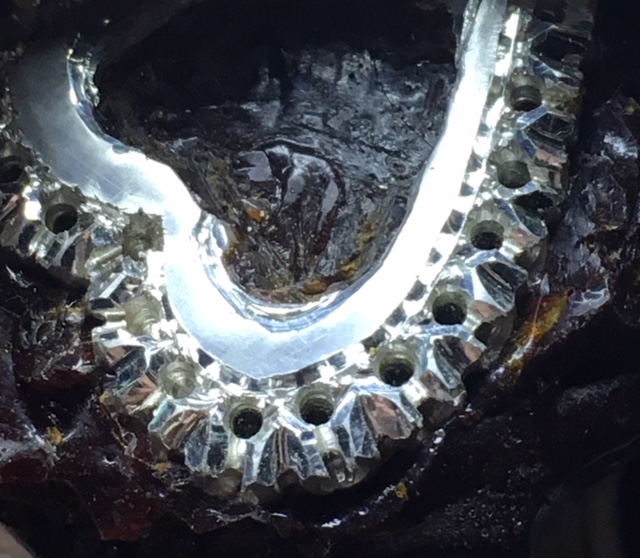
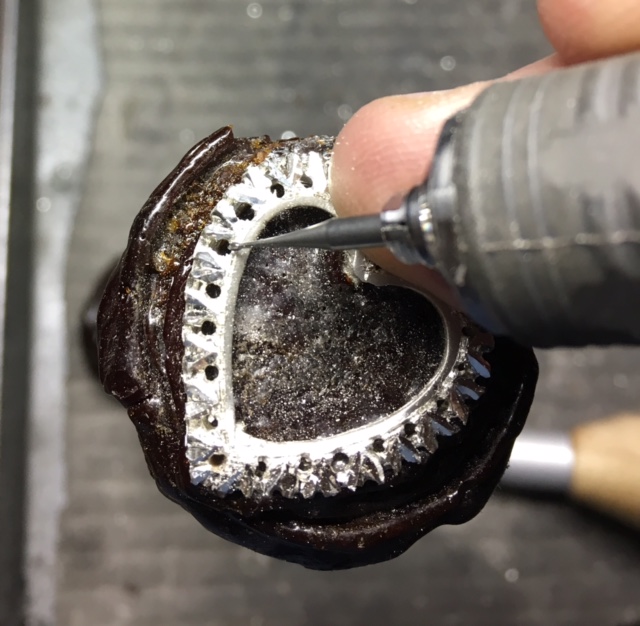
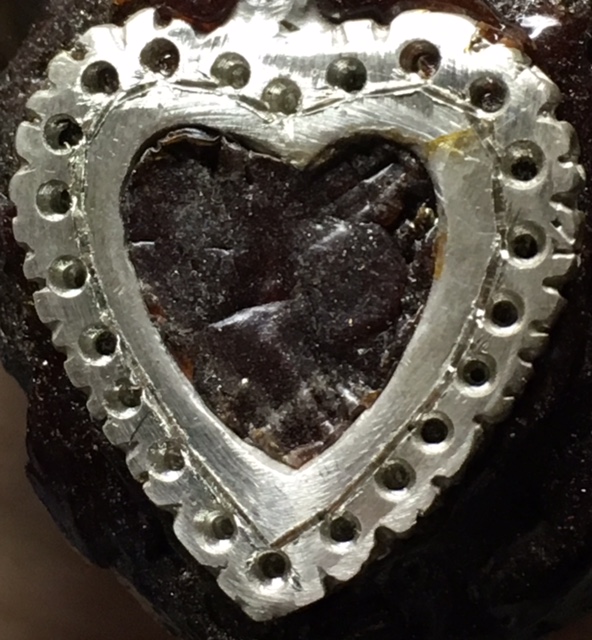
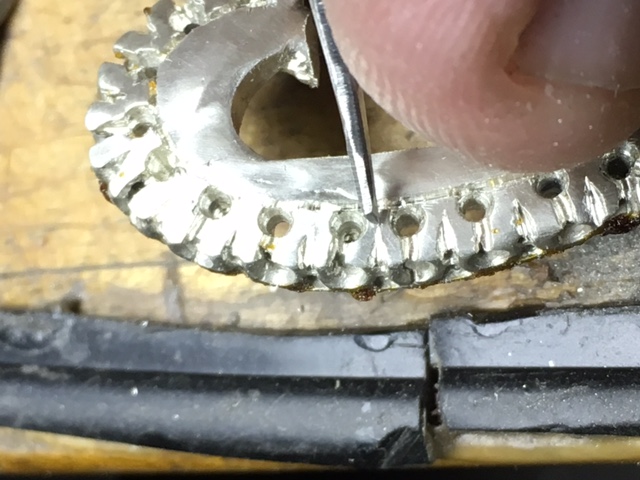
All along the heart-shape pendant, the cut must be shaped with great precision. With this, I will use a graver to cut a ‘very rough’ design or pattern all around the anticipated areas for stone setting. I will again recut this pattern (later explained) a second and third time, each time digging deeper into the metal. Each cut must be aligning itself at the edge of the rim of the hole just where each stone will be placed. If a ‘gem-setting hole’ is not properly opened in the wax, then cast in the metal, I will discard the whole metal object immediately.

If I’m not totally satisfied in the casting product, nothing will look good for further precision cutting! All of the 21 holes of this pendant must be correctly drilled through evenly, not one .05mm out of place or again it will be scrapped!
While cutting with your Onglette #1 graver, the ‘face & graver body’ must be held in a near vertical position. All you are doing now is to ‘cut an outline’ just for the next step at the “Onglette #2, Right-Sided, Bright-Cutting” blade.

When satisfied, you are now ready to proceed further, I suggest using a 10x power loupe at every opportunity, just to examine your progress.
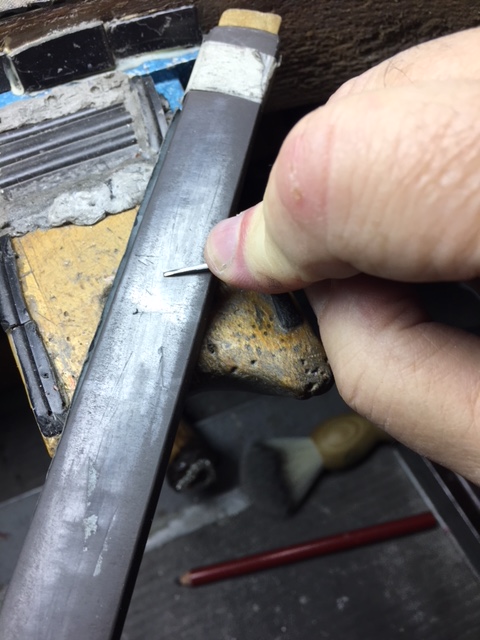
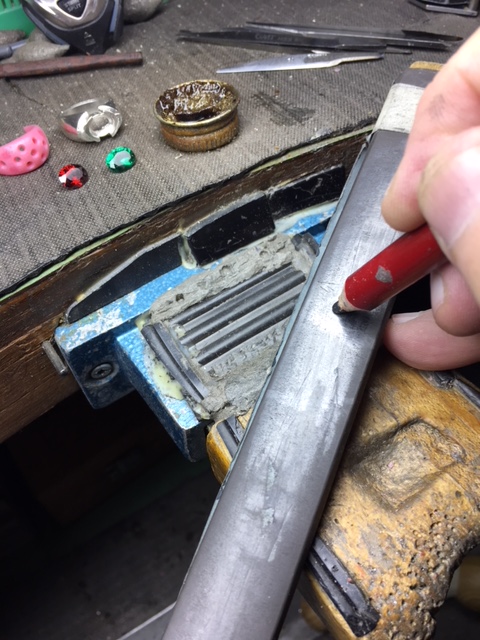
One thing we must all remember is how to hold a graver. The wooden-handle must sit in the ‘palm of your hand’
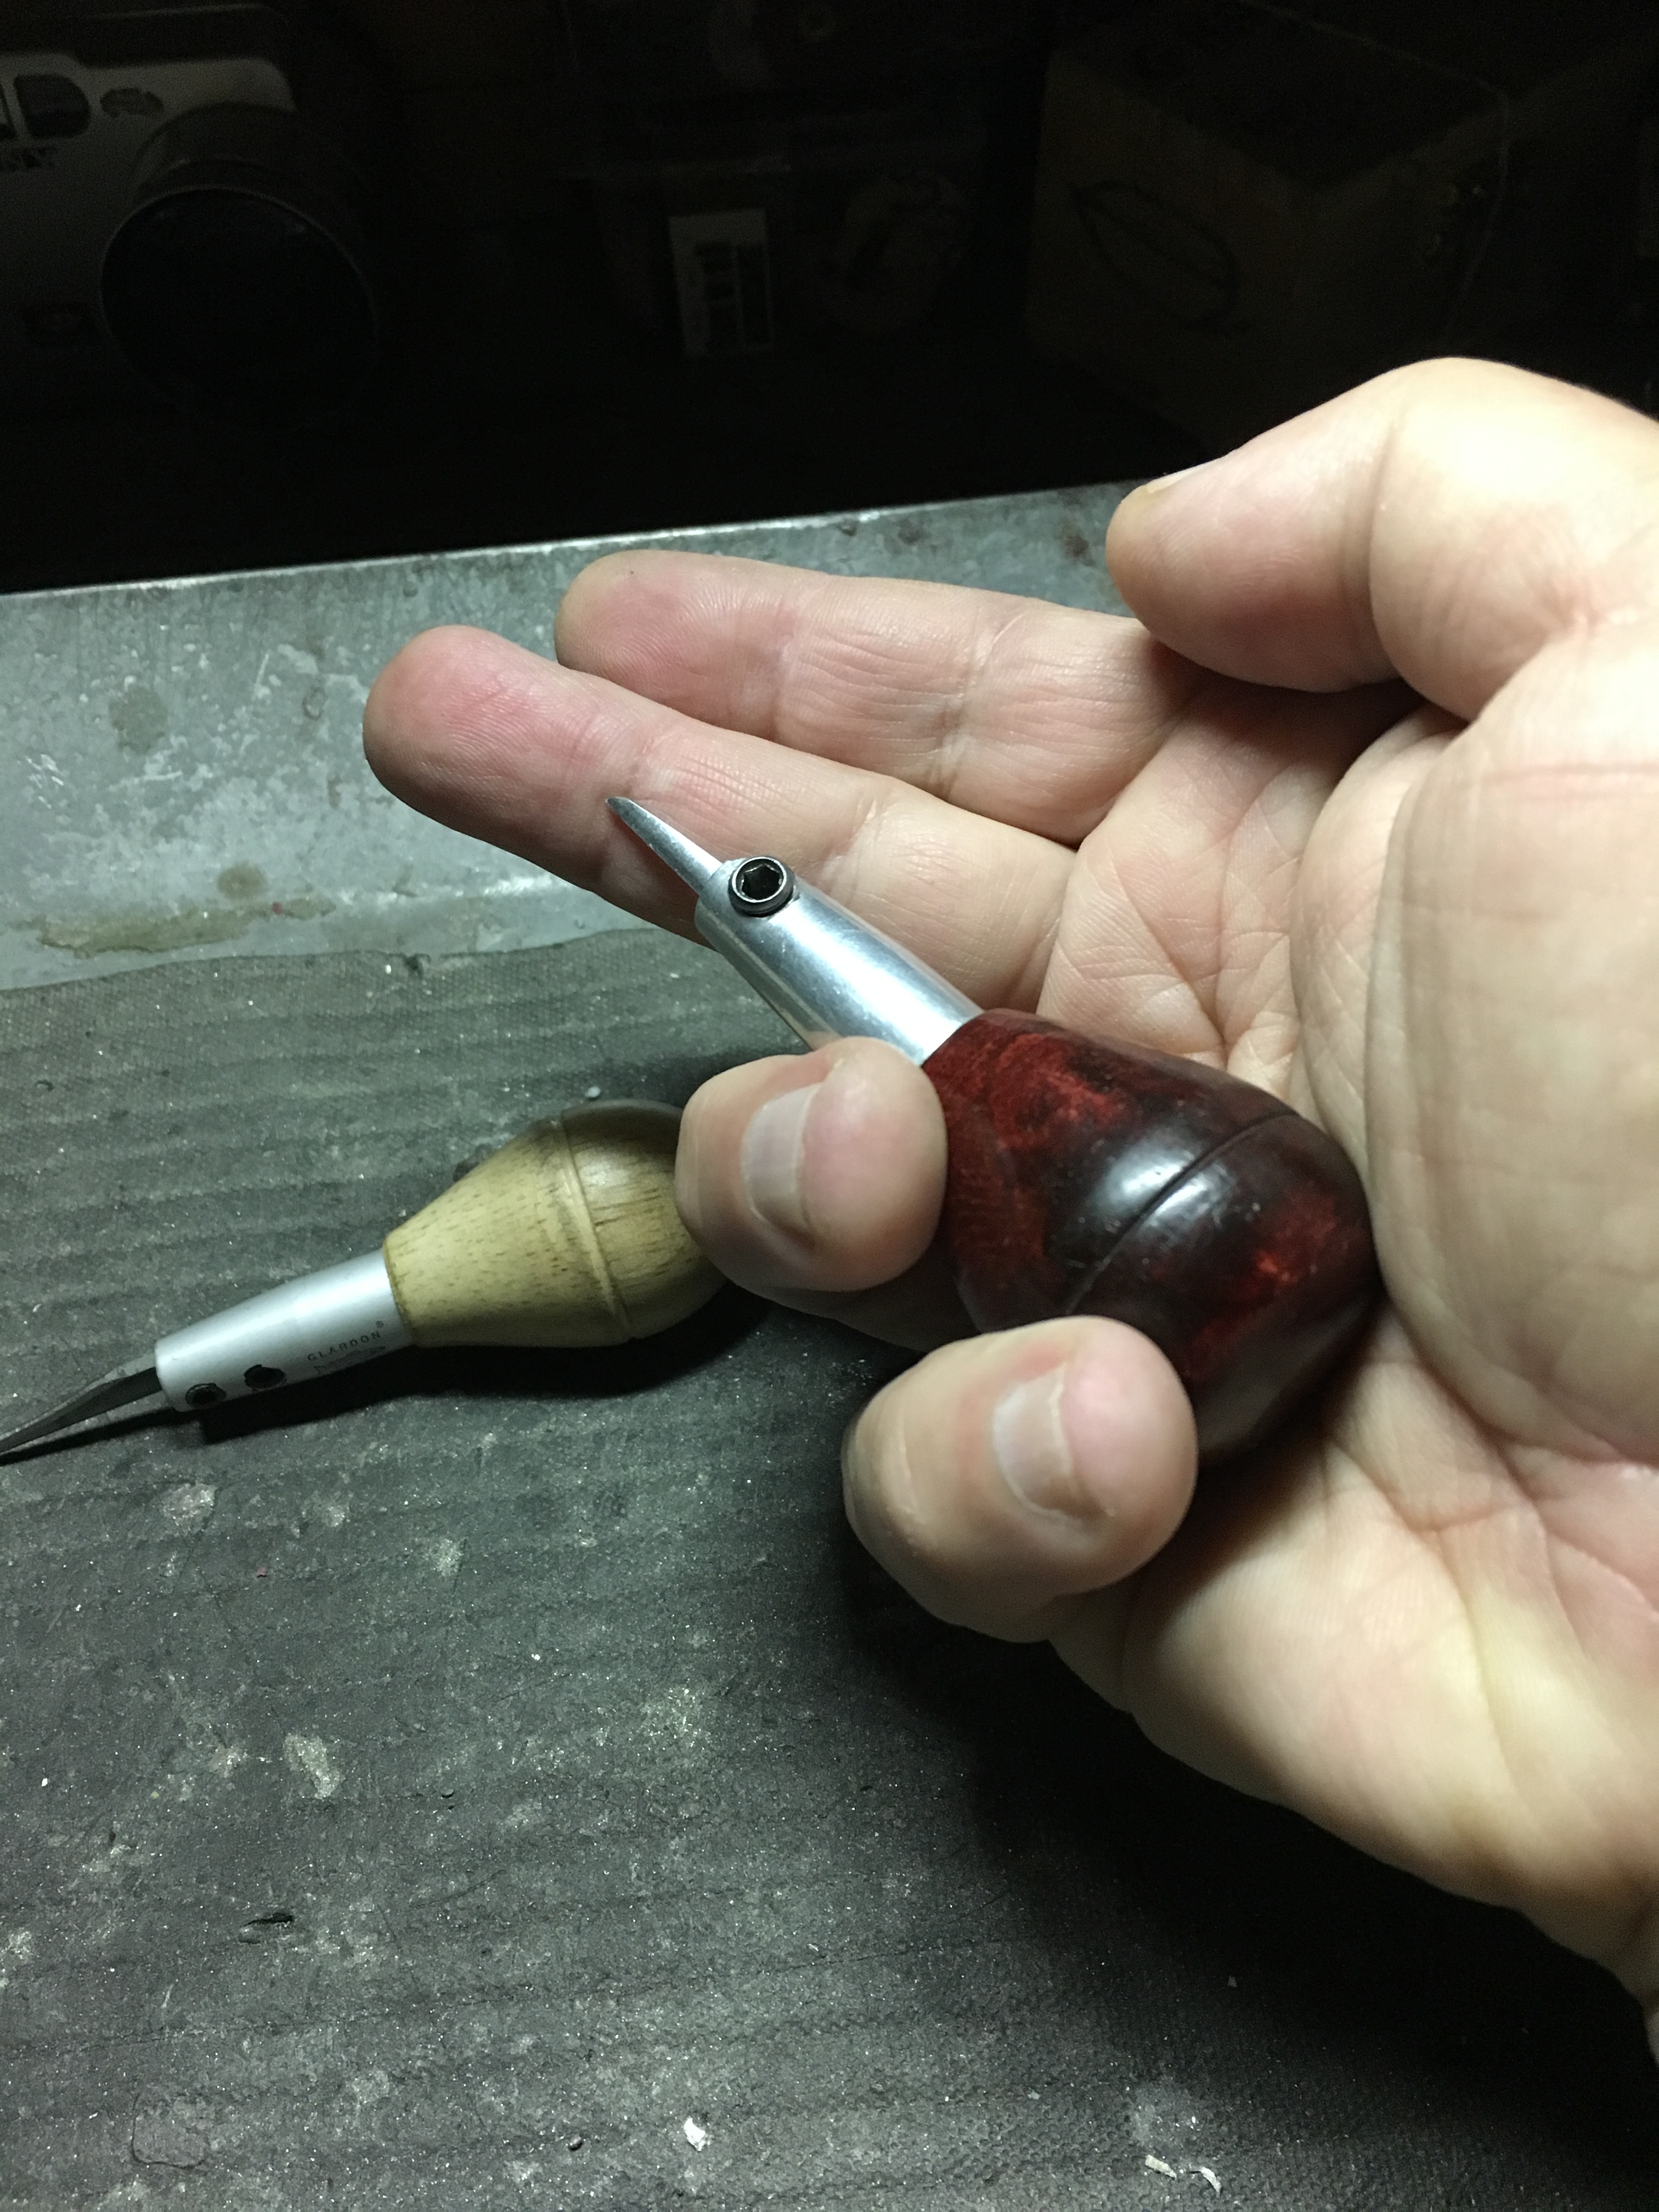
The tip of the graver, must not exceed the first knuckle of your middle finger. (Observe this one important photograph)

All gravers must be kept in pristine condition all during the very important and delicate “Bright-Cutting stages”. If you see some little lines occurring in your cuttings, “please, please stop your cutting.” It could be that the front of the cutting edge & face is broken from continual contact with the metal and therefore ‘scoring’ occurs.
Then immediately assess your problem, with the aid of your oil-stone. Only then you may re-sharpen your graver ‘face & point’, followed by the polishing-paper of #800 & #1,000.
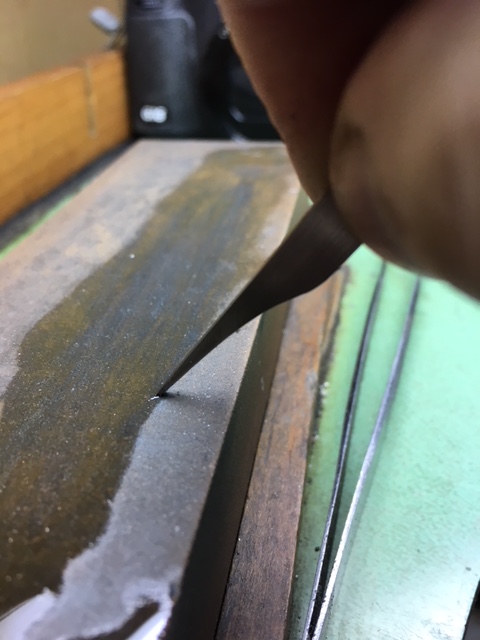

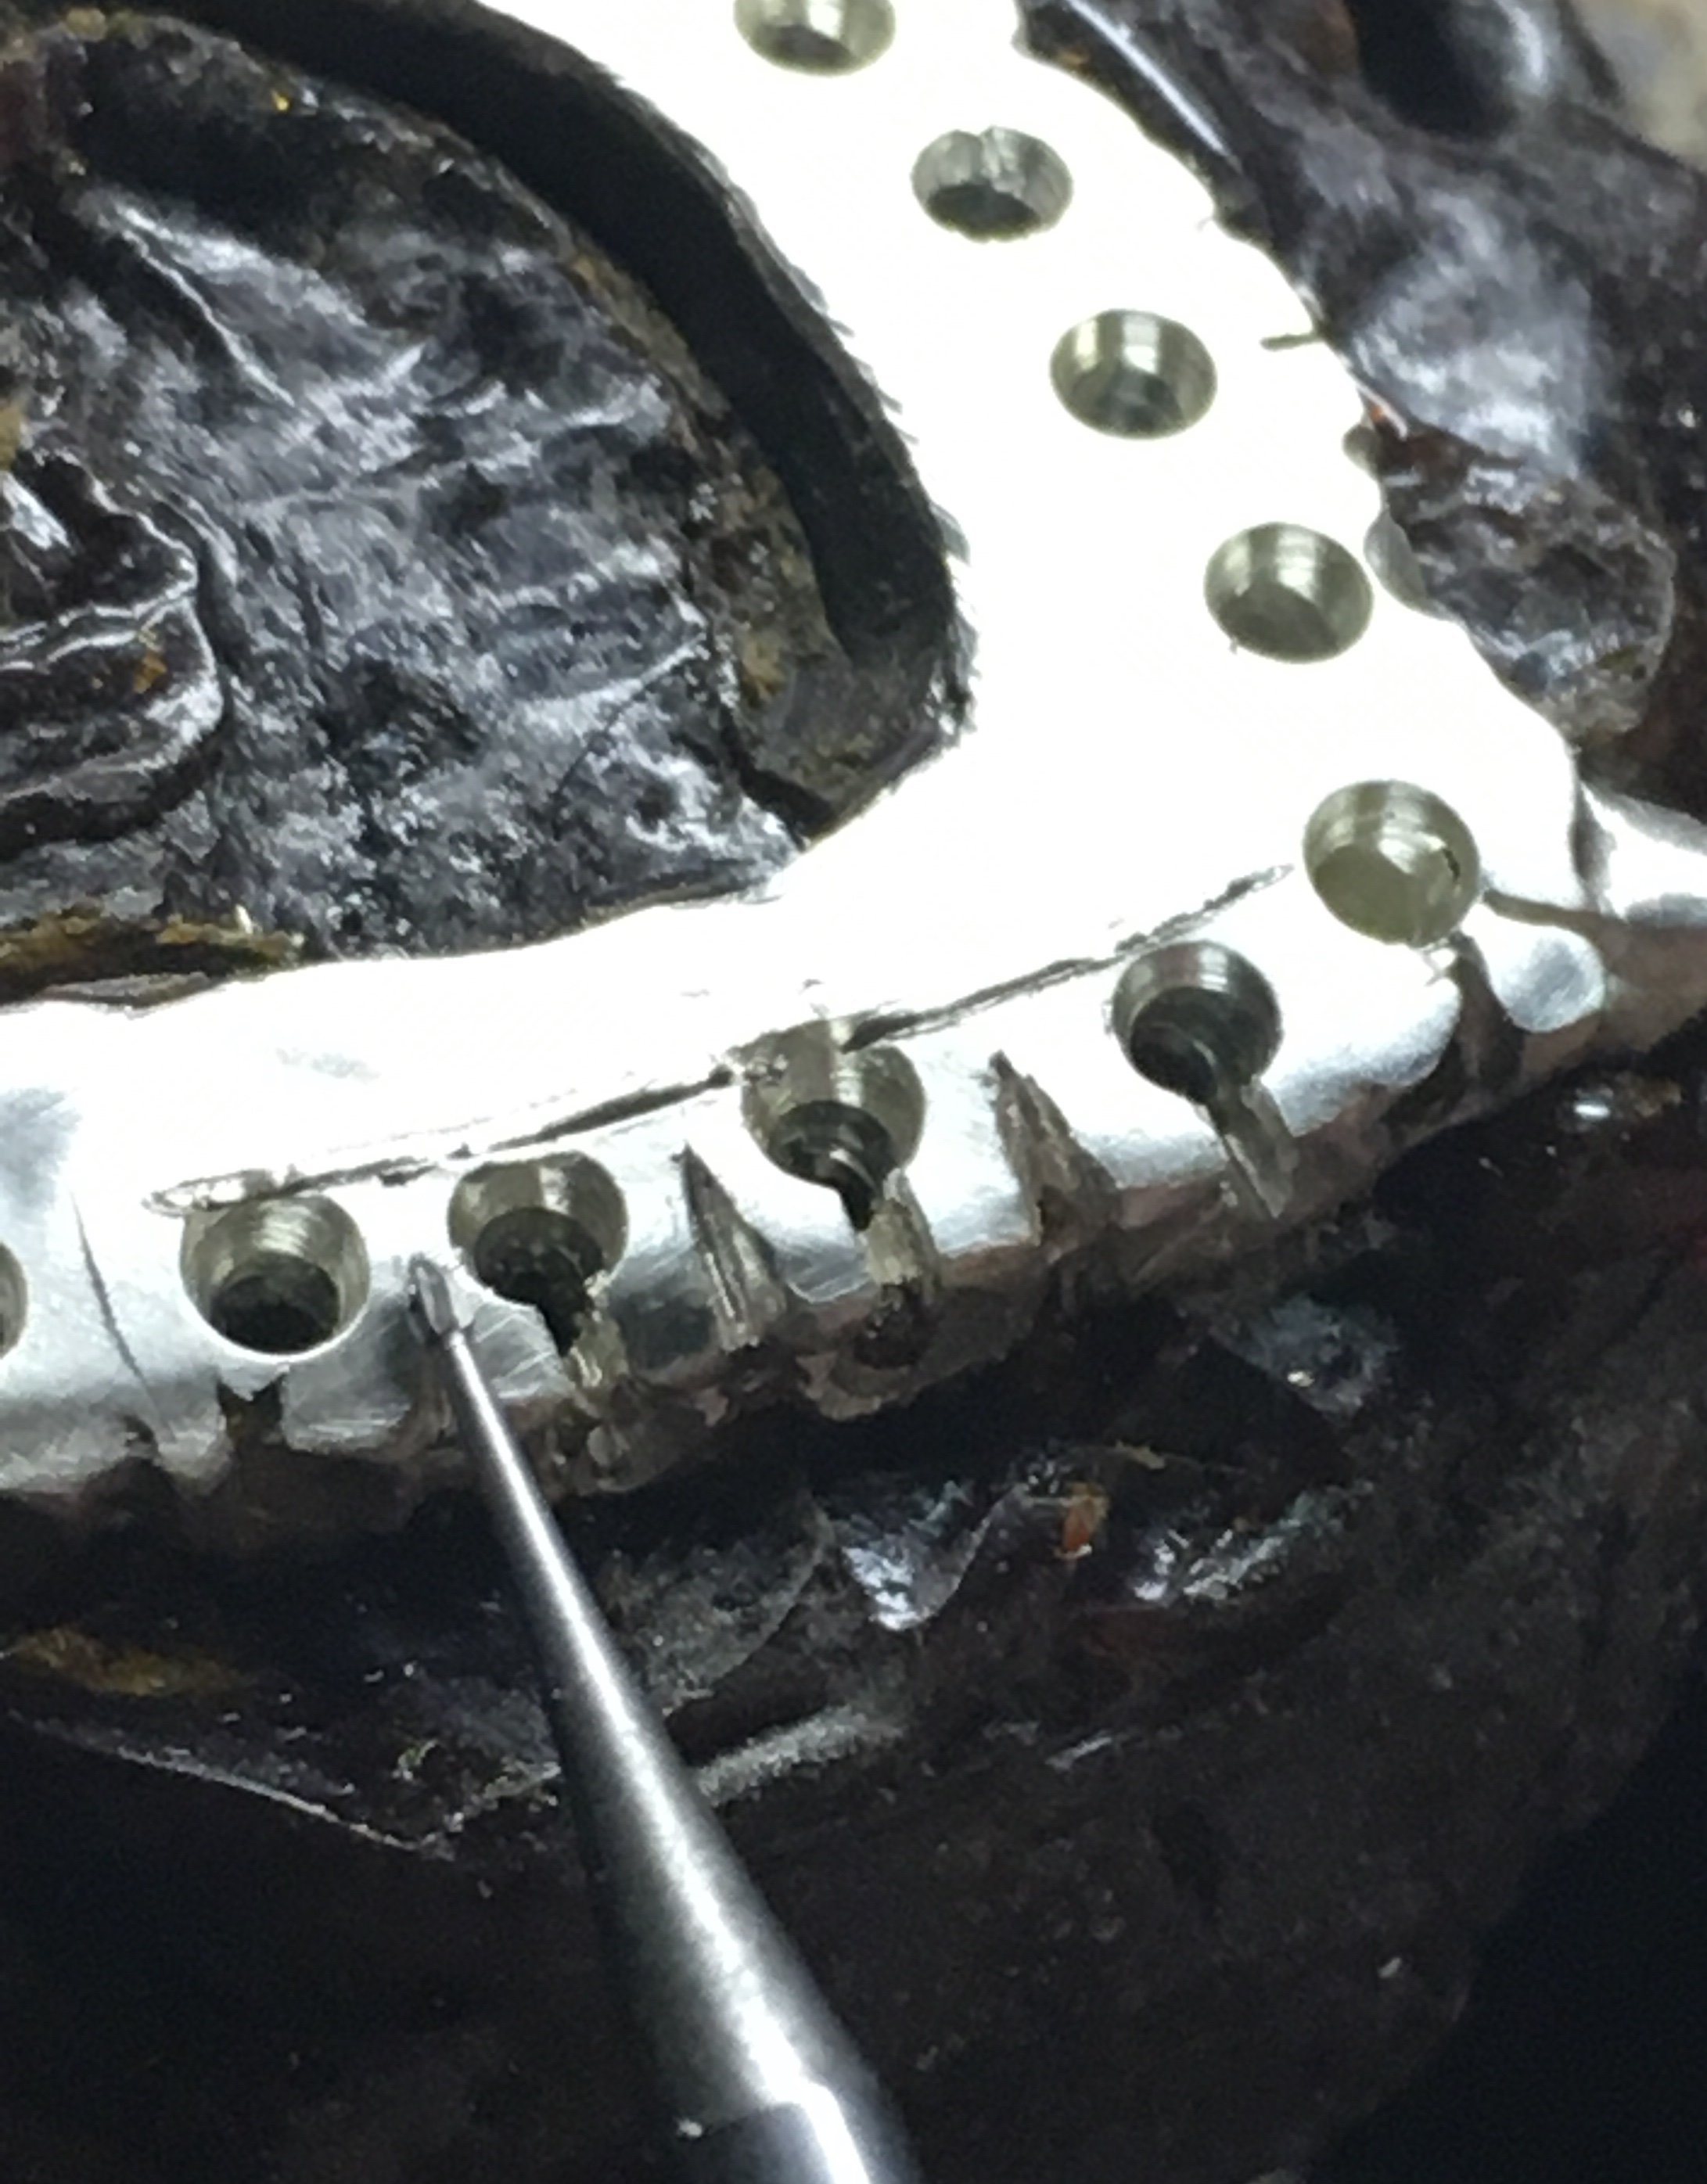
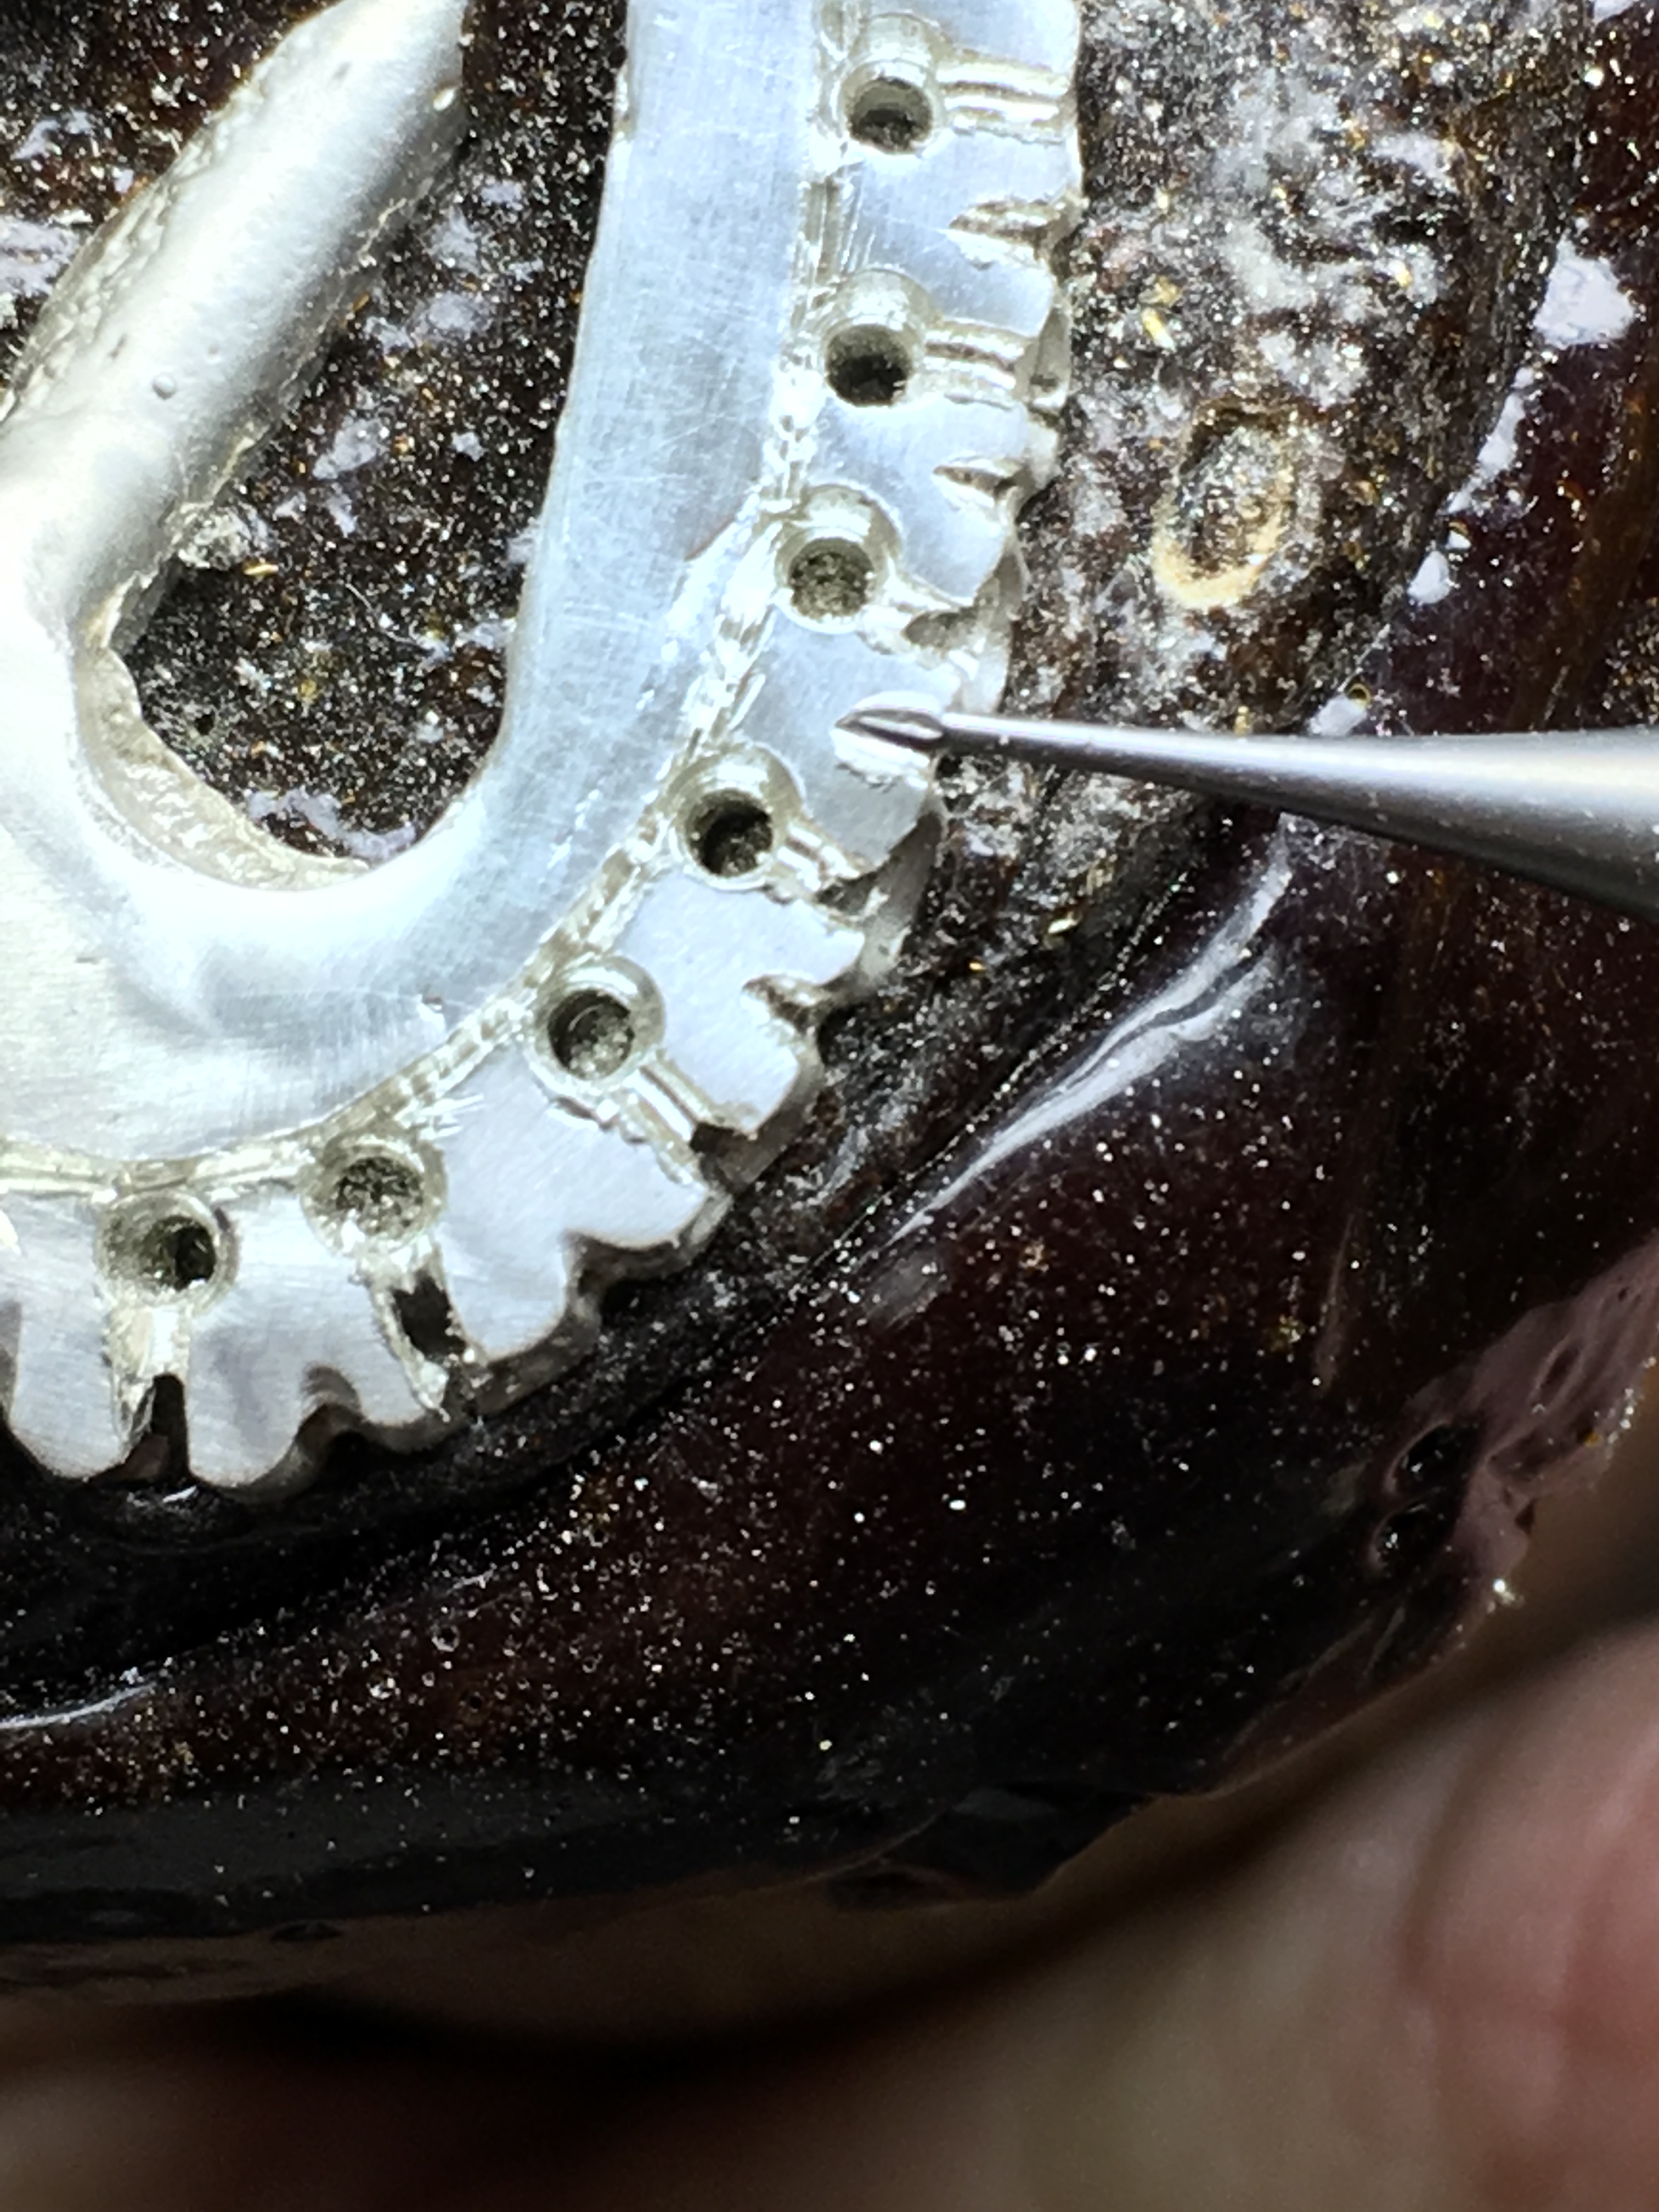
Where do you start your first cut? A very simple question, the answer
is shown as it should be obvious a cut must be initiated just ‘before’ the hole of your choice, literally at any point along the “21, stone-hole” pathway!
It is apparent that the first cut is only a ‘line-marker’ for the following 3 rounds of cutting, each ‘round’ should be deeper than the previous, why so? This ‘line-marker’ is only a guide for the Onglette #2, Right-Sided graver finishing-cut later on.
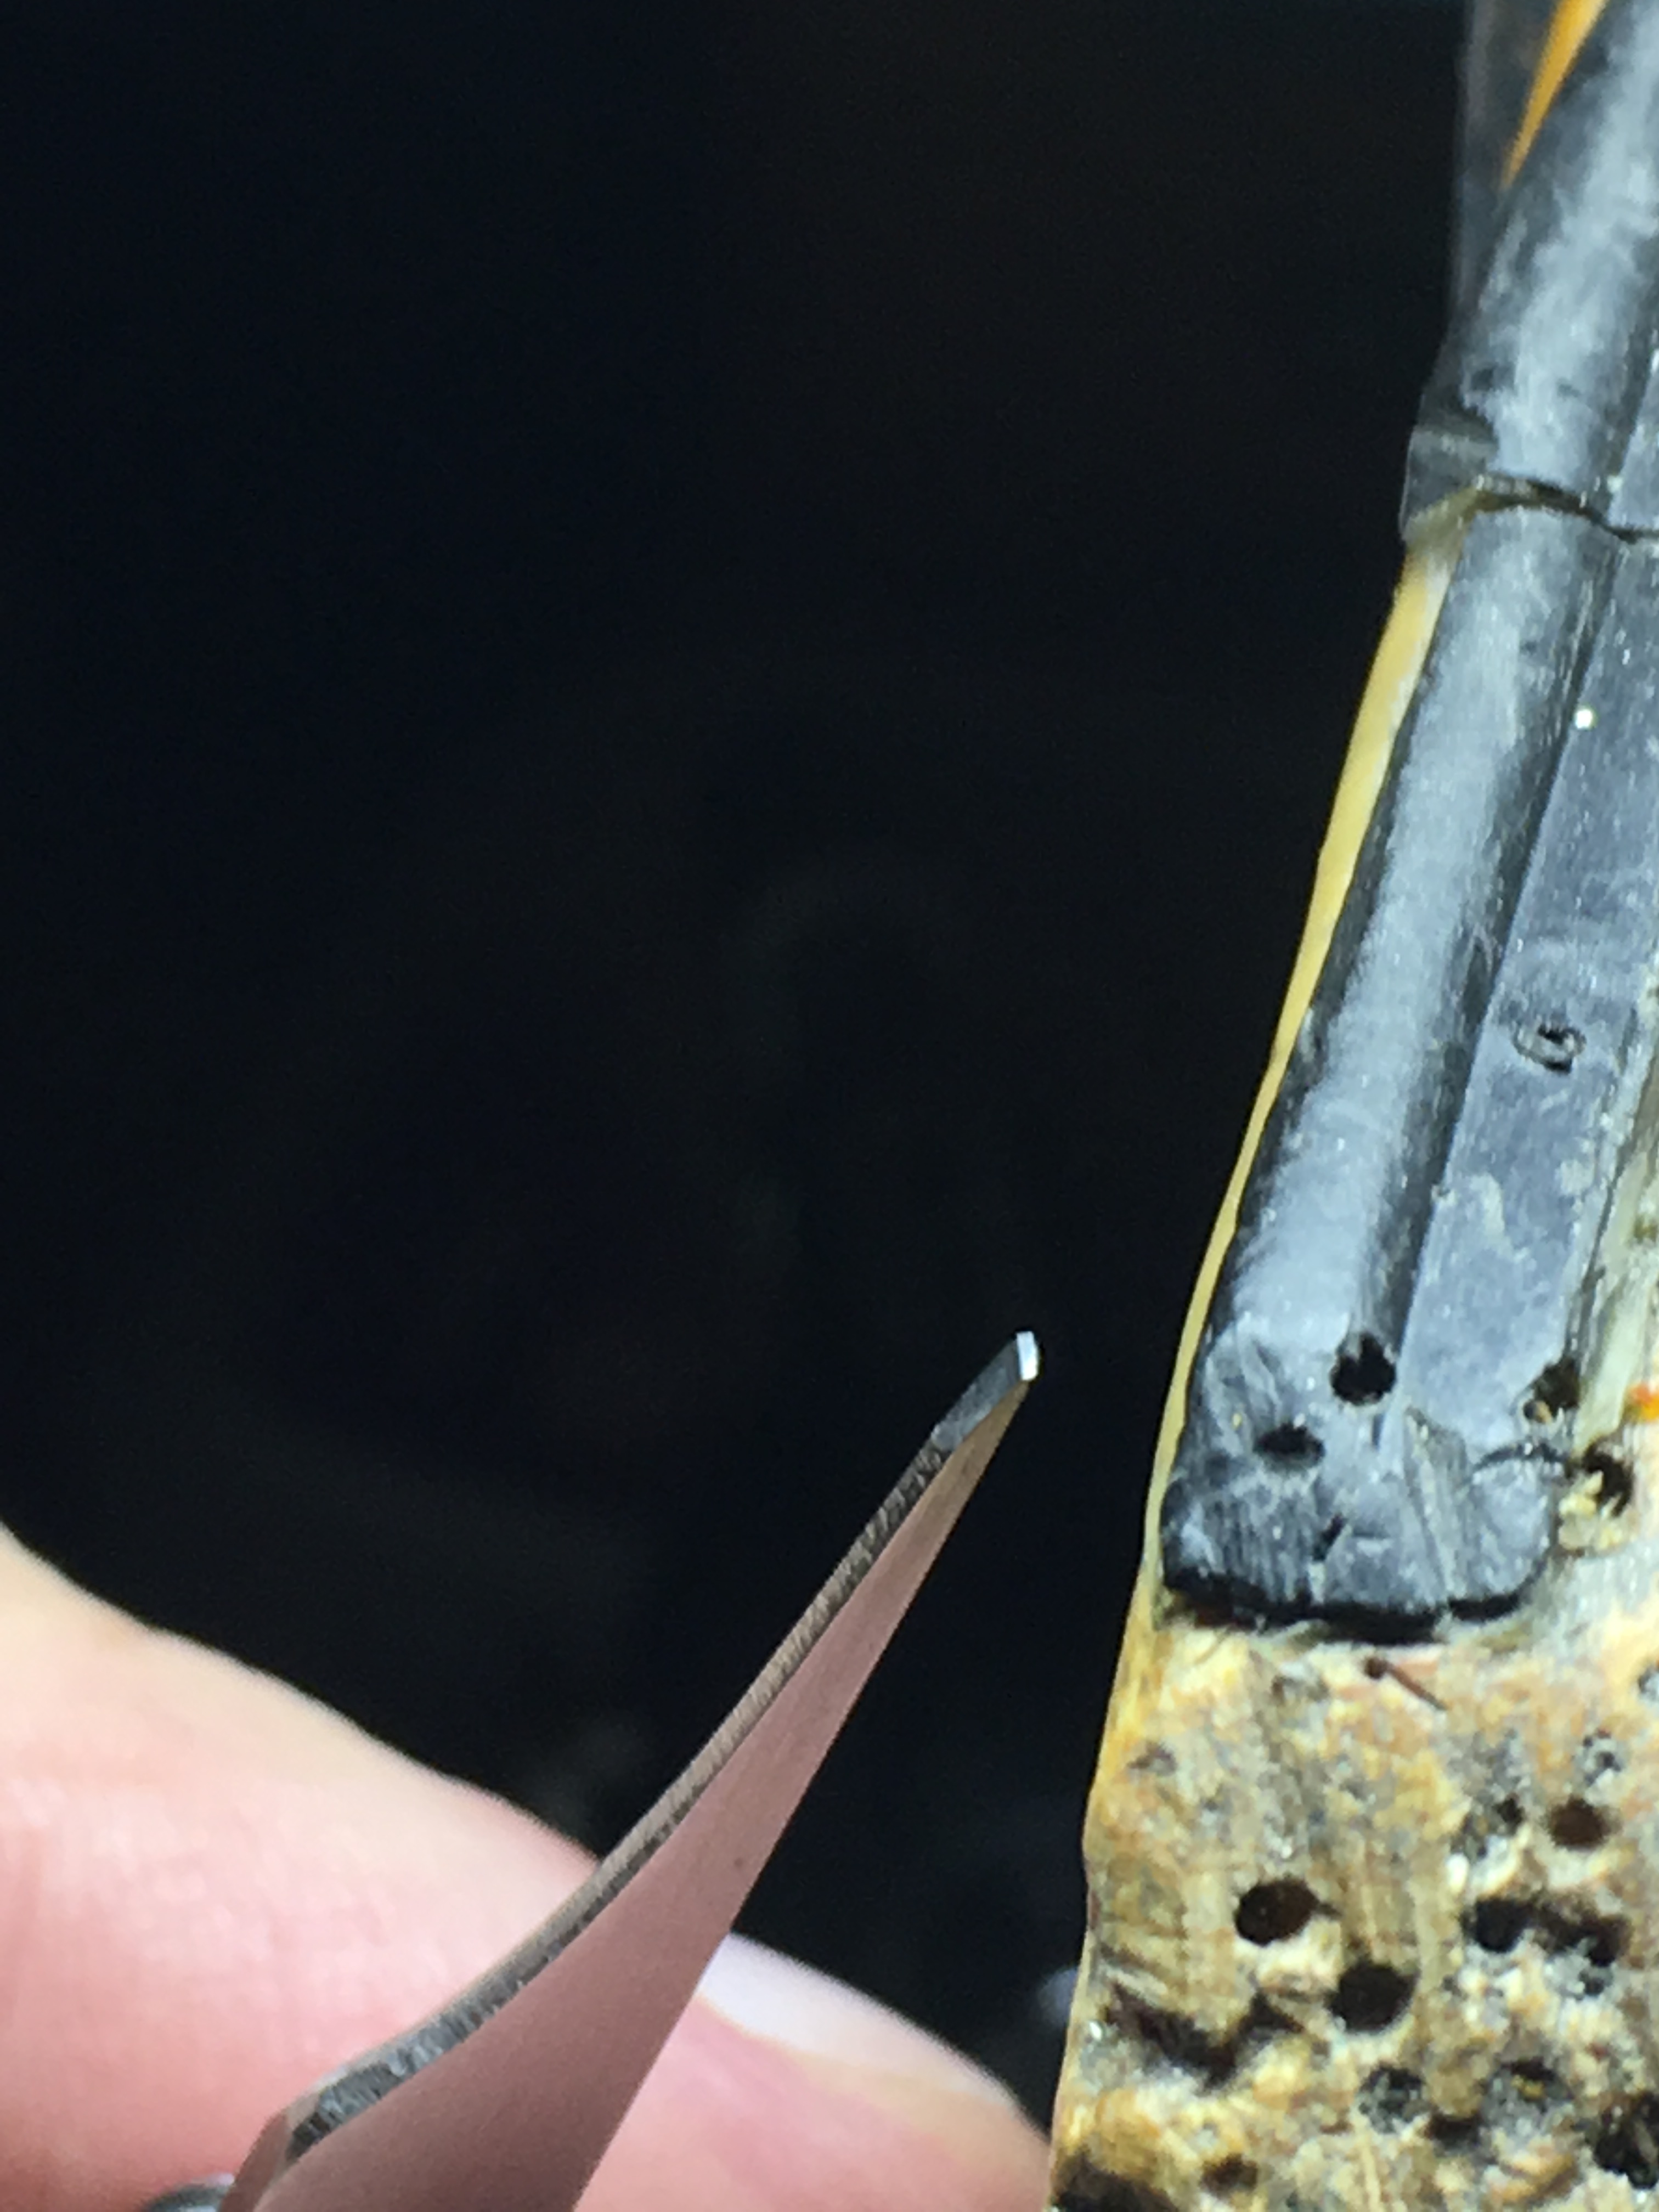
To repeat, ’you have only one opportunity to make a fantastic Bright-Cut’, this alone is what we’re aiming for. No second chances are allowed, this so very important! Your cuts must be 100% perfect, or even better! Your Onglette #1 graver has to be radically modified to be no wider than .4mm in total width.
Your graver must be reshaped narrow & be able to cut into little ‘rough-cuts’ made with your #1 Onglette graver. For this, I will make the ‘face’ created thinner just to cut a little “V” in creating the little beads. I call this stage now “Graver Modification!” Your graver can be easily ‘modified & altered’ on your oil-stone, this must be done on both sides of the blade.
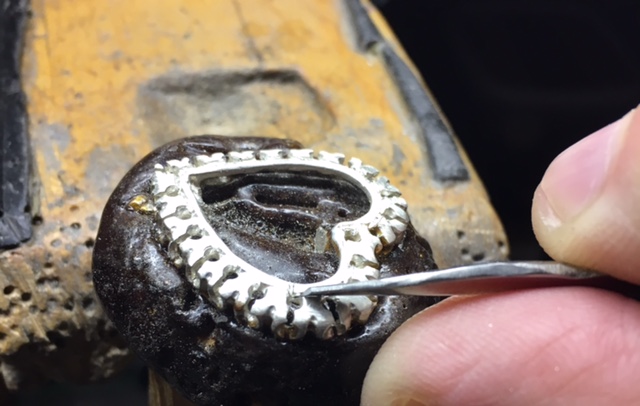
This is to start your ‘rough-cutting’ and be aware this is only rough-cut and nothing more! My main concern is to make the ‘new beads’ similar to a little ‘post’. These must be able to be then bent over the gem-stone in the future in this setting project.
In between the two beads, I will use a #007 round-shaped bur and remove any unnecessary metal. This will now occur in between the “metal beads” and as well the metal on the edge of the setting hole,
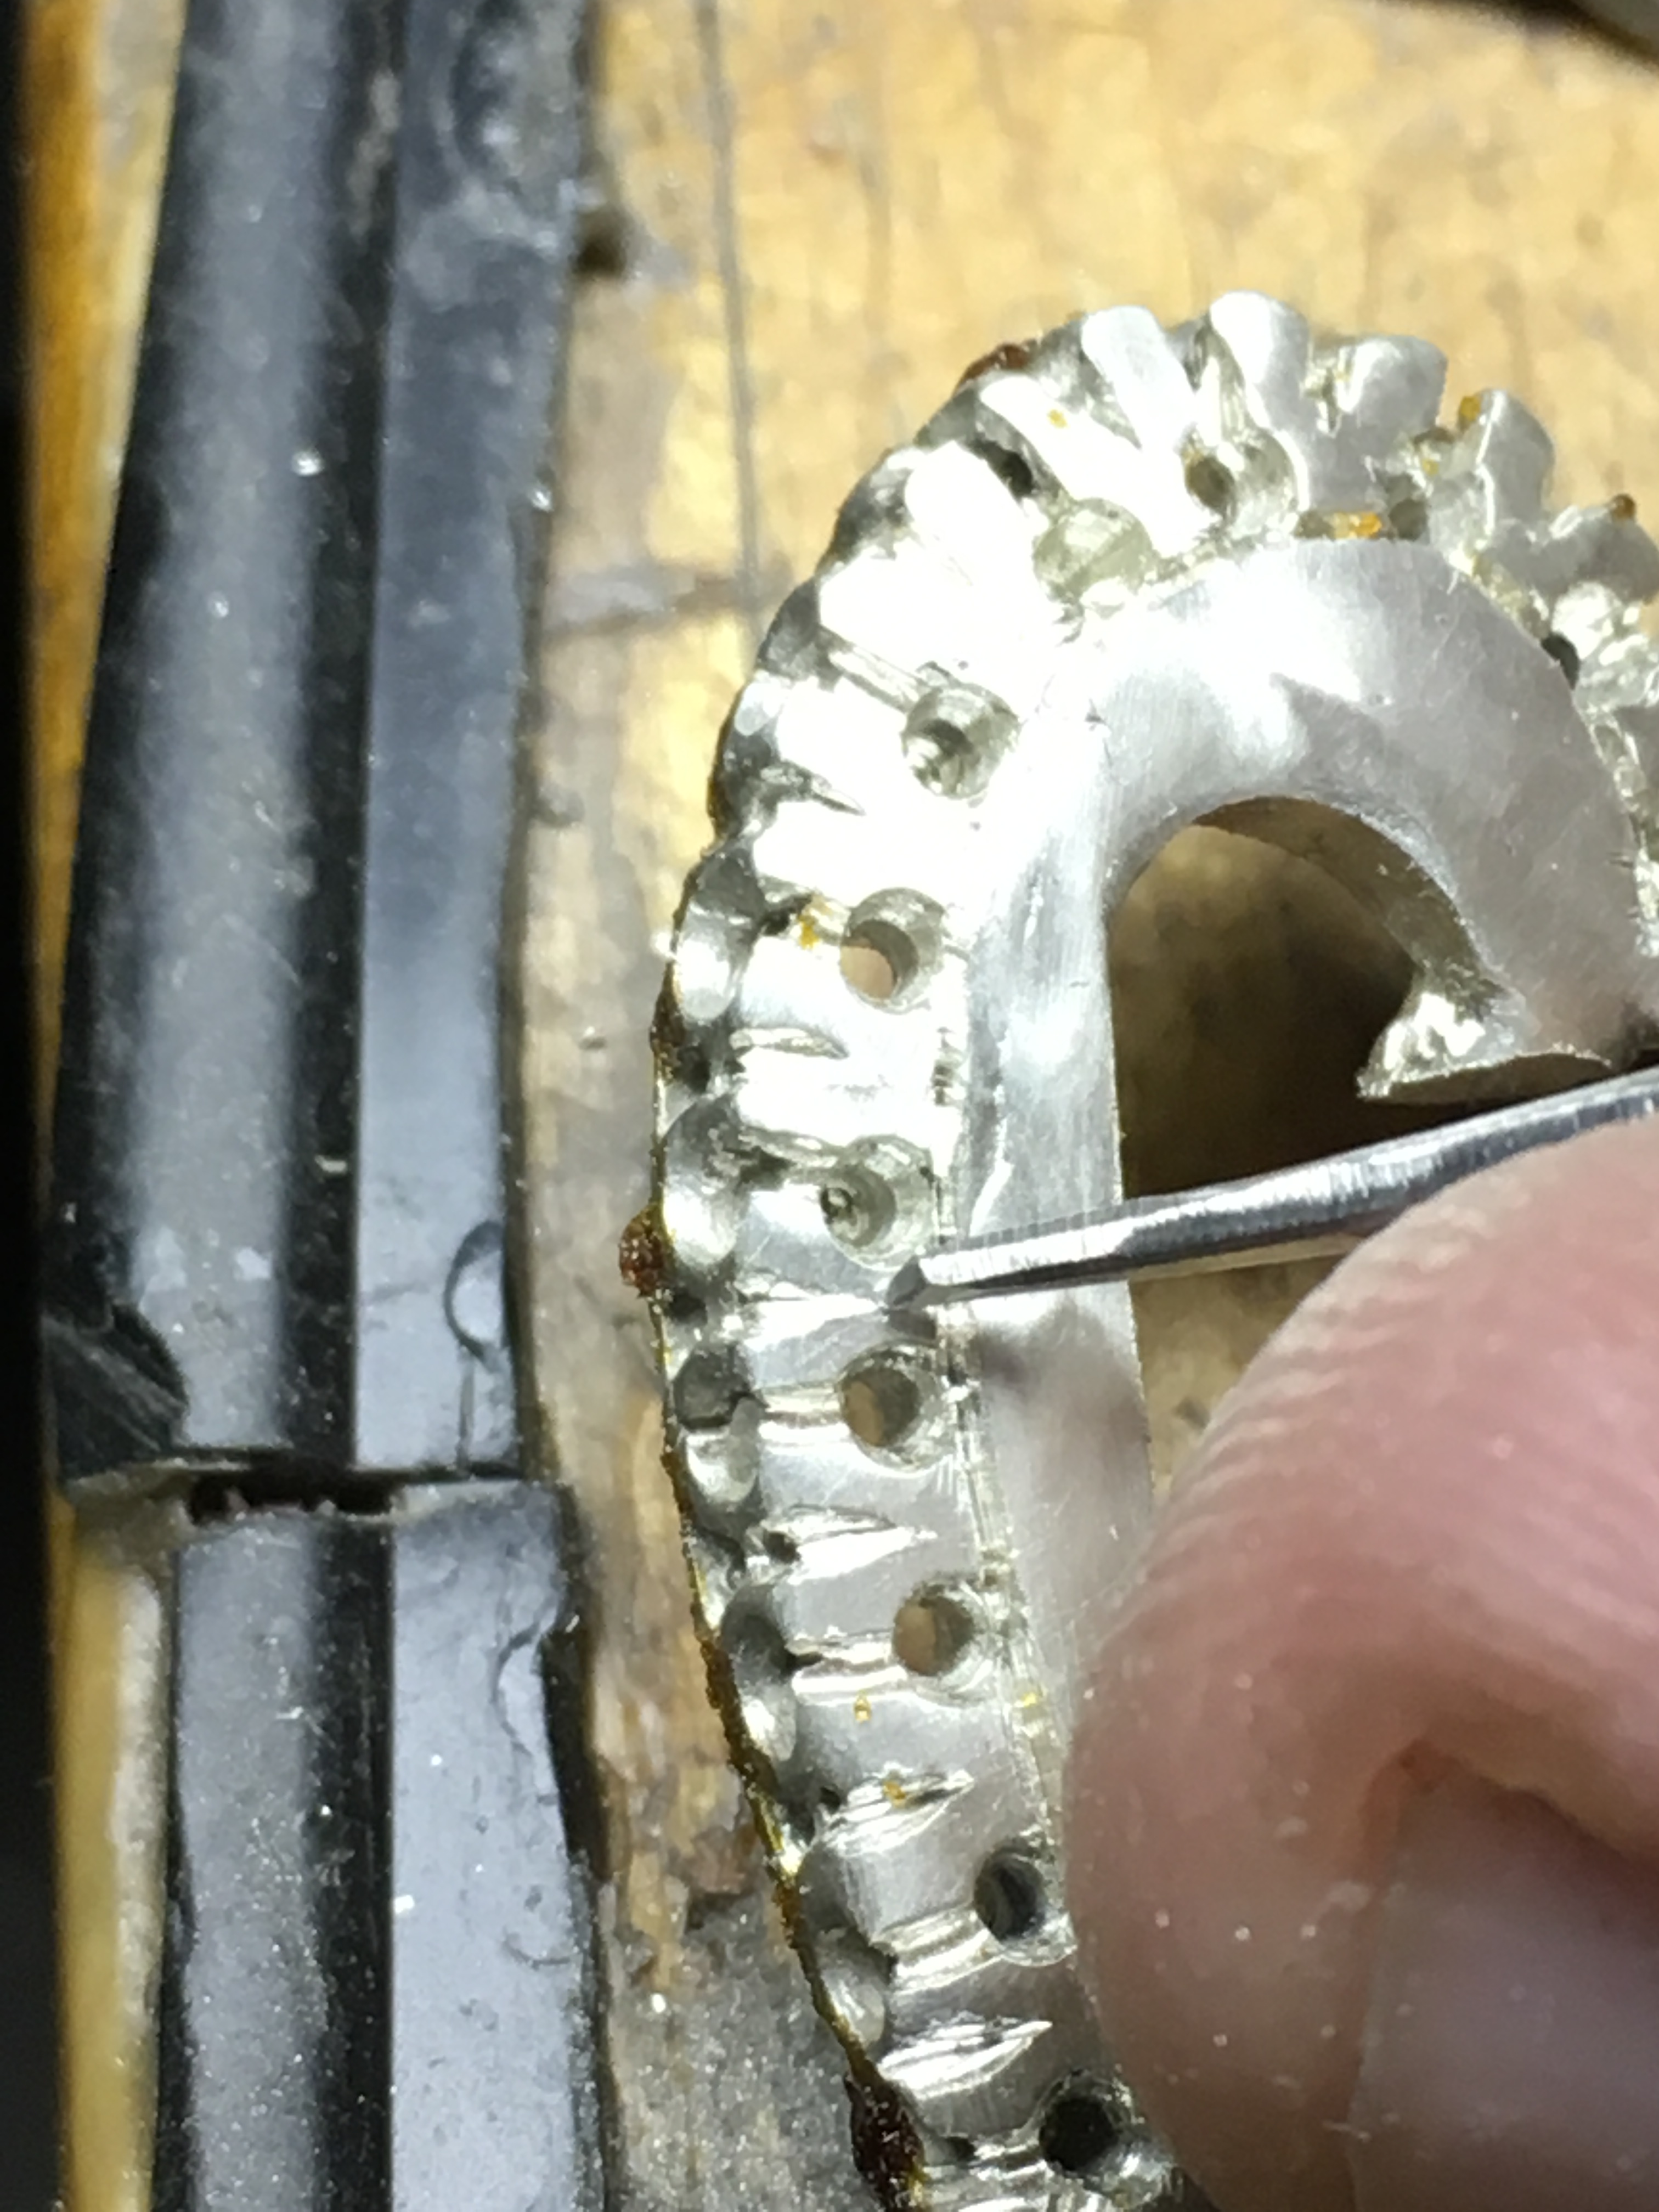
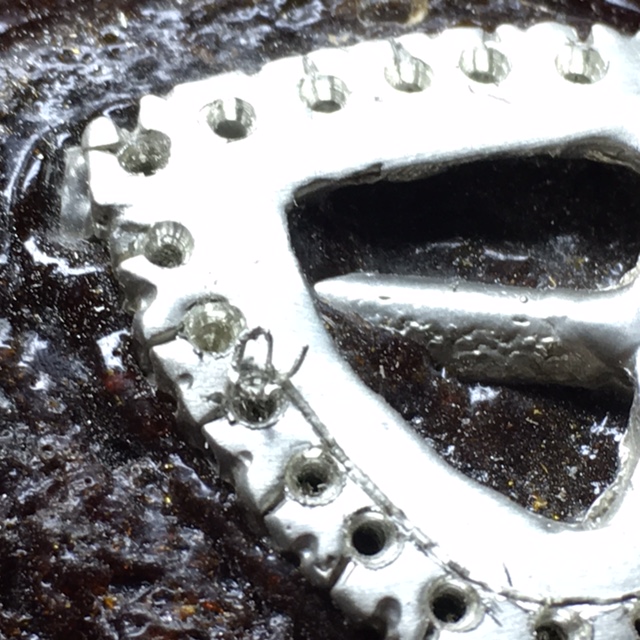
For the Flat graver, I will start the cutting of the “Fish-Tail” pattern. Let your graver-blade get right into the hole-opening, there must be no little edges of metal remaining. The stone must rest against these Bright-Cut sides.
For the “Tail” shape, I’d use the #40 Flat graver and cut it so the ‘face’ is relatively thin from the top of the cutting face to the bottom. You need a clean & polished graver-surface at all times! No striations from any graver as these will be easily transferred to the metal. Prior to any cutting is even attempted, loads of metal preparation should be started. We (including you) must use a ‘twist-drill’ and open the holes for the culet so not to touch any metal. Then partially open up the holes to at least 80% of the stones’ diameter. This is so very important! The next step is to use a #006 bud bur & extend the Fish-Tail pattern and then the inside of the ‘tail’, but not fully up to the Bright-Cut area. This is now the “Creative Beginning of the Fish-Tail” pattern!
I will now select my Onglette-shaped, Graver#1 and cut deeper into metal where the two ‘curves’ meet.
You may use a #007 Bud bur to separate and only here you may use carefully, a Triangular file #4 cut (fine grit) to insure that the ‘tails’ are properly separated.
The Bud-bur should cut right through the “tails”, to repeat, cutting right through the two tail-curves. This is not for ‘simple aesthetics’, but keeping the ‘tails’ ready for the next exacting cuts!
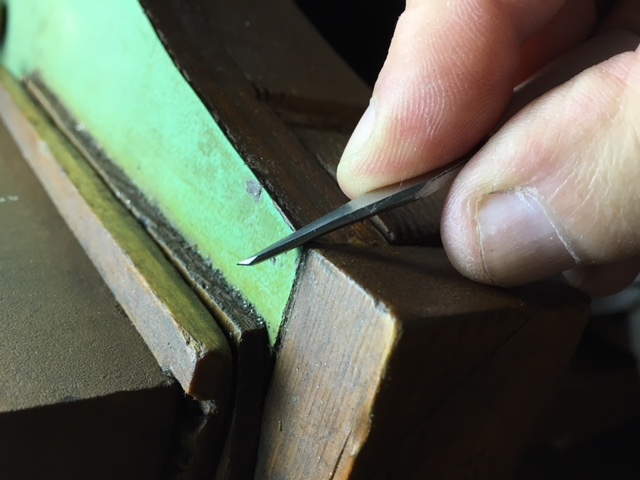
Once we have decided ‘the depth of the rough-cut’, it is now time to proceed further. Remembering all gravers must and should be held in your palm of your hand in a ‘near vertical’ position. No gravers must be leaning over too far from the vertical! The ‘barrel-shape’ of the graver has the correct, desired & preferred angle that you so desperately need!
I will, at this point may start to use a Bud-shaped bur of #006 and remove any extra metal laying at the edge of the hole!
The bur must be held in a ‘near vertical position’ just to have the bur-teeth make contact during this ‘removal of metal’ stage. This process is so important!
as there must be no extra metal on the edge of the stones that are to be set. If there is any metal it looks so ‘poorly set and ugly’. It appears that the setter doesn’t care about his setting, I wouldn’t want to be known as a mediocre setter.
“Graver Modification” can be made on your oilstone easily by laying the Onglette graver ‘flat & against the barrel-shape’. What you see now is a ‘facet’ but not allowing the point to be touched!
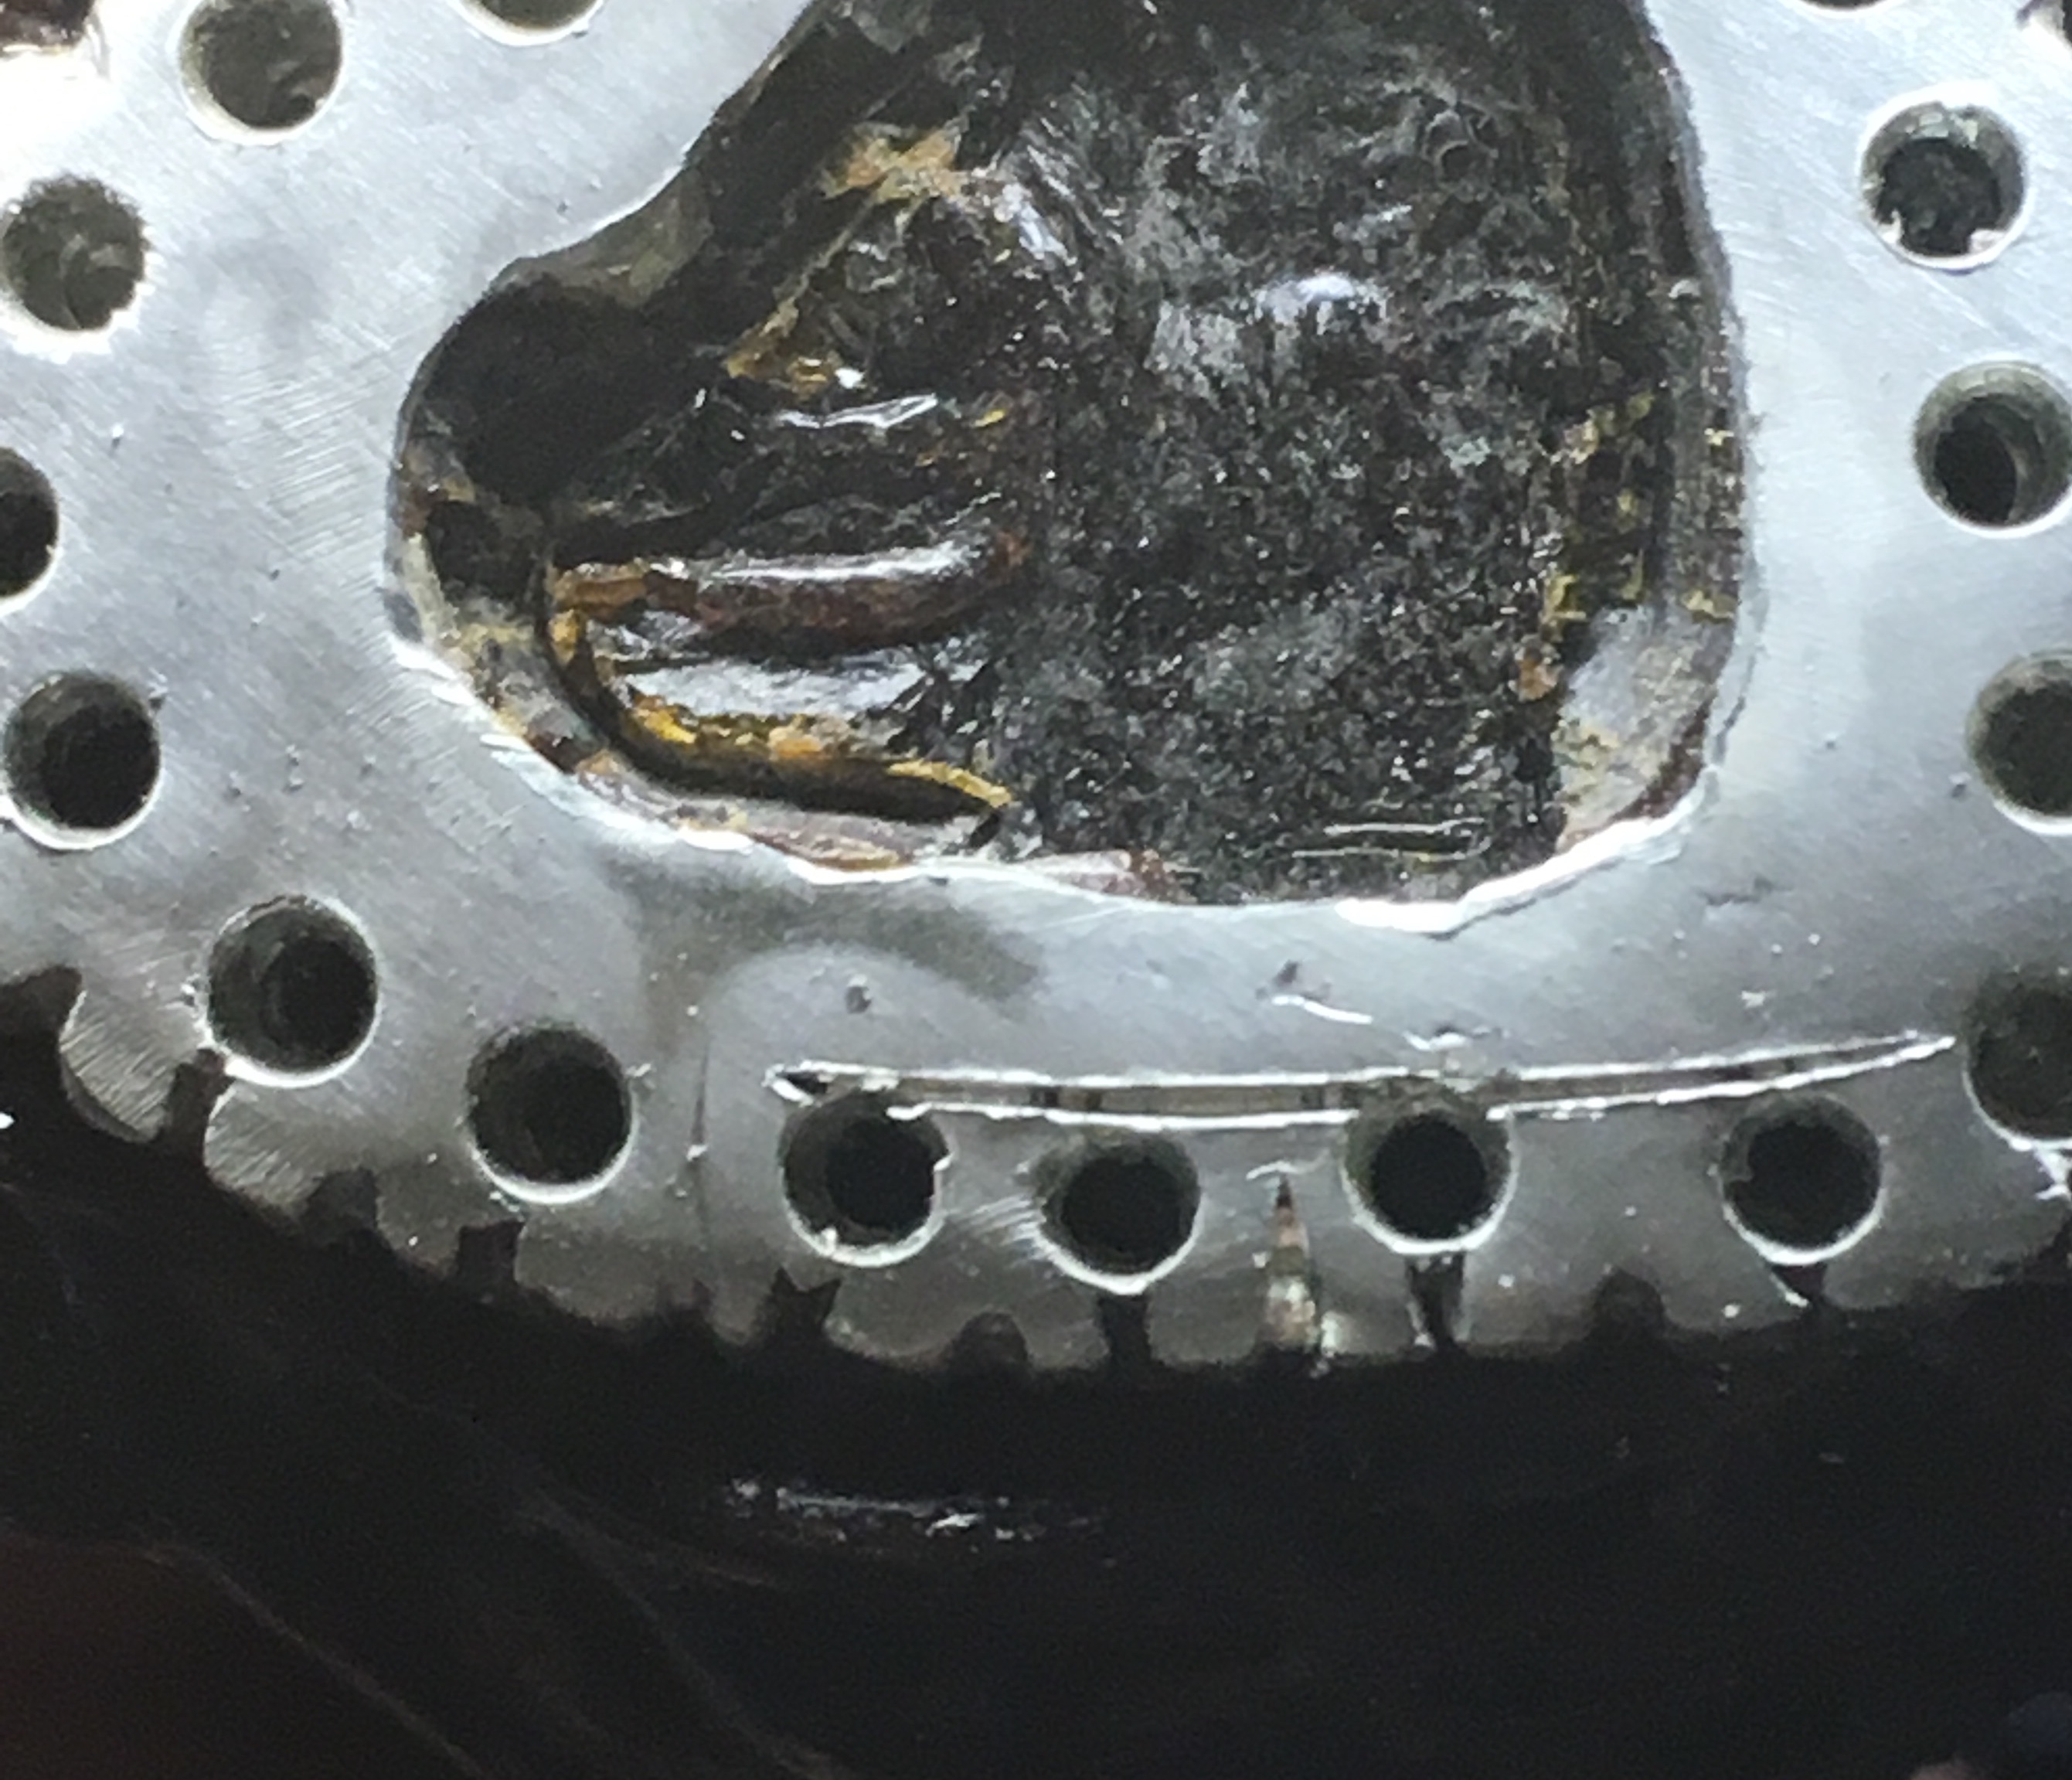
How are the “Two Beads” created? These ‘two beads’ are the most interesting feature of this pendant project. I need the graver to be made ‘extra thin’ at .035mm or .04mm in its appearance! It has just one purpose and that is to form a “Vee-shape cut”
The next stage in this cutting, is to outline your ‘forming of the beads’. Let me just say that all steps in cutting, are not for ‘now’, but for the ‘next three steps’ ahead!
If I make an error anywhere, it will be reflected in my cutting with my Onglette #2 Graver & ‘Flat’ graver further on. For reference now, view some of the photographs being shown. Any graver held in the hand must sit well with the action that will be taken.
How are the ‘bead-forming’ be made and with which tool? Simple answer! The graver #1 face is only 0.4 mm’s wide and must not cut any deeper than 0.7mm’s. The little triangular-cut must be only as a little “V” as in “OvO”
The graver cutting of the “V” must also have the graver-point cut into the hole! Now what remains is a little triangular remnant of a piece of metal that is now the precursor of a bead … but only in the ‘formative stages’!
Your graver must not exceed the measurement quoted as this must allow a very thin series of cuts into metal. Each cut must be carefully contoured & shaped! In between these two beads, a little triangular shape of metal is now appearing.
In between these two shapes, full separation must be made by using a round bur of #007. No metal should be left around as this will prevent any pushing over the ‘posts’.
I would even use a ‘Bead-Burnisher” to round off the tip of the Triangle of metal that you just created!

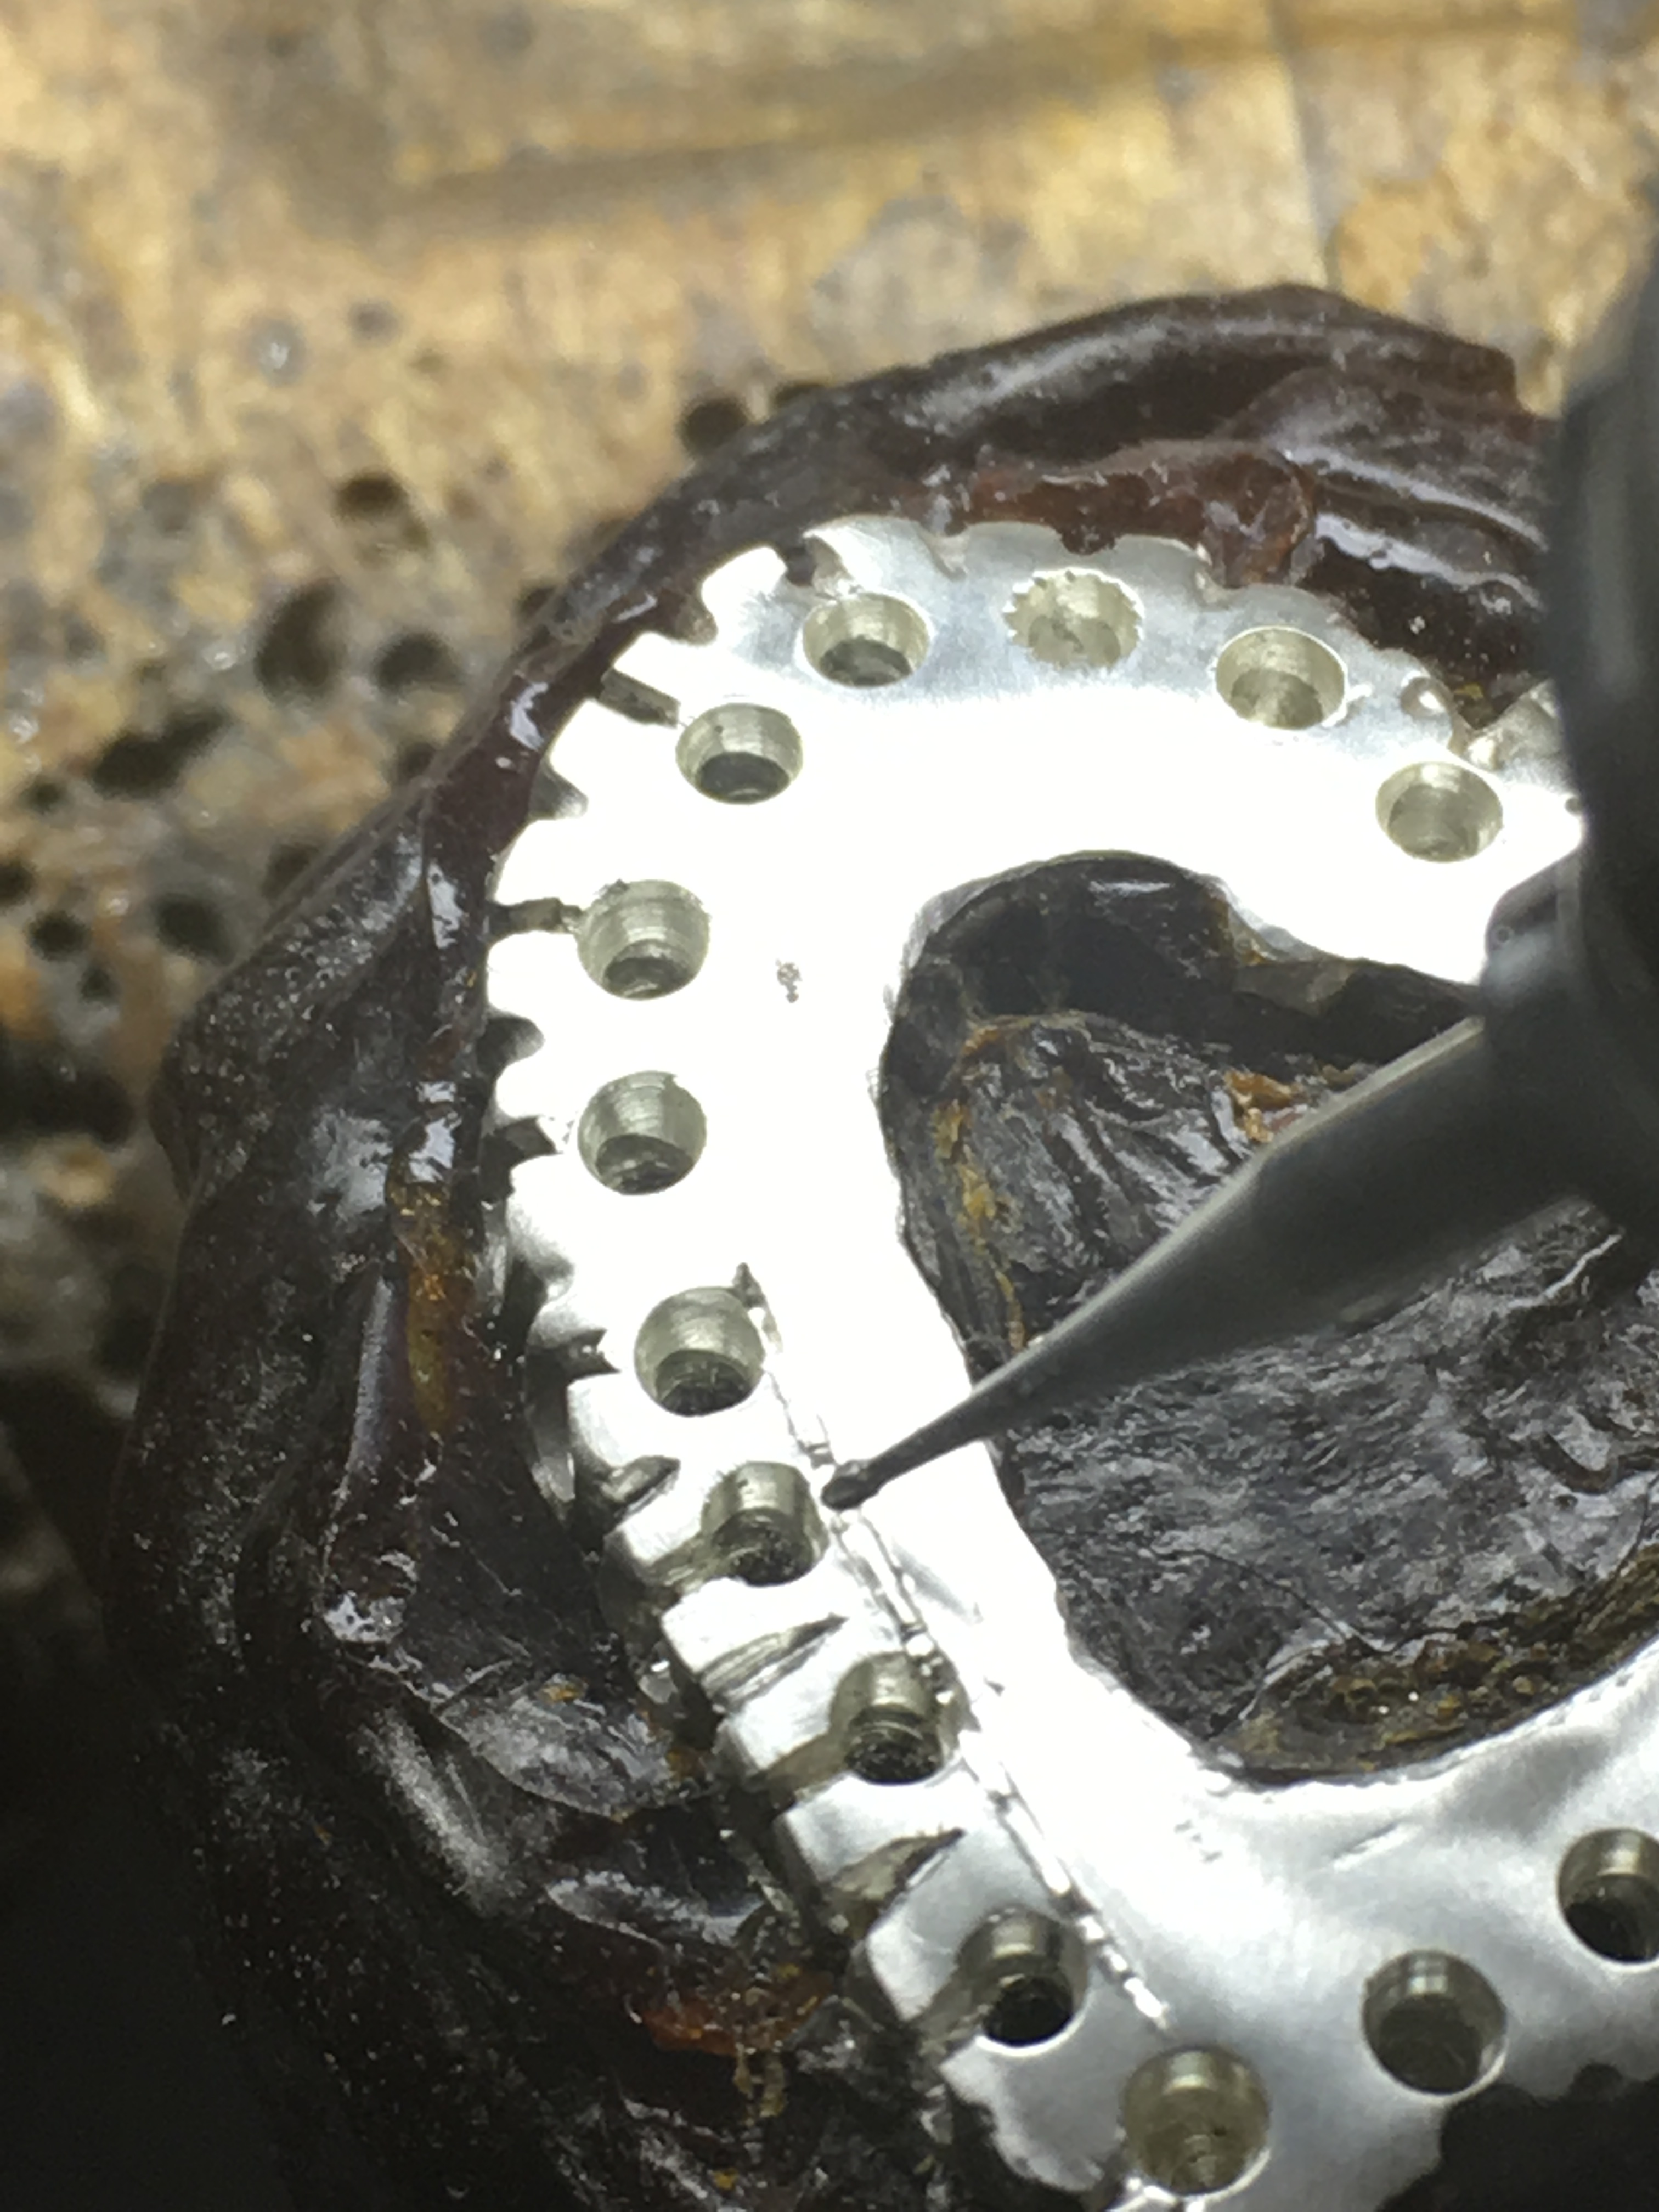
It is at this point, I will prefer to go over all of the ‘holes & beads’ with your gravers & burs. This is prior to Bright-Cutting now to follow. I call this “a rough-cutting clean-up”!
I have photographed & catalogued many photographs for you & everyone to understand these cleaning processes. Pictures are better than words!

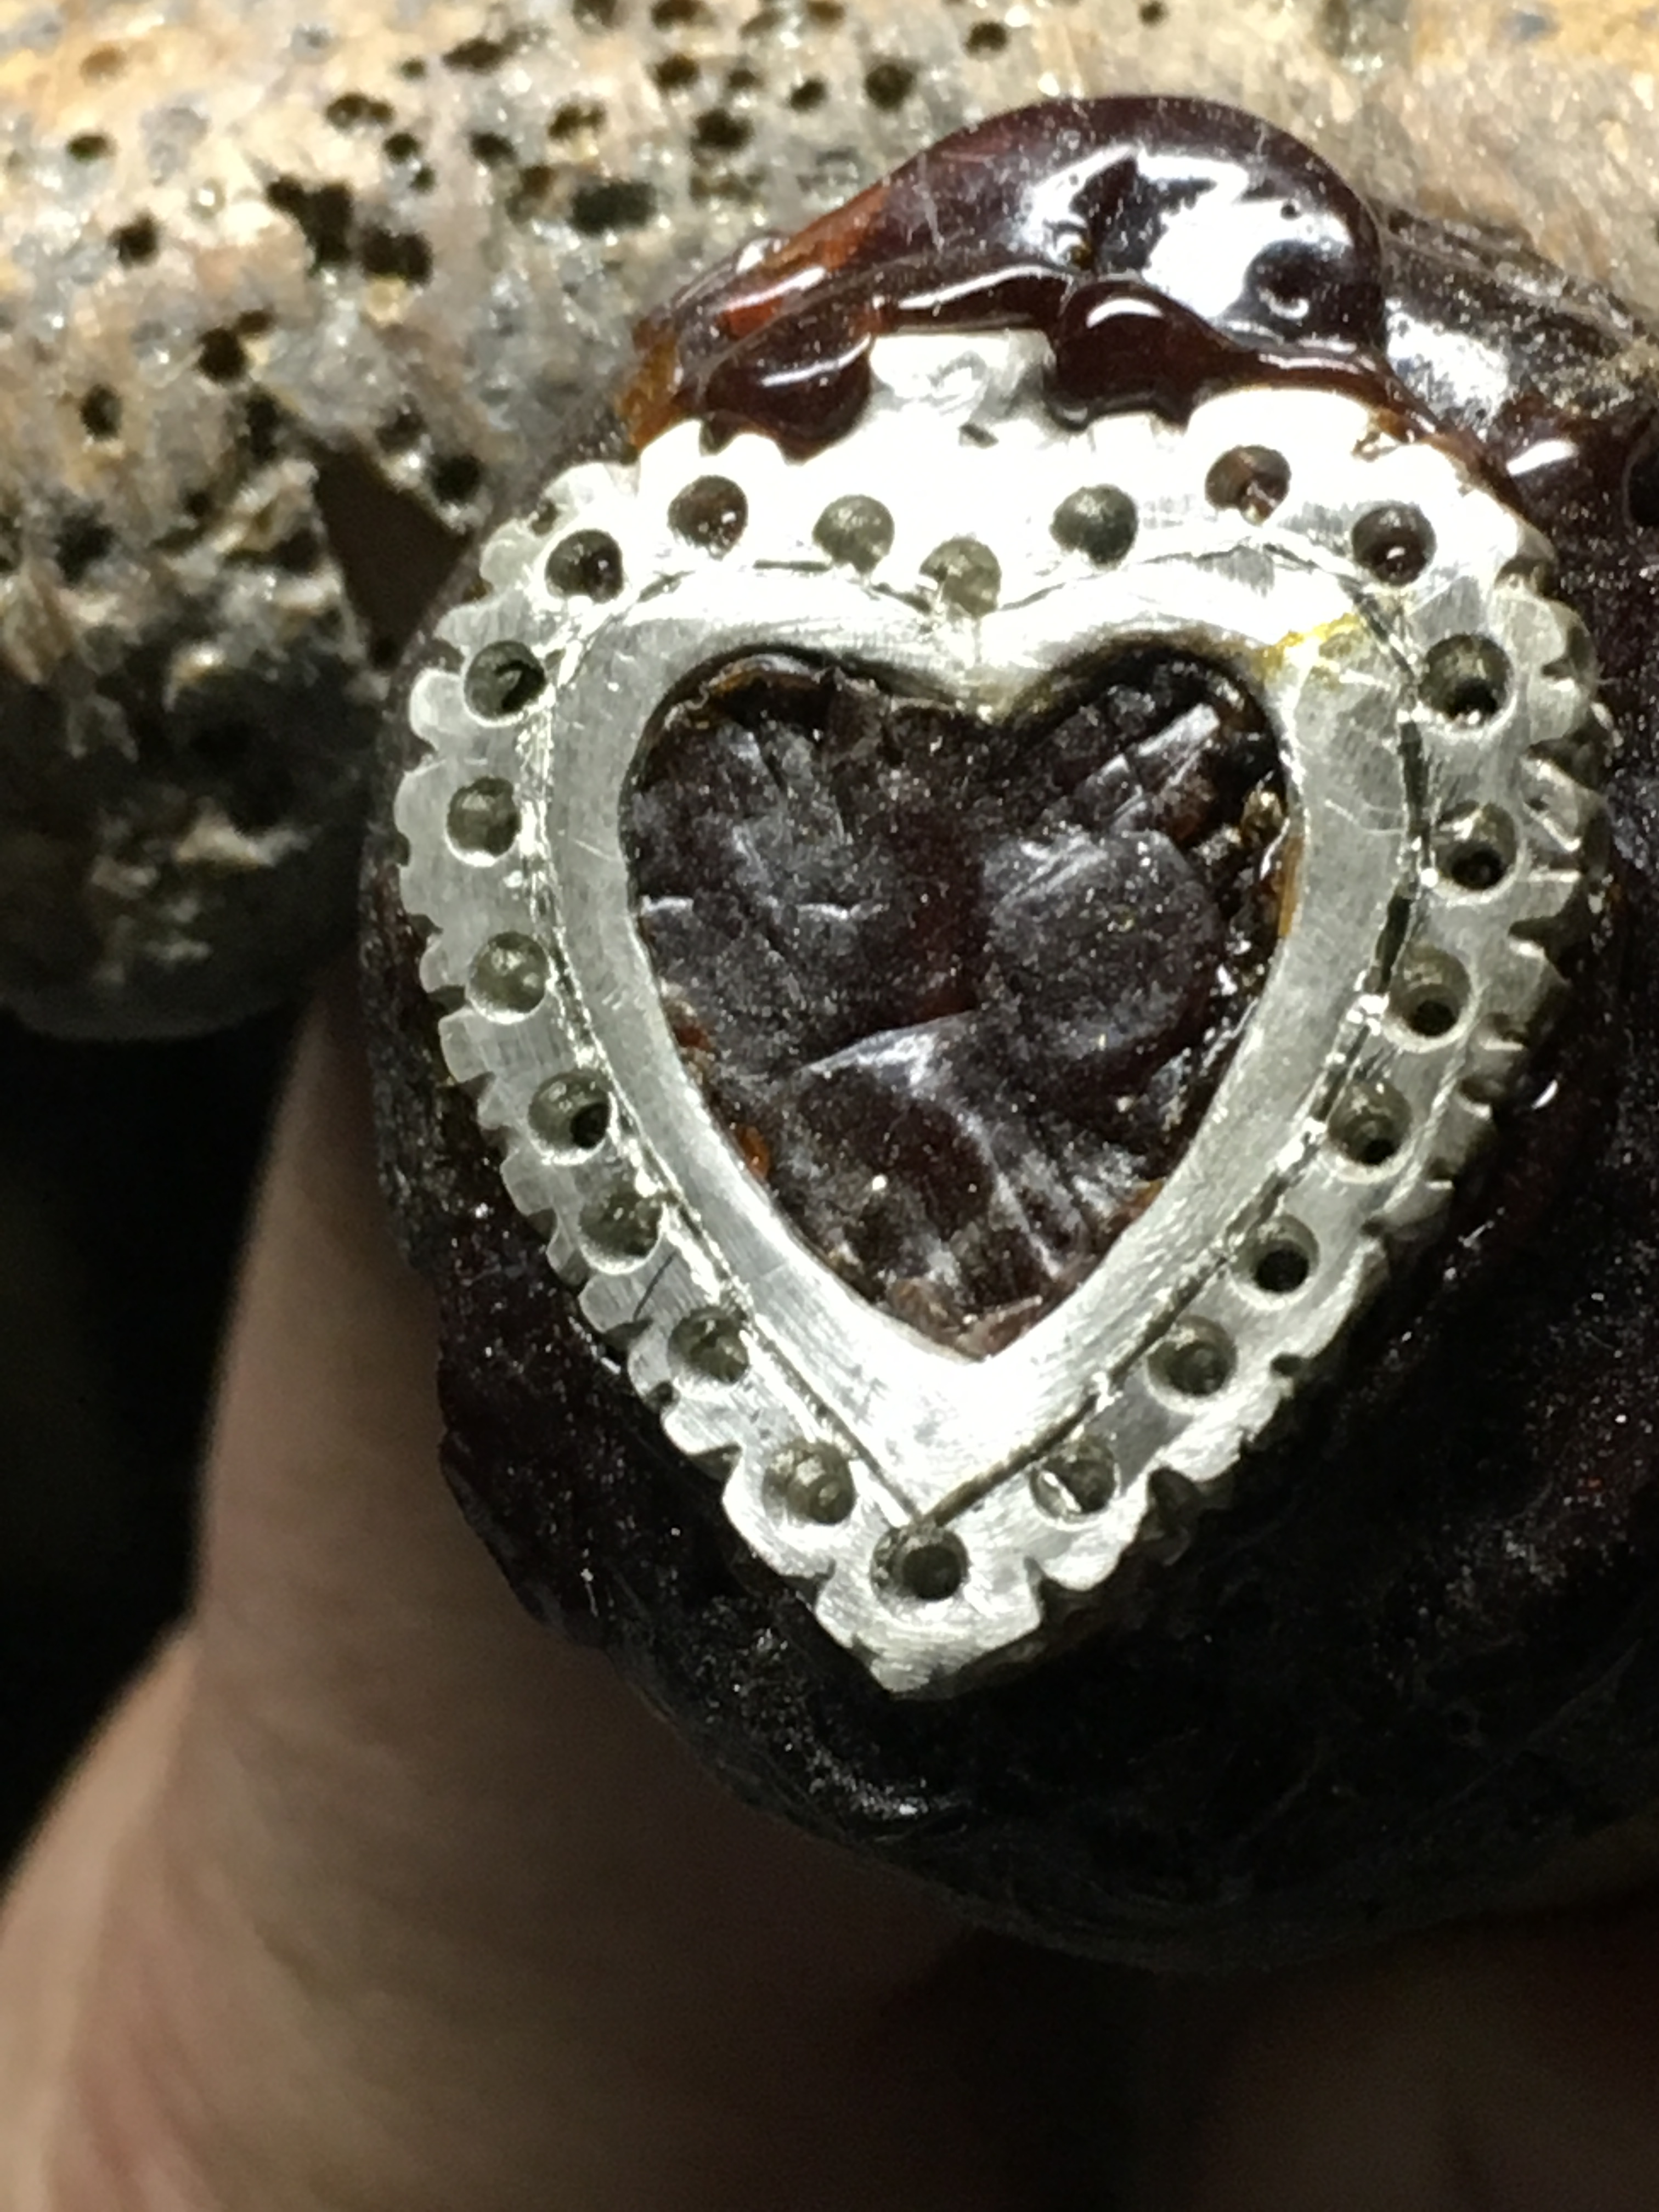
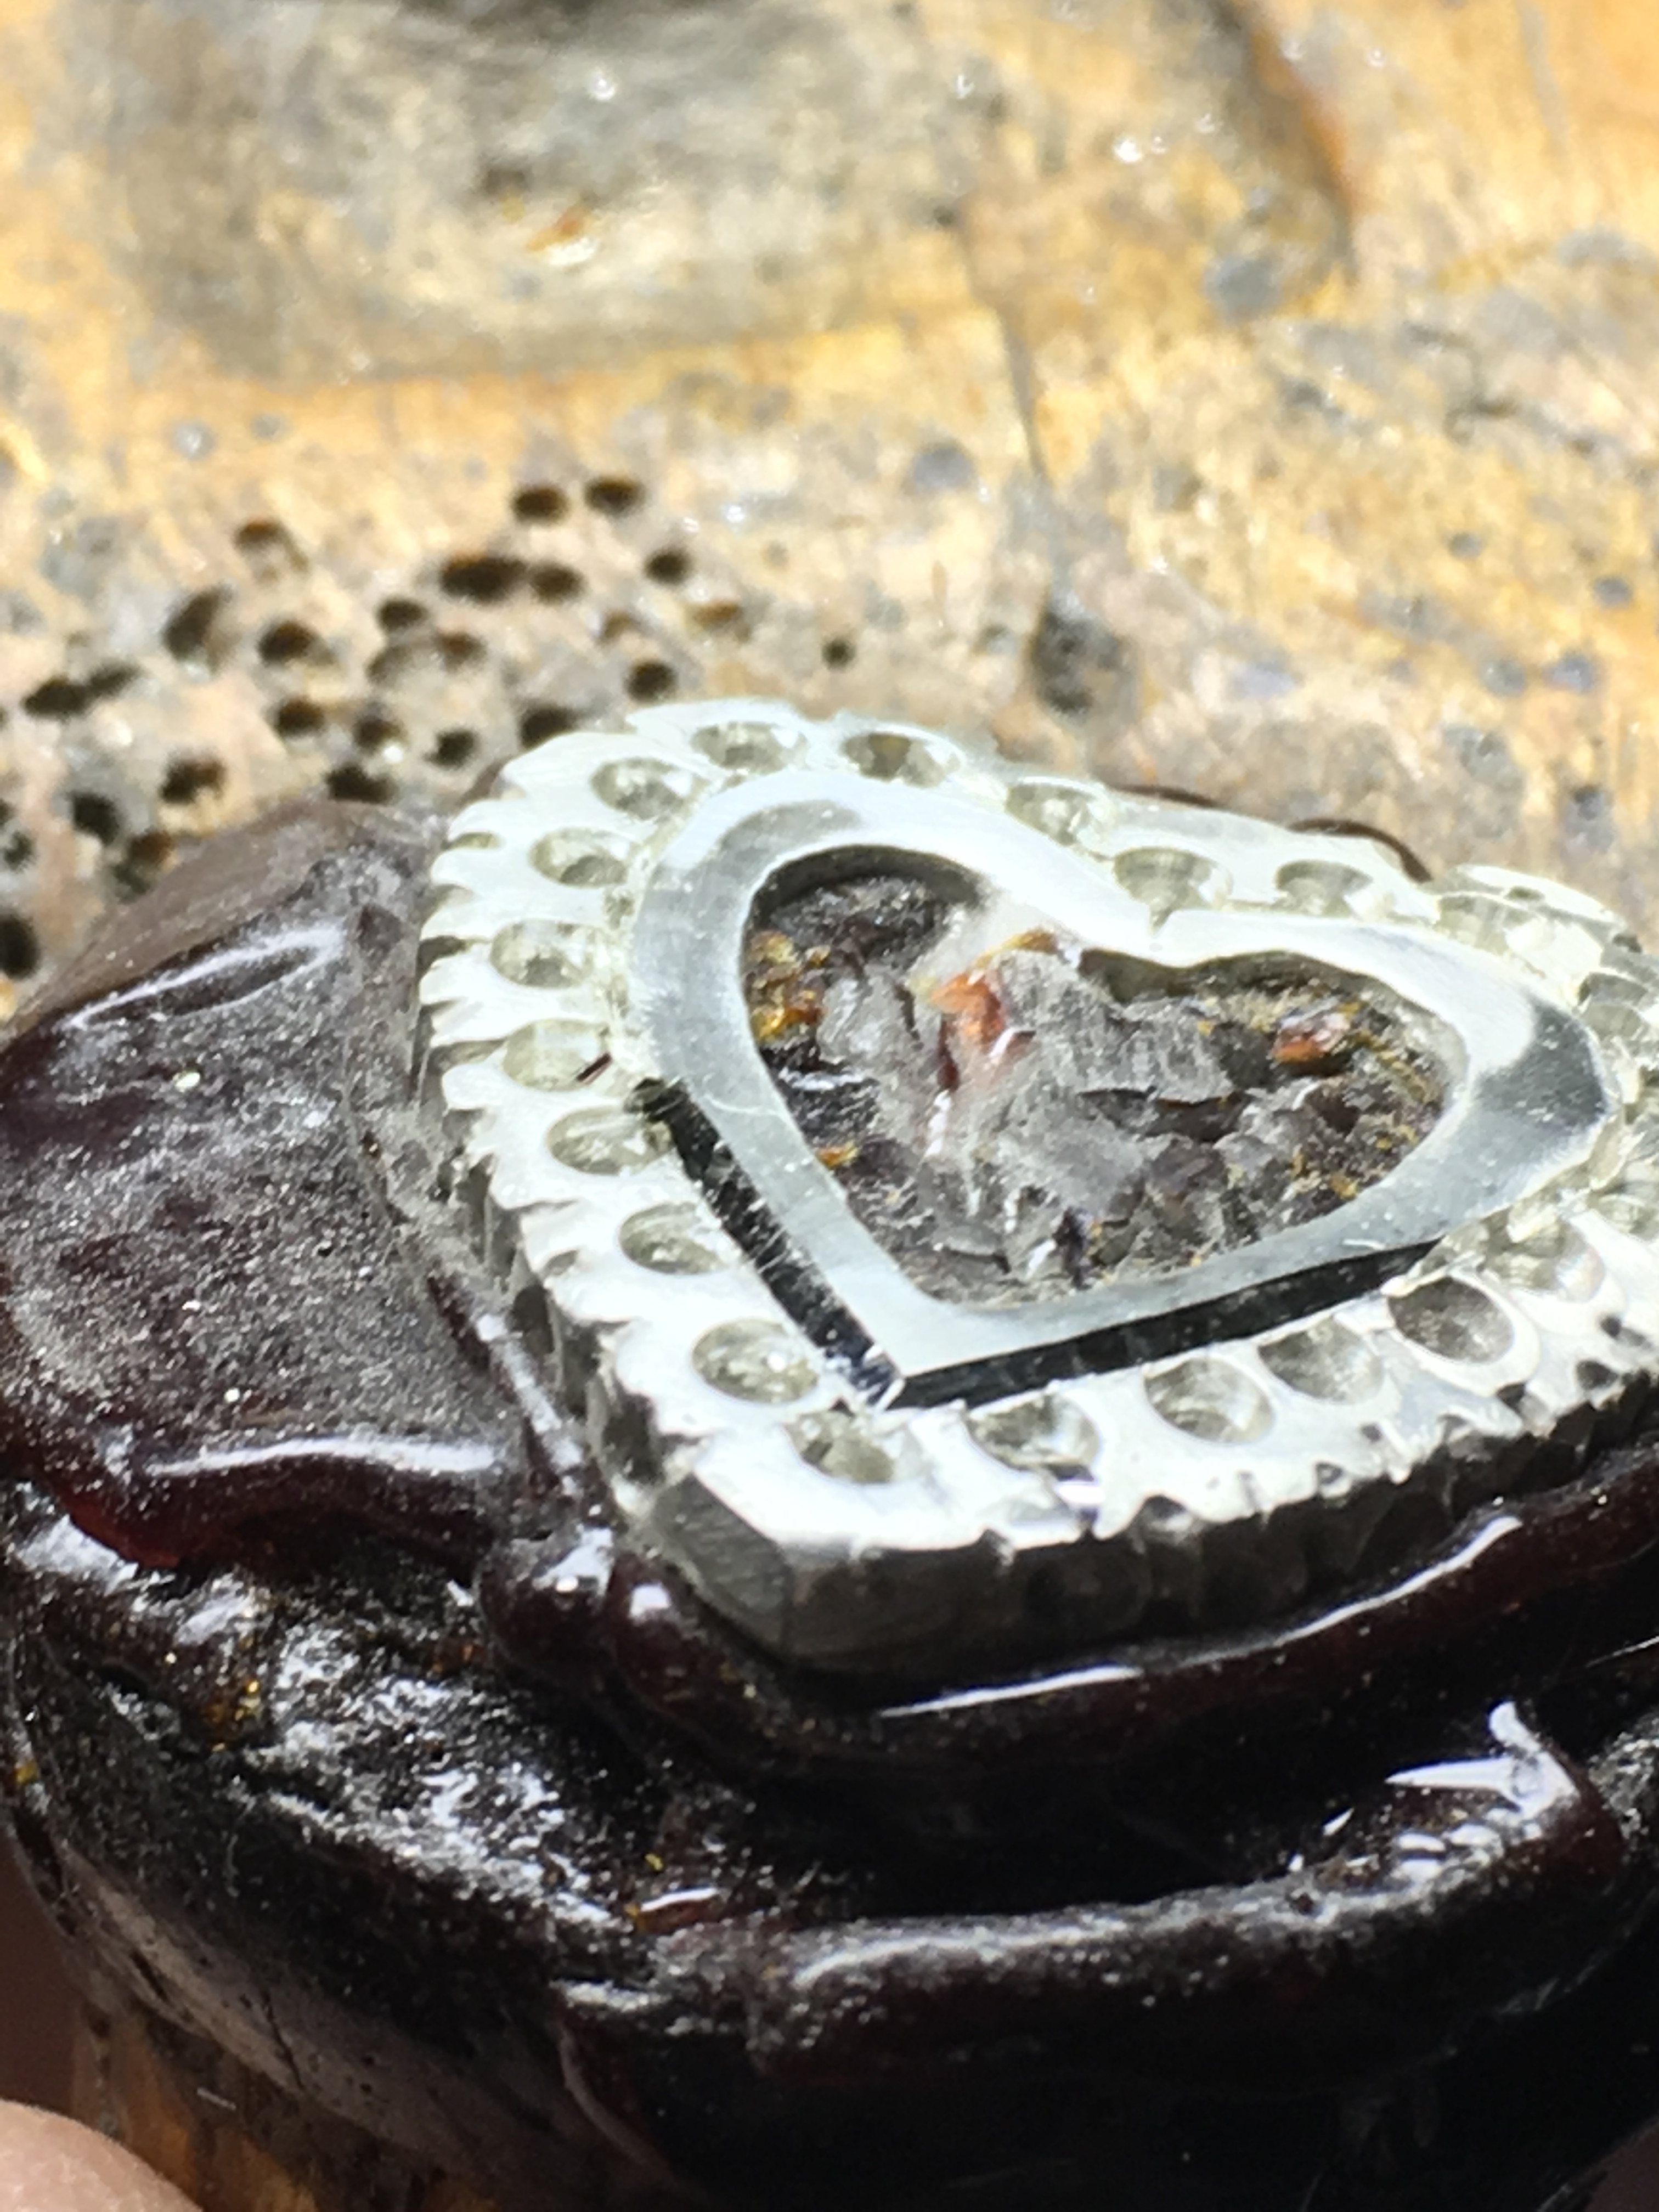
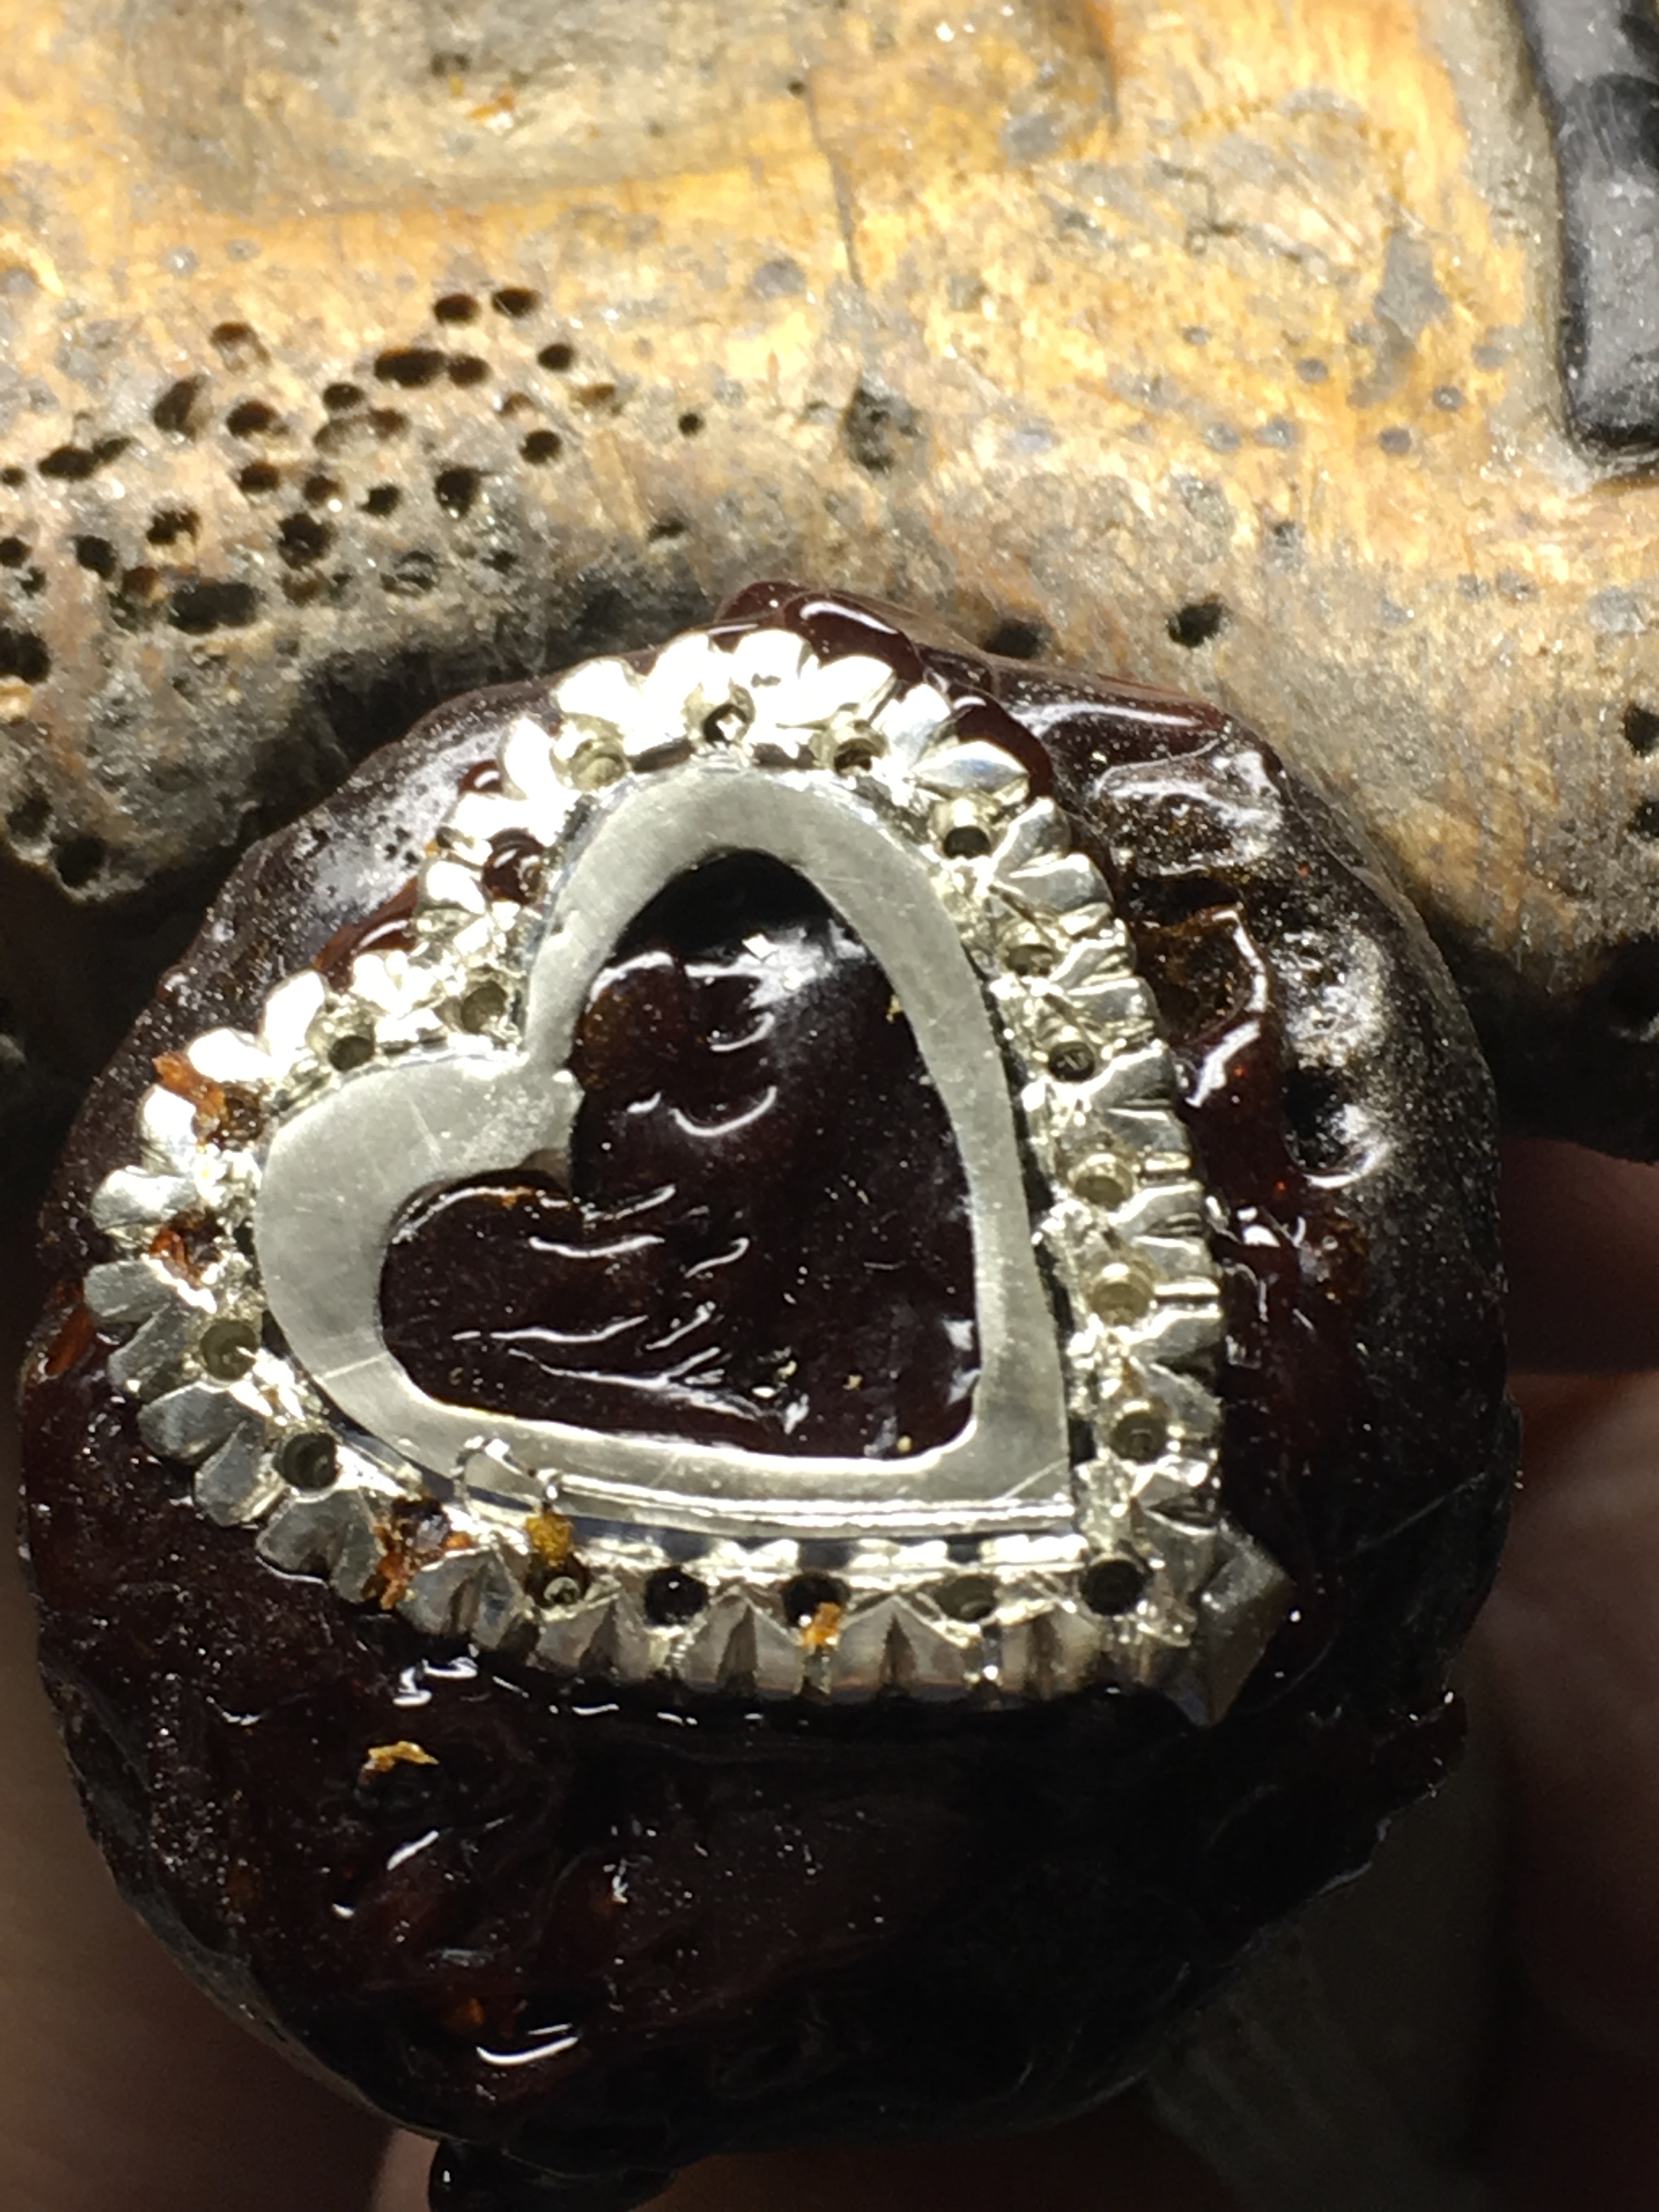
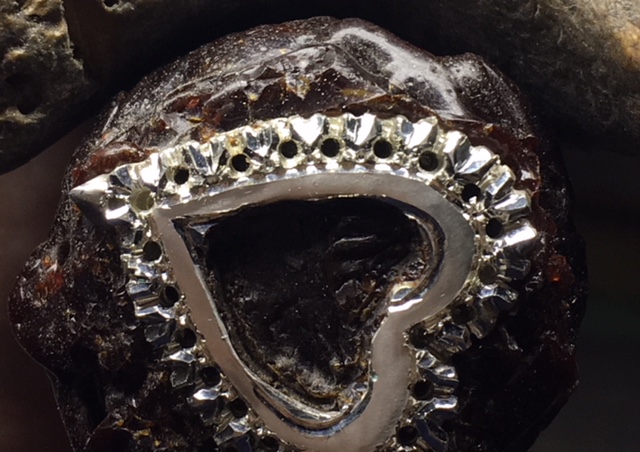
We are now fully ready to initiate the “Bright-Cutting” into the heart-shaped pendant two curves’

I call this a very ‘Creative Part of Diamond Setting’. From the inside of the two beads, I will now proceed to use my “Vallorbe” or “Glardon #12”, Flat graver, these simple cuts must now start in between the ‘v’ cut & right into the Fish-Tail curve (photo #?) The finish of the cutting should end where you used your fine-cut Triangular file #4 grit to separate the two Fish-Tail curves.
“Your aim is to keep your graver at the same angle (vertical) at all times in all cutting processes”. Always checking for graver sharpness! This stage of cutting must be watched (with a 10X power loupe) continuously! At every cut, you should be checking your graver point! By clicking it on your finger nail, if it slides along the nail, the point of the graver is ‘broken’ and must be re-sharpened! I use only #800 & #1,000 grit Polishing Paper I use a #800 or even a #1,000 grit polishing paper and rub this paper with a graphite Artist’s Pencil.
What happens here is simple, is that the graphite gets into the pores of the paper and increases the grit from a #1,000 up to almost #1,200 or more. This alone is “graver modification” at its best!
For the long Bright-Cutting with your Onglette #2, Right-Sided cutting blade, I suggest highly to try to keep your blade in a near vertical position. I will allow the barrel-shape and create that angle that is required needed. I would like to see all of this cutting done with no stopping. Any deviation from the angle will give you poor results. As you cut around the two curves in the pattern, this is the most difficult part of cutting on this pendant. You just cannot cut and cut, you have to think on how your blade won’t destroy and beads. For my solution on this, is to make little cuts around the two curves with your Flat graver! You must avoid at this point, any long cuts. Your aim is to make your cutting attractive, no cutting with any faceting in the metal. Practice on this will come!!!
The next step is to cut the actual “Fish-Tail” pattern. This is a very delicate stage in cutting. Accuracy of 100% demanded at all times!
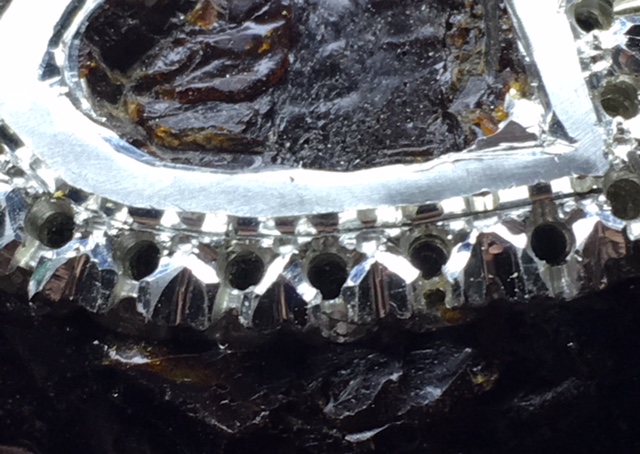
Your Onglette #2 or the Flat Graver, graver-blade must never lean at any angle. Your ‘graver-created’ angle is all that is required. The “Flat” must be held in a “near side-up, vertical position”, thus giving you a mirror-like cut! If you observe on some of the photographs, you will see an image being reflected of from the beads, That is how bright the cutting will appear, I will only use this method once the Onglette #2 has started the cutting, the Flat will be final, if necessary follow-up manoeuvre!
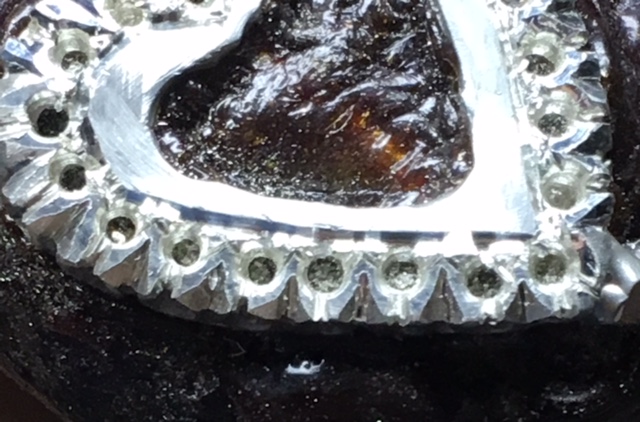
Proceed to cut along the “path” that the Graver#1 was initiating. Bright-Cutting your path in small series of cuts all around the pendant pattern, “go forward 2 cuts, come back one & then proceed further 2 more series of cuts”.
__This is like climbing a ladder, ‘up two steps, down one & up again 2 steps, then cut further’!__The very delicate area is the top of the two ‘curves’ of the pendant heart-shape. Much care is involved as you are now trying to keep the Bright-Cut walls at the same angle all through the curve. This area is where patience & exact careful cutting is now taking place, again one time cutting and with no repeating your cutting steps!
Practice & more practice, I suggest buying 2-3 pendants from this author for practice in Bright-Cutting and graver management!
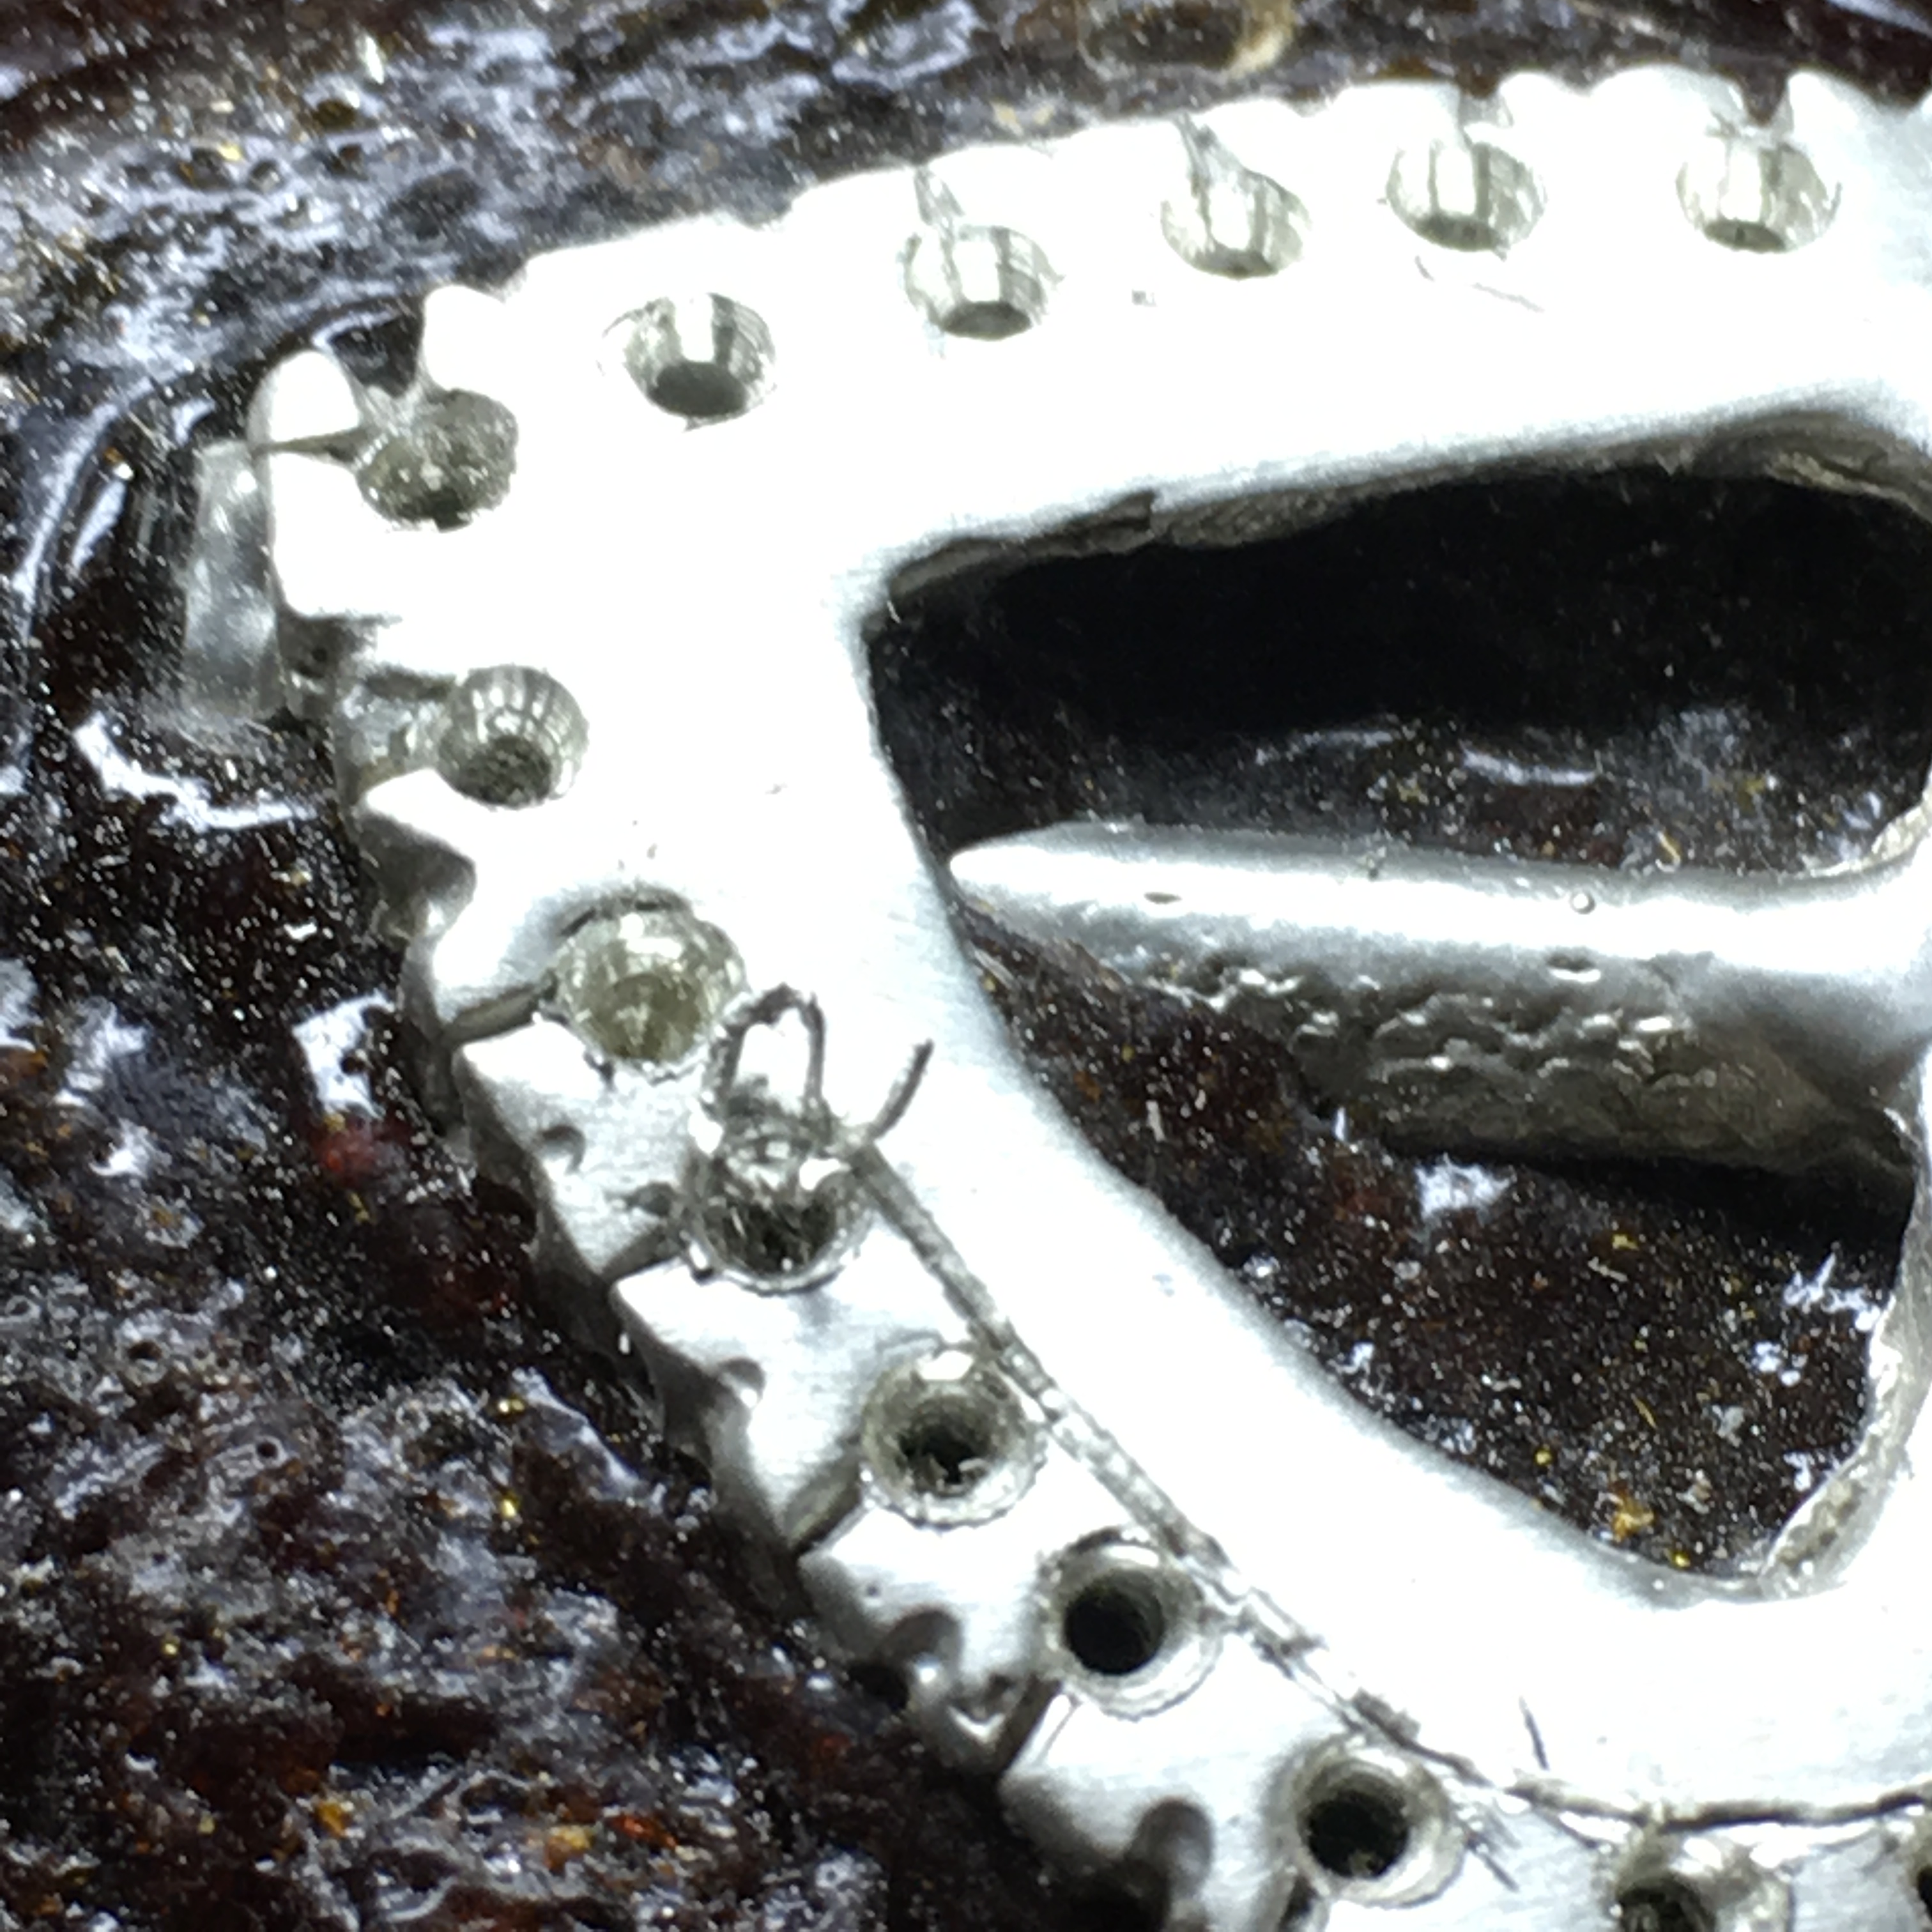
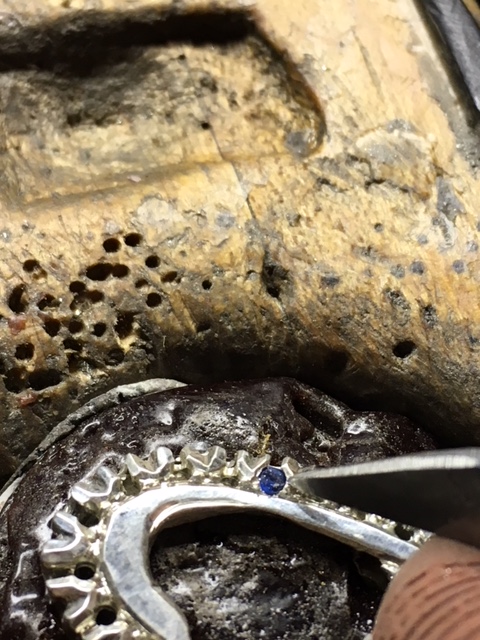
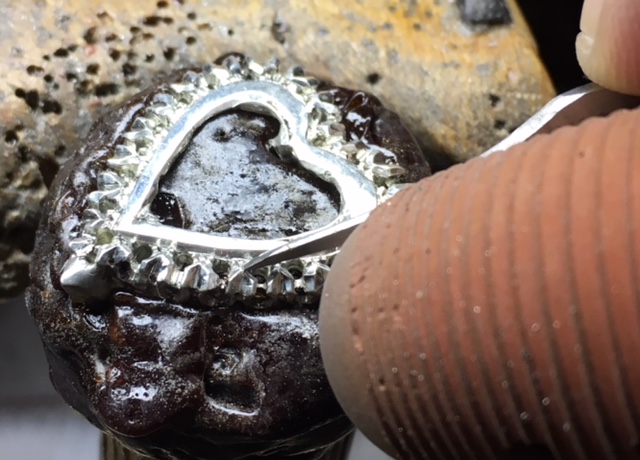
We are now 95% finished in this process of cutting. The next step is to ‘open up’ the setting hole for each stone. The beads must now be burnished down over each stone into a round shape! I will under-cut each little ‘post’ or new bead with a “156C”, a.k.a “90 degree, Heart-shaped” Carbide bur, or an “Under-Cutting” bur, also known as a “Bearing-Cutter”.
This “Under-Cutting Bur” gives a place for the stones to rest. I will secure & place each stone into that new opening & use an Onglette #1 securing a little ‘wire-bead’ above the girdle and against the Fish-Tail formation
I’d use a piece of old vulcanized rubber from an old not used mold & rub this over everywhere and it will remove much of your dirt and any oil


This will gently shine the metal as well.
You are now finished in creating this “Wonderful Piece of Wearable Art”. After 55 years of using a graver, nothing is difficult, but this is a truly challenging project & it is for sure!!! No shortcuts, no errors are allowed, no ill-prepared gravers are ever used, not even used. On a **“Difficulty Scale, this is a definite 50/10”
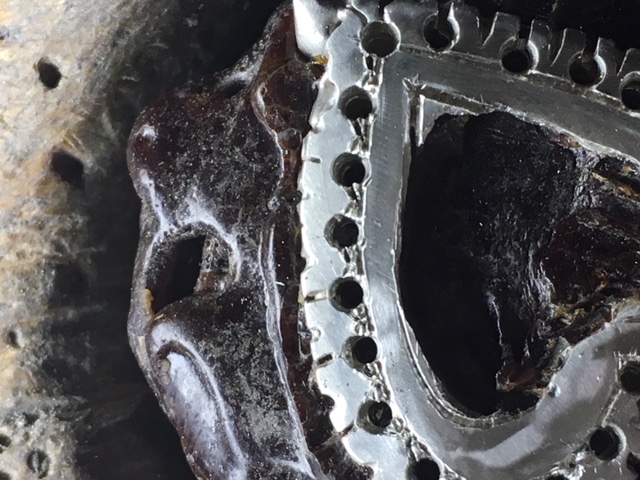
__At this time, as I am finishing my essay, I’d very much like to show you some more of my photographs, in random order. These photographs all speak for themselves!!_
If you are wanting “my silver castings” for your own practice, they can be purchased!
I can be contacted, 24/7 @ “gerrylewy18@gmail.com”