The term French Knot comes from an embroidery stitch by the same
name. When done properly it results in a ball of floss on top of the
fabric.
Norman
The term French Knot comes from an embroidery stitch by the same
name. When done properly it results in a ball of floss on top of the
fabric.
Norman
I found your explanation of the word ORCHID amusing and feel that you
are some one that looks beyond items. Although, I have found that
whatever these items are called, french knots, sizing balls, etc. My
mother had many placed on her good rings that were worn everyday
since her C2 fx and surgery which caused atrophy in certain fingers.
This enabled her to wear rings without them turning and being
damaged. This was atleast 30years ago. Like your sense of
humor…Keep it up
Pat fr Arkansas
This concept of sizing balls is new to me,but I find it very
interesting. On numerous occasions,I have been in a position to be
unable to resize a ring in the normal or traditional
manner,ie.,adding or taking away of shank stock because the shank was
made of patterned stock.Which has found more favor with most of you
silversmiths and your clients,the sizing balls or adding some shank
stock to the inside of the shank? Another question,do you flatten the
ball or bead slightly before soldering? Also,is 2mm (it was
mentioned) the largest you would use? I would appreciate all input,
Best wishes and thanks to all, John Barton,Images By JJ
Karen, You can see a picture of these at
http://henryjordan.com/owlring.html ,. I hope that this makes things a
little clearer.
Neil KilBane
Longford,Ireland
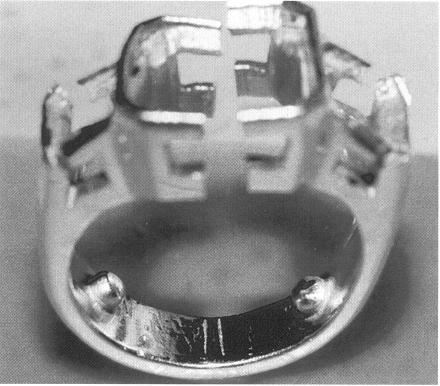
I have posted the picture of Fred Ward’s emerald ring setting for
those interested.
I am not sure if this link will work for you. But if not click on
the ganoksin.com/ftp link below and scroll to the Sizing Beads listing.
Again thanks to Modern Jeweler, January 1998 for this picture.
Norman
It seems that it would be easiest to explain sizing beads, (the term
I learned for these devices) is a picture. I have attached a picture
of Fred Ward’s infamous emerald ring setting, care of Modern Jeweler
January 1998 issue.
** Attachment Removed **
I have taken to using a 1.5 mm round bur to make a small depression
at about 4 o’clock and 8 o’clock so I can readily place the sizing
beads just where I want them, as they have a tendency to move around a
bit when the solder flows. I then ball up two rings that I wind around
a mandrel so as to keep the pieces uniform. I then sweat a small
amount of medium solder on the bottom of the beads, place them in the
little dimples and slowly heat the ring until the solder flows. This
method works really well when I have a large wet paper towel wrapped
several times around the stones to protect them from the heat…I have
already located where I want to place my beads and do not have to
struggle to find the center line of the mounting and then look for 4
o’clock…
Works for me.
JMalone
Hello Geo., The small beads go on the inside of the ring to slightly
pinch the finger, preventing the ring from turning. However, now that
you have brought up the possibility of putting them on the outside, it
sounds like a terrific design concept. The ring wouldn’t turn and it
would look cool. Have a good day. Tom Arnold
Another thing that can be used is a half spring which is a piece of
gold rolled out to the with of the shank and the thickness of about
half a mm white gold is best as it will work harden and work as a
spring. You arch the metal so that it is round like the ring. Then you
cut it to length, this is done by measuring from the 6 o�clock
position (where you would cut the ring to size it) and up to the 11
or 12 o�clock position. Round the 12 o�clock end and put a little
lever bend in it. This is so that when it is pushed back to the shank
(after it is soldered in) it will not go all the way down to the shank
and just lay flat against the shank. Know just solder it into the ring
at the 6 o�clock position. You then have a ring with a spring half
ring on the inside.
   Am sure you are confused so draw a circle then draw a half
circle on the inside only touching at the 6 o�clock position and
going up to the 12 o�clock position.
JB
Tom Arnold, I hadn’t thought of it as a design element until you
mentioned it. But if a person wanted to put the balls on the outside
of their ring, they could put posts instead and then attach small
gemstone, pearl or glass beads instead, dependant upon the ring style.
That is a good idea, thank you. Geo.
Maybe I"m missing something heRe: Isn’t the principle of the sizing
balls to grip the finger enough to keep the ring from turning
around, while still enabling the wearer to slide it over a large
finger joint? If the sizing balls were on the outside of the shank,
how would they keep the ring from turning unless they were heavy
enough to act as counterweights? Dee
Another comment on the ever expanding world of Sizing Balls: This
modification is included in “Ring Repair,” the first in my
Professional Jewelry Repair Series. The book includes real life
repairs made to rings, plus lots of explanations of other ring
procedures, with dozens of close up color photos and over a hundred
sketches. There is a chapter on installing Sizing Balls, exactly as
discussed on Orchid. In addition, among the 15 chapters, there are
projects on installing a spring insert and an adjustable shank, all
applicable to arthritic fingers or people who have markedly larger
knuckles than the rest of the finger. Also included are simple to
complex projects on sizing up and down in gold, platinum and silver
as well as soldering rings together, adding a bi color shank and
more. Take a look on our website for about this book. Go
to www.revereacademy.com and go to the page on books and videos. Alan
Revere
Michael, I used that type of sizing at one point off and on depending
on the customer. But I had a 78 year old female customer come in one
day in obvious pain. She had this type of sizing done on her wedding
band and when she went to do her dishes she tried to remove her
ring. She buried the loose edge into her finger and then to make it
worse pulled on it! The poor thing was freaked when she came in.
She’d been to the doctor and they wanted to use a pair of heavy duty
diagonal cutters to take it off which would have destroyed her ring.
She told the doc’s no way and left. So when she got to my shop she
was in a lot of pain. I didn’t want to hurt her anymore and was
afraid I’d make it worse but she told me I “had” to do it. So we got
her as comfortable as we could and I used a manual ring cutter to cut
it off. Then we drove her to the emergency room! She ended up with 4
stitches and one hellava sore finger. From that day forward I have
never used that type of sizing again.
Just my opinion and hey, I could be wrong Keep it Shinny, Matt the
Catt
Am sure you are confused so draw a circle then draw a half circle on the inside only touching at the 6 o�clock position and going up to the 12 o�clock position.
I generally prefer to install these so the solder joint is at about
the 10 o’clock position, with the C shaped spring going down and
around the finger to about the 4 or 5 o’clock position. The
difference is pretty much a matter of choice and the design of the
ring. My way, the top of the ring is held down onto the finger, which
I feel looks better in wear. Your way keeps the shank of the ring up
tight to the finger, and any gap is then at the top. Six of one, half
a dozen of the other. But we do, sometimes, do a varient which works
very nicely. In this, the shank of the ring must be about 3mm or
wider, and at least about 1.5 mm thick all the way around. It is
grooved out on the inside with a shallow (.5 to .7 mm deep) flat
bottom channel Routed into the insde of the shank all the way around.
Now a spring, such as you describe, but shaped more like a horseshoe,
is soldered in at the bottom (the six o’clock position". it extends
up on both sides to the 10 and 2 o’clock positions, where those loose
ends are then slightly bent back towards the shank. As described in
the prior post, those bends serve to ensure some spring, but also to
see that the insert engages the groove on the inside of the ring when
it’s depressed. What this does is that when putting on the ring, the
spring is pressed into the channel, so that the sideways friction of
the finger cannot push/bend the spring out to the side of the shank.
Plus, it looks a lot more tailored when done.
Peter Rowe
Hi All. During all of this discussion, noone has mentioned square
rings for the arthritic fingers. I bought a squarish mandrel
(probably the one Rio Grande calls “roundish square”) over twenty
years ago and they work great. I also sometimes build up the lower
corners on the outside to produce a more pronounced square. This is
especially effective to prevent rotation of rings with larger stones.
HTH, Roy- in the Highland Lakes area of central Texas
Dee asked:
   if the sizing balls were on the outside of the shank, how would
they keep the ring from turning unless they were heavy enough to act
as counterweights?
I once did a ring that was essentially round but with 4 evenly spaced
nodes on the outside of the shank. I wore it for a number of years
and it never turned, even though the nodes were raised no more than
1.5 mm. It isn’t the weight. I think it is because fingers are
aligned so that they naturally touch each other in the resting
position, plus the little bit of webbing between fingers working as a
barrier is enough to prevent rotation.
MP
Hi Roy; I often recommend rings with square corners on the bottom
outside shank to keep rings with heavy tops from turning on the
finger. Haven’t tried rings with square holes yet. By the way,
anyone out there know where I can get a rubber ring mandrel? Rio
used to carry them. I never tried one, but I thought they might work
for square rings, or rings with odd shaped or distored shanks, like
heavy class rings that get sized up a lot but can’t be rounded out
again. Also, as per the “arthritic shank” solution, there are also
shanks you can make or buy that are hinged at the sides and slide
open and closed. I’m not talking about the “finger-fit” type with an
actual clasp in them. These kind, the shank on the lower half of the
ring is made of two thinner strips that slide past each other with a
thing on each end like the part on a belt that is past the buckle
that holds the tip of the belt from flapping about. I also have seen
a think where a small tube is soldered on the outside bottom of the
shank, about 5:00 o’clock. A wire passes through the tube, forming a
long rectangular frame, the other end of which clips down over a
small nib of metal. It passes either side of the shank when closed,
thereby squaring off the bottom of opening in the ring.
David L. Huffman