                       _**“Princess”, 4-Claw Setting!**_

 **__**High maintenance’ in preparations for setting this stone!***_*_
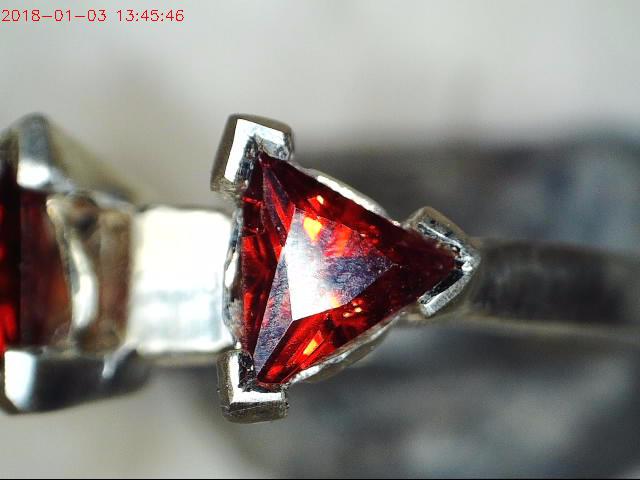
What do the Princess, Marquise, Trillium & Pear-Shaped stones all have in common? They ALL have “VEE” shaped claws!
I’ve been called upon many times to explain & demonstrate on how to prepare & set “Princess, Square-Cut” stones.
On the Difficulty Scale for this setting, is a 15 out of 10. This style of setting is not for the “Novice”, nor the “Beginner”!

The tool & bur selection is as follows.
1) Triangular-shaped 20 cm’s in length file & number #4 cut.
2) Pillar-shaped file number #2.
3) The required burs are, Round bur #008.
4) Bud-shaped bur of #007, or ‘the thickness of the girdle’!
5) Flat Graver #40 with a highly-finished flat underside!
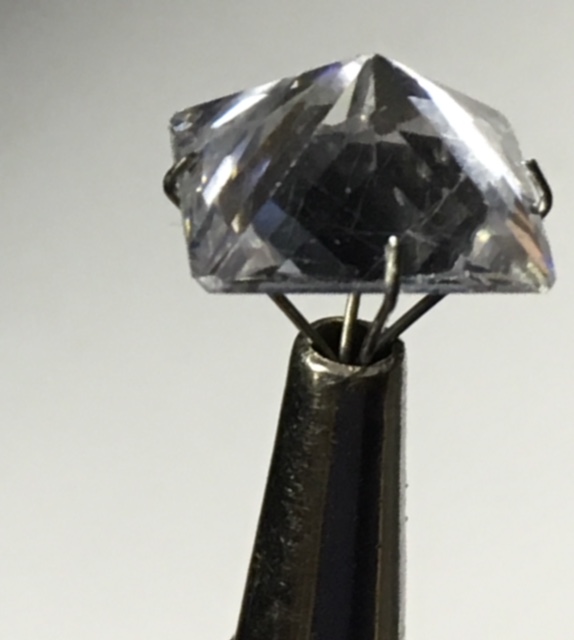
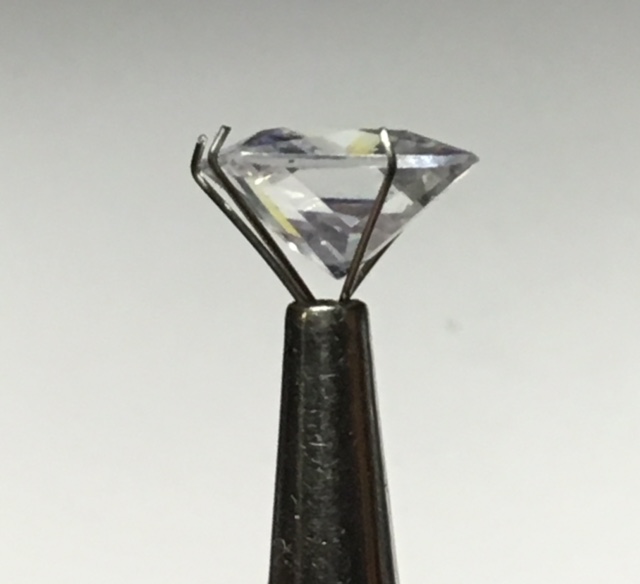
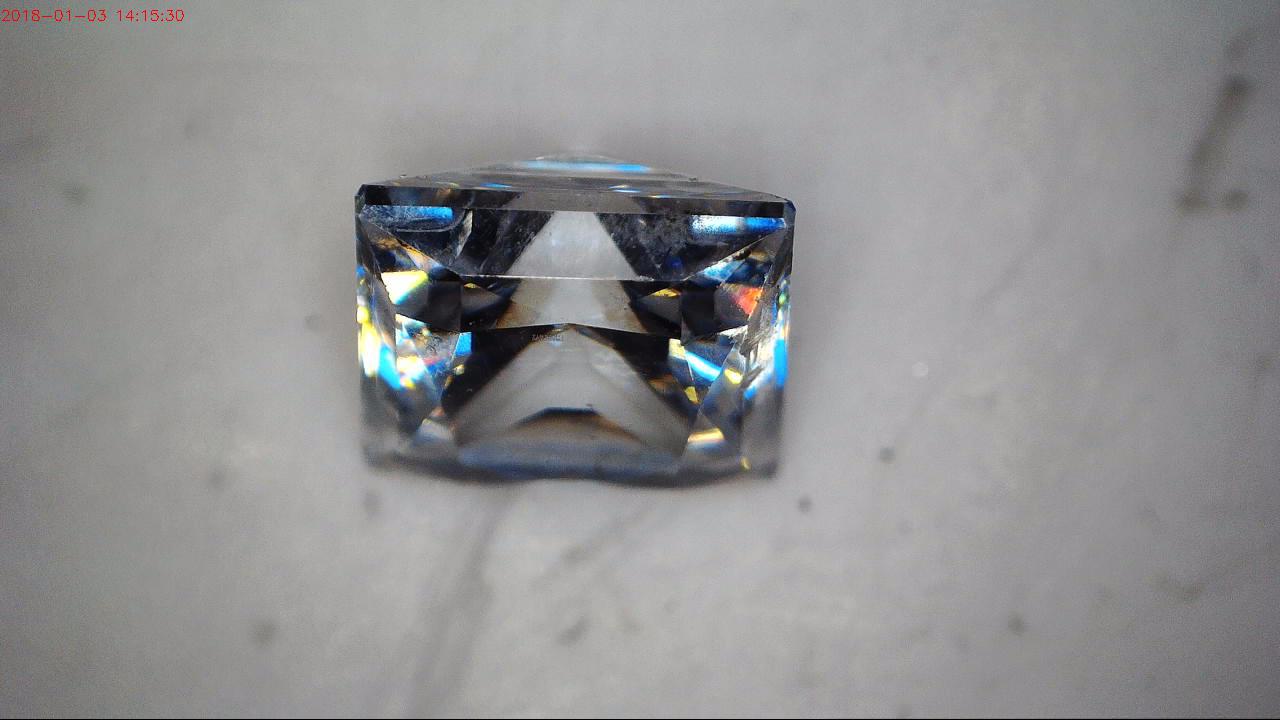
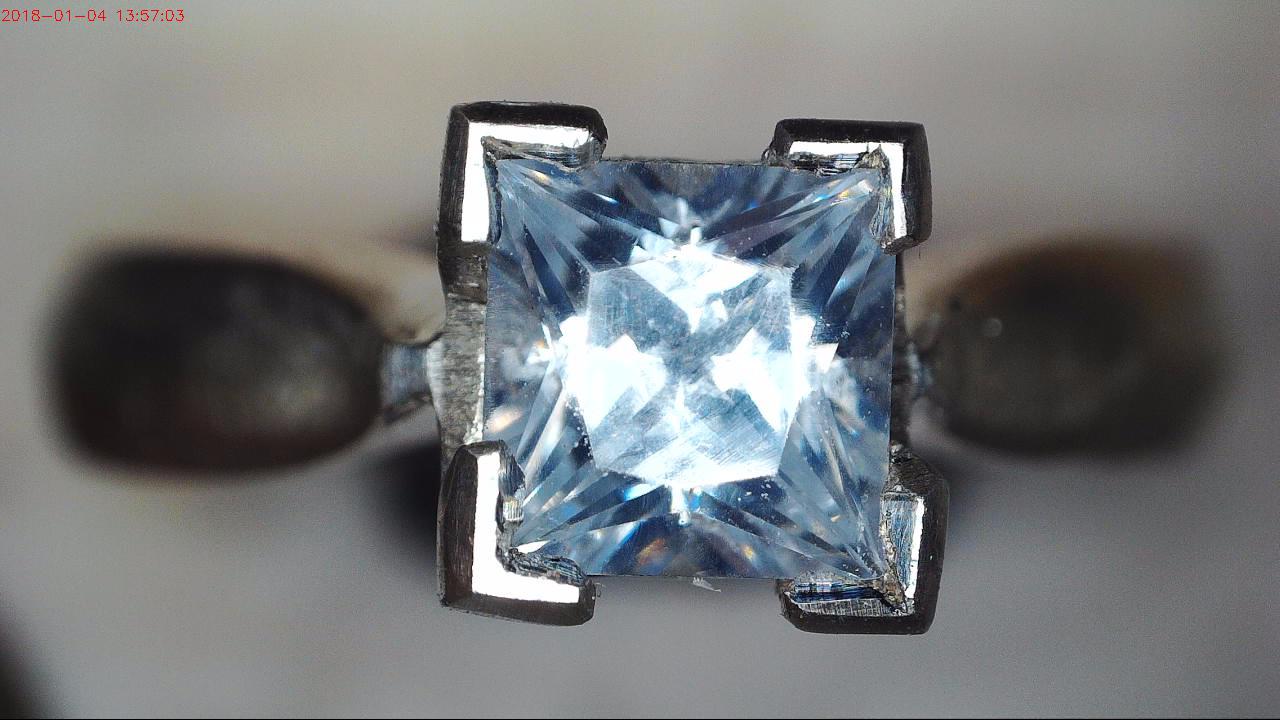
The stone in this demonstration is a Cubic Zirconia with a “Swarovski” brand name & hardness rated at 8.0+ on the Mohs scale. As these are quite resistant to breaking & aggressive filing cannot damage any of the facets during this setting process.
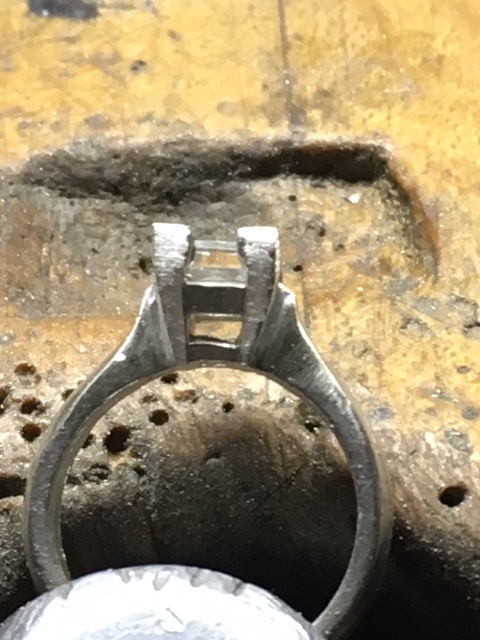
In this essay, is a new ring that I “modified” to take a 6.5 mm square stone, why this size? I want to have ‘more room’ to navigate around the claws, at all times. It is easy to view & fully understand every setting step in this somewhat ‘challenging’ process.
Upon examining the stone for any inclusions, I will hasten to add that any fractures or ‘disturbing defects’ must be immediately noted, or you will be at fault!! This does & sometimes happen if this was a “remounted stone”. (I am speaking from personal experience!) I had to remove a 1.25 carat diamond, but I stopped, as I found there was breakage from the "Girdle’ halfway down to the Culet and hidden under a claw, I saved the company about $12,000.00
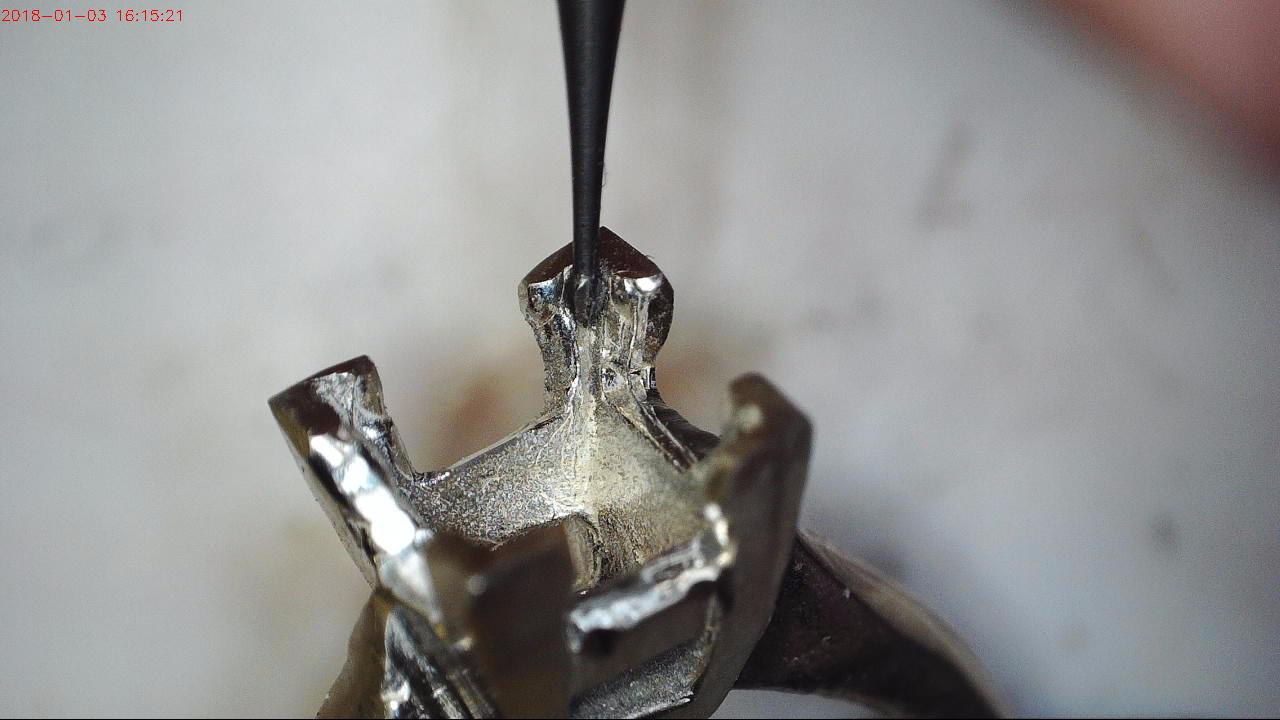
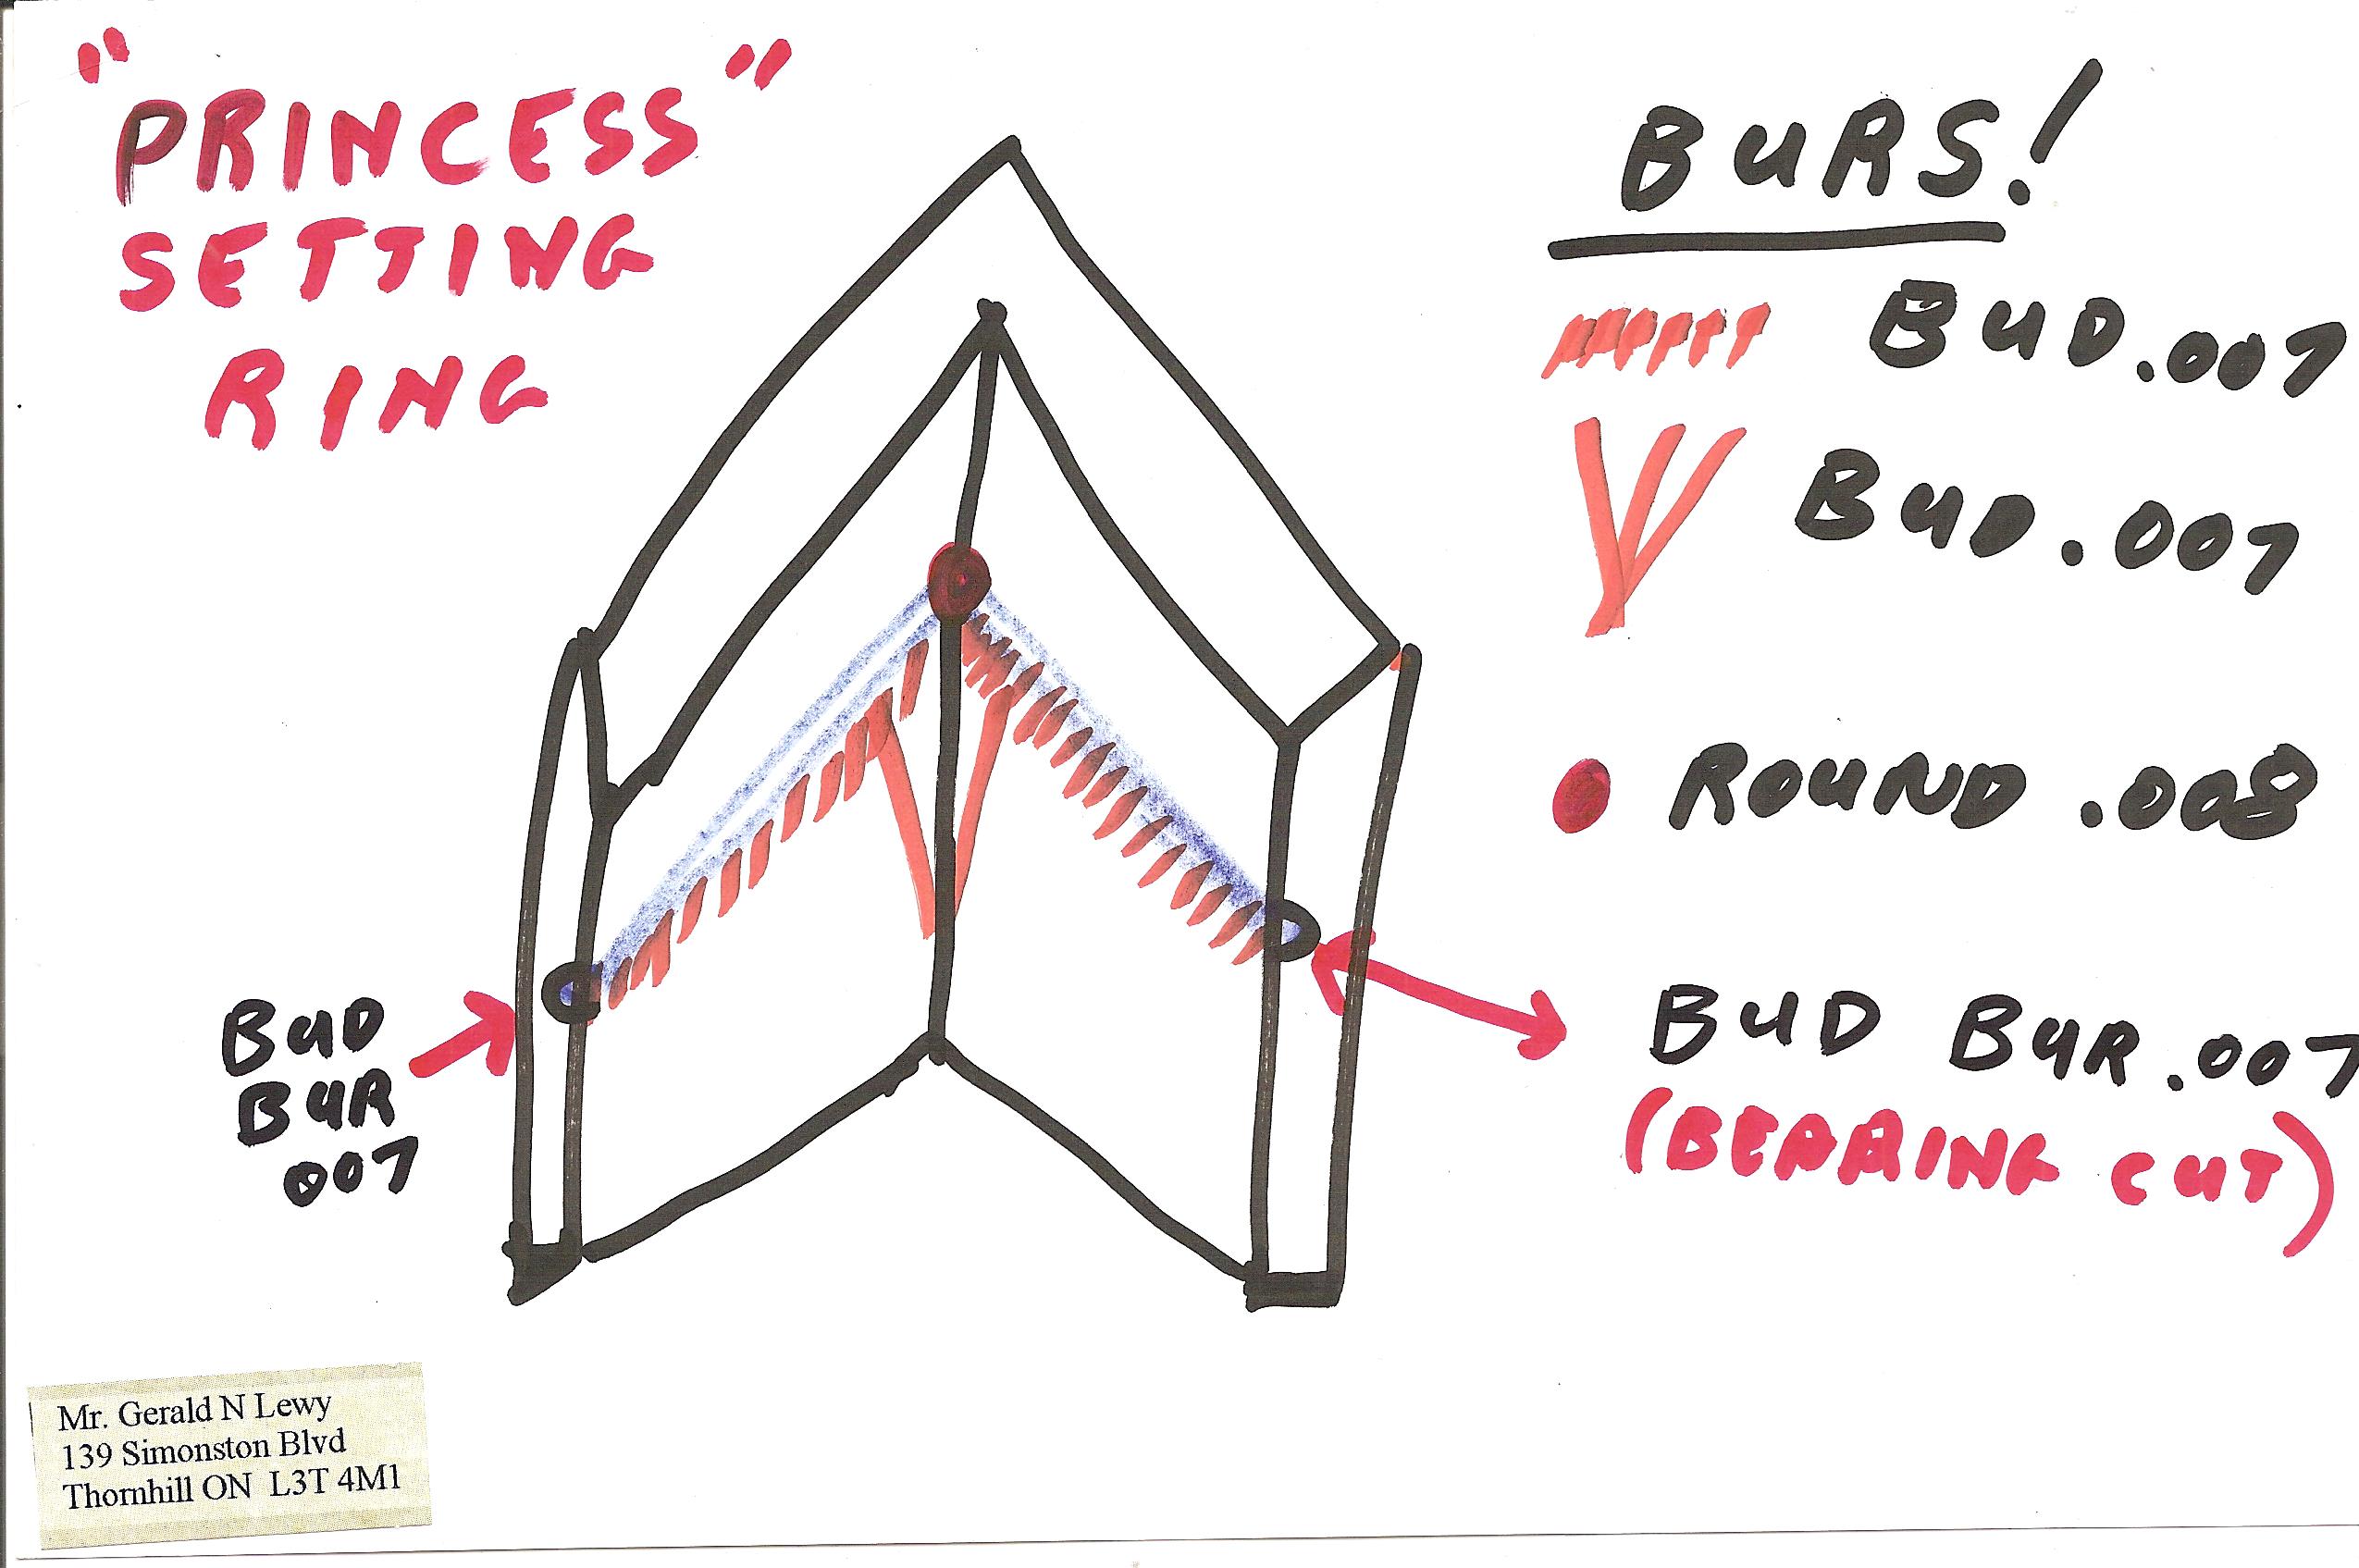
At first glance, I will widen the distance between each of the 4, “VEE” shaped claws. I need ‘full access to get my burs to initiate any cutting of the bearings that are on a horizontal angle. I will drill approximately 1/3 down from the claw tip, is where I will use my round bur #008. I will laterally drill into the ‘VEE’ shaped claw, how far into the claw will I drill? Until the head of the round bur is in the metal! This is just where the point of the stone will be resting, but never touching any metal.
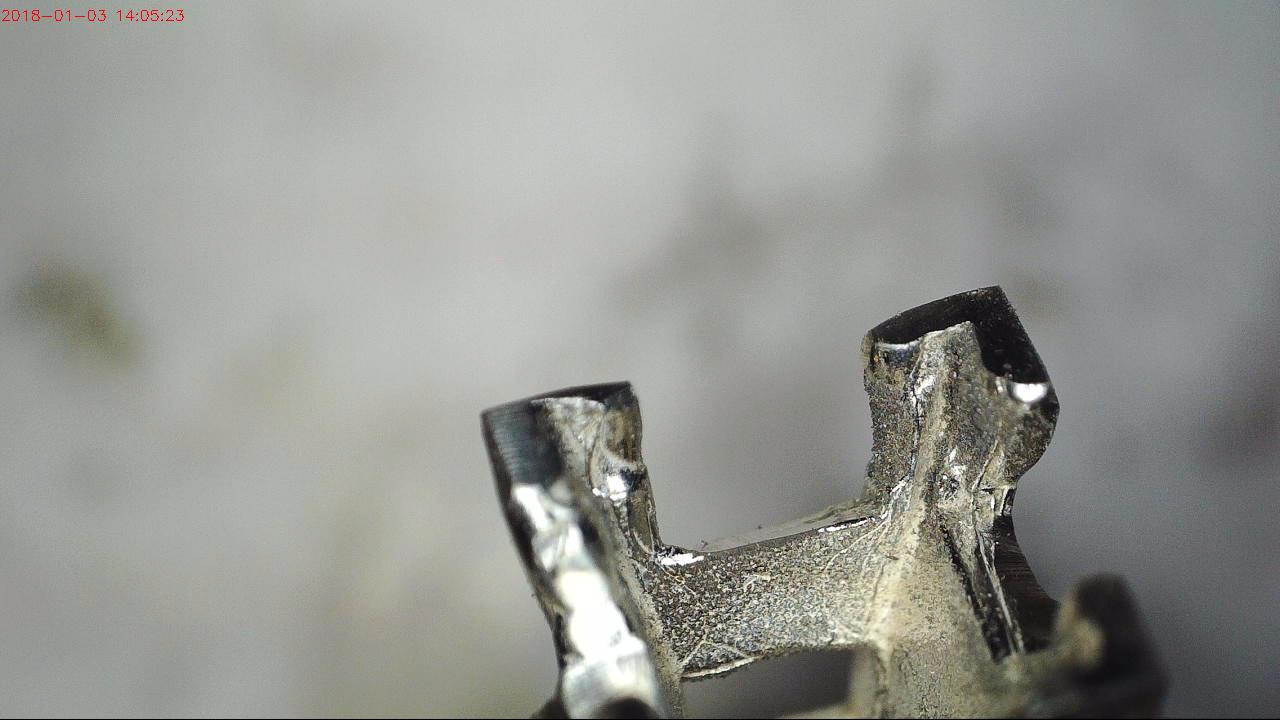
The four points are the “Achilles Heel” of the stone. When the two sides of the claw is resting against the girdle of the stone, no metal will have any opportunity in touching the ‘point of the stone’.
I’ve seen some jewelers actually split this claw with a saw-blade! This method is a ‘short-cut’ and I do not permit it in this setting!!
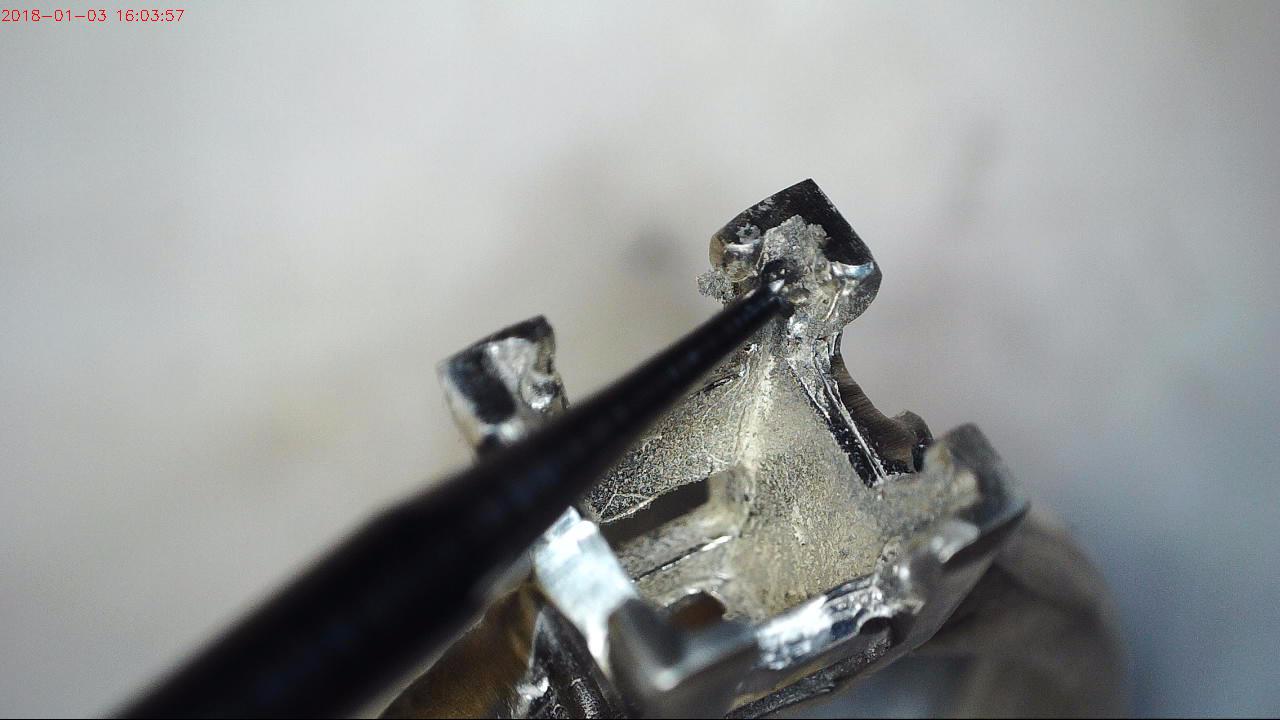
From the juncture of the #008 round bur hole, I will create two bearing-cuts, or “seats” as this is for the side-girdles of the stone….cut right out from the center of the two sides, to the ends of each claw. This is just where the Girdle of the stone will be resting!
Before any stone is to be set, all of the “Gallery” metal must be cleaned & if possible, polished! If you wish to “Magnetic-Tumble” the ring, please do so now! This cleaning process is so important, no other time in setting of this stone, can the inside of the ring be made ready for the setting.
Make very sure all of the ‘bearings’ are correctly contoured & carved. Once the stone is in the ring, it is safe to say the ‘stone will find its own place to rest’. All of the girdle-sides or edges will be sitting correctly & in-line with the points of the stone in relationship to the “Vee” shaped claws.
There must be no Pavilion facets touching the lower section of the claw. That too must be cleared away! (Please see my illustration).
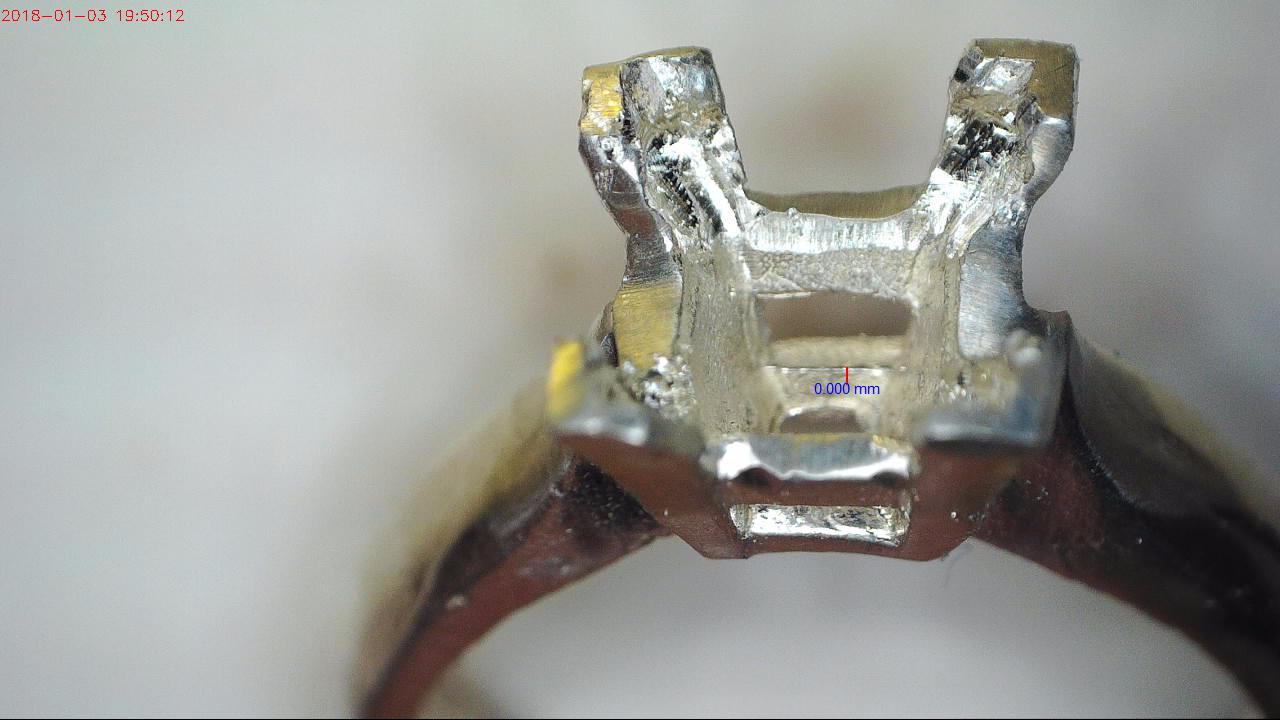
I must have the inside edge of the “Gallery’ be cut away with a #008 ‘bud-shaped’ bur. This ‘cutting’ will be at an angle of 45-degrees, just in case the Pavilion touches the stone. This will indeed prevent the stone from sitting IN the Gallery, where it belongs.
I instruct my students to even use a Pumice Wheel & clean up all of the claws before the stone is set. A soft-touch, Rouge-Cloth polishing wheel could be used. The downside is that the sharp edges of the claws might be made ‘slightly-rounded’. I’d use the ‘magnetic-tumbler’ which is less prone to wearing down the edges of the claws.
Just prior to the setting of the stone, again make sure that there are no inclusions anywhere in the stone. Examine the ‘resting place’ for the Pavilion, or the underneath section of the stone.
Use your Loupe & quality-control every millimeter of the claws. For the first time place your stone into the 4, 4-claw head & then again examine how the stone is sitting & the girdle must be at 90-angle to the axis of the ring. Are the “Girdles” sitting against the 8 bearing cuts, evenly?
So important, there are no shortcuts allowed!
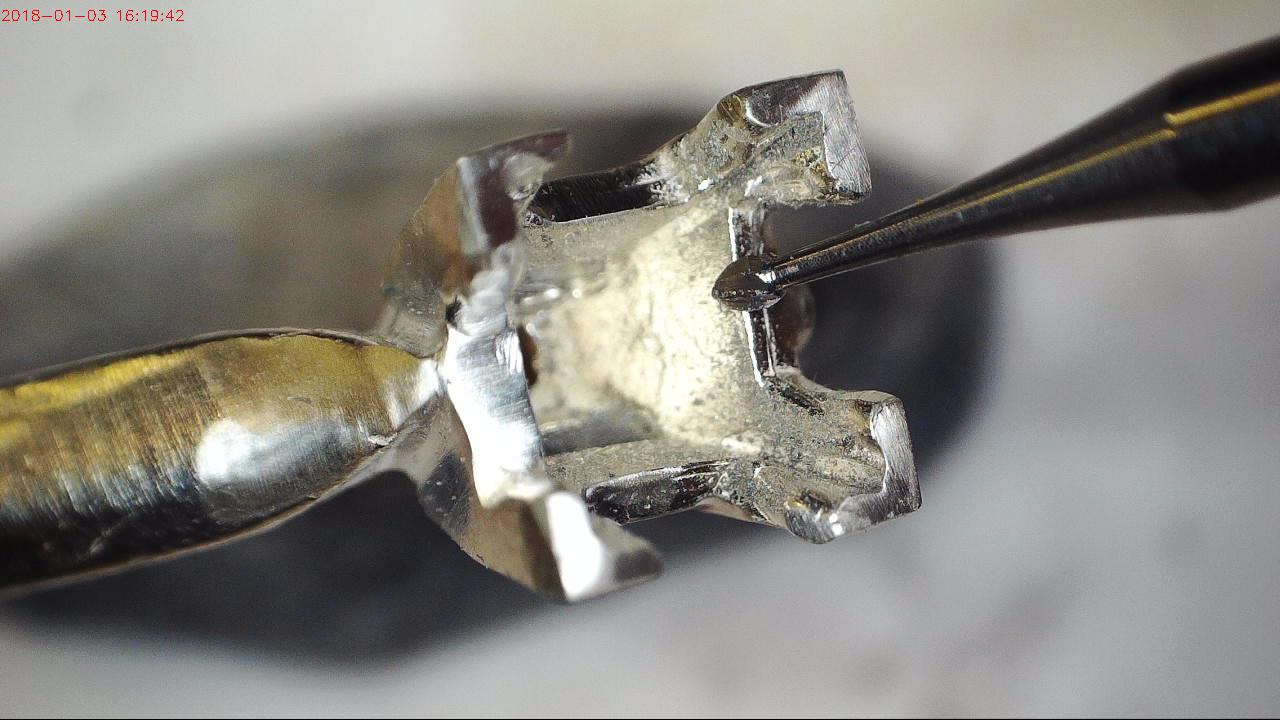
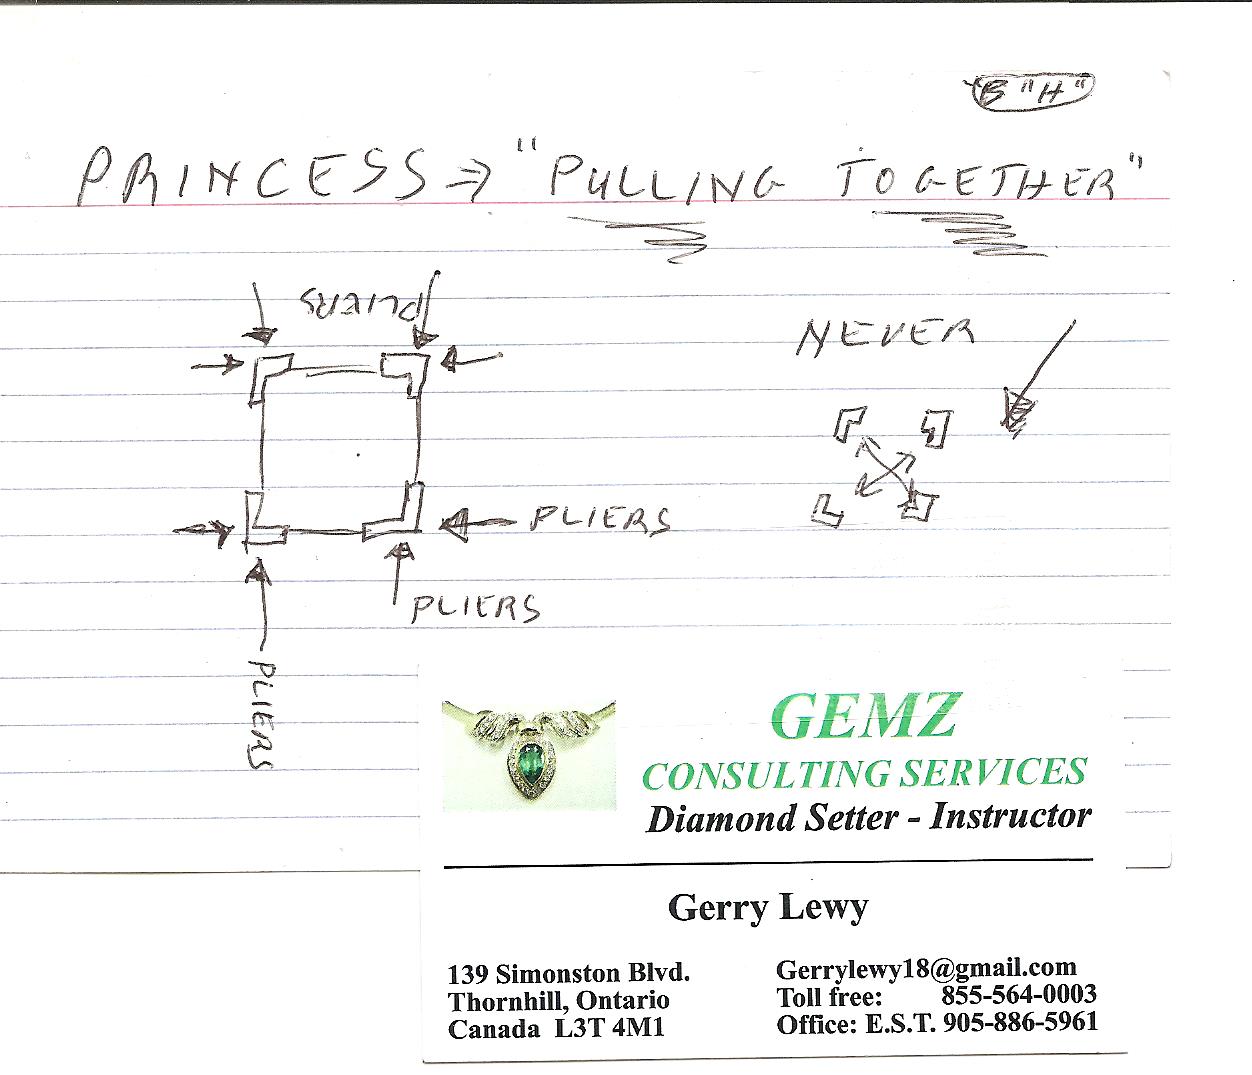
The most important step is now to follow, “closing up the “VEE”-shaped corners”. There is only one way to do this. DO NOT CLOSE (the claws) apposing POINT-TO-POINT!! But here is the best way and my hand-drawn diagram will guide you.
_ Inside of the “Chevron claw” is that #008 bur hole. DO NOT LET THE POINT OF THE STONE TOUCH ANY OF THE INSIDE METAL! If you allow the point to come in contact, ‘breakage” will occur._
You are now closing up all eight-sides (8) of the claws, not the 4 holding sections of the stone.
In this process, you should be using a fine-textured jaws of the pair of pliers! I engrave lines into the tapered point of the jaws of the pliers with a “Corundum, Separating Disk”. I will then smooth over any rough surfaces. This allows the pliers not to ‘slip off’ while bringing in the “Chevron” claws! This can be very $$$ disastrous if anything happens.
Bring (not pull, or push) in the claws slowly together. Making sure the stone is sitting straight, not tilted, crooked and the 2 side-Girdles are at a 90-degree angle, to the axis of the ring!!
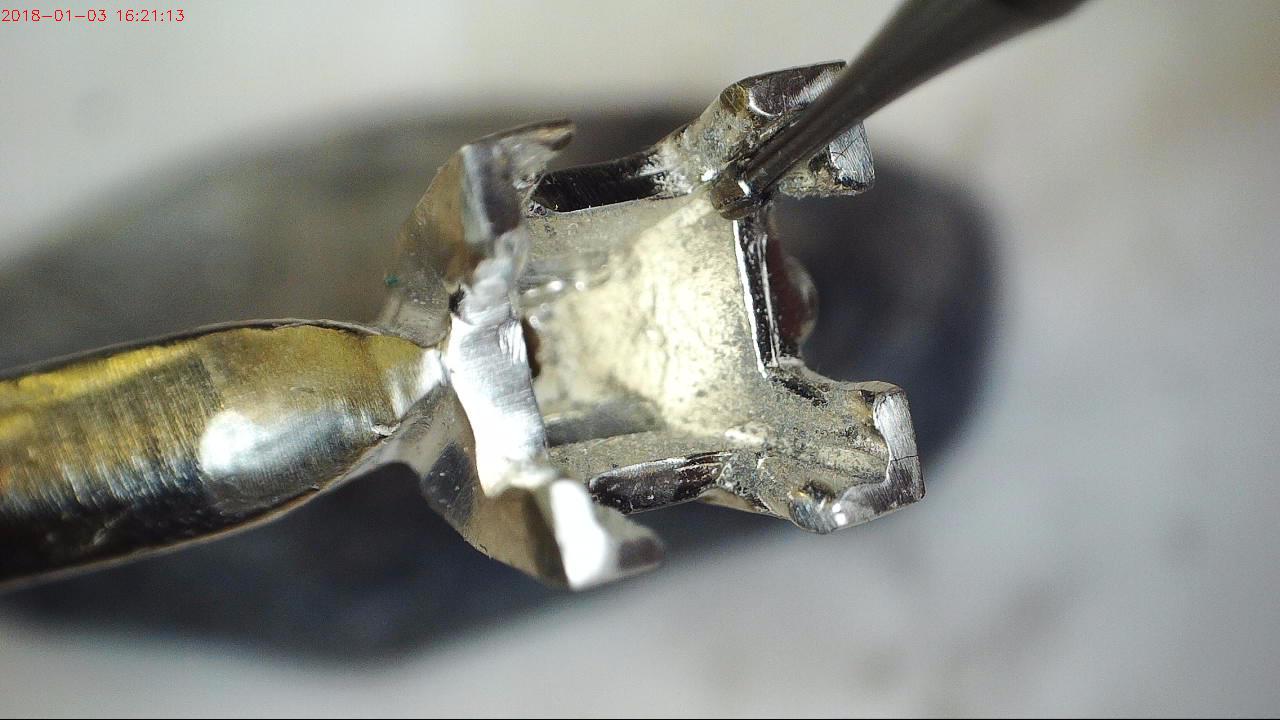
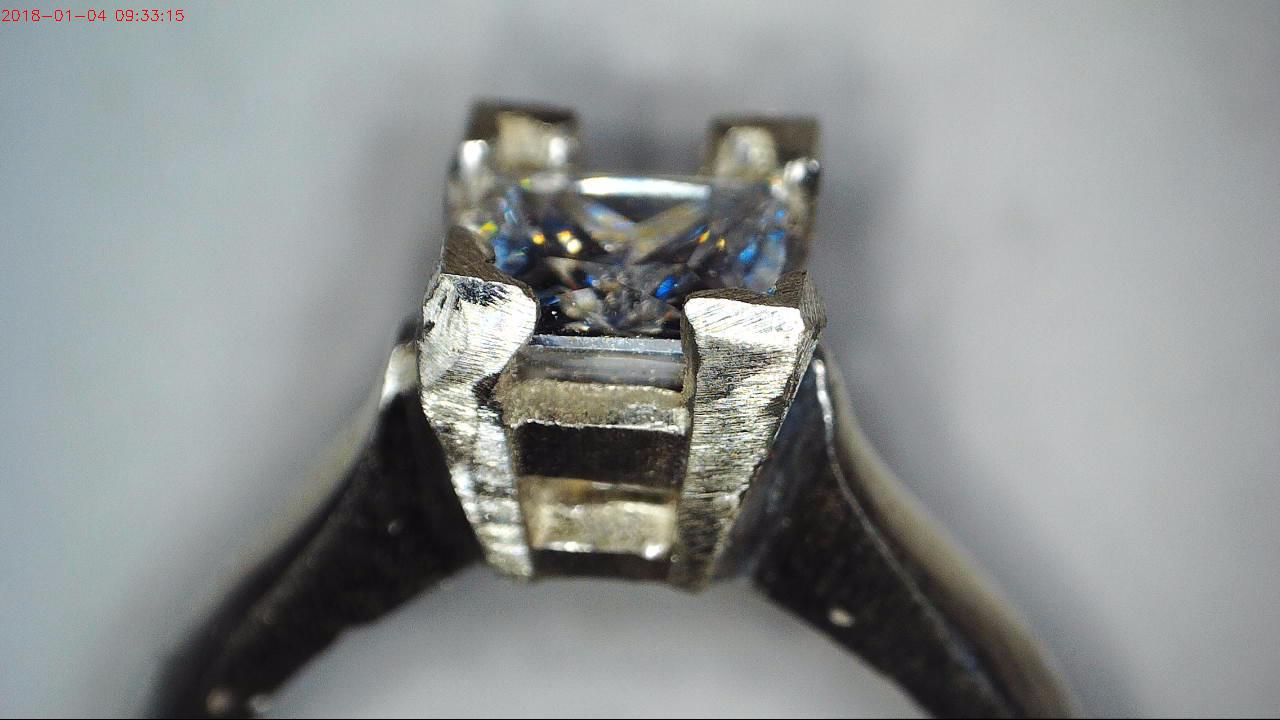
Prior to filing of the claws, I will, if space permitting, use my Flat graver #40 & cut inside of the “VEE shaped” (once closed) claws just to giving the inside edge, a thinner & narrower appearance!
This will give the ring an aesthetic look with no large ‘heavy mountains of metal’. I want to see the angles of the claws actually blend towards the same angles of the stone. This makes the ‘finished claws’ look almost invisible from ‘viewing from the top’.
When starting to finish the filing or trimming of the claws, my instructor (about 50 years ago) suggested these following interesting steps!
Follow these next instructions carefully: Carry down the “line of facet angles” from the stone “Table-facet” all the way down to the outside edge of the claw, then they will have the same angle to the stone. This now appears in the two photographs showing how this balancing looks. All of these steps are done with your Triangular #4 cut file then followed through with your Flat-Faced Pumice wheel of #180 grit. This is a skill all unto its own!
This essay on setting a Princess Stone & their techniques, is one of the most difficult to write about, so many rules & scheduling of events. Remember, no short-cuts are allowed, because there aren’t any in this “Princess Setting” exercise!
I honestly suggest you to practice on some silver rings first, prior to your gold or platinum rings.

You may buy them from me, just email me your orders, I will supply the Flat #40 Graver, CZ’s & rings together into one simple package. “gerrylewy18@gmail.com”
 Your letter was my own dessert!