Hi Folks,
The recent slow period of work around the Holiday was really pretty messed up . I’m used to being busy as bees , so the only good thing that came out of it …um, well, besides music and fractals ![]() , was that it got me motivated again to write about making dies. That may be the one regret I have at the end, if I don’t get it together and keep chipping away at it (writing) : that I didn’t document in detail some more of the work I’ve been doing since I stopped jewelry and started dies (1988) . I used to have this pie-in-the-sky idea of a book, but books are SO last Century, and getting all the info organized and whipped into publishable shape is the work of someone that I am not . There’s no time for that, but there is time to chip away , take pics, shoot a little video, and post here now and then, and write about work instead of talking trash on unrelated forums (“hello, my name is Dar and I’m a Postaholic
, was that it got me motivated again to write about making dies. That may be the one regret I have at the end, if I don’t get it together and keep chipping away at it (writing) : that I didn’t document in detail some more of the work I’ve been doing since I stopped jewelry and started dies (1988) . I used to have this pie-in-the-sky idea of a book, but books are SO last Century, and getting all the info organized and whipped into publishable shape is the work of someone that I am not . There’s no time for that, but there is time to chip away , take pics, shoot a little video, and post here now and then, and write about work instead of talking trash on unrelated forums (“hello, my name is Dar and I’m a Postaholic ![]() ”) I’m also a disorganized Mad Professor of sorts, so it’s all I can do to slow down and attempt to articulate these things and present them as coherent
”) I’m also a disorganized Mad Professor of sorts, so it’s all I can do to slow down and attempt to articulate these things and present them as coherent
segments . There will be no perfection and attention to cosmetic detail, except that the information is as accurate as I can manage .
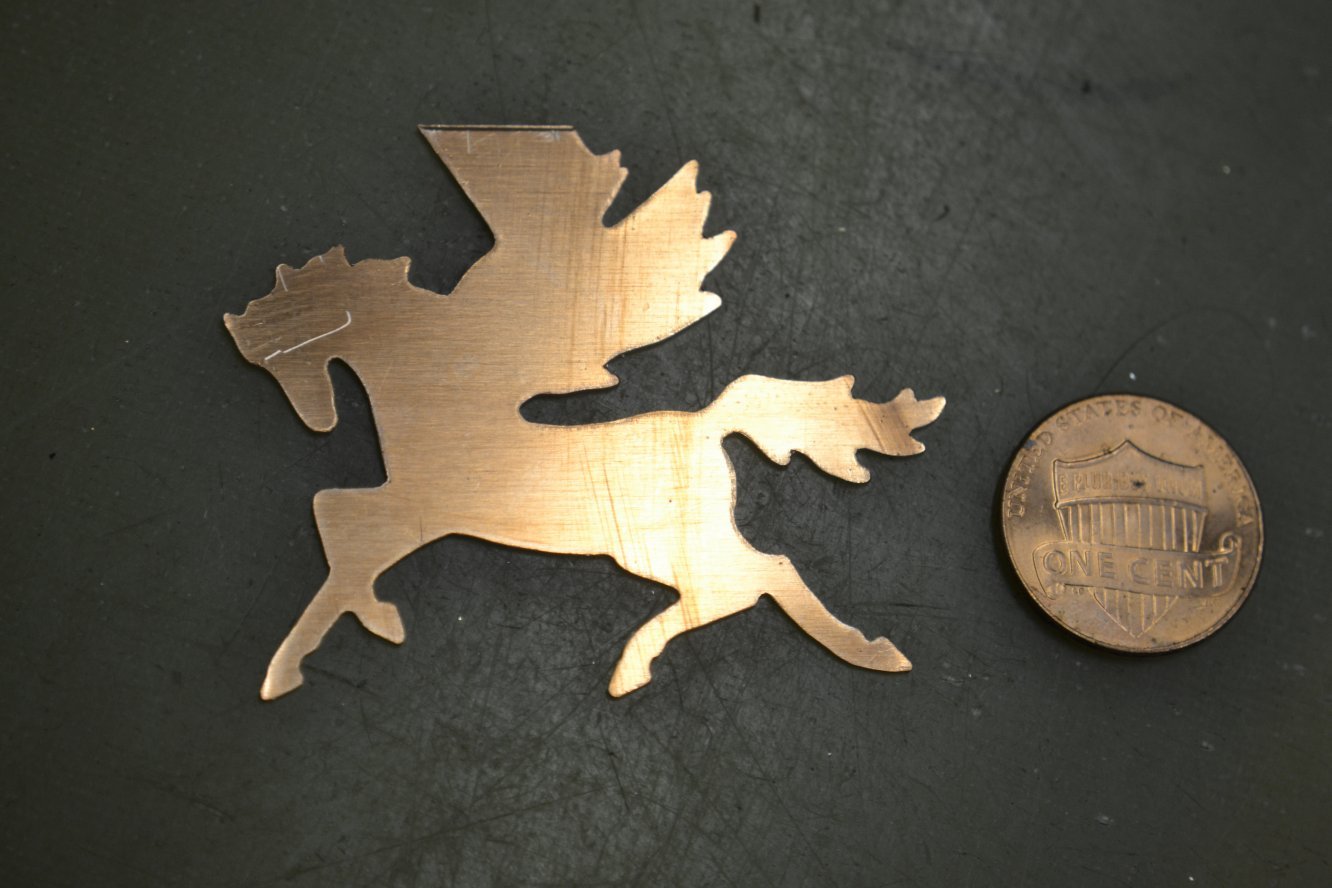
That BS out of the way , I’m taking this opportunity to post about an interesting die I just finished. A normal pancake die , no embossing, no donut hole, just a nice, complicated design : a Pegasus , provided by and done for our very own Laura (SupplyDiva) . The design is 2" across, and will be cutting 20 ga. brass and copper (?). Here’s a shot of the die ready for sawing :
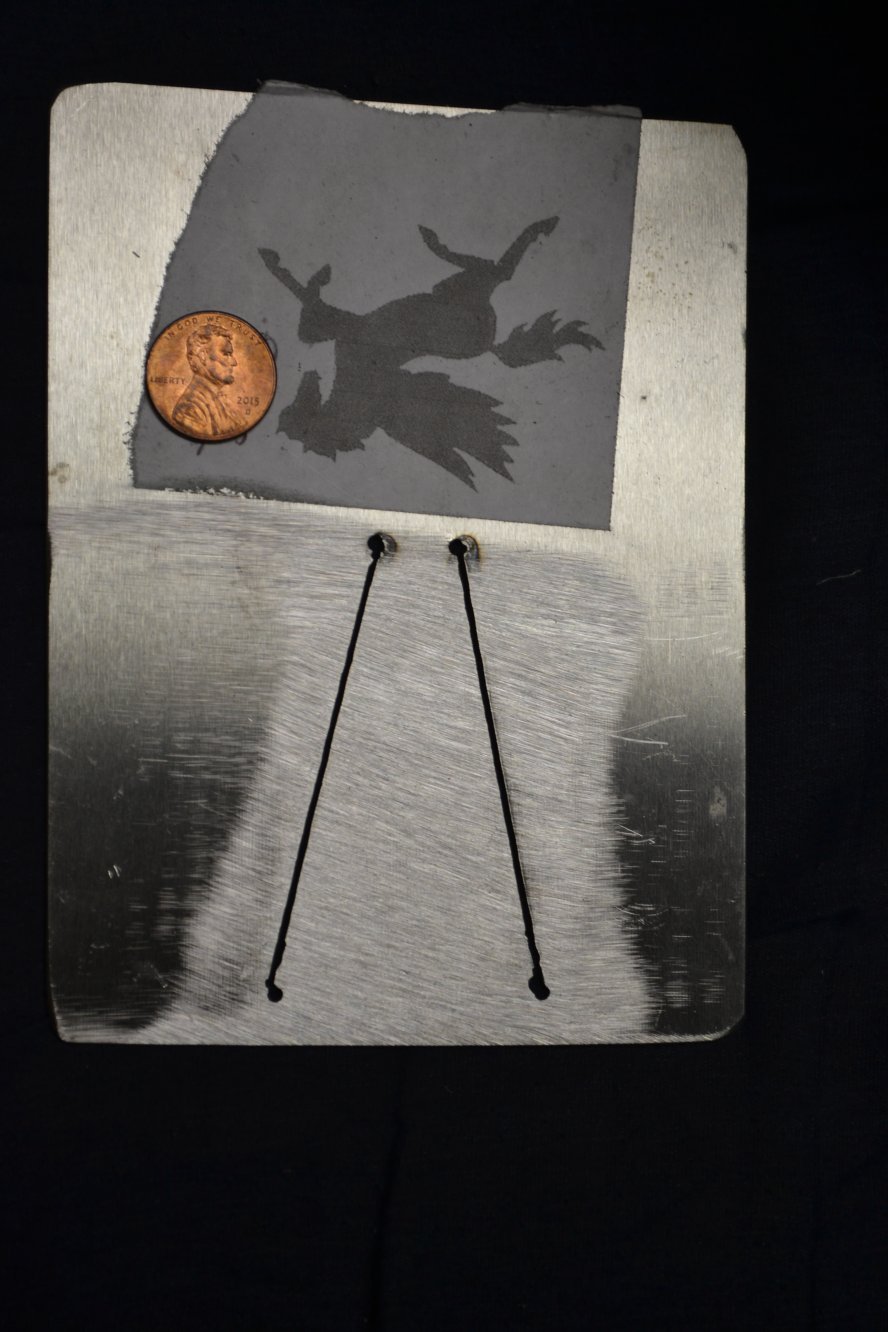
I chose 5/64" steel because 1/16 is thick enough to cut 20 ga or 18 ga. , but I wanted more beef, more strength for the delicate areas. Also, because I wanted to strike a balance between function and practicality , and going up to 3/32" steel wasn’t very practical from the pricing standpoint . Generally, it’s always better to thicker with designs like this, but that doesn’t always seem like such a great idea when you get in there on a difficult design using size 4/0 blades , The difference between sawing 1/16" and 5/64", or between 5/64" and 3/32" may not sound like much (“what difference would 1/64” make ?" you wonder ? … just try it ) but trust me, it is ! . 3/32" is about
6-8 x harder to saw than 3/64" , not 2x as hard, so I have to weigh that aspect in heavily . I want to get a lot of detail , but I don’t want to drive myself nuts . It can take 30+ strokes just to work your way around one sharp corner , even in the 5/64" . The Platinum blades are not actually the best cornering blades I’ve used (I used to love me some Yellow Dagger) but they are the only ones that will keep sawing and cornering in a way that makes life tolerable. Since Platinums don’t come smaller than 4/0 (and if I’m wrong about that, I don’t care, I don’t want any !!! ![]() ) I chose 4/0 to get “the most” detail . It took maybe 7- 8 blades to finish this one. I didn’t count , but I got the tail and part of a leg with one, and most of the wing with the first one. Amazing blades, really .
) I chose 4/0 to get “the most” detail . It took maybe 7- 8 blades to finish this one. I didn’t count , but I got the tail and part of a leg with one, and most of the wing with the first one. Amazing blades, really .
Here’s a shot of it partially sawed:

You can see that I’ve simplified things some around the most detailed areas ; partly because of the cornering issues just covered, and partially because I wanted to beef up the daintiest spots because they were too narrow. Remember , the taper from the sawing angle makes the back side of the design narrower , so if you have things too narrow to start with, there’s not enough mass to hold up to punching forces , and maybe even no surface left on the backside for the press to push against . Very bad, so one has to understand all this and be careful. here’s a shot of the die after sawing , showing the back side , and a close comparison will show how it looks skinnier and has sharper detail than the sawed side of the die.
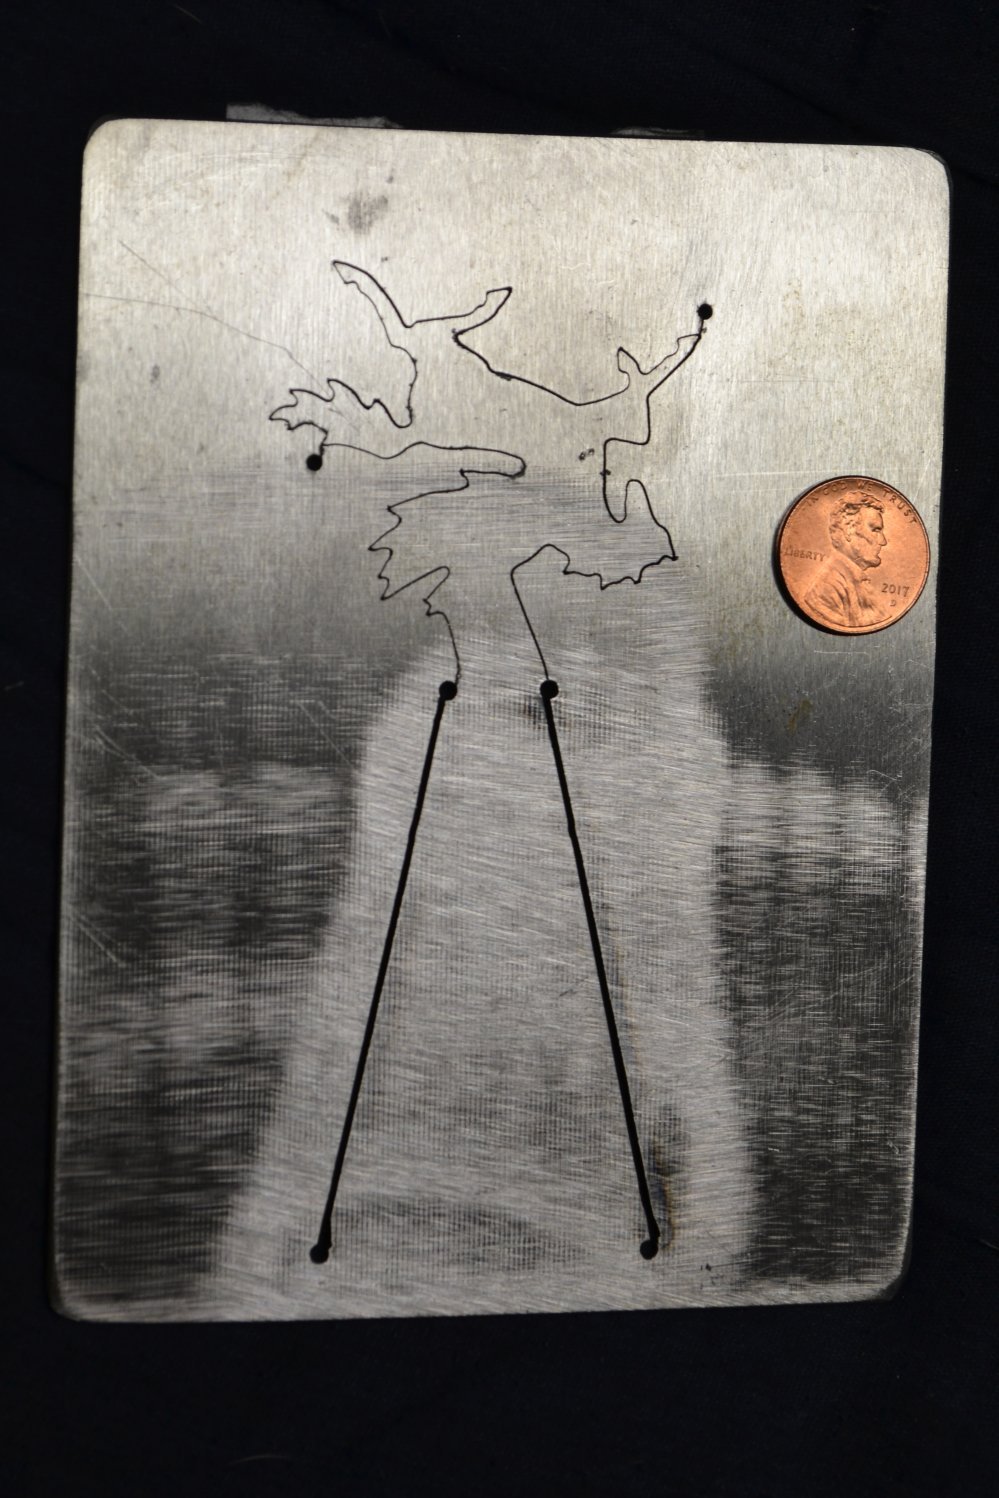
The two extra holes (next to the tail, and front hoof) are access holes , to start sawing again after a blade breaks. It’s faster than feeding a blade through all the previously cut length , and sometimes the residual tension in the die steel gets released after sawing , and the design shifts . Any little narrowing of the saw gap from this makes feeding a new blade through difficult or impossible . Usually, the holes are just to make things faster/easier.
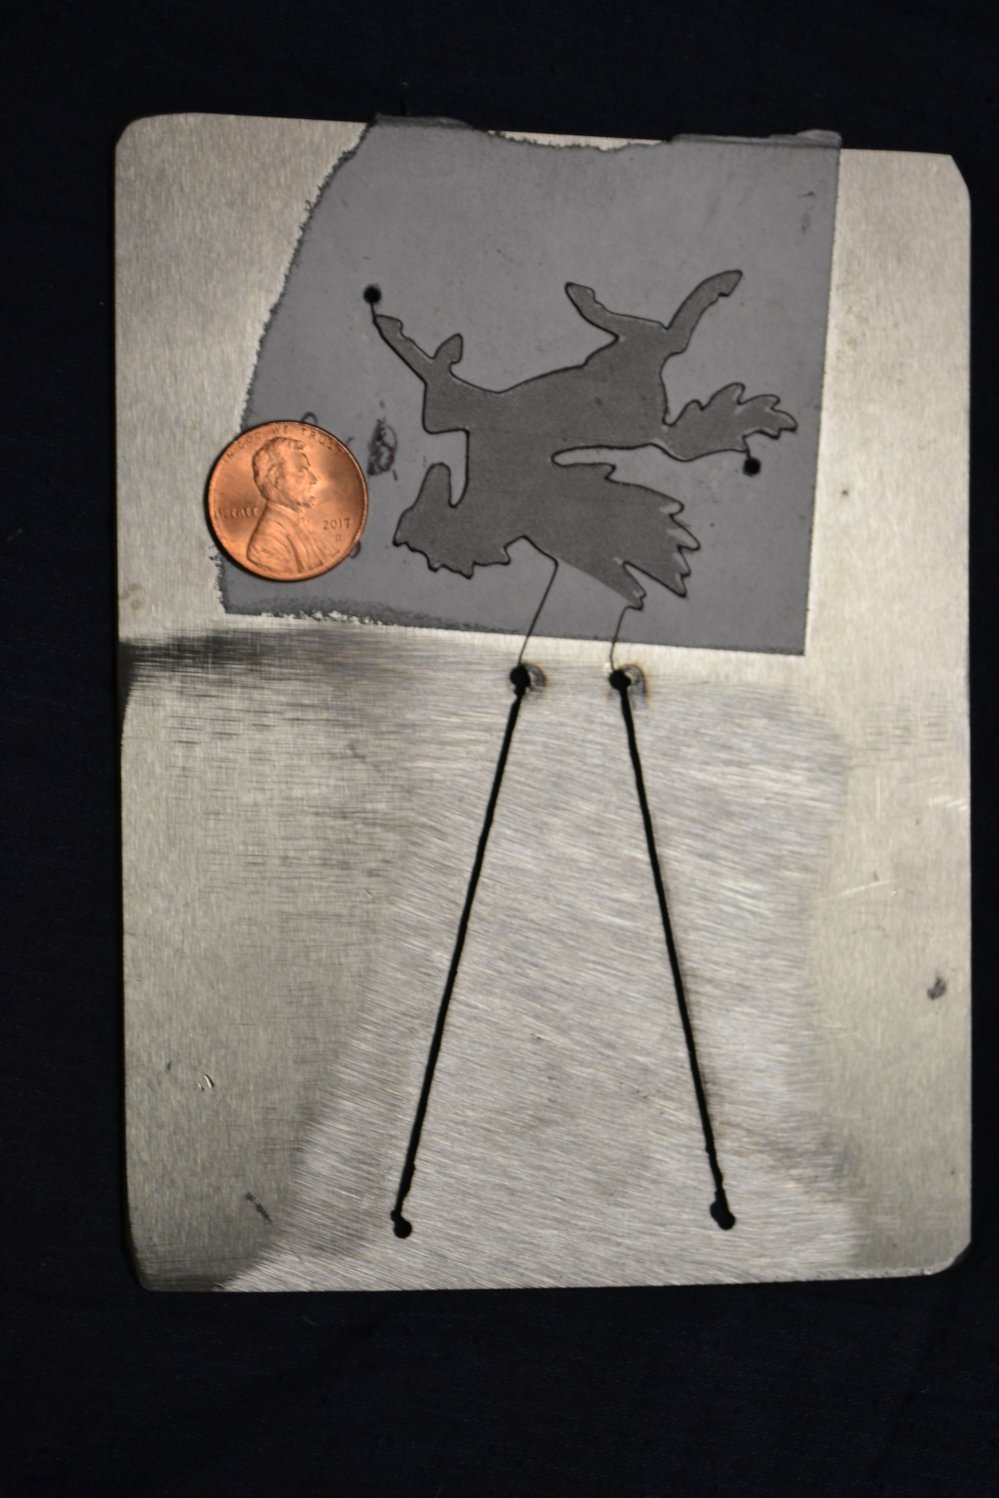
Sawed side up :
Okay, so we skip a whole bunch of fun stuff about heat treating , and go right to the end (I did shoot some video , along with some little hand dies I’ve made as this part of
“the bigger picture” . stay tuned , but no breath holding ) .
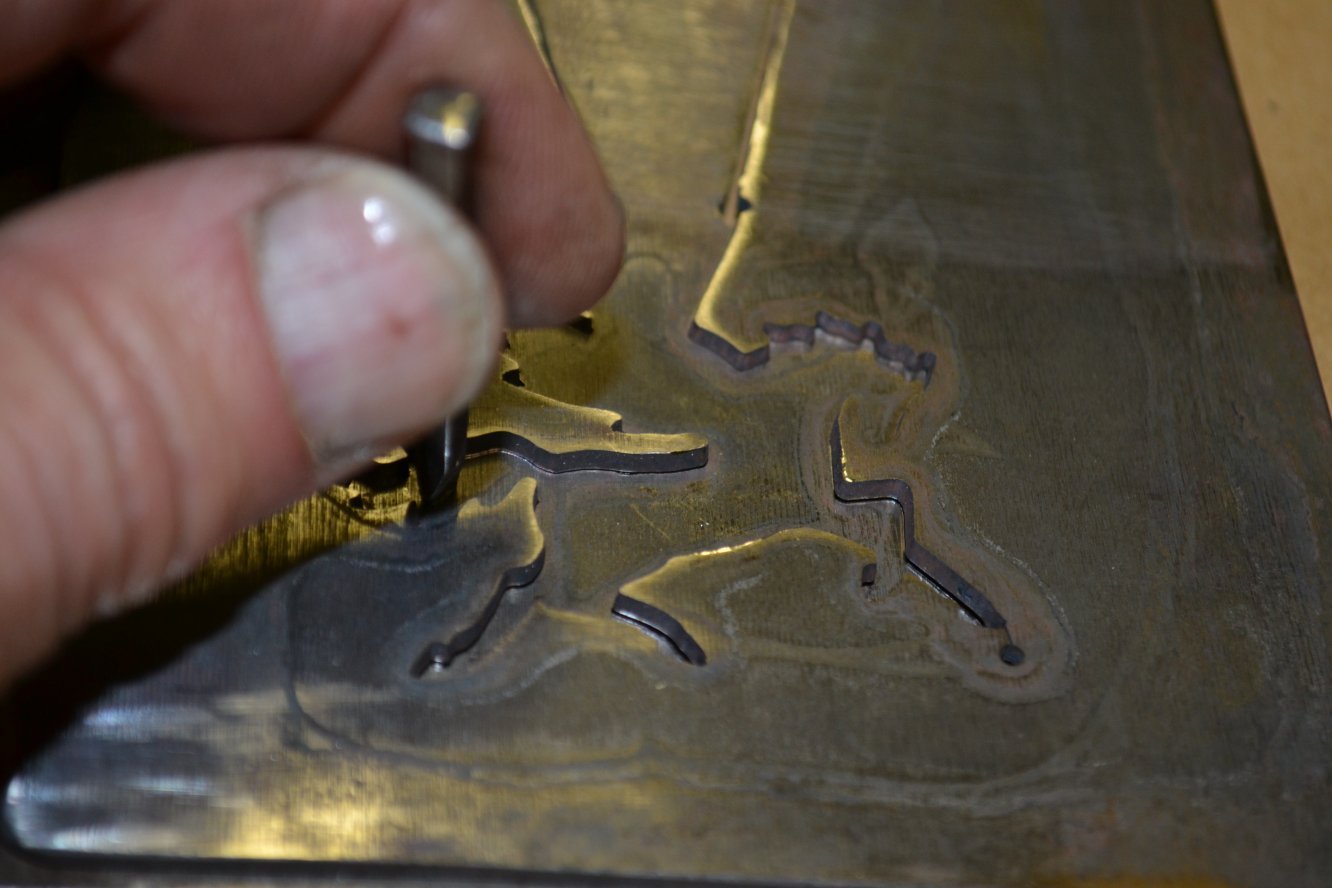
After hardening and tempering , it’s time to crack open the die for the first time . I usually make dies so tight that they don’t just push open with finger pressure; they need to be hammered open , or , more commonly, propped up at a low angle and use a punch and hammer . Intricate designs present problems , because they can’t be made as tight as simple -shape dies, or the hammering force could bend or break the delicate areas (I still do it once in a while) . With a design as complex as the Pegasus, I have to back off a couple of degrees on the sawing angle, and that makes getting the die open easier, but I still needed to use a punch . You have to work your way in from the extremities very gradually , and if the die is really tight, go through several cycles of opening a little, then pressing it closed, then open a little more, etc. You can ruin a die easily if you don’t know what you’re doing and are not careful enough (I still do it once in a while ) . So, even though the Pegasus had it’s angle backed off, it required the small punch working in from the extremities (hooves first , then tail) . After it was done and broken in, however it opens easily with a smack against a solid surface . That’s why it’s so critical to cut these dies very tight (not as necessary on complex designs cutting thicker metal, as is the case here) , because after cooking and breaking in, they are a lot looser than right after sawing . Here’s the die being coaxed open :

and another
After that I cycle it dry a few times (press/open/press) and then prop it open and torch
the hinge to “freeze” it in a semi-open position , which makes opening and loading it much easier . I also torch any super-vulnerable areas (that little tongue of negative space between the upper back and wing, and the hooves/legs) to give them a little more of a soft temper . Overall, a die like this should be tempered pretty soft already , but I’d rather have a die fail from bending due to soft temper, than have a leg snap off, in this case . I learned the hard way …
Shots of the finished die and parts

Front side :

And the back side . Notice how clean the piece is on the back . Clean and flat , yep, that’s why they pay me the medium bucks !!! ![]()
Well, that’s all I can think of right now . Thanks for the job, and use of the design, Laura, and happy punching ! ![]()