After collecting over 850 photographs during the past many months. My photo-inventory is literally bulging at its seams. I now have something to write about! The first and hopefully (many) essays I will delve into everything about gravers and what they can do you for YOUR inventory of hand-made jewellery! Remembering that my form of Graver usage & setting dates back to 1970’s B.C. (Before Cad-designing).
You want and need photographs? Well, this essay has only 48 photo’s to make your reading much easier. Go enjoy and of course learn…this will be my 71st essay for my blog.
In this essay, the discussion will be on Using Onglette & Flat gravers in ‘Bead-Raising’ and as well ‘Bright-Cutting’.
This is an easy title to read, but there is so much to learn. I’m even planning to split up this topic into many essays.
"The Difficulty Scale is literally off the boards at 25+ on a scale of 10"* .
I’ve spent many days & weeks taking (51) up-close photographs in preparation for this extensive essay. I’ve even prepared many ‘demo-items’ of metal also for this interesting exercise.
BTW, there will be some photographs you might have been seen in previous technical essays. I am using these for a simple reason and that is I might still be needing them to help in the explanation of a newer topic.
If some of these photographs seen to be out of sequential order, my apologies!
I want you to be comfortable in viewing & understanding the text and along with the multitude of photographs! Let me tell you just why this ‘difficulty’ number is rated so high!
How to prepare a ‘Bead forming’ tool that is created from a simple Onglette #1 or a #2 graver? The ’ width, or size of the bead ’ decides which ‘modified’ graver to use, that is why you should have at least 3-4 sizes of the Bead Raising tools. Not too mention that I have as well 4-5 Flat Gravers & many more Onglette gravers of #1 & #2 at all different shapes and sizes.
In this simple photograph , you can see just how simple this little deviation of the original shape can be.
The size of the Bead-Raiser also is an interesting aspect of making a new tool. I could keep rounding off the tip of the graver, but this will make this tool a very wide setting tool.
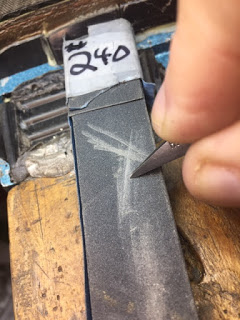
A regular bead-raiser is formed by removing the sharp point and rounding that point with your #240 emery paper.
Each Bead-Raiser is now ready to move metal against & over the edge of the girdle of the stone.
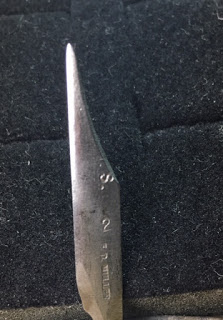
As you can see that this graver is a few decades old , but it still is usable for other setting jobs.
Knowing just where to ‘push over’ the metal and how much metal is needed & what is required to ‘hold’ that stone in place! This why the ‘difficulty scale’ is so high!
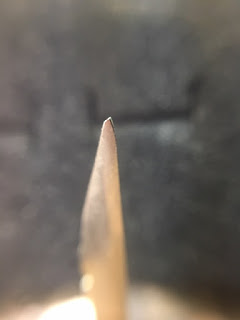
Creating an "Onglette #2, Right-Sided (or Left-Sided) graver that is totally modified to cut only on one side of the blade!
Using an “Onglette #1” graver that is basically named a " Rough-Cutting " blade! I always reduce the thickness of this blade as it has to get into areas where the demand is to cut a very thin ‘rough-cut’.
Understanding all of the basic manoeuvres of "Bright-Cutting" and then bringing all of your cutting experiences to make these stones shine when they are in the metal! This exercise demands so much patience & repetition.
If your Onglette blades are not doing what they are required , you can use a Flat graver #40 & why? There are times that the allowed space to fit in your graver is very fight for the Onglette graver. I’d quickly change to in using my Flat Graver instead, is this allowed? YES, it is!!
You can use any graver tool you wish just as long as the setting job gets done. my teacher once said to me. “You can use any tool you wish, even if it’s a knife & fork, just as long as the manager/owner approves of the final results.”
There is simply no way to move or push over any well-formed beads over a stone, if not for a ‘bead-raiser’!!!
=> How far over for each newly created bead would each bead be? The bead should be moved over just enough to cover the ‘girdle’ of the stone. <=
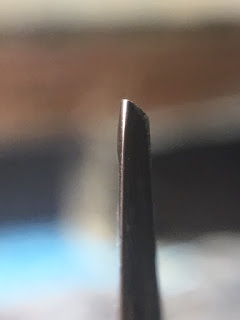
In this photograph, you can see just how the graver face has been modified just to cut on the ‘right side’ of the blade!
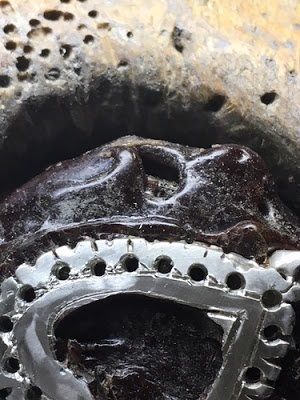
This is the original graver that my teacher gave me prior to his retirement. This Onglette blade was used primarily during the 1940’s A.D. Each hole had to be opened and shaped to set all of his "Rose-Cut’ (flat bottomed) stones.
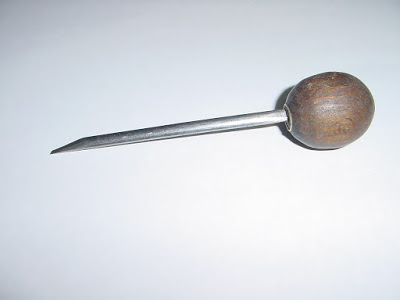
My teacher used this graver that’s called a "Bull-Stick" ( circa 1940 A.D. ) to carve a seat for any stone that came to his setting bench. BTW, there were no precision cutting burs as we have and use today!

To round off any and all beads I again ‘modified’ even my Bead-Burnisher. Why is this so important? As you are rounding off the point of the tip of your bead, the ‘flat’ surface will be facing the stone and not ever damage the stone.
With this modified burnisher , you can literally press down and just never have any touching to the stone, even an Emerald!
The process of doing this modification is rather simple . All you have to do is to lay the new bead-burnisher on your oil-stone and carefully remove one half of the rounded edge.
While setting stones , this could be a ‘life-saver’ for your new setting tool requirements. Imagine how many stones you can now set without any serious complications…a.k.a. ’ breakage '!
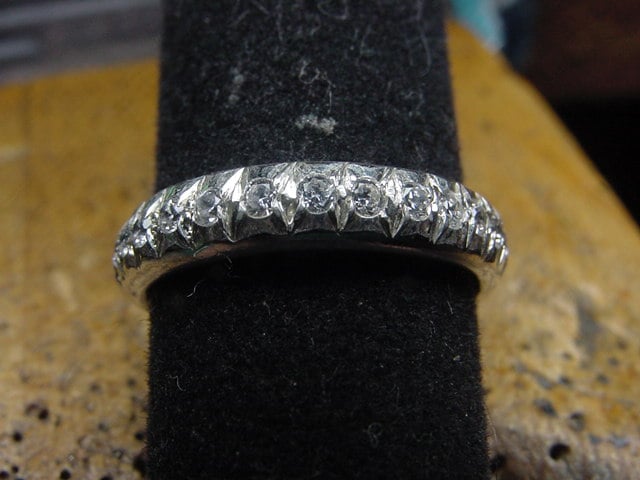
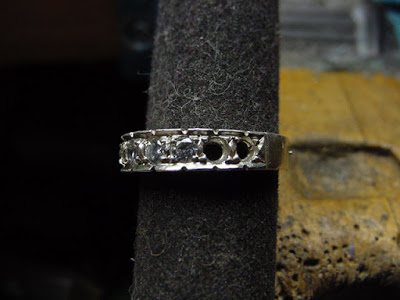
I used this ring as a ‘demo’ while I was teaching in a jewellery factory . You can see just how each line was carved. I used only one graver and that is the Onglette #1 blade. This process is aptly named " Pre-Cutting ". All of the future metal-carving is dependant upon these few & simple lines of cutting!!!
This Difficulty Stage is rated at 8+ out of 10 . Basically, it looks easy and it really is…simple, that is once all of the steps are followed.

I Bright-Cut all of the lines of Rough-Cutting until I was satisfied and wanted to proceed further. The next step was to start setting of the stones.
Some jewellers create (and still do on expensive items) little patterns in the metal just under each and every hole. This process is called “Azure”.
BTW, I did this “Azure Cutting” only with an Onglette #2 graver. I cut the first of two cuts directly into and towards the hole of each stone. Was this delicate? YES! This process is a '8 out of 10’ Scale of being difficult !

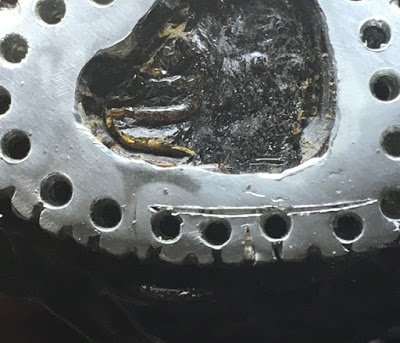
The very first cut any setter will make (and hopefully you!) is to cut right against/beside each hole, as it is now shown.
I would ask you to use a Right-Sided cutting blade, why is that? I want to ‘save’ that narrow band of metal between each stone. This is where the new beads will be then created & used to set each stone.
I have a great interest in dealing with the explanation of using the ‘Right-Sided’ graver. It will be your best friend in the many years to come!
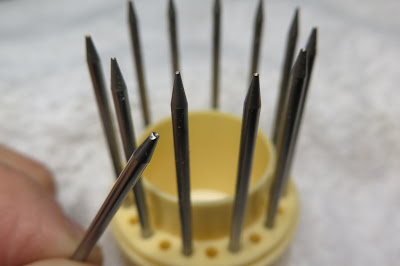
In this photograph, you can see just how the shaping of the graver is much needed. I have 15 graver blades in my inventory, as some are Rough-Cutting and four are just for Bead-Raising.
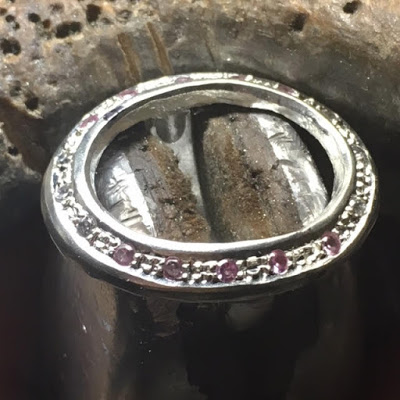
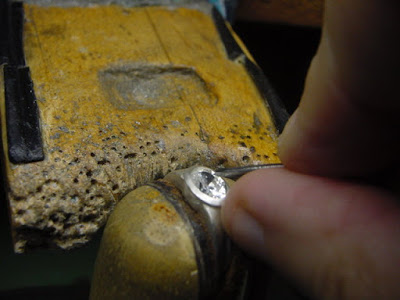
With this "Right-Sided, Onglettte #1 blade" , I can easily execute the simplest form of cutting. That form is to Bright-Cut the inside of an Oval Bezel Setting.
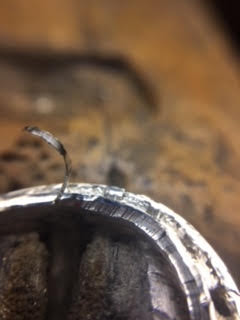
You can see the thin sliver of metal being removed , this was done only with the Flat #40, Graver. Unfortunately, there are situations that are caused by the graver continually being rotated & removing the metal.
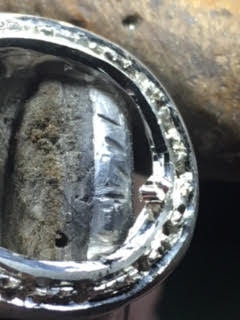
I recut these steps many times just to get all of the curved metal smooth and with no little ‘faceting’.
There is now a smooth surface , but with no, or fewer little (ugly) facets in the ‘inside curve’. BTW, this little ‘faceting’ sometimes occur but don’t get irritated with these (****) cuts.
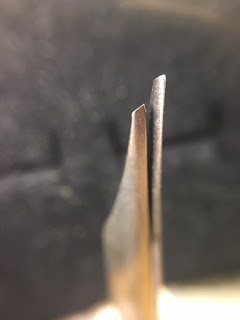
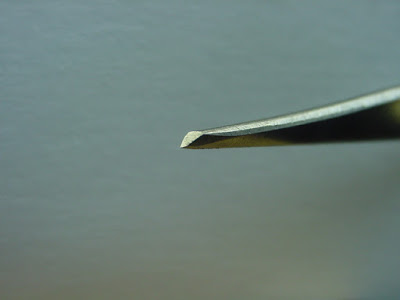
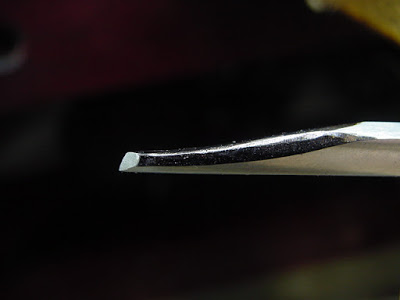
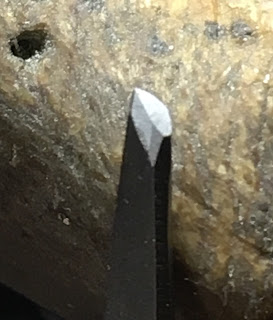
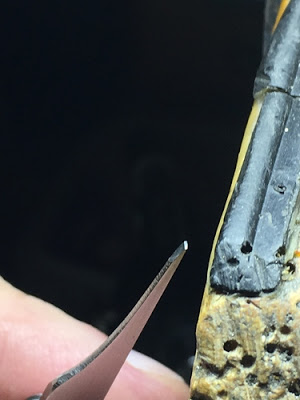
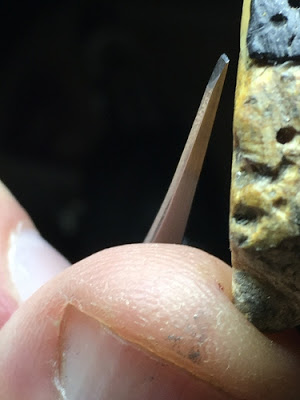
In this super-close view of the modified graver , you can now observe how the left-side of the graver has been totally removed. There will be fewer chances of the graver touching or making contact to the metal.
Basically, you are only using the right side of the blade and nowhere else! One of my gravers is only 0.31mm’s wide , from the usual 01.50mm’s. when they are initially bought.
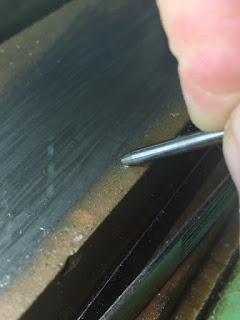
That little 'black-line’ is the refection from the bench-light to the metal.

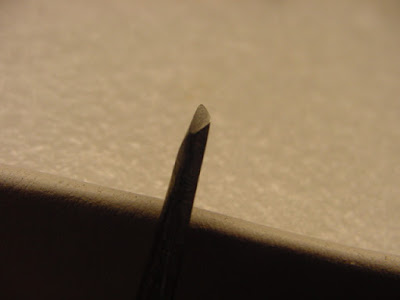
Do you notice just where the ‘rough-cut’ is being drawn? This one photograph deserves an “A+” on my scale. From this point on, all the ‘creative cutting’ is now about to commence.

This photograph of my Flat #40 graver has a face of only 0.33mms from the bottom to the top of the cutting surface. It has to get in between all of the required angles and depths of the grooves.
Here is an up-close shot of the first of the 'rough-cutting’ that is now slowly taking place. You will notice the first depth being made, it just basically scratches the metal, and each following cut will be made just a tad deeper.
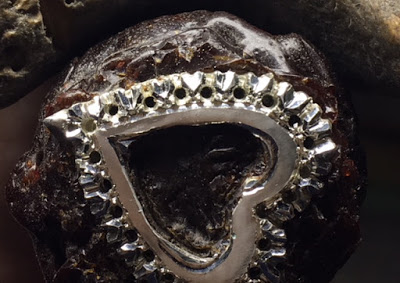
After much labour intensive Bright-Cutting , you can now see the reflection of the Bright-Cutting processes. The angle of this cutting is almost 75 degrees.
Here is a view of the first Bright-Cut, it looks so simple. Much thought has gone on prior to each following cut. There is no " cut & goodbye !" Much thinking has gone into each series of basic cuts!
This can be very ‘mentally taxing’ after a while of intensive metal-cutting.
Here you can see (finally) how this ‘rough-cutting’ blade looks and just where it is about to start the cutting into the metal. Always use a ‘thumb-guard’!!
With this same very narrow cutting blade , the effects are now being shown. I’m now preparing to create the 2-beads that are used to hold the stone.
There are no short-cuts in the preparation of any sort of this 'rough-cutting’ . Each cutting step must be well planned ahead of time.
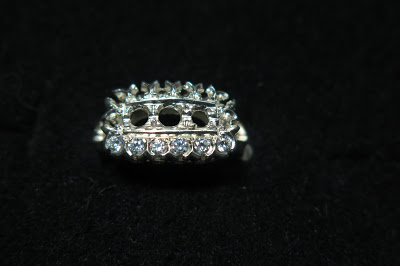
The Rough & Bright-Cutting is now totally finished. All that remains is to set the genuine stones.
This is my favourite Flat graver of #40. I keep this blade in pristine condition at all times. In fact, when I need to use it, I always check for its sharpness before any bright-cutting is even attempted!
The demonstration ring was only partially completed, this was to show how the ring was started before the rough-cutting took place.
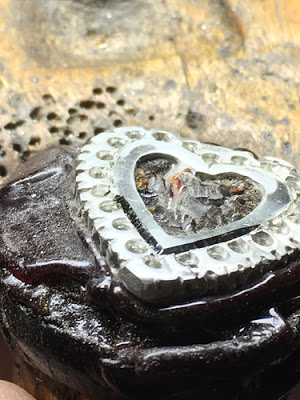
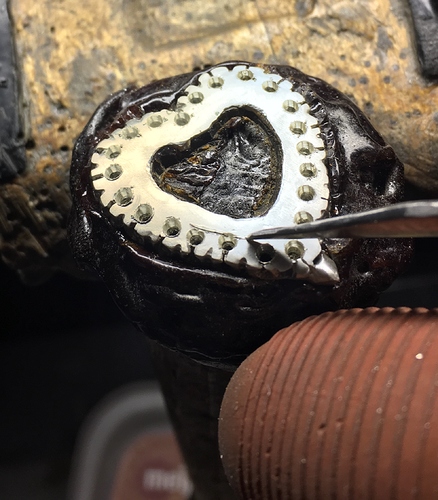
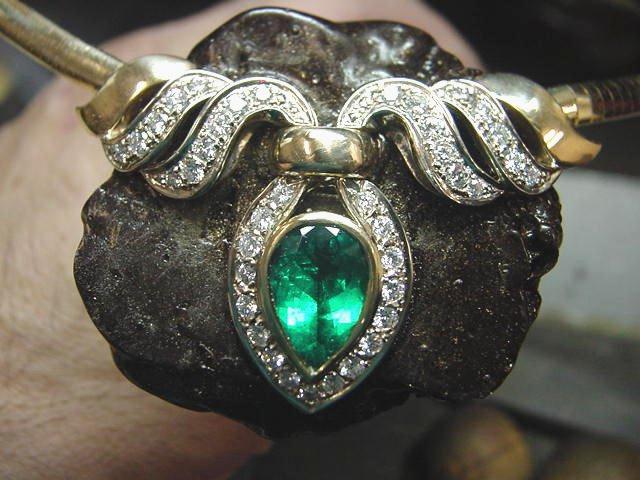
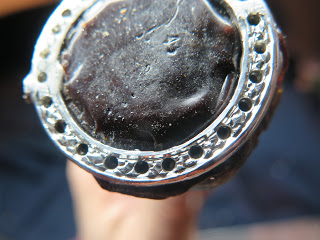
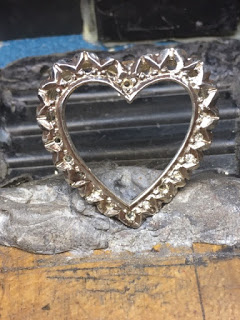
This pendant is my favourite example of bead-setting then followed with Bezel-Setting the 5.25carat Genuine Emerald. BTW, this stone was worth $8,000.00 in 2005AD.
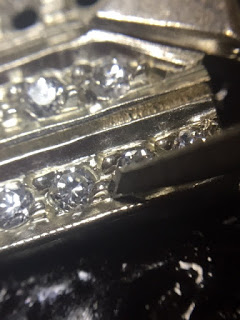
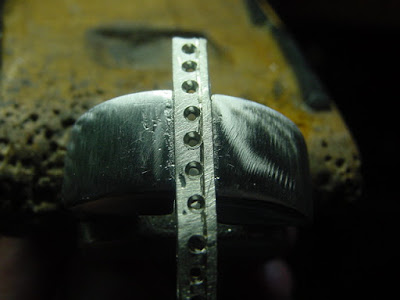
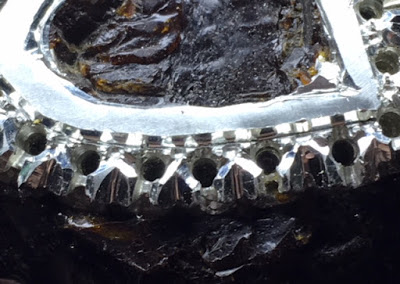
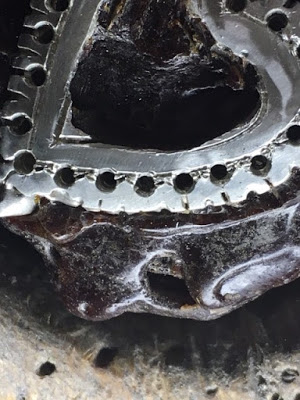
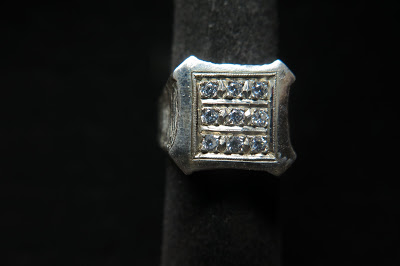
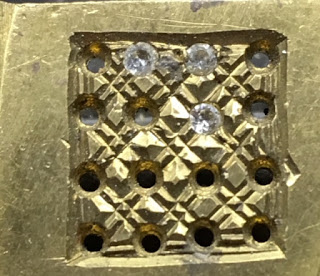
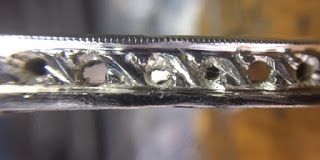
In this semi-finished state of metal cutting , you can see the ‘little square’ pattern. When the diamond hole is prepared to be set, the ‘bead-wires’ now being shown will be greatly reduced in size.
I would now finish the cutting of those square-metal patterns , why now? Once the stone is in, there is very little chance to keep cutting to improve on the overall appearance.
This one top of the ring was only a flat piece of metal, not even with holes. This ring was created and set long before CAD (a.k.a. “Computer Aided Designing”) came into being! This is also known as ‘free-hand’ cutting.
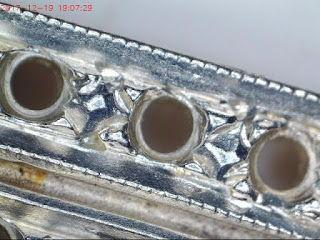
The next three photographs are named for this pattern " Fish-Tail Setting ".
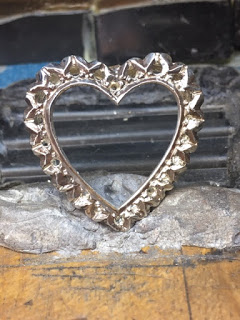
This "5-star’ design is not at all easy! Every cut has to be well thought of during each of the many ( 45 ) graver cuts.
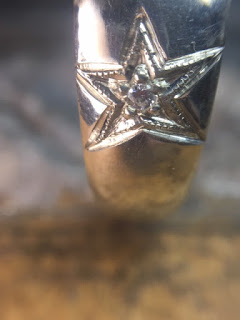
With just two gravers, I fashioned the little cuts to present something interesting. The name for this setting is called "
This was one of my very first attempt (1970 A.D.) to cut metal , although it was done in Brass it was still very hard to work on. But in those earlier days, I knew what had to be done!
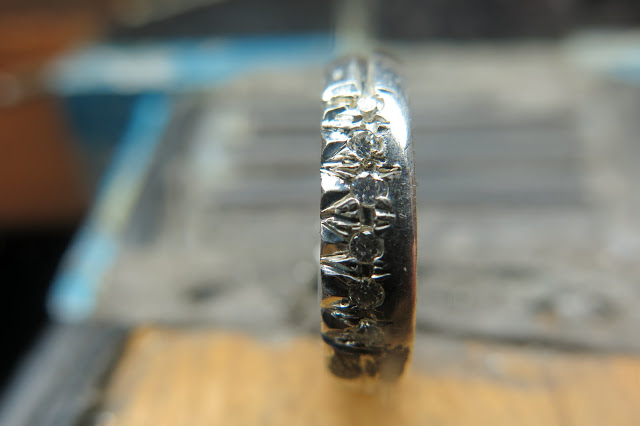
This style of setting is called "Two-Bead Setting" . As you can see, there are only 2 beads holding the stone! You can see the ’ angled cuts ’ in between each stone.
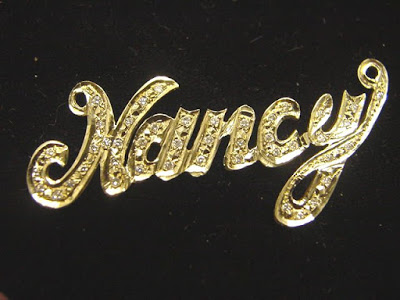
With the new found knowledge and now the skill, the results are now shown. Again, no holes were drilled upon getting this ’ hand-carved & scripted name’.
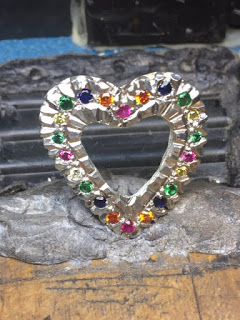
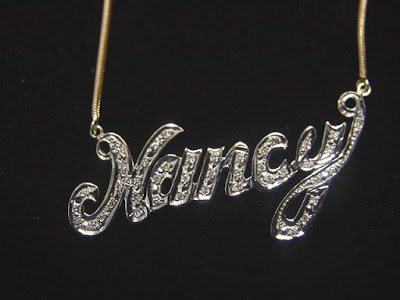
Now here is the final results of all rough-cutting and then the mighty Bright-Cutting. All that is now needed, is to practice & practice (non-stopping).
Even to this day, I keep this strange looking ring, why so? It assures me and the students (of any age) showing just what are the many steps involved in creating a great looking ‘piece of art’!
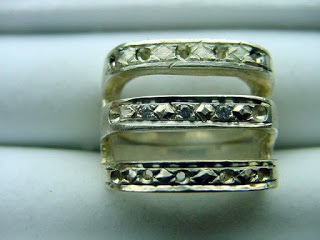
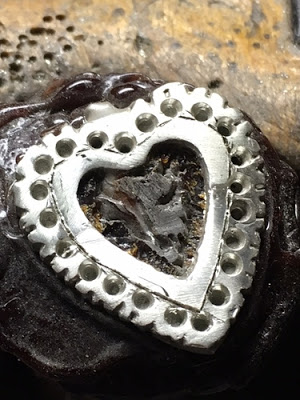
The little ‘scoring’ is due to my error in putting the silver, ‘demo-strip’ into my mini-magnetic tumbler. Now you can see that those little ‘triangles’ as these will be the ‘new beads’ being ready to be used.
In the following essays soon to be ‘posted’ , I will endeavour to discuss and explain the mini-topic of ‘Bead-Raising’.
What you are seeing in this essay took me ONLY 50 years to learn & fully understand all of the subtle nuances of Diamond Setting.