Hi everyone!
I just posted my 105th essay on “Setting Square shaped stones in a End Bezel” style. It is very detailed (as usual) but literally nothing has been overlooked. I even made a few setting errors in the bench-work just to show what could and might happen to you!!!
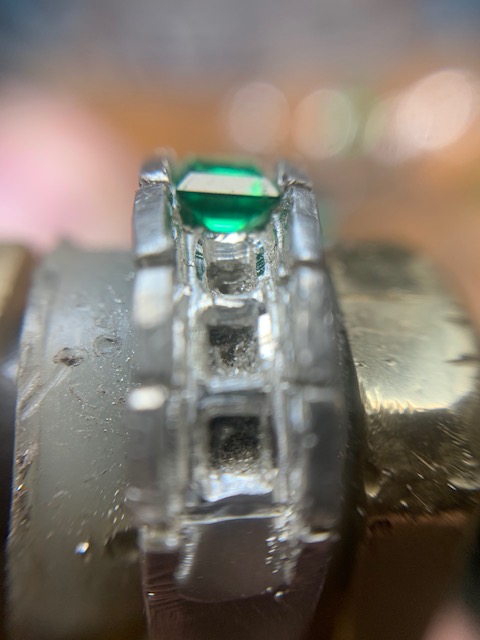
“Princess”, Square-stones in End-Bezel ring
In this new essay I’ve decided to explain something just a bit different. This just isn’t a “Channel Setting” nor is it a “Bezel Setting”. I would definitely now name this exercise an " End-Bezel Setting "
This particular design has “Semi-Split, End Bezel” metal covering that one stone. But here is the interesting part, is that these sections are all joined together…OUCH!
Remember that we are now dealing with "square stones" and all of them must be dealt with great care! The care required, is in protecting the four corners of that stone, allowing the Pavilion not to be touching any metal underneath.
Of course the bearings must be straight across the end-sections of the semi-bezels.
Is this difficult? NO, not in the slightest, but certain rules & techniques MUST be followed!
On my “Difficulty Scale”: I’d put this pattern at a 7.0 out of 10.
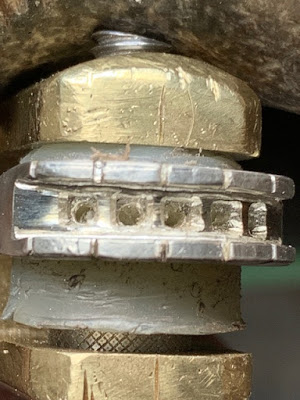
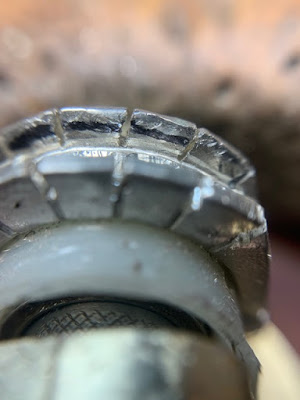
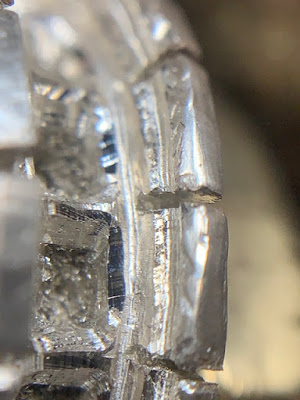
You can easily see just how the end-bezels are looking, each one of them are attached to the next. We must now separate each of them with a saw-blade, I prefer a blade of #2/0 width.
Further on in this exercise, I will use my bud-shaped bur to again separate the metal after setting , but not the saw-blade!!! This will be explained further in greater detail.
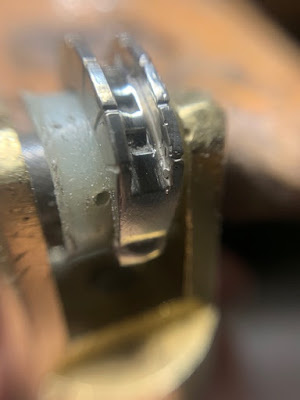
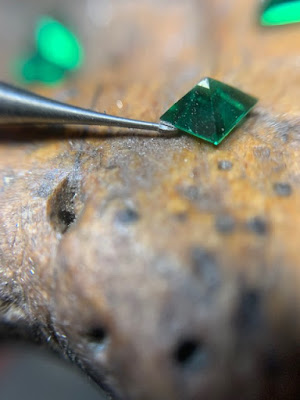
My very first step is to make the setting hole square as this must conform to the Pavilion group of facets on the Princes stone. In this photograph all of the bezel holes look almost rounded…YUK!
I now have much work to do in creating each of these holes and also cleaning them to accept each of the Princes stones…loads of hard work with the #007 bud-shaped burs,
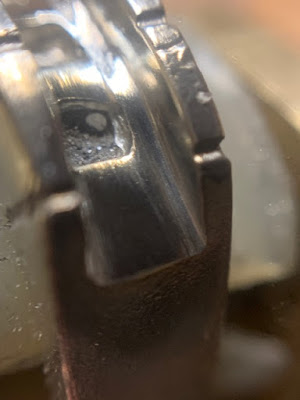
I’m now using a bud bur #006 to clean out the inside-corners of the channel . I want each of them to be in a good condition to be able to move towards the stone.
As you can now see how the corners of the holes are starting to now appear . Don’t spend too much time on this step, just make sure they are clean from any casting defects!
This is not to be seen by your customer but make sure the stone will sit against the holes with no effort!
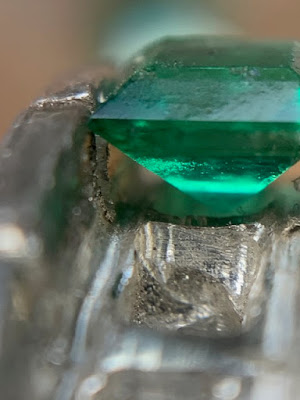
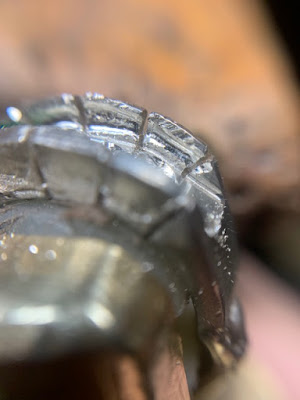
I’m inspecting how the Princess stone will look against the edges of the walls.
Now you can easily see how and where the stone will be sitting. As you can see that the “Pavilion” is not touching the inner hole … NICE!
Before I start to make a bearing-cut, I need to have a bud-shaped bur , what size will I be needing? I have no idea, I will have that opportunity by placing the bud-bur against the “Girdle” of the stone.
I’ll pick a bur that is slightly larger. The bur number is not important, but as long as the bud-bur is larger than the Girdle of the stone!!!
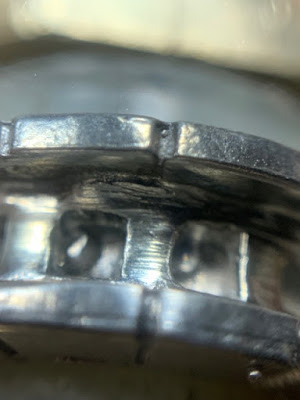
Before I touch the inner wall, I need to know just where I will start the first bearing for these lines!
I prefer to mark with an "felt tip, ink-marker to estimate the depth and where each bearing will be made. In this view, you can see the separation of the walls
I prefer a bud-shaped bur for this exercise , no round burs are allowed. You will see in a moment!
Don’t play around by ruining your bearing-cuts with any use of a round bur. These will not work as you can see in this photograph.
You MUST HAVE A STRAIGHT and WELL MADE BEARING CUT!!! Each line must continue from the previous line to the next section, simple as that!!!
Now comes the fitting of the stone, there are many things to look out for. Bearing must be made wider that the Girdle, is the Pavilion touching the inside hole?
How about the side Pavilion facets => are they touching the metal under the bearing line; so much to think of …WHEW & OUCH! Everything you do now takes precious time, no guessing!
If the stone is too (girdle) wide, I will exchange it for a thinner (stone) Girdle?
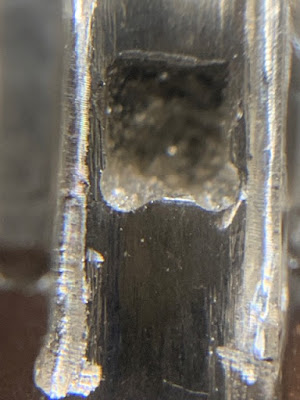
I like to clean the inside of the hole with my Flat graver. I want the metal to be shiny at all times ( if this is at all possible ) and no remaining pieces of metal that might touch the stone…:>(
Make the bearing wider than the Girdle, don’t have the metal squeeze the stone when it’s set!!!
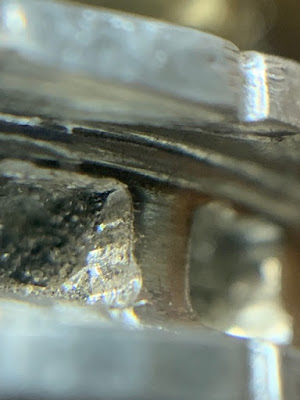
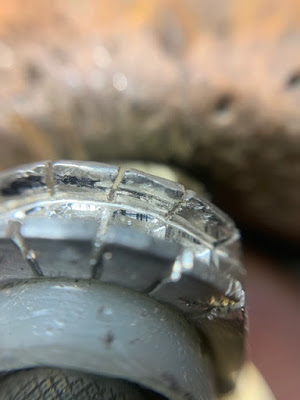
Already you can see just how wide the stone is. But look at the height of the wall, as it’s holding the stone, this is exactly what I’m looking for . I’ll explain in a minute.
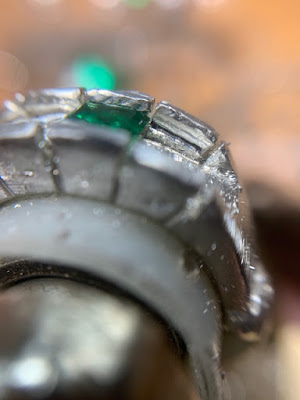
Be so darned careful that not one corner of the stone is touching the corners of the metal. If this is happening, take the stone out and re-core the corners, again! (I made this error just for this demonstration of what might & could happen!)
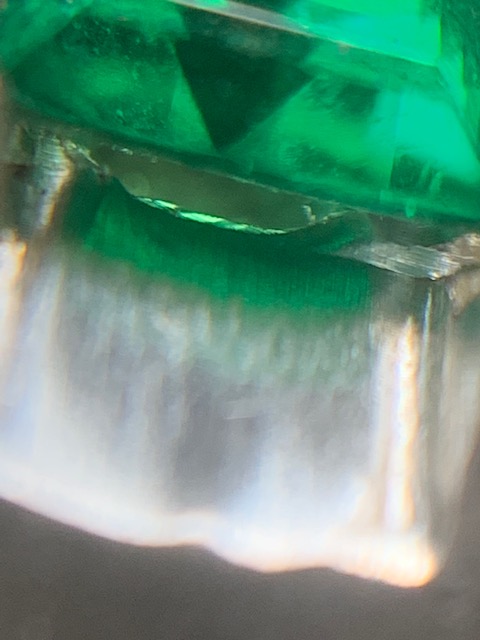
Your (tapered) corners…must…look…like…this, agree? THIS CONFORMS TO THE SHAPE OF THE STONE.
OMG, the corners of this stone are overlapping well into the next setting spot. What do we do now? I’m not worried!
I will make allowances to this problem by having the corner rest against the slanting design or end-pattern. I will make an extra “half-bearing” to allow that corner to rest INTO the metal.

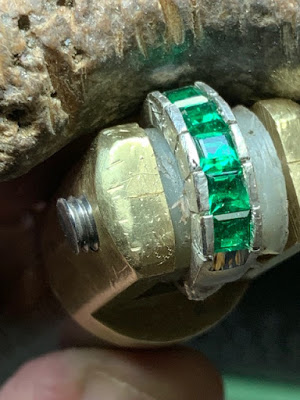
I used a pair of pliers to individually open up each two sides to allow the stone to sit in it’s new ‘home’. As you can see that these green stones were not well-made in the ‘faceting department’. I’d call this a ‘double problem’ for any setter, or jeweller.
But it’s great to know nothing is perfect, when dealing with inexpensive imitation stone cz’s…YUK & YUK, again!
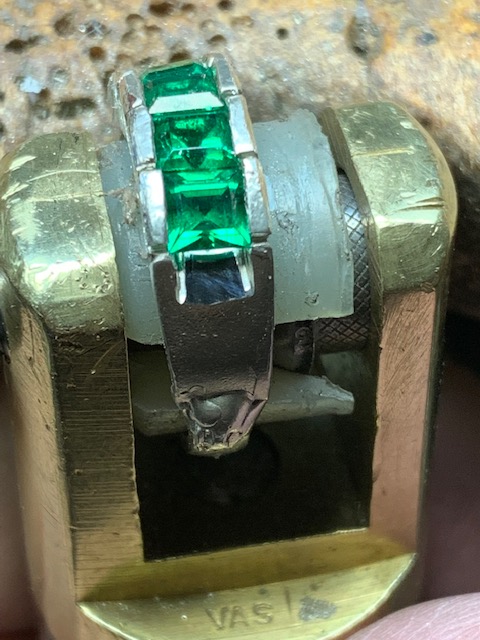
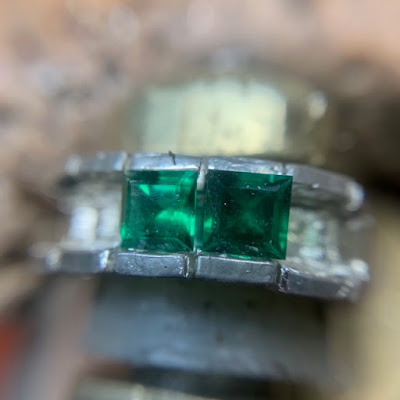
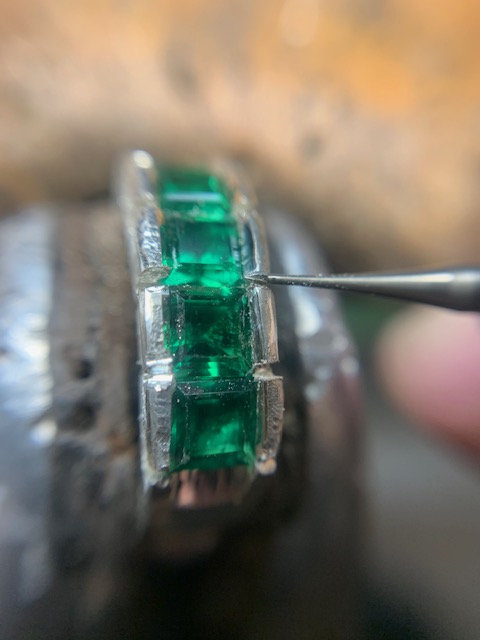
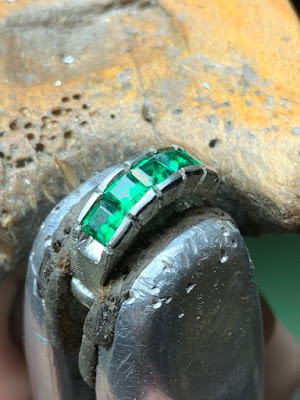
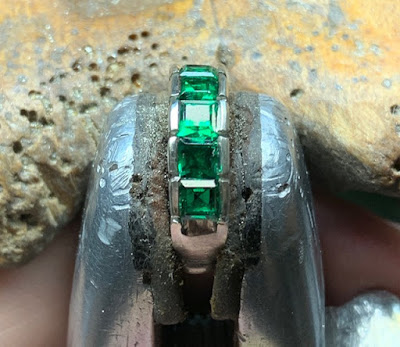
As I only had a few green stones in my inventory, some of them are showing signs of previous setting. Get all of the stones really close to each other.
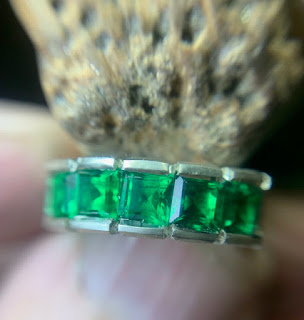
I don’t want any spaces in between any of them, plain & simple!..NO SPACES. Just a fine line of the colour GREEN!
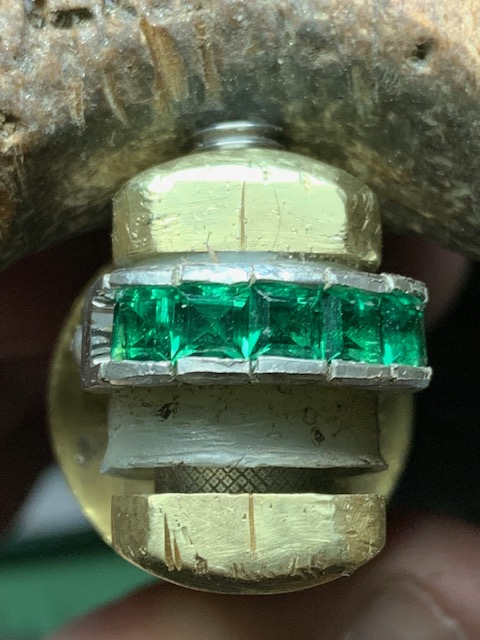
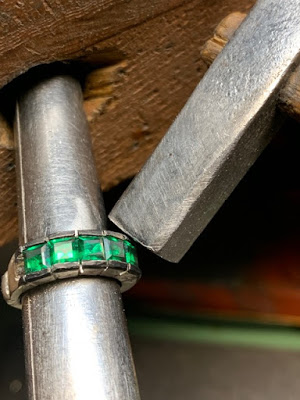
I’m making sure that the stones in their respective setting and the metal has been pressed over with your pair of pliers (to gently secure). I don’t want any movement when the metal is being tapped over with your Riveting Hammer.
I will use the hammer on the ring while the ring is sitting on a steel mandrel, why so? If you hammer in a leather clamp, the ‘hitting power’ will get absorbed and the stone will never get tight!
Tap one side of the end-bezel on all of the stones, you can see that the stones are getting secure at each tap! Try not to use the “Reciprocating Hammer”. I find that with this strong hammer, I have little control on these very delicate and large stones.
As each hard downward tap might move that stone and crash against the neighbouring stone and WHOOPS! Both stones might get broken!
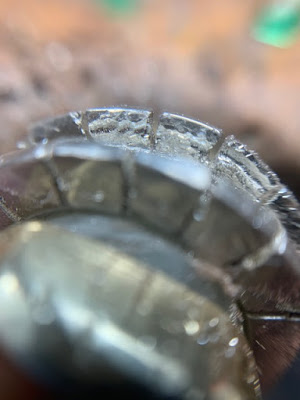
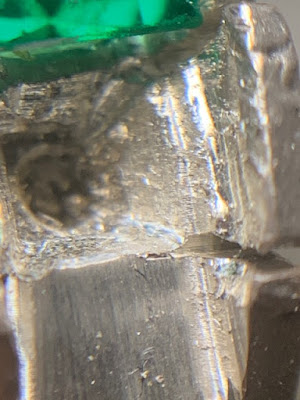
I chose in using a ‘bud-shaped’ bur and not the saw blade as I need, and can also change the width of the cutting at that moment. Using a saw-blade is too restrictive and time wasting for me …:>(
If I need a #006, or then a #007, I can easily change the bur in a couple of seconds…saw-blades takes too much time and my mind is on one thing, that’s to separate the metal edges…FAST!!!
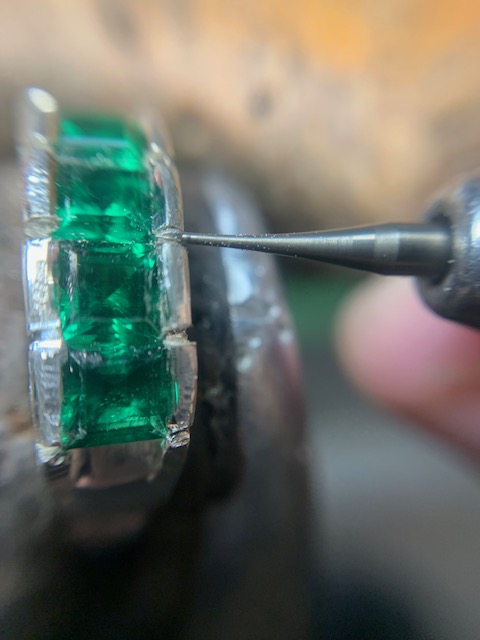
This "chosen cutting apparatus" gives me more access to anywhere on the ring, and at any position!
This final cleaning is so important that there are no short-cuts, anywhere, at any time!..:>(

I marked the outside area of the top edge. I now know where and how far against the metal must a file be touching (on the outside edge only) in the finishing stages of this ring!

I won’t touch anywhere near the front of the edge,why? You will see in a moment.
This ‘front section’ against the stone, is just where the Flat Graver #40 will do it’s final cleaning. I even won’t touch the top area, as I must have “thickness” of the metal to “Bright-Cut”.
PLEASE do not use a file to clean the front metal, why?
Two reasons: you might hit & scratch the soft stone, and leave striations in the inside metal line!
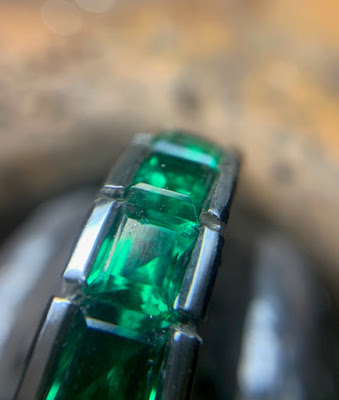
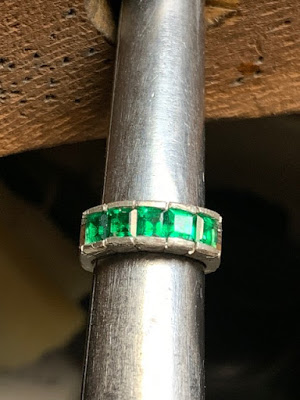
Can you see any spaces in between the green stones? There aren’t any, and that is what is required.
Eye-Appeal at all times!

Any further cleaning is up to you. I still find (sometimes) that I have to do a “minor touch-up” and everything should be ready for the final polishing and be left in a pristine condition!
Even on smaller (4 mm’s) stones, the same principles and techniques are used . There are no differences in the burring and making bearing-cuts…Straight lines across the inside walls at all times!
Just some more things to remember, please be very careful when dealing with these large and very delicate stones. Think about the nest step & the continuing steps ahead in this type of setting!