This newest technical essay took me a period of 4 weeks, from receiving this diamond setting project until the completion of this essay.The “10 karat gold tooth” essay has an estimated 39 photographs all describing the beginning of the project until it got ready for giving this back to my client.
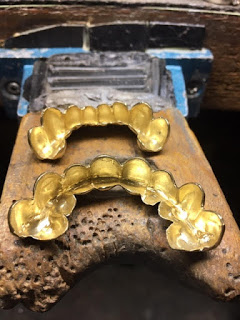
The assortment of many sizes of 139 diamonds are for only the “upper dental tooth-covering”. It was much to think about and planning during the actual setting. I recorded and noted via photographs every single detail as I progressed further.
I sincerely hope that one day you too will learn and experience such wonderful diamond setting projects. I want you to put much of these essays into your own growing library of helpful setting techniques. BTW, my client is very anxious to see this essay and tooth-covering for himself.
Enclosed are only a few of the photographs from this essay…Enjoy, enjoy!
Article and photography by Gerry Lewy: Diamond Setter, Instructor & Author.
"Diamonds ON YOUR TEETH!"
Once in a while, you might get some rather interesting Diamond Setting projects, here is mine!
I asked my client if I could record & document this extremely interesting setting project. He was honoured & obliged and was so very anxious to see this detailed & extensive essay. I also told him that a ‘few jewellers’ might be as well be interested…(worldwide). To say the very least, he was very excited about this idea.
Many years at the setting bench and loads of experience are indeed warranted. This is a culmination of 59 YEARS and still happily Diamond Setting & still hopefully many more years! …;>)
The Difficulty Scale is off the cha rts at ‘50 out of 10’!
(BTW, some of these photographs were not in sequence, my apologies!)
What tools did I choose for this project?
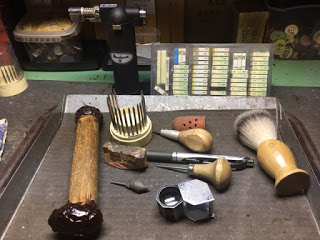
1) I had to use a wide assortment of 'Bead-Burnishers’ to accommodate the many ‘widths’ of the beads. These ‘burnishers’ were a collection of 20 different sizes. Some of these can be seen in the round plastic tray shown in this photograph.
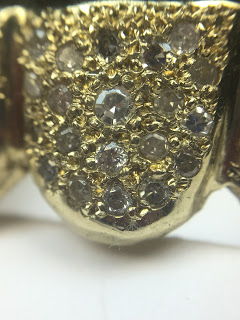
For your information, I counted the number of individual ‘beads’ that I raised in total. The number is in excess of 600 beads securing these 139 diamonds.
2) 10x power loupe, *this one item is so essential in the many stages of Diamond Setting. My Optivisor#5 lens was not sufficient enough to examine the setting.
3) A felt-marker pen *to assist me to keep my eyes on the right stone to further bead ‘when and where necessary’. When I am changing the position of my shellac-stick, I sometimes lose track of which stone I should be working on. To avoid this problem, I just marked a few stones around the periphery of the multitude of stones. It’s very disconcerting ‘if I lost my place’ by just rotating the gold tooth plate covering!
4) Rubber 'thumb guard’ , *this one item prevents any cuts to my ‘finger-pads’
5) 'Shaving brush’ this is to ‘gently’ remove any gold dust and make the stones easier to see. If I used a ‘tooth-brush’, those bristles were too course & might remove any diamond that is waiting for me to bead & secure.
6) In the background of the photograph is my inventory of Round & Bud shaped burs ranging from #005 up to #007 burs, why so many? If one bur is slowly getting worn, I won’t be needing it and will quickly exchange that ‘worn’ bur, for a newer one.
7) On the background, you will see my ‘mini-torch’ that I use constantly to heat the shellac to the exact location for the flame and heat the ‘tooth-frame’. An alcohol Bunsen burner flame is too wide & much of the low heat flame and is wasted and not getting to the exact location where it is needed.*
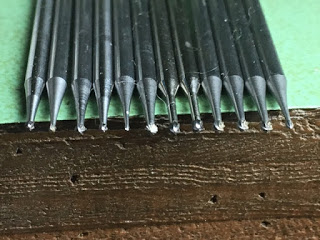
8) A full set of "Bead-Burnishers" ranging from 0.055 mm’s and up to 0.015 mm’s in width.
9) At the bottom of my bench-tray is my rubber pad that stops any ‘bouncing’ of diamonds if I accidentally drop one, then it ‘won’t go bouncing all over my bench’.
10) My other 'bench, catching tray’ is another metal pad with raised edges.
11) I have my wax-tip that is composed of Bee’s wax mixed with Charcoal, this has a ‘quick-release’ composition. I can shape it with the warmth of my finger-tip and it’s basically just an old bur that is used to hold a diamond.
12) Just in front of my bead-burnisher is my ‘Bead-Raiser’, it’s just a modified Onglette-graver made for this sole purpose of moulding beads to hold and secure the stone.
13) I prefer using "Flake-Shellac" , why so? It melts so easily and as well it ‘binds & bonds’ with the gold teeth. The width of the wooden stick is easy to grasp for long periods of hours at a time. If I used any other form of ‘holding-substance’ that substance just won’t bind into the small crevices and thus giving me a stronger bond for those thin metal tooth-coverings!
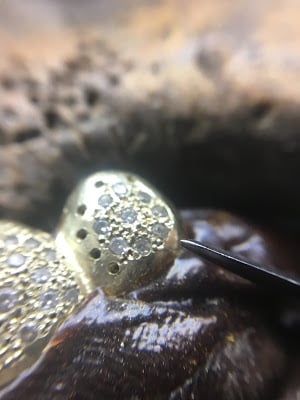
In the following photographs, you are seeing at least 4-5 different sizes of diamonds, *from 1.36 mm’s to 0.066 mm’s. Many of these stones are even smaller than my #007 Round bur.
Some of the stones were “Full-Cuts” and many are just “Single-Cuts”. My problems were many, ‘black coloured’ from internal carbon deposits, (enough to heat a home). Obviously, I avoided using many of them!
(In the diamond community, the term of ‘Single cut’ is shortened to just “8/8”) A “Full Cut” diamond has 57 facets including the “Table Facet”. A “Single-Cut” is a diamond that has 8 facets above the Girdle and 8 diamond facets below the Girdle!
Many of these were full of “Inclusions”, these are not broken, just “P-1”. (This is a name for “Promotional” quality stones).
"Raising Beads" was another concern as I had to maintain security on every diamond being shown. If during the delicate operation of ‘moving & digging’ to make a bead, I could have slipped with my modified “Onglette, Beading Raising” graver.
*BTW, the repeated times that you use a “Bead-Burnisher” on a bead, the harder the metal becomes! The reason is that when you are continuing to pressing down the bead to hold and to secure the stone, this makes the bead eventually more difficult to move!
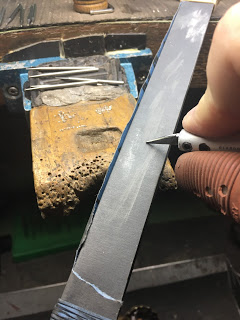
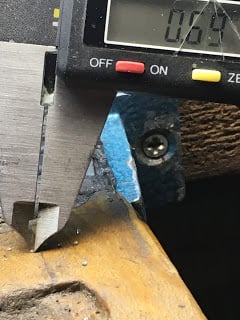
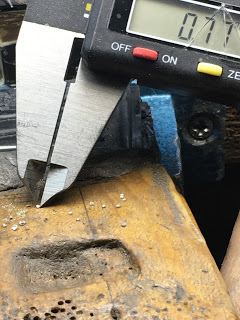
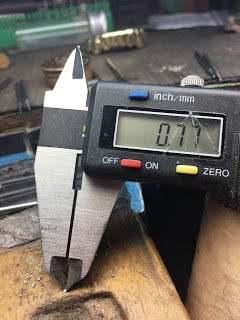
I continually ‘roughened’ the tip of the graver point (as shown) as a ‘slip’ could have been disastrous. I had only one opportunity in securing the diamond and with no second chances. I measured some of the ‘mini-beads’ some beads were estimated to be only 0.0055 mm’s in width.
I use a Bud bur of #006 size to open where the Pavilion and its Culet of the stone where each stone will be ‘resting’. This so very important in clearing the area for all 139 stones.
BTW, the metal was only at 1.30 mm’s in thickness. At some point, I decided to use a #007<=>“156C” bur to undercut and make a ‘little bearing’ just to have the stone to fit into the hole. There were many opportunities to make ‘shambles’ (English, or UK expression), or just ruin this extremely challenging project.
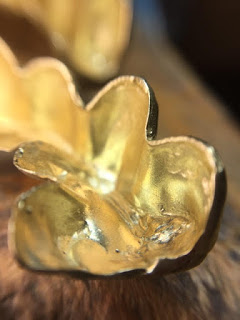
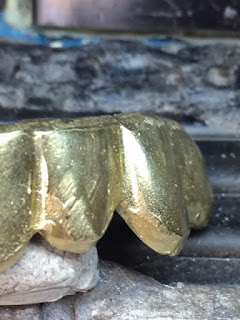
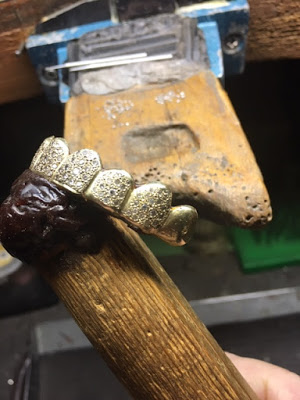
In the first examination of the customers casting, I noticed a few ‘irregularities’. I’ll just call them ‘defects’. I made a decision to remove every one of them, prior to the setting. I used a bud bur to get in between each tooth and then using Tapered Pumice wheel of #180 grit and following that with a #1,000 Pumice wheel to clean & smooth each defect. Here are a few of them.
I had to use my Sanding disk of “Medium grade” to remove every casting error. The timing spent now would increase my chances of having a ‘decent’ setting finish.

With these photographs, you can all see what I was up against prior to my initial laying out of the stones further on.
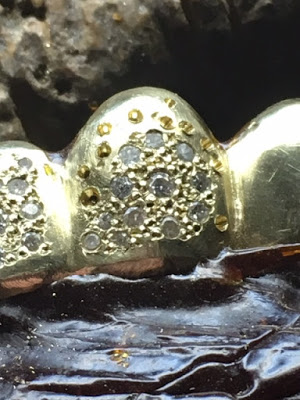
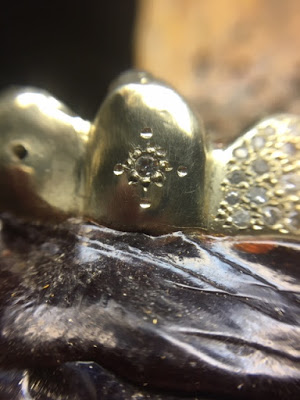
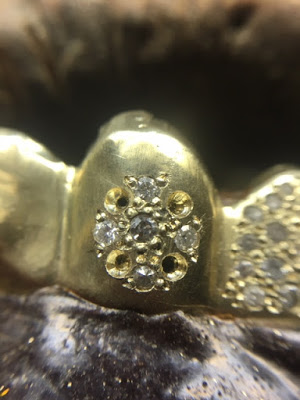
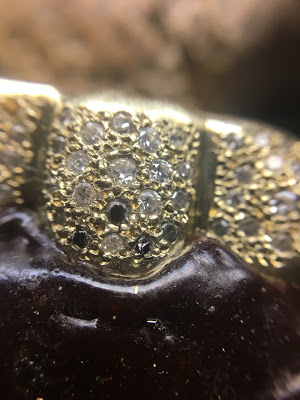
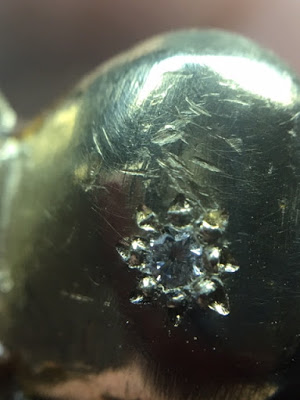
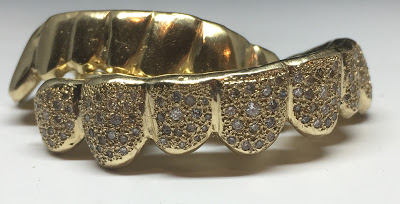
I decided to make a ‘little pattern’ in each of the 8 teeth. By selecting the largest diamond measuring only 1.36 mm’s I made this to resemble an ongoing ‘pattern’ that would be used in the next & remaining 7 teeth!
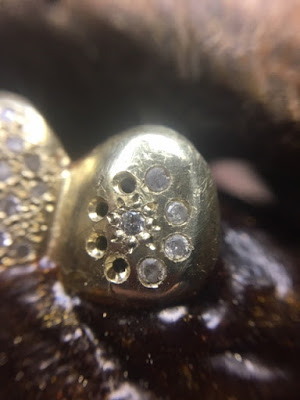
I used the next smaller size to set the next 8 stones to circle each of the center stones.
In this photograph, you can see how I marked with a #007 round bur to lightly ‘score’ the metal. This is prior to the next step and that was the actual (carefully) drilling each hole. Tedious work and no mistakes are needed.
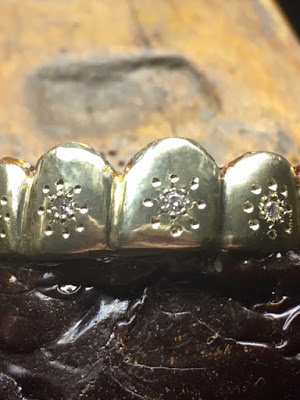
Here is the ‘after the drilling’ and initial setting of the ‘ongoing pattern’ that will follow.
That little stone was too small (bottom left of this photograph) and it was replaced with a slightly larger stone.
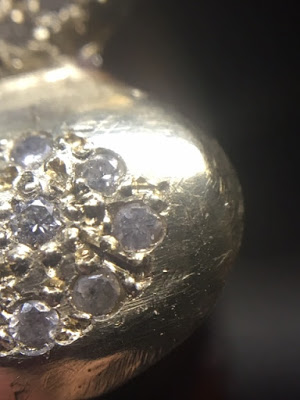
Remembering I was always selecting non-stop the next size smaller stone at this stage of setting. I am now using 0.08 > 0.06 mm’s stones on the perimeter of this pattern.
Here are some of the average sizes of stones I was dealing with.
At every remaining space had to be filled with a stone. Each tooth had to be then filled up all the empty empty spaces as this was the initial request of the client!
My twist-drill was not small enough to drill through the thin metal because of this, I decided to use a #006 round bur to slowly and very carefully drill through the metal.
In this photograph, I now selected and separated 7 sizes of diamonds. Each stone had its own use and all were eventually used.
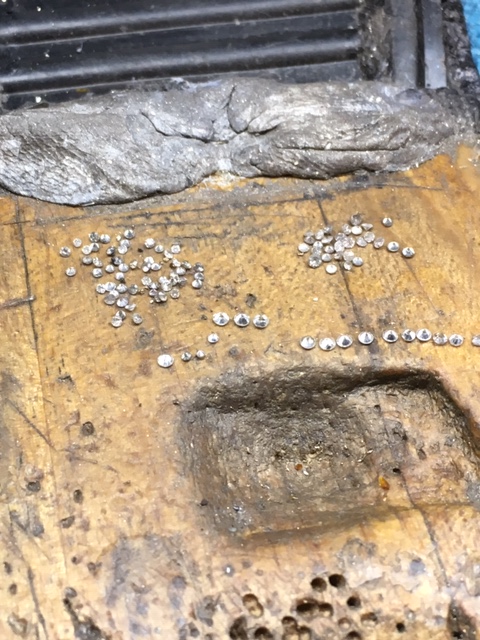
The smallest stone in this picture was only 0.005 mm’s in diameter.

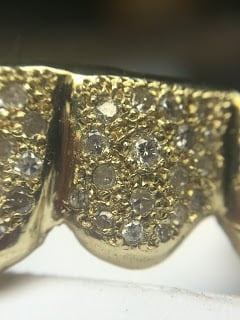
This pattern was repeated many times and all of the 8 diamonds being chosen were kept separate from the rest of the group. I ‘bead-secured’ these 4 diamonds, as I now had enough room to do my further bead-raising. This process was again repeated on every tooth, as I went further along the full upper denture-plate.
At every opportunity, I did my bead-burnishing when I had space.
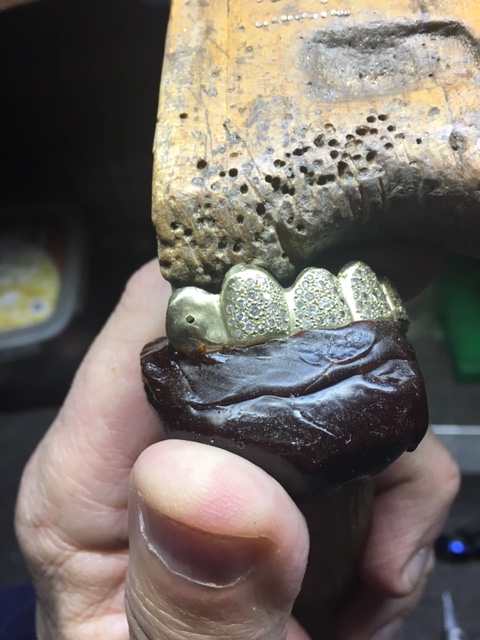
I had my gold-plate resting and secured against my bench-pin for safety and security. If I didn’t, the whole denture plate could come loose and disaster would be a common occurrence.
In this view, you can see my bead-raiser starting to secure the diamond, noting the rubber finger-pad covering. The shellac-stick is again being supported at all times.
Here is my Bead-Burnisher ready to ‘round the beads’ where needed!
In this interesting photograph is my felt-tipped marking pen being constantly used. I had to resecure any stones that were needing some ‘extra securing’.
This marking pen feature was a great help in figuring which stone needed more careful attention, again! Remembering I had well over 600 beads to hold the 139 diamonds.

I only worked on just one ‘tooth’ at all times, never working and setting numerous teeth at once! This whole setting process took me over two weeks of mind-numbing setting. I had 3-4 hours each day of careful planning just to examine and process my thoughts on how to get each of the stones to be ‘well secured’. No darned easy task!!!
My mini-torch (being shown here) was in my bench and never too far away from my hands and the work area. This torch was an active part of the whole setting process, without it, I would be literally lost in not knowing how to hold the upper-denture plate.
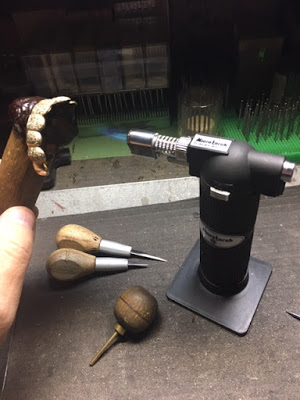
This great little torch paid for itself just in using it for this singular setting project. The flame heat was concentrated just on one spot and just never heating the whole area. I wanted the ‘low-heat’ (adjustable) to hit only one area & as when needed. If the heat got too hot, it would burn and cause the shellac to “boil” and then be totally useless.

I chose to keep the ‘pattern’ as a guide and future pattern making right from the start. This way I could easily burnish each bead with no ill effects when other stones were put into place. I tried on many occasion to clean up the surface, these were a visual-distraction for me. I prefer a smooth surface, not knowing if these marks would be visible later on!
Not knowing ahead of time if I put my shellac down and rest would any stones come loose, I decided to ‘bead-secure’ only 4 stones at a time. This opportunity gave me greater access to do my bead-raising.
In this photograph my “Onglette, Bead-Raising graver” actually 'slipped’ and in-between the two stones you can see what happened. I quickly stopped the setting process and ‘roughened’ the underside of my graver to prevent this from happening again! Many times I had to do this ’scoring on Emery paper’ (the paper has a grit of #240) at the graver point.
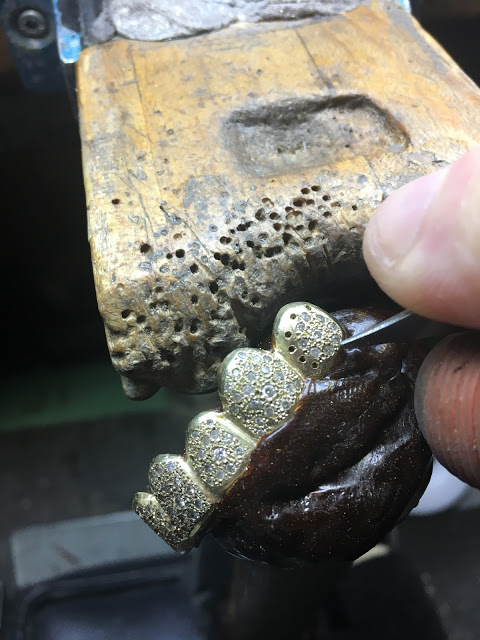
To keep the pattern ‘active’, I drilled holes for the stones between the beads holding the center stone.
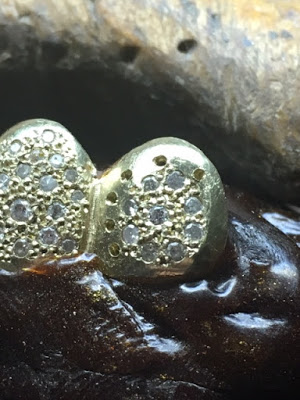
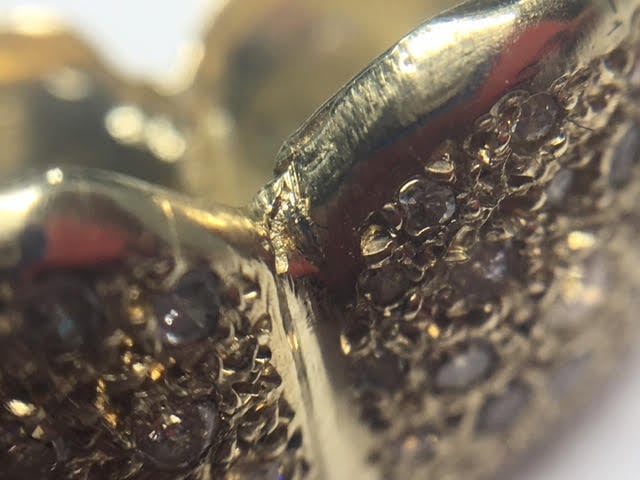
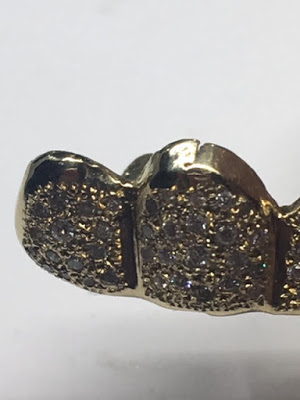
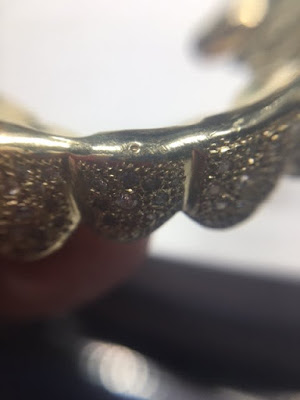
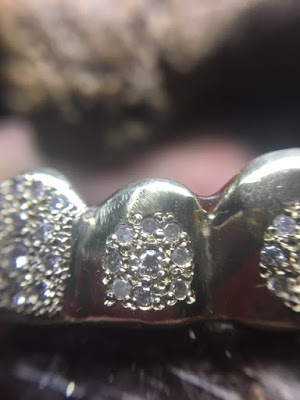
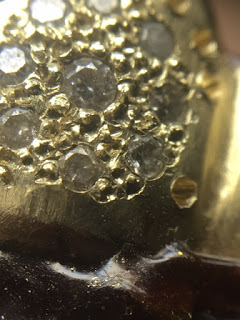
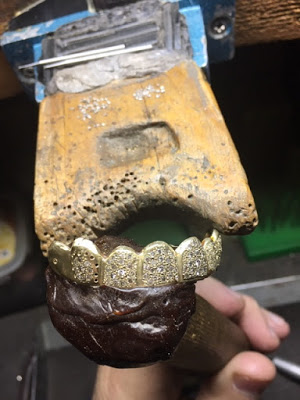
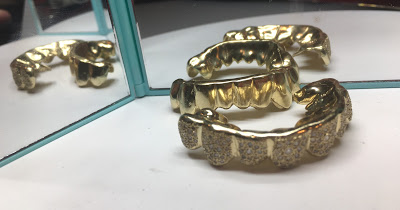
Here are a few ‘finished’ views of the teeth. ENJOY them as much as I am now, I’m now realizing this is literally one time in a setters life that this project comes to this bench.
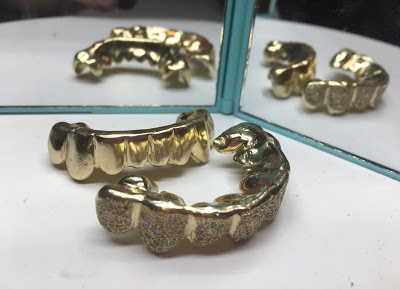
As a final thought, careful planning ahead of time enabled me to successfully complete this project with no problems!
I’m honouring this essay to three people, My Parents; Maurice (z"l) & Sarah Lewy (z"l) and my teacher Mr. Stan Levine, both of them "May they all Rest In Peace!"
My Mother; who was a prolific writer, as well as a photographer. Her ‘gift’ of writing and appreciating the written word, still gives me much enjoyment in writing these many blog essays.
My Father; what instilled the need for me to learn a trade when I was only 16 years young. He was a jeweller & Diamond Cutter & Polisher in Antwerp, Belgium & London, England.
My teacher to whom I learned much from him during the 14 years that I spent in a large jewellery factory. Much of his wisdom was passed down to me and I still remember so many great days & years listening to his techniques that are now being written on my blog.
To all three of them, this essay is dedicated…thanks!